
When Sharing Happens
After you save a new board, the Access/Share flow is immediately presented as the next step — you're prompted to share before anything else. You can also access the sharing flow at any time from the Customize panel.
A board in Draft state is not visible to anyone except its creator. Publishing happens when you confirm the Access flow.
The 3-Step Access Flow
The Access flow is labeled "Access" throughout the UI (not "Share" or "Distribution").
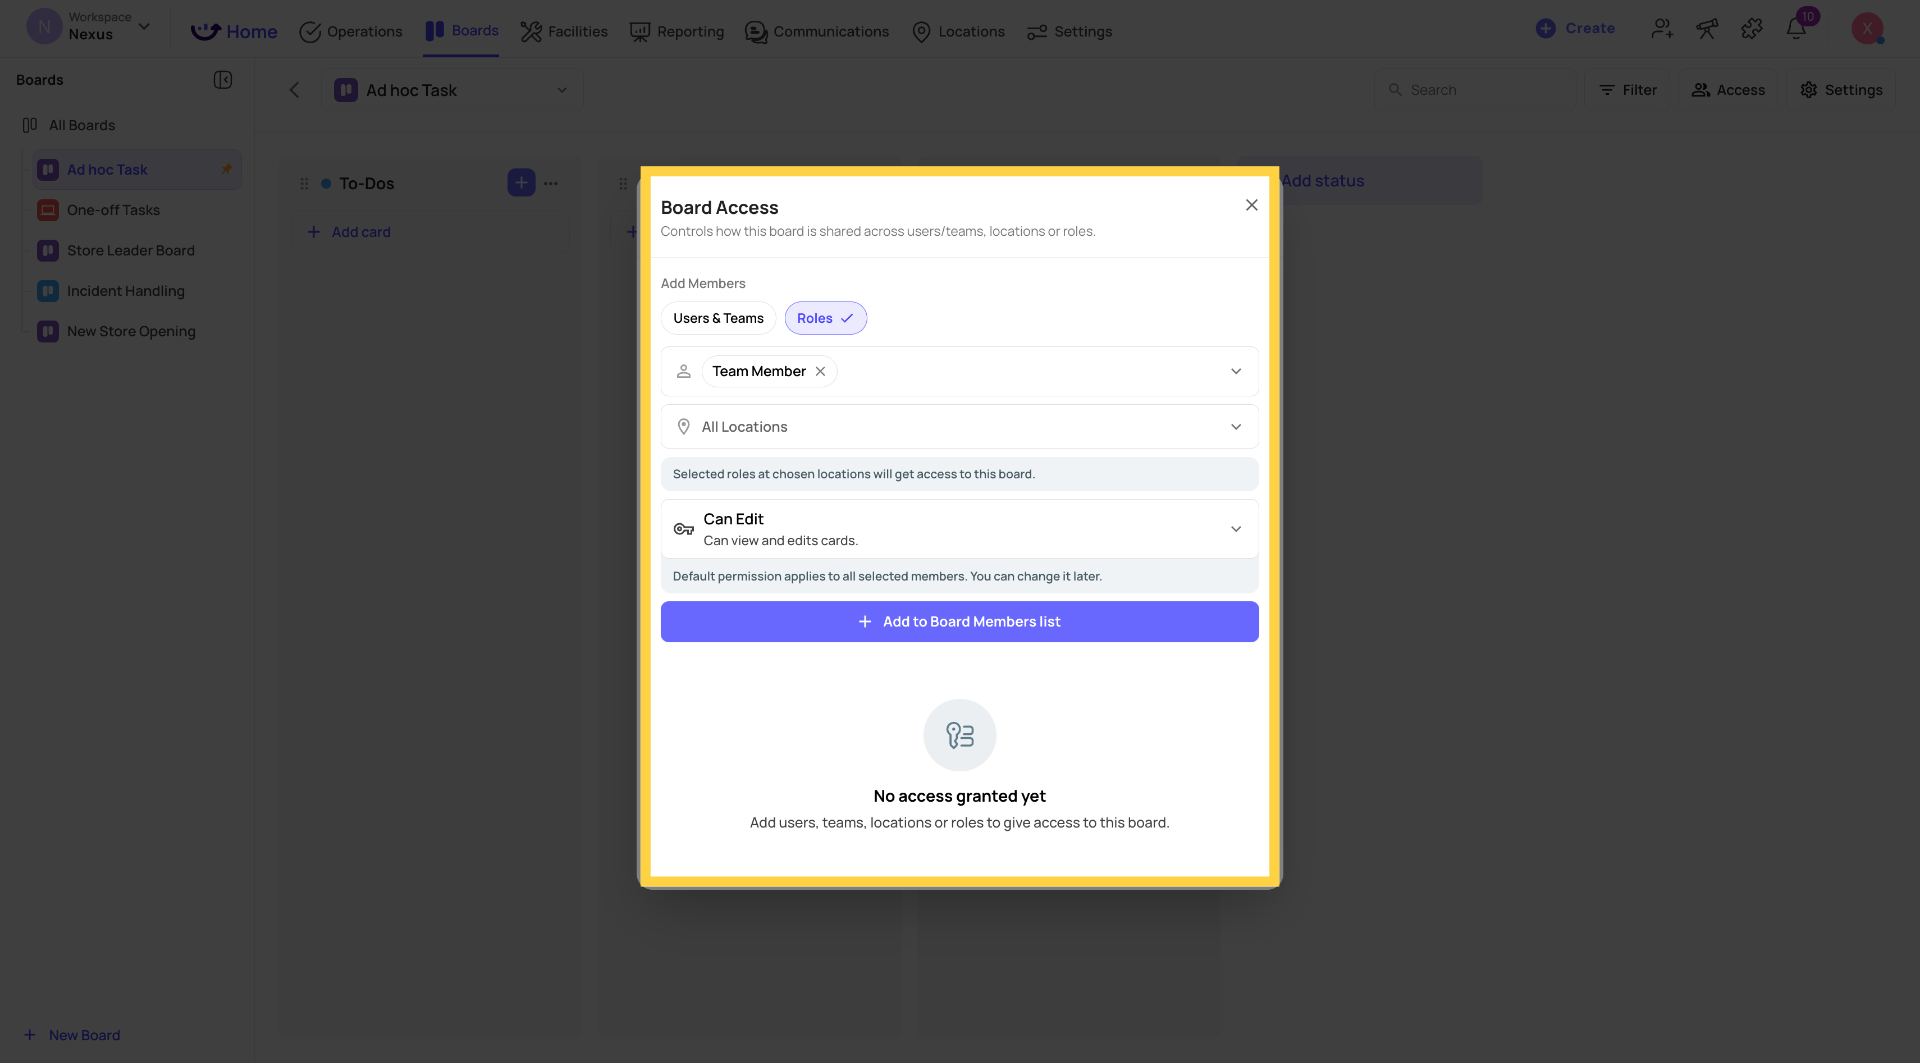
Step 1 — Select Who Gets Access
Choose from four scoping options — you can use any combination:
- Locations — all users at the selected location(s) with board access permissions get access
- Teams — all members of the selected team(s)
- Roles — all users with the selected role(s) at the selected location(s)
- Individual users — specific named people
Participants who are already on the board appear pre-selected and locked in the picker — you can't accidentally remove them from this step.
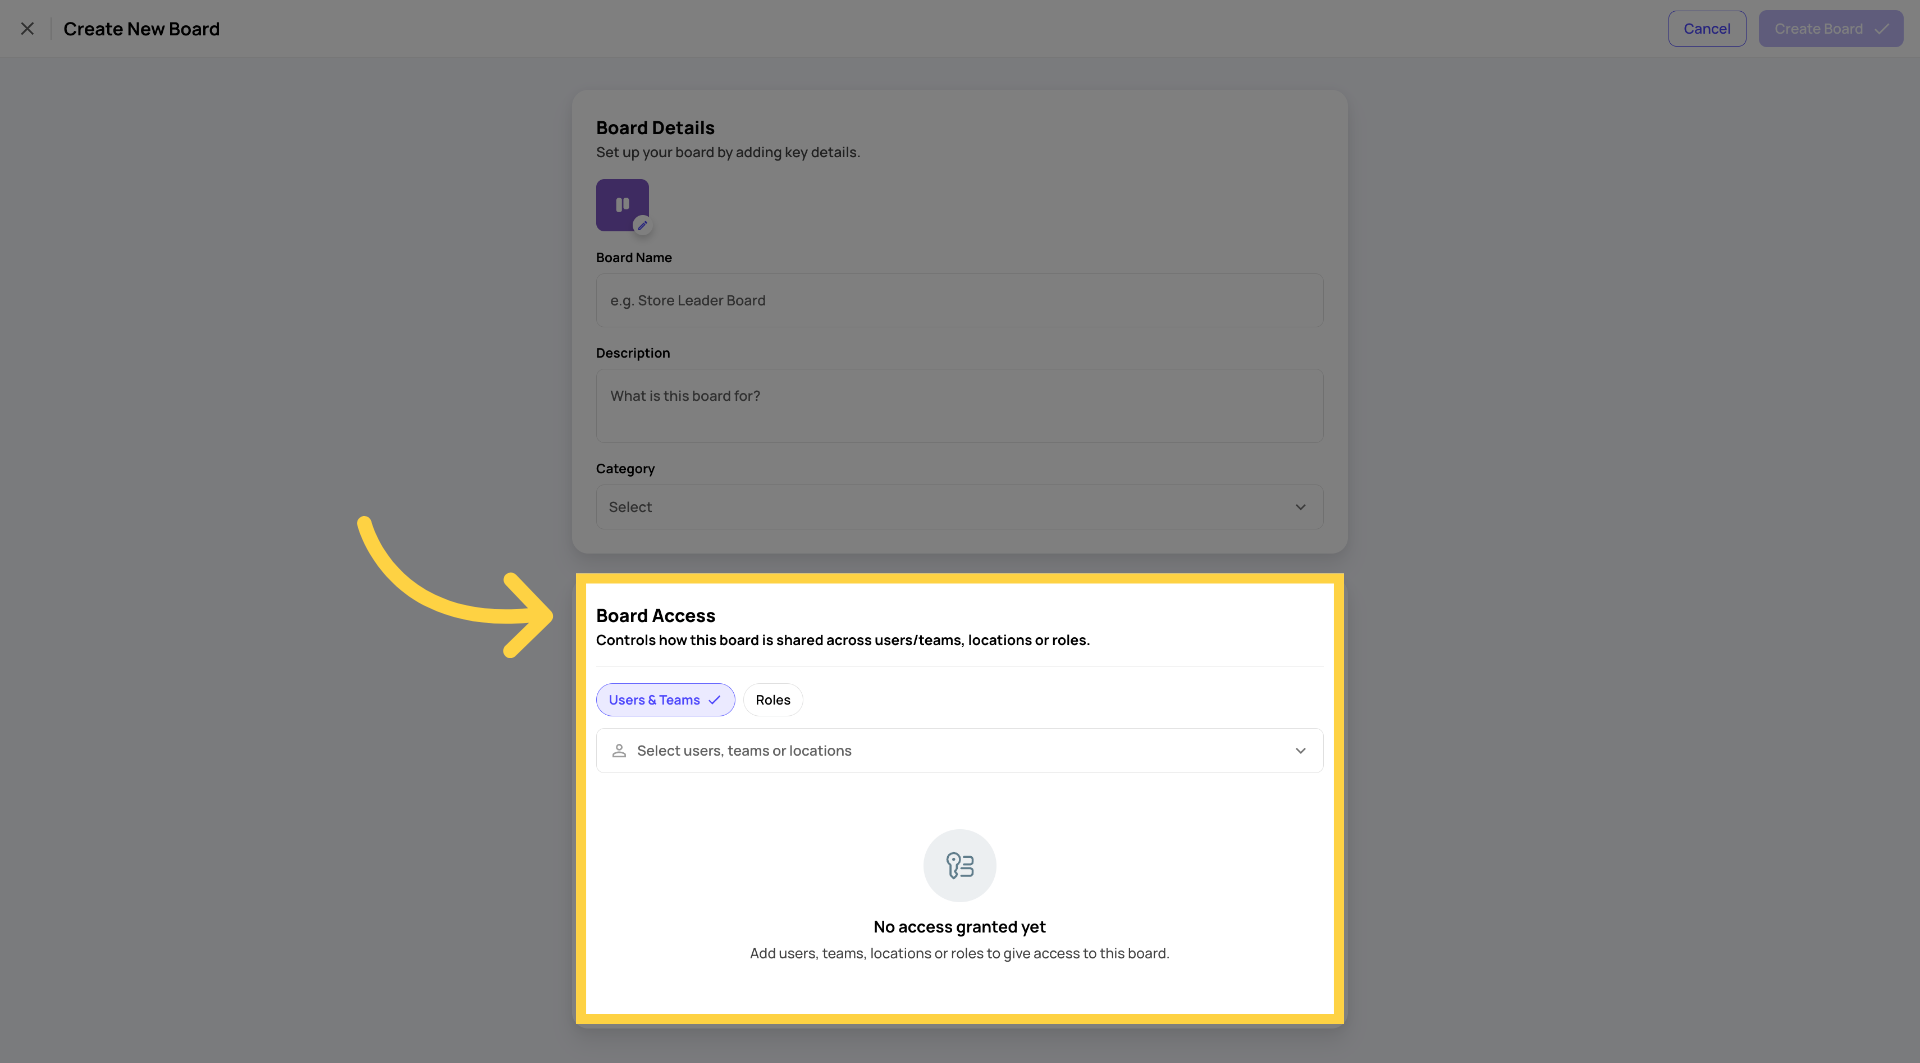
Step 2 — Settings
Configure notification settings for the new participants. The notify toggle is off by default. If turned on, a role/user picker appears so you can select who receives the notification.
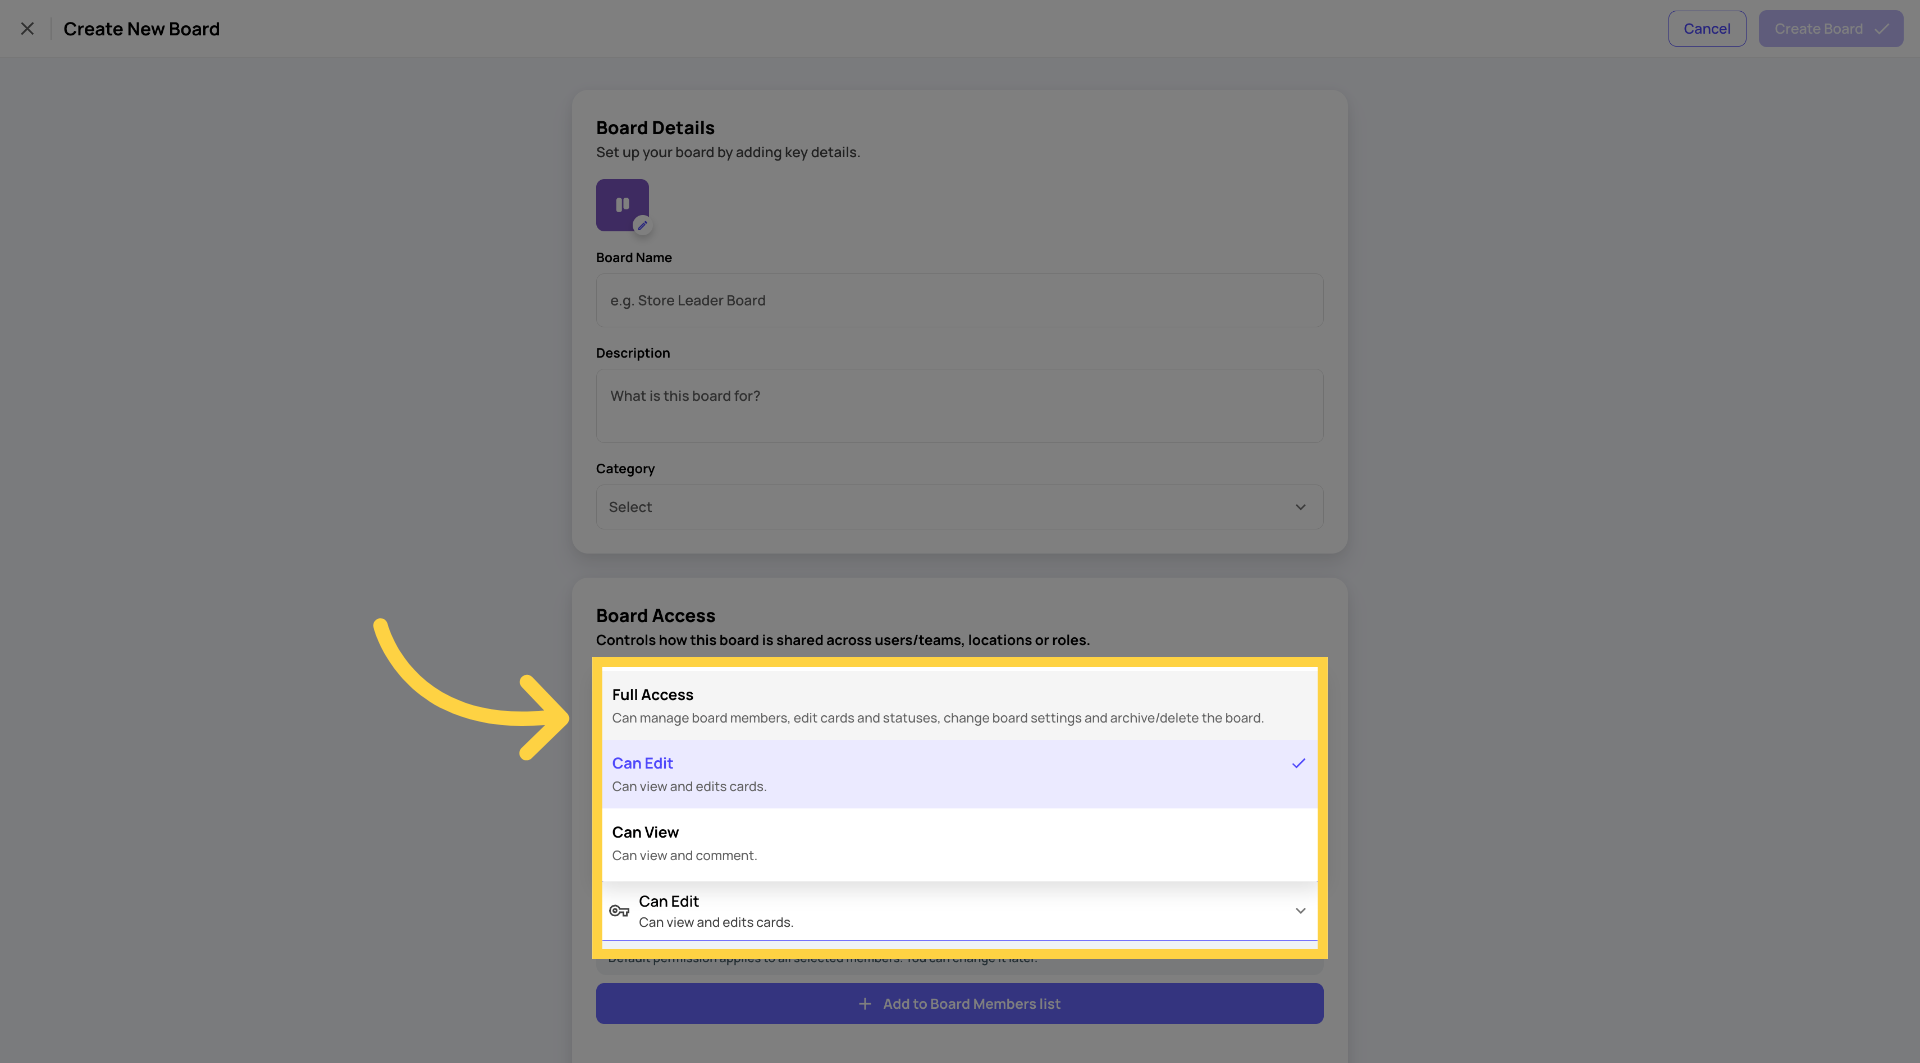
Step 3 — Review & Confirm
Review the full list of who will have access. Confirm.
On confirm:
- The board status changes from Draft to Published
- The board becomes immediately visible for all granted participants
- A "Shared" visual tag appears on the board card in list view and in the board canvas topbar
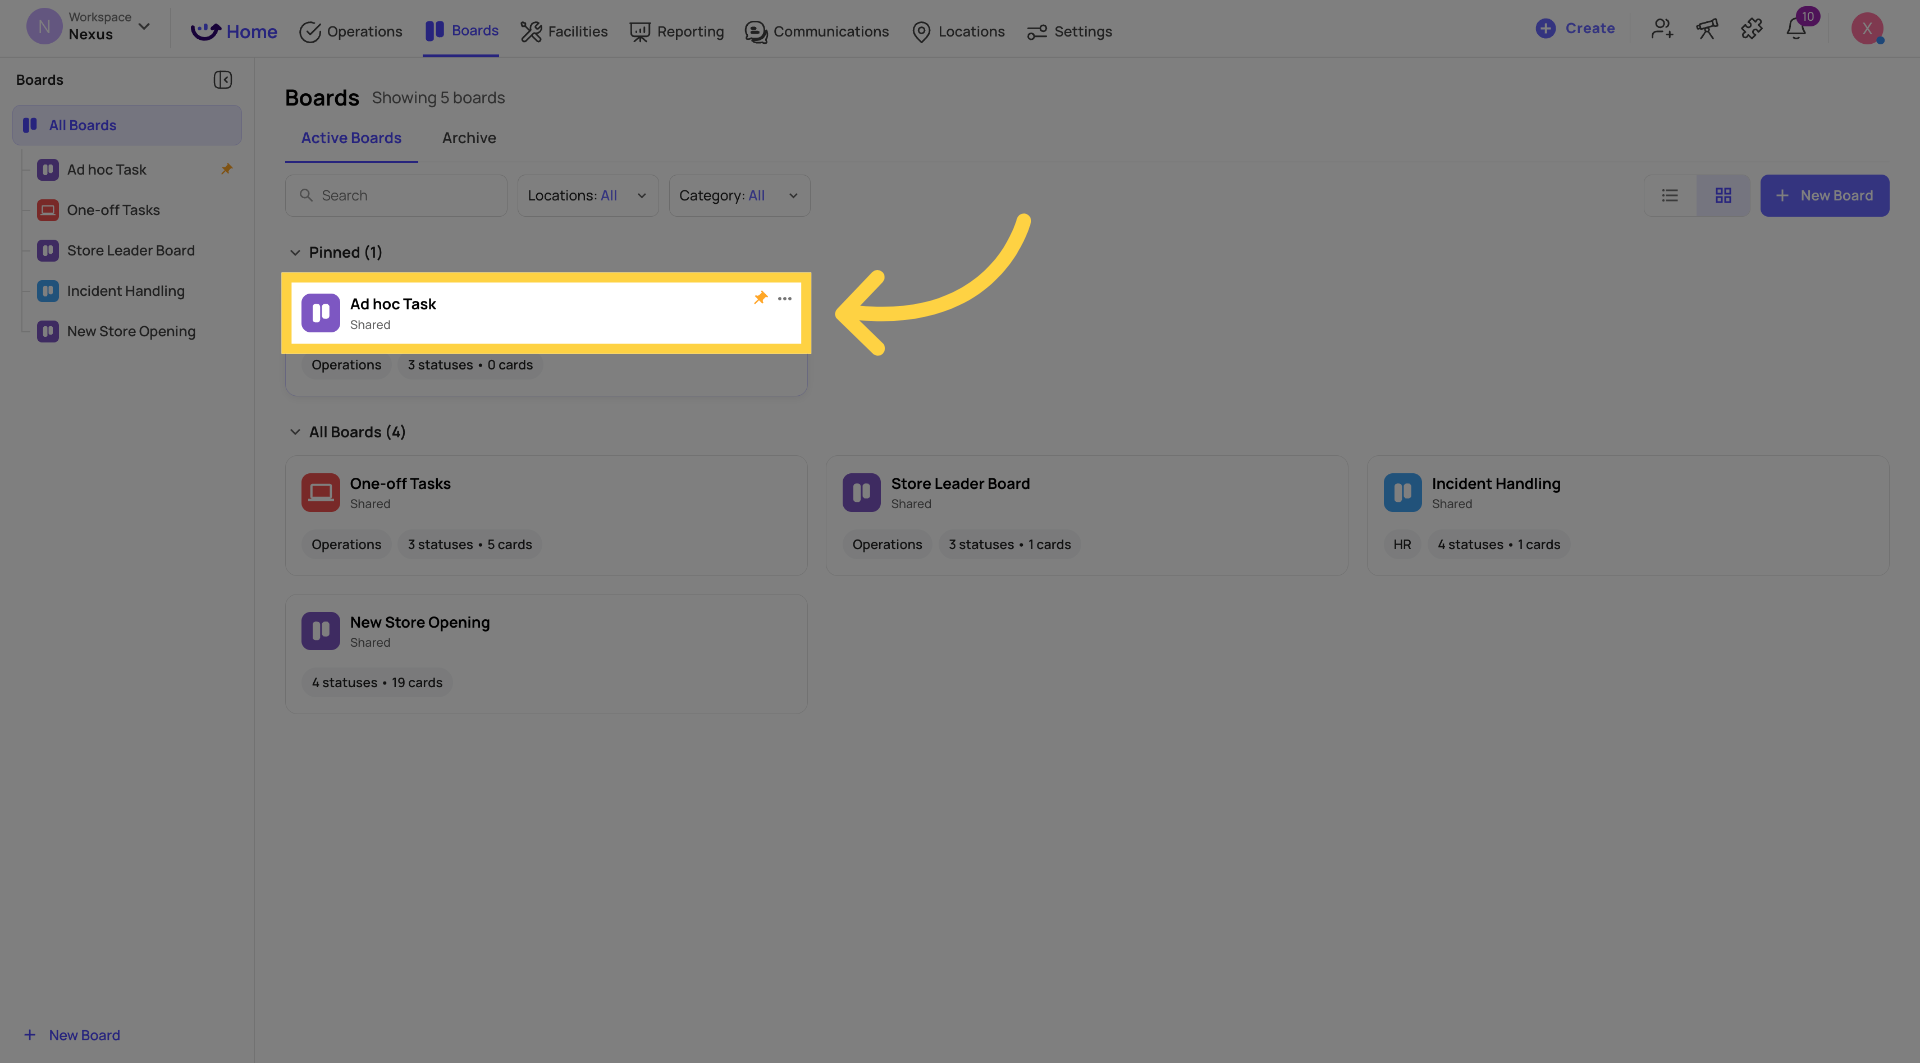
The "Shared" Tag
All boards are shared boards — multiple locations and/or users collaborate on one live board. The "Shared" tag is visible on:
- The board card in the Boards list view
- The board canvas topbar
Shared boards display a read-only Origin field on each card showing which location/user created that card.
What Shared Means in Practice
On a shared board, all participants see the same live board at the same time. When someone moves a card, everyone sees it move. When someone adds a card, it appears for everyone.
The Origin field on each card is read-only — it shows which location or user created the card, helping multi-location teams understand where work is coming from.
Permissions — Who Can Do What
Boards uses Xenia's existing role permission system with the following board-specific capabilities:
| Capability | Admin / Owner | Full User | Basic User |
| Create & publish boards | ✅ | ❌ | ❌ |
| Manage board access (share with locations/teams/roles/users) | ✅ | ❌ | ❌ |
| Create cards on any board they have access to | ✅ | ✅ | ❌ |
| Assign cards to others | ✅ | ✅ | ❌ |
| Delete cards | ✅ | ✅ | ❌ |
| Manage labels | ✅ | ✅ | ❌ |
| Update cards assigned to me | ✅ | ✅ | ✅ |
| View all boards across locations & teams | V2 | V2 | ❌ |
Key takeaways:
- Only Admins and Owners can create boards and manage who has access
- Full Users can fully participate — creating cards, assigning, managing labels, deleting cards
- Basic Users can only update cards that are assigned to them
- No role can see all boards across all locations in V1 — access is always board-by-board
Accessing the Board Access Settings After Creation
To update board access at any time:
- Open the board
- Open the Customize panel (right-side panel)
- Find the Access section
- Use the same 3-step flow to add or adjust participants
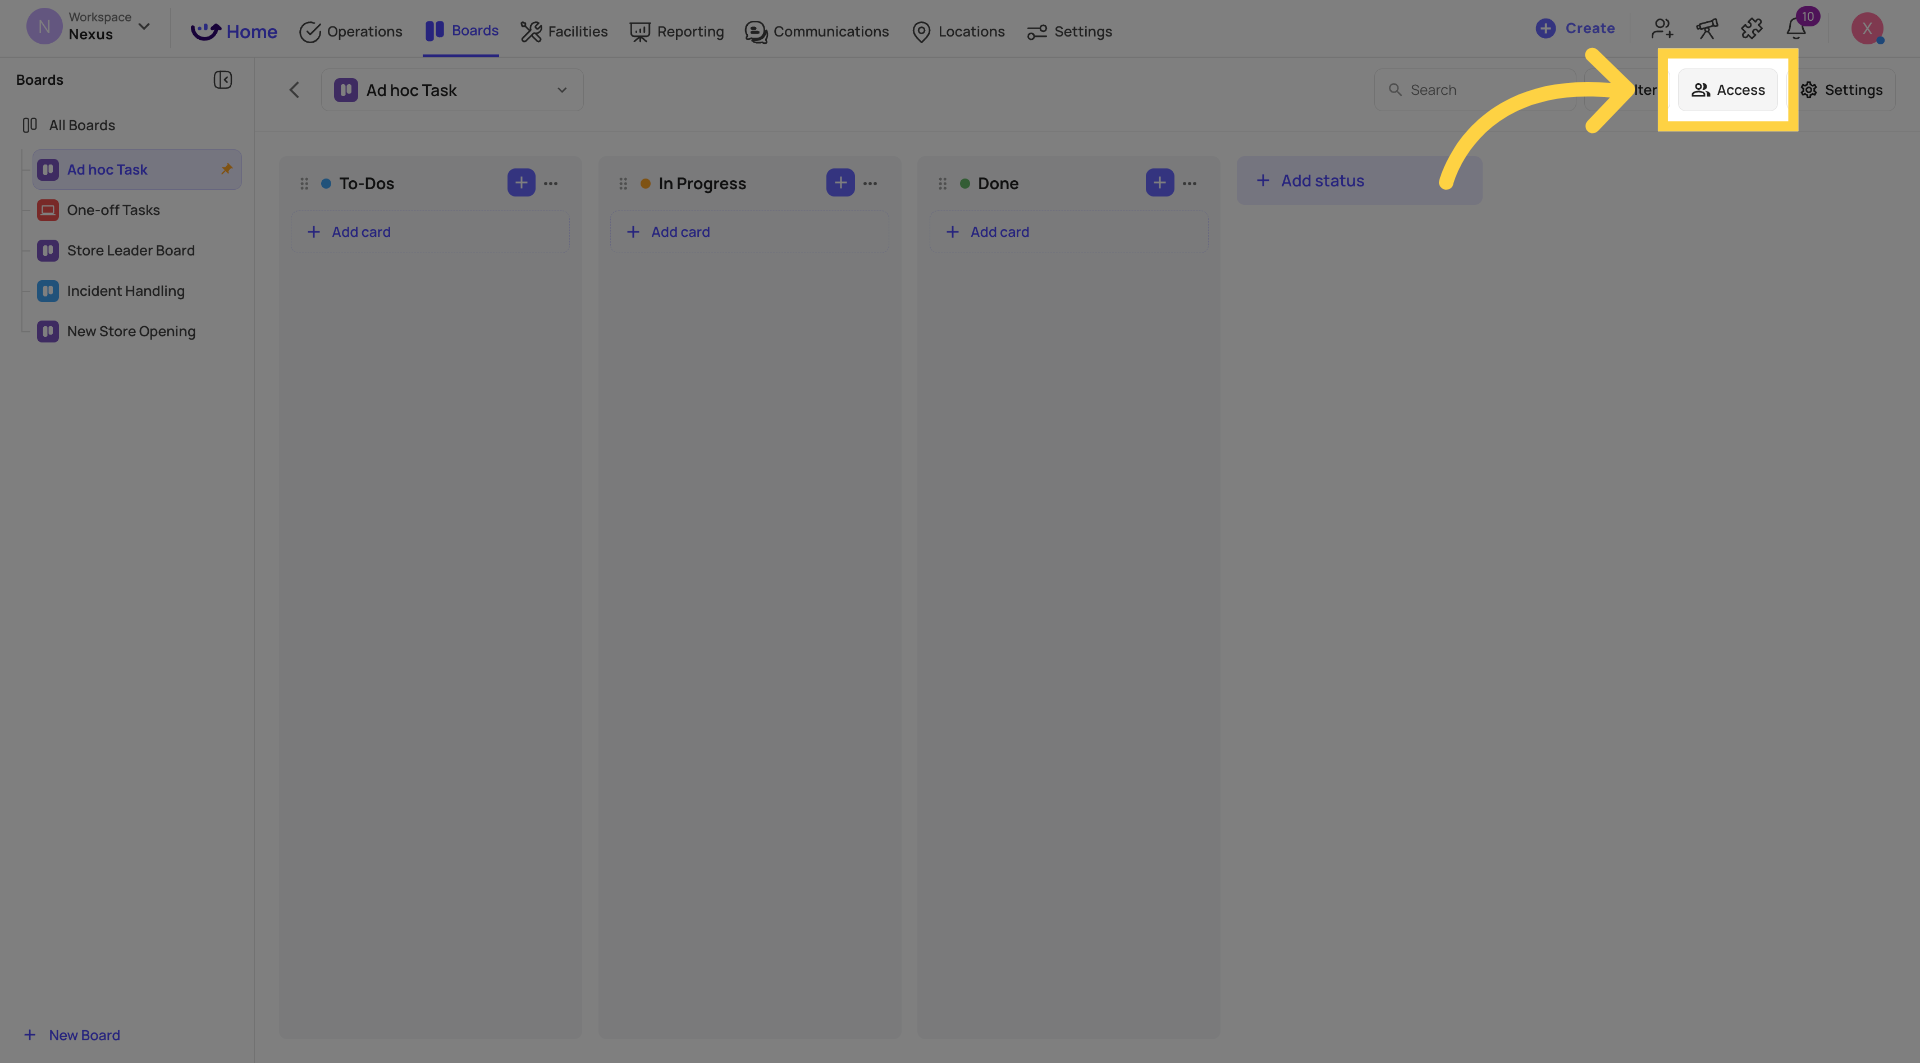
Role-Level Permission for Boards
In addition to board-level access, there are two role-level permission toggles in Settings → Users & Teams → Roles:
- Can access boards — whether this role can see and use boards at all
- Can create boards — whether this role can create new boards (in V1, Admin/Owner only)
These role-level toggles control access at the workspace level. Board-level access then provides finer control within that.
Reach out to our Support Team at Support@xenia.team
Comments
0 comments
Please sign in to leave a comment.