What the Vendor Contact Book Is
The Vendor Contact Book is a dedicated section in Xenia where you store contact information for your external service providers — HVAC contractors, plumbers, pest control companies, refrigeration technicians, electricians, and any outside contractor your facilities team works with.
The problem it solves: Without this, vendor outreach happens manually and outside Xenia. A facilities coordinator receives a ticket, pulls up a spreadsheet, finds the right vendor's email, writes the details, and sends it manually. The work order in Xenia sits unresolved with no record of who was contacted or when.
What Xenia does instead: When a vendor is stored in the Contact Book and connected to a Routing Rule, the vendor email fires automatically the moment a matching work order is created — with the full work order details included. The Activity Log on that work order records the event instantly: vendor name, and the timestamp the email was sent.
Vendors do not need a Xenia account. They receive an email to their existing inbox. No app access, no login, no onboarding required on their end.
Where to Find the Vendor Contact Book
Facilities → Vendors
Adding a New Vendor
Required fields: Name and email address. Everything else is optional but recommended.
- Go to Facilities → Vendors
- Click + Add Vendor
- Fill in the vendor details:
Vendor Name (required) The company name. Be specific — especially if you have multiple vendors per category across regions. "Elite HVAC Solutions" or "CoolAir Services — Miami" is more useful than "HVAC Company" when you're managing 15 vendors.
Email Address (required) The address that receives work order notification emails when a routing rule fires. Use a dispatch or service inbox rather than an individual rep's personal email — this way the contact stays valid even when staff changes.
Phone Number (optional) For manual reference. Visible in the vendor record when your team needs to call directly. For urgent, time-sensitive repairs, phone follow-up is often necessary regardless of what the routing rule does.
Category / Vendor Type (optional but recommended) What type of work this vendor handles — HVAC, Plumbing, Electrical, Pest Control, Equipment Repair, Refrigeration. This helps you organize the contact book and know at a glance which vendor handles what, even if the routing rule already handles the connection.
Notes (optional) SLA commitments, service territory, account numbers, after-hours procedures, preferred contact method — any context your team needs when working with this vendor.
Location Assignment: (Recommended) Assign one or more specific locations to this vendor to ensure accurate routing of work orders.
Primary Contact: (Optional but Recommended) Assign a primary contact to the vendor record to streamline and improve the effectiveness of your communication.
- Click Save
The vendor is now in the Contact Book and available as an assignment target in Routing Rules.
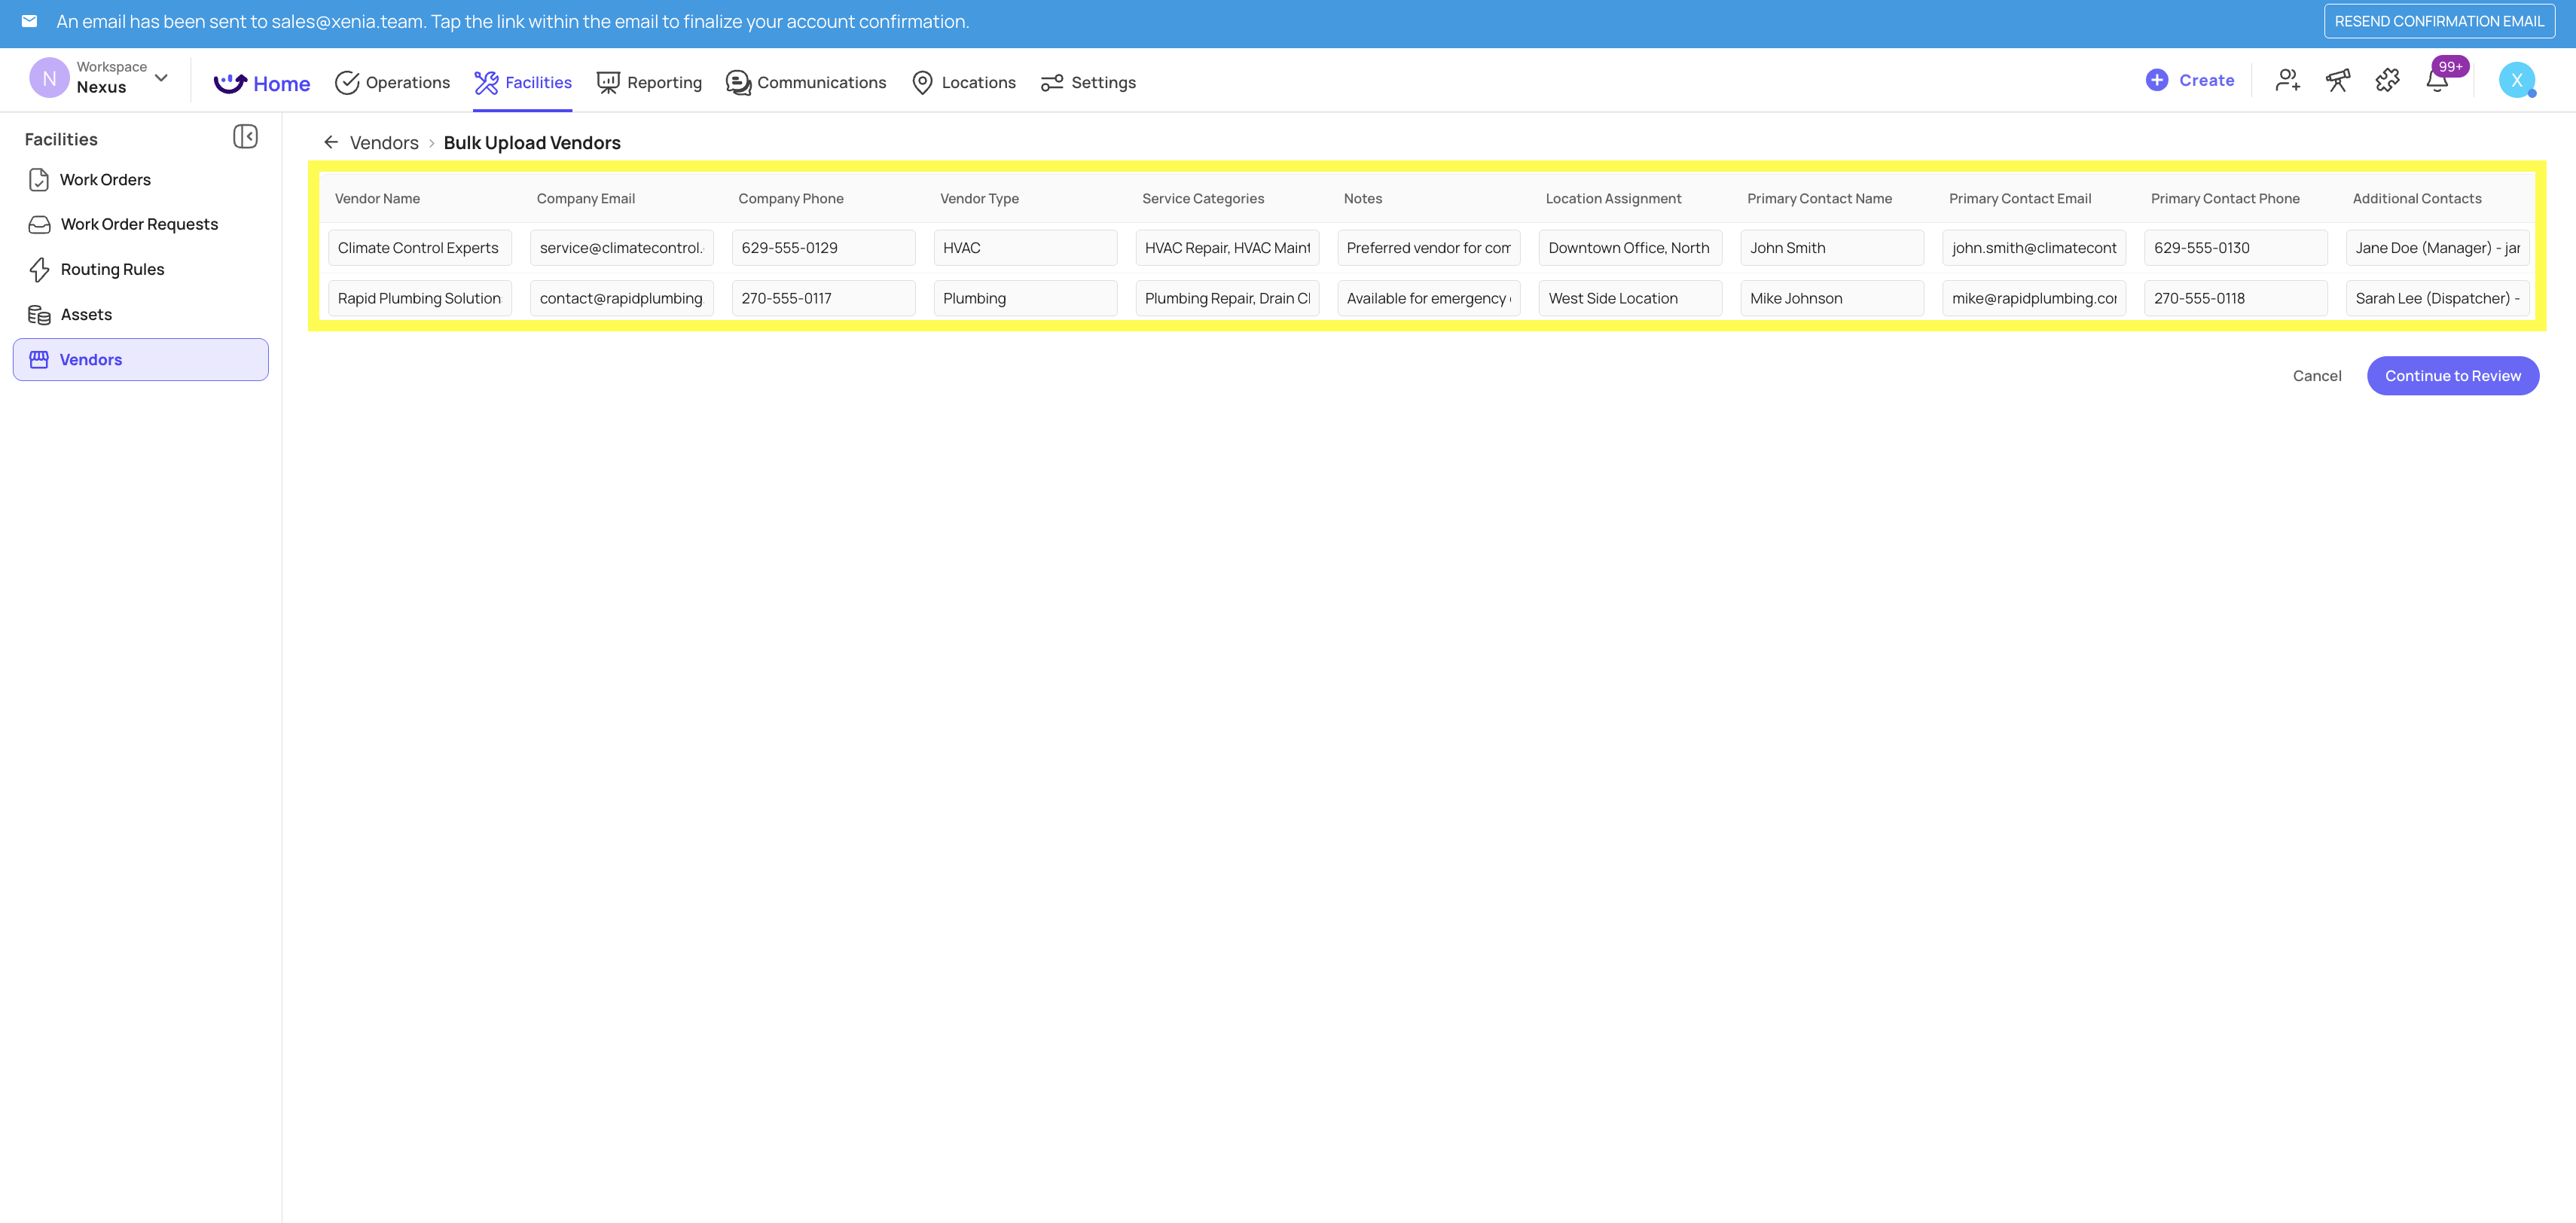
Bulk Adding Vendors via CSV Upload
If you have an existing vendor list in a spreadsheet, you can upload all vendors at once.
- Go to Facilities → Vendors
- Click Bulk Upload or Import CSV
- Click Download Sample CSV to get the required column format
- Fill in your vendor data — match the column headers exactly
- Upload the completed file
- Review the import results — rows with errors are flagged for correction
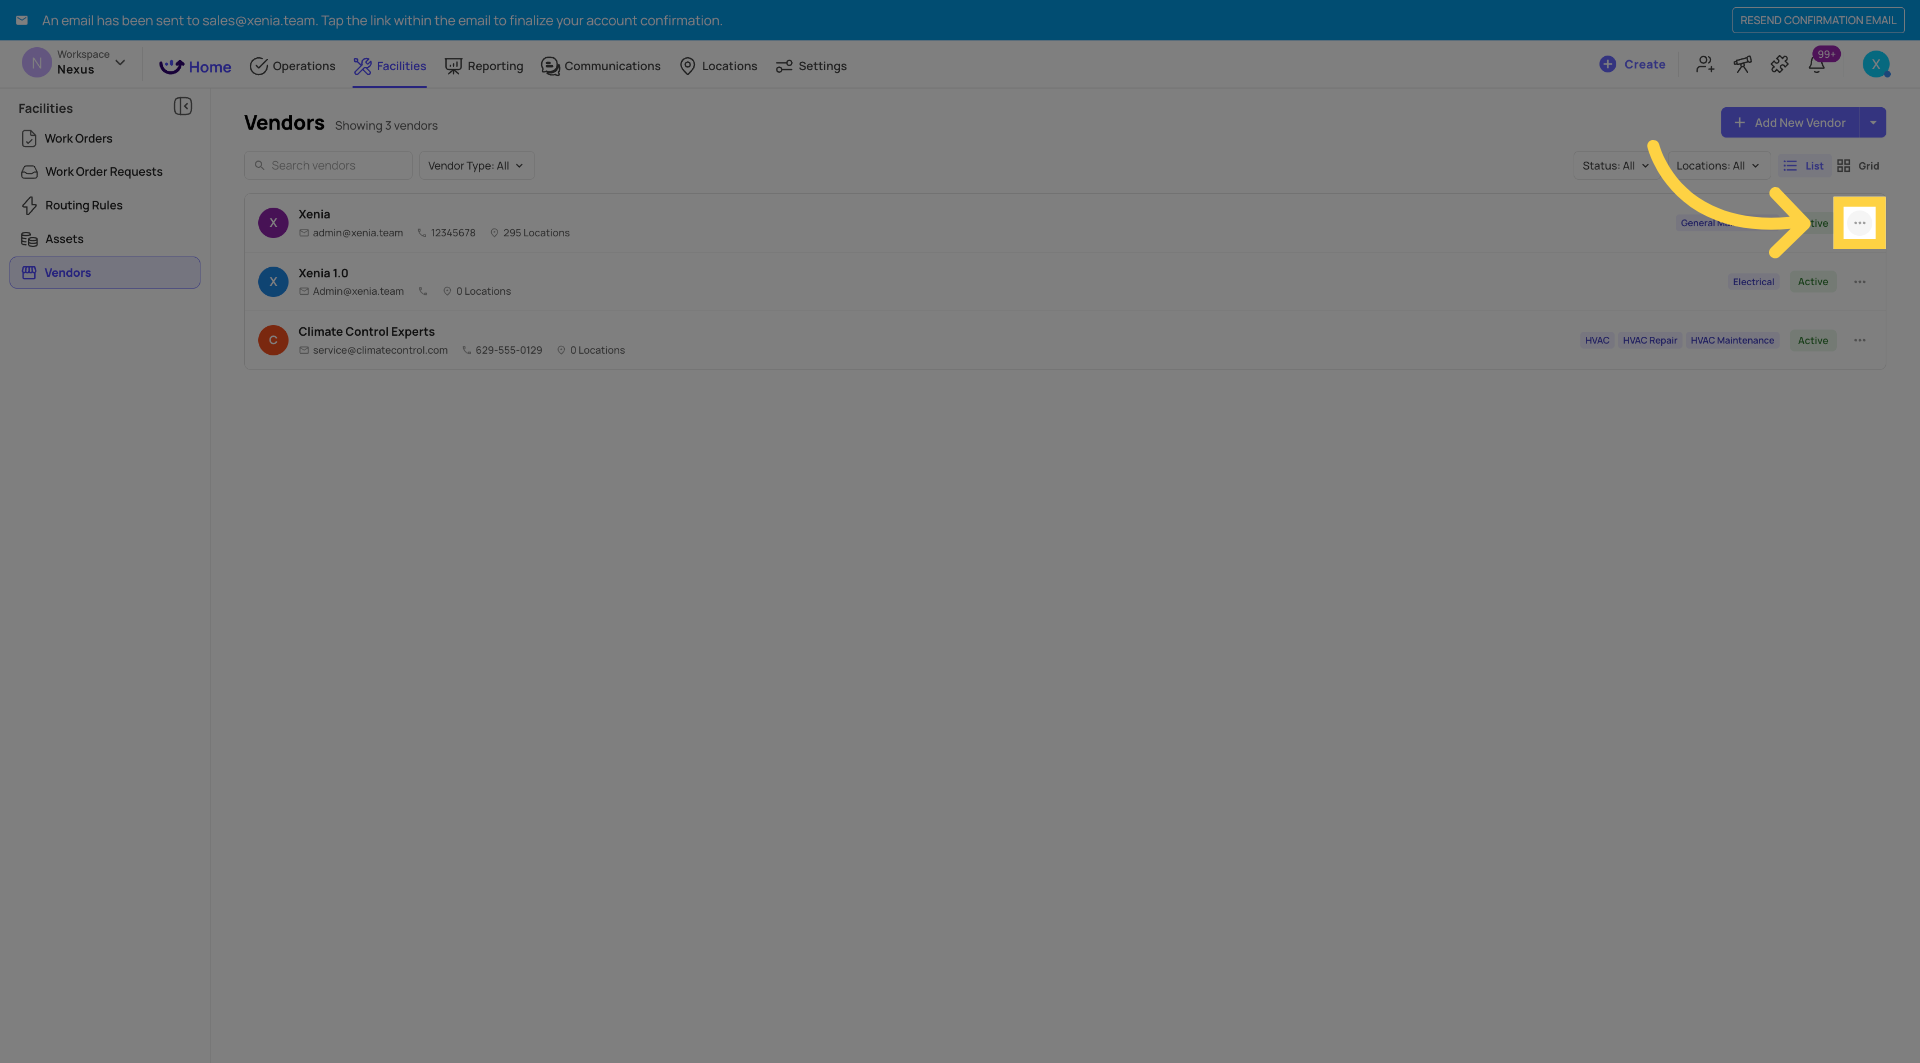
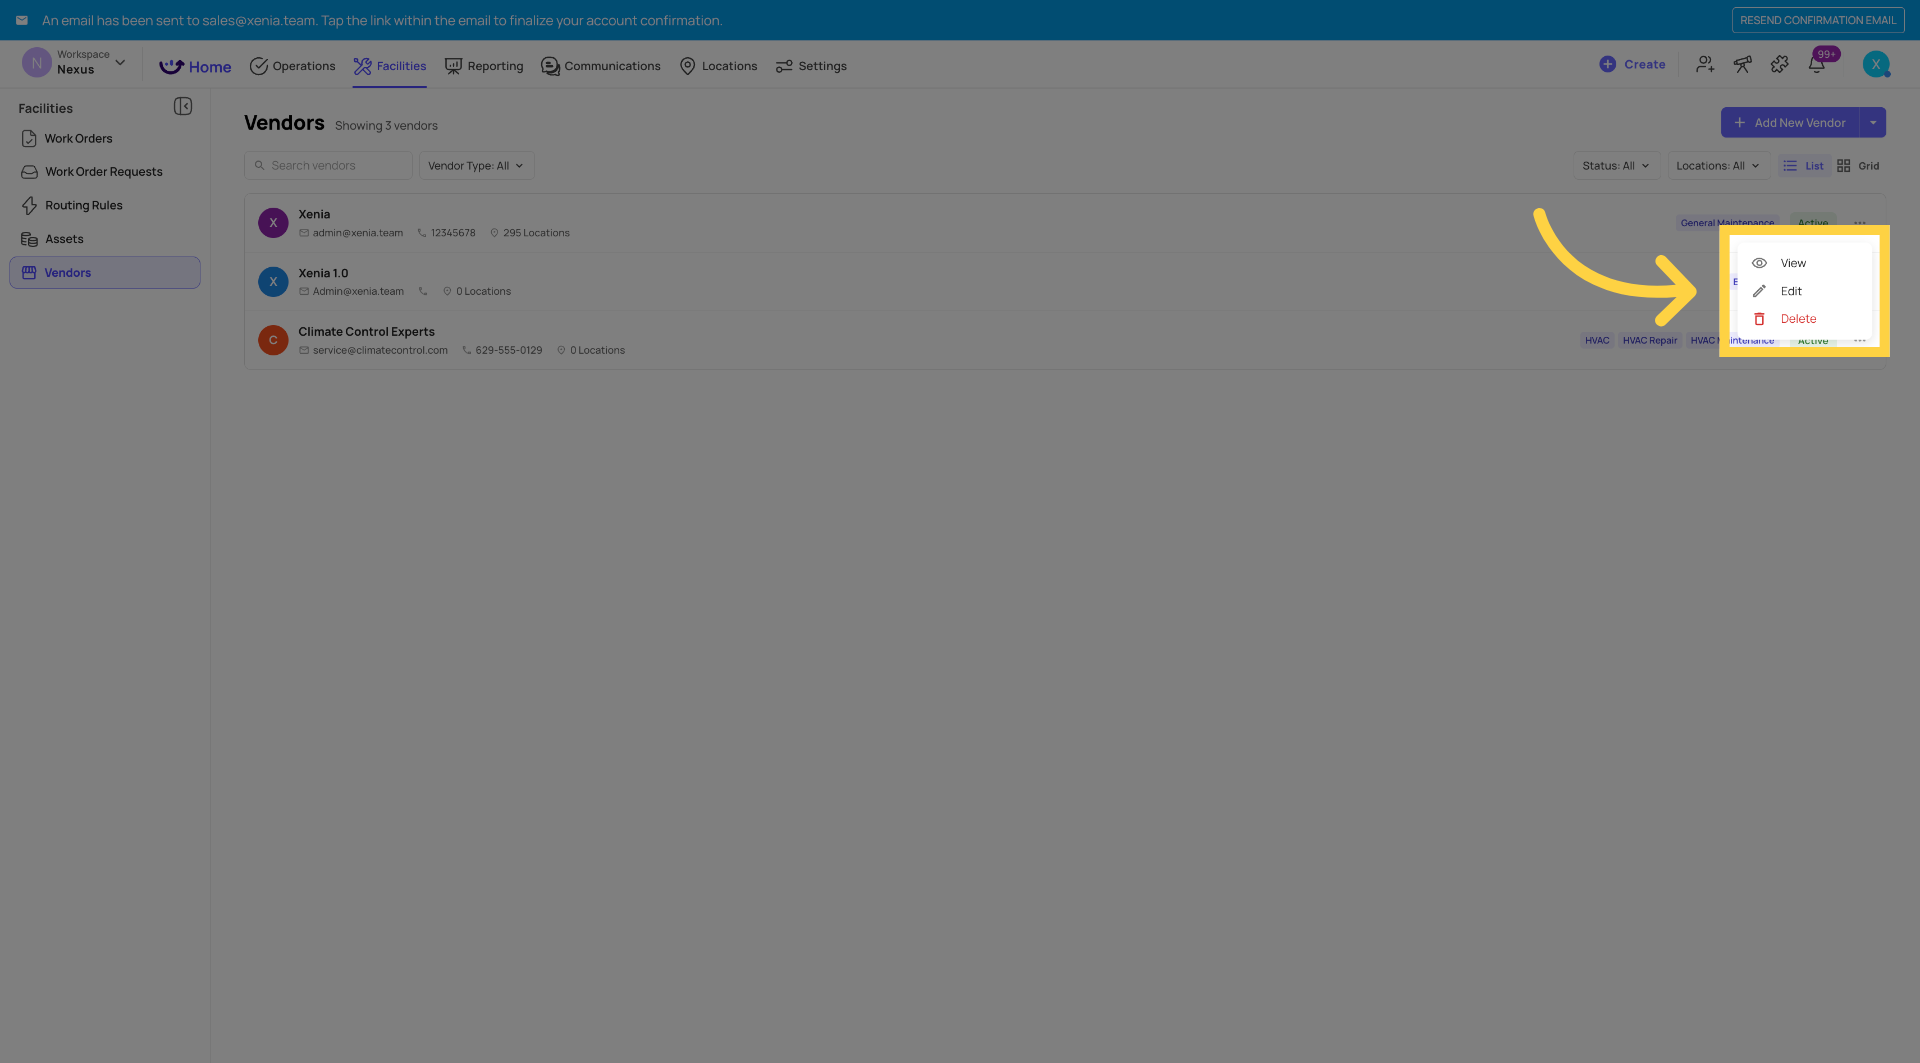
 Editing a Vendor
Click the vendor name or the three-dot menu → Edit → update any field → Save.
Changes take effect on future routing rule triggers. The vendor's name and timestamp for any previous routing events in the Activity Log are preserved as recorded.
Deleting a Vendor
Three-dot menu → Delete → Confirm.
Important edge case: If a deleted vendor is still referenced in a Routing Rule, that rule will surface a clear error or disable gracefully — it will not silently fail. Review your Routing Rules after deleting any vendor and update or remove the affected rules.
Vendor Contact Book — What It Is and Isn't
What it does:
- Stores vendor name and email for use in Routing Rules
- Enables automatic vendor email notifications when routing rules fire
- Records vendor name and timestamp in the Work Order Activity Log
What it does not do (out of scope for now):
- Two-way vendor communication or a vendor portal
- Vendor performance tracking or SLA management
- Integration with Limble, ServiceChannel, or other CMMS platforms
- Vendor field directly on the Work Order creation form (manual assignment — roadmap)
Best Practices
Review quarterly: Update contacts, remove vendors you no longer work with, add new contractors.
Keep the email current: A stale email means no notification reaches the vendor. This is the single most important field to maintain.
Name with context: "Elite HVAC Solutions" or "Elite HVAC — South Florida" depending on how many vendors of the same type you manage.
Use Notes for operational context: After-hours numbers, escalation contacts, service area limitations — anything your coordinator needs at 2am when an emergency comes in.
Need Help?
Reach out to our Support Team at Support@xenia.team
Comments
0 comments
Please sign in to leave a comment.