1. Before You Start
Open the task from your home screen or Work tab. Read the task description — it tells you what needs to be done, where, and any relevant context. Don't start working until you understand what's being asked.
Tap Start to open the attached checklist.
2. Working Through the Checklist
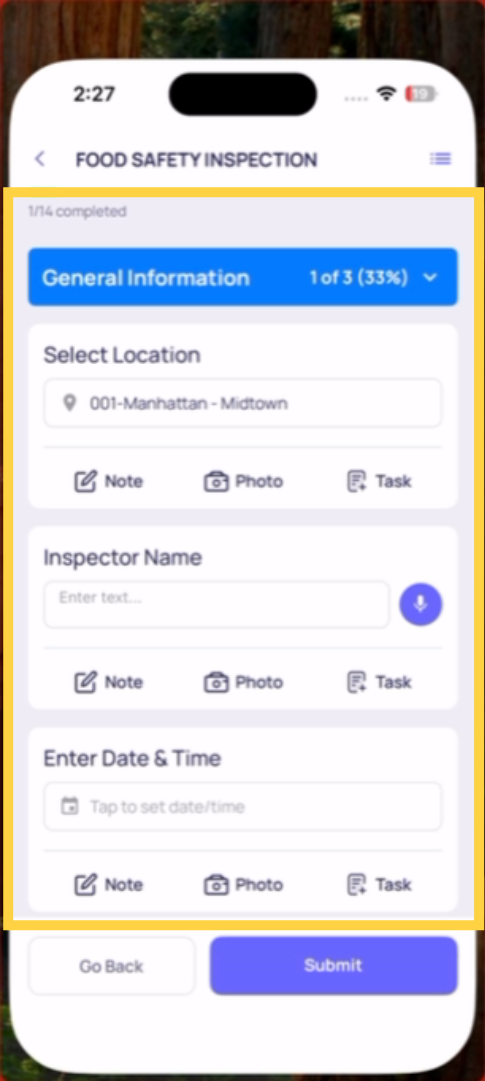
The checklist opens on the first step or first section. Work from top to bottom.
Answering each step type:
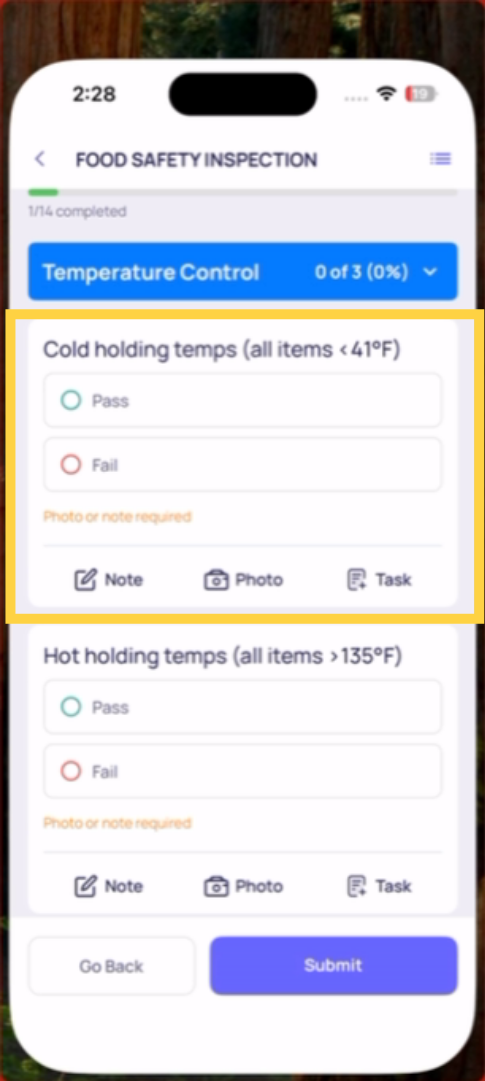
Multiple Choice / Pass/Fail: Tap the response button — Yes or No, Pass or Fail. The button highlights when selected.
Temperature: Tap the field. A numeric keypad opens. Type the reading. The unit (°F or °C) is shown next to the field.
Number Answer: Same as temperature — tap, numeric keypad, type the value.
Text Field: Tap the field. A keyboard opens. Type your response. Be specific — vague answers like "done" or "fixed" aren't useful to anyone reviewing the submission.
Take Photo: The camera opens automatically. Point it at the subject. Take a clear, close-up photo that shows what's being documented. Tap use/confirm. The photo attaches to that step.
Procedure (checkbox): Tap the checkbox to mark it complete.
Signature: Draw your signature on the screen with your finger.
Date/Time: A date or time picker opens — scroll to the correct value.
Location step: If you're completing this checklist from a project task, your location is pre-filled automatically — you don't need to interact with it. If you're completing it ad hoc, tap the dropdown and select your store.
3. Required Steps
Steps marked as Required have a visual indicator. You must answer them before you can submit. If you try to submit with required steps unanswered, the checklist highlights the missing steps and scrolls you to the first one.
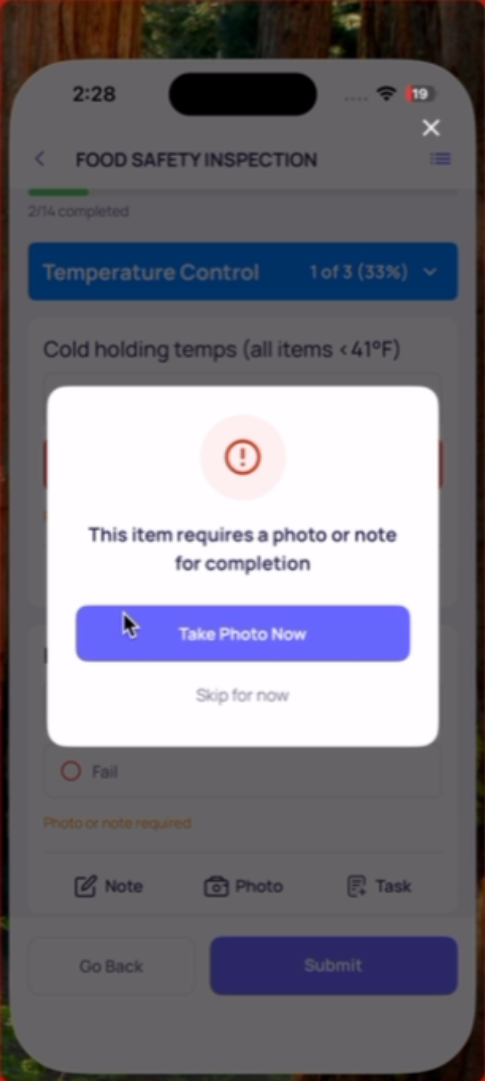
4. Conditional Prompts (What Appears After a Failing Answer)
When you mark a step as failed (No, Fail, out-of-range value), something may appear immediately inline:
- Camera opens: You must take a live photo before continuing
- Follow-up question appears: Answer it before moving to the next step
- Confirmation message: "A corrective task has been created" — note this and continue
Handle whatever appears before moving forward. You cannot skip these prompts.
5. Navigating Sections
Long checklists are organized into sections (Front of House, Kitchen, Restrooms, etc.). You can see all sections listed and jump to any one by tapping its name — useful when you're physically moving through a store and want to complete each area in order.
Completed sections show a visual indicator. Collapse finished sections to reduce clutter.
Completion Progress
A progress indicator at the top (or top of sections) shows how many steps are answered. Use this to track where you are on a long form.
Need Help?
Reach out to our Support Team at Support@xenia.team
Comments
0 comments
Please sign in to leave a comment.