1. Introduction
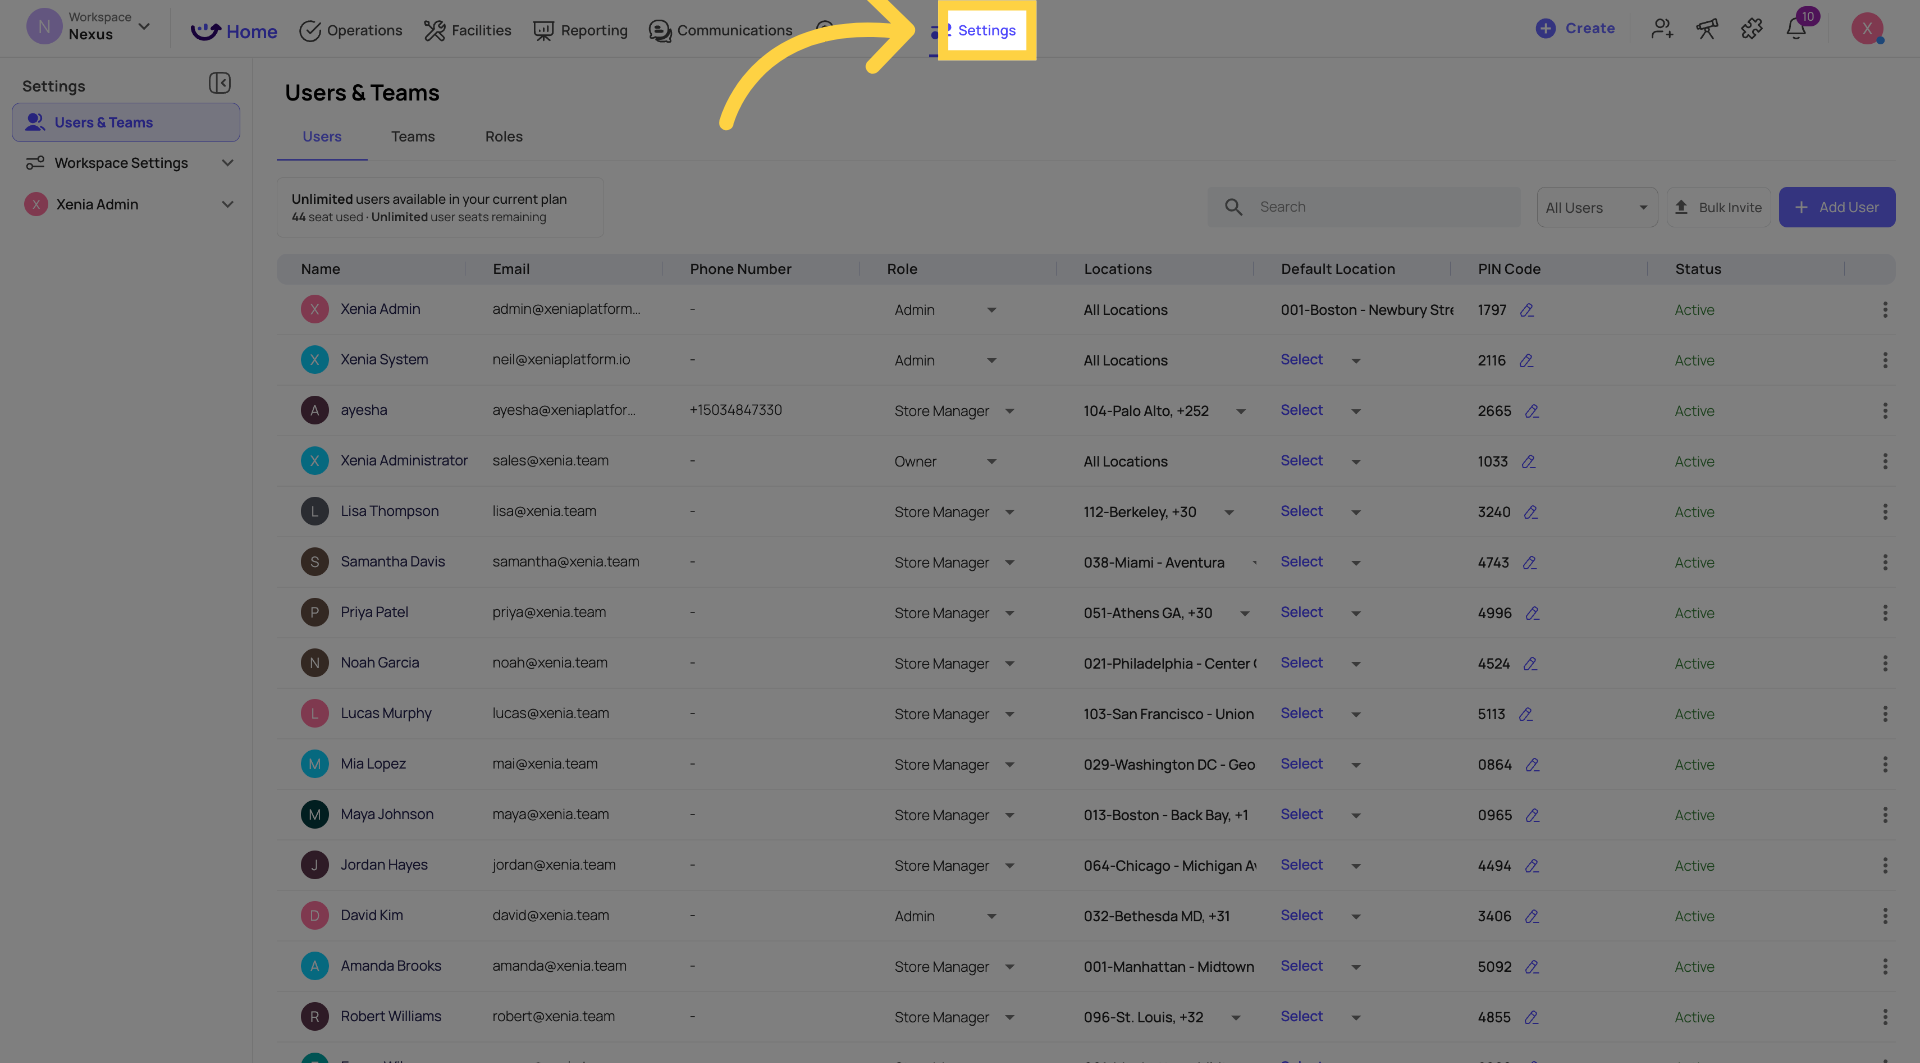
2. Step 1 — Go to Settings
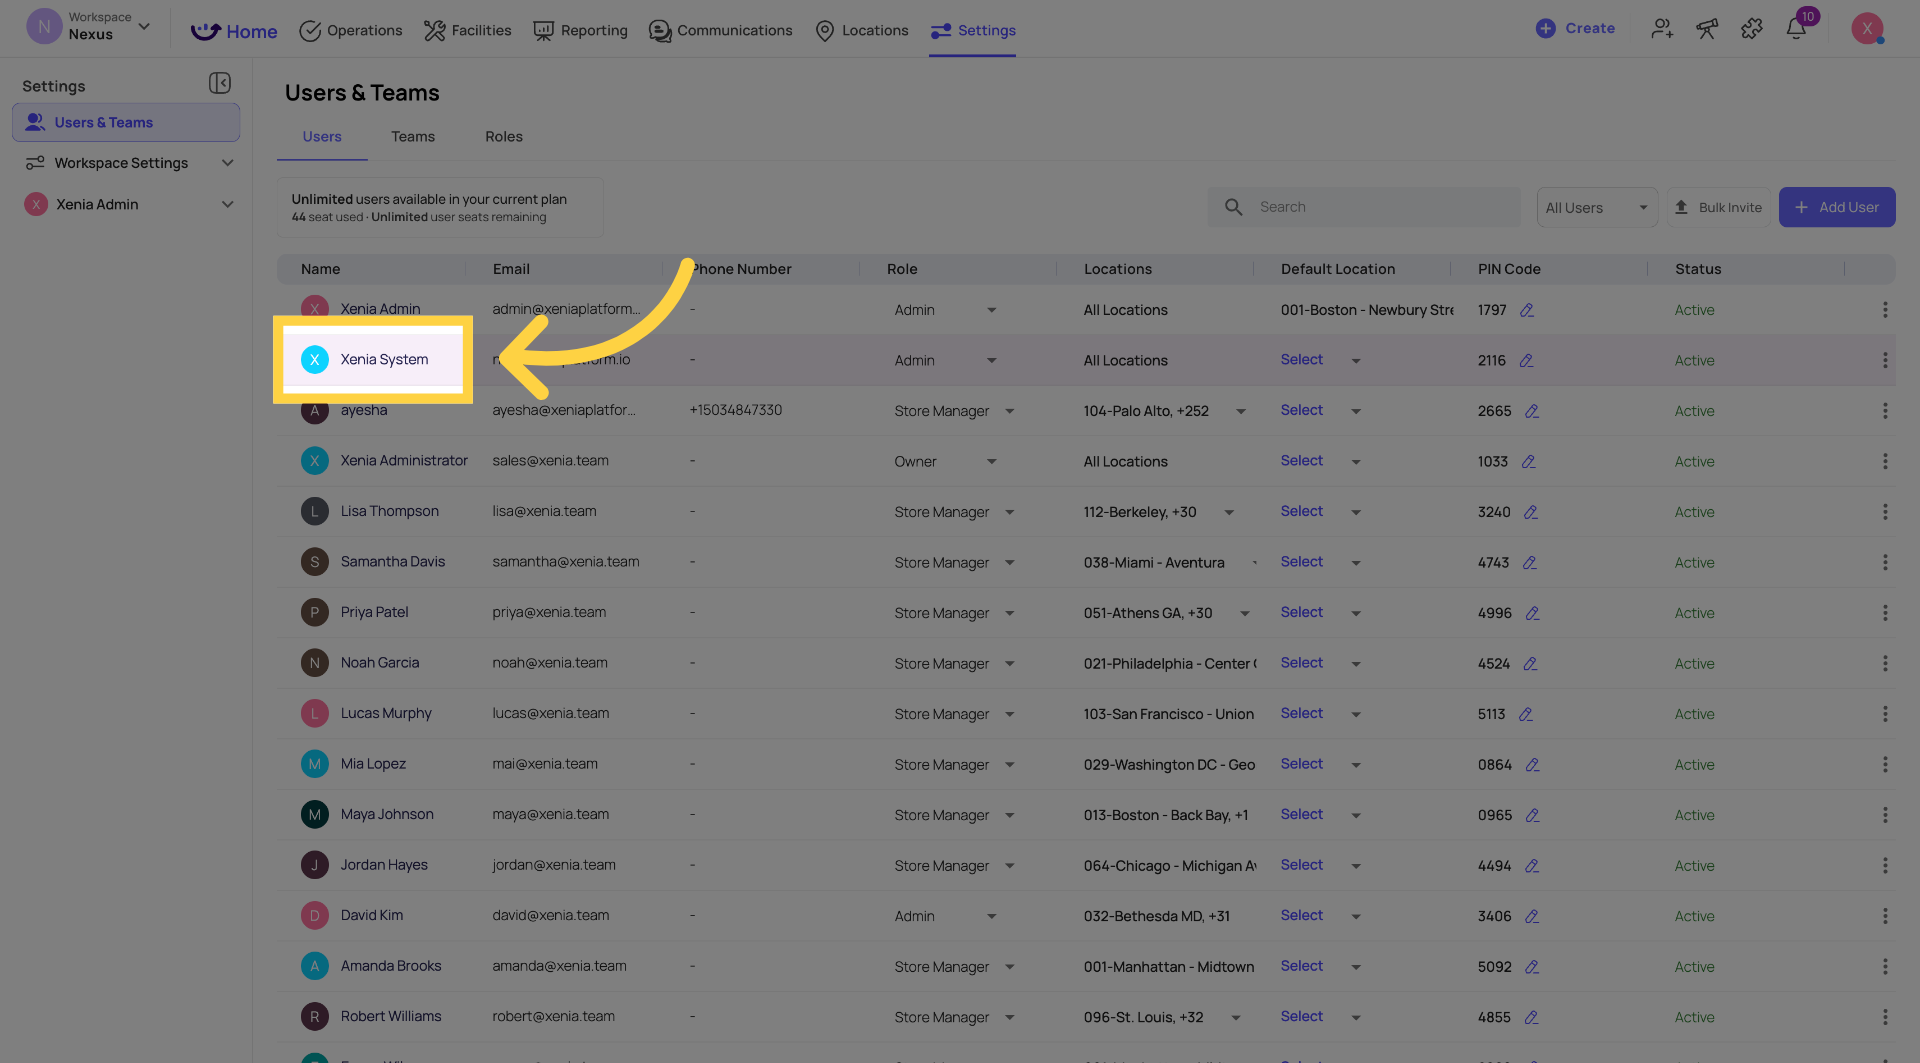
3. Step 2 — Select the User
From Settings, navigate to the Users section. Your full list of workspace users appears. Click on any user's name to open their profile sidebar on the right.
4. Step 3 — Edit Contact Information (Name, Phone, Email, Position)
With the user's profile sidebar open, click Edit at the top of the sidebar to enter edit mode.
In this section you can update:
- Name — the user's display name as it appears across Xenia
- Phone number — click the phone number field to enter or update their contact number
- Email address — click the email field to update the address associated with their account
- Position — click the Position field to enter or update their job title
When done, click Save Changes to apply the updates.
5. Step 4 — Edit Role and Default Location
Click Edit again to modify the user's role and default location settings.
In this section:
Role: Select the user's associated role from the role dropdown. The role controls which permissions and features this user has access to across the workspace. Changing a role takes effect immediately.
Default Location: Select the user's default location from the location dropdown. This is the location the app defaults to when the user logs in. It is separate from their full location membership list.
When done, click Save Changes to confirm the role and location updates.
7. Step 5 — Configure Location Membership
Click View All Locations to see and manage the complete list of locations this user has membership at.
From this view you can:
- See every site and location the user currently has access to
- Add new locations to their membership
- Remove locations they should no longer have access to
- Toggle between Sites and Locations views for granular control
Location membership determines which stores' data the user can see — their tasks, submissions, dashboards, and reports are all scoped to their member locations.
8. Step 6 — Configure Notification Settings
Click Edit on the Notification Settings section of the profile sidebar.
Choose which notification channels this user receives alerts through:
- Push — banner notifications on their mobile device
- Email — notifications sent to their account email address
- SMS — text message alerts to their phone number
- WhatsApp — WhatsApp message notifications
You can enable multiple channels simultaneously. Click Save Changes to apply the updated notification preferences.
9. Step 7 — Review the Activity Log
Click Activity Log to review a timestamped record of recent actions and system events for this user — submissions made, tasks completed, logins, and other activity.
This is useful for auditing purposes or when troubleshooting issues with a specific user account.
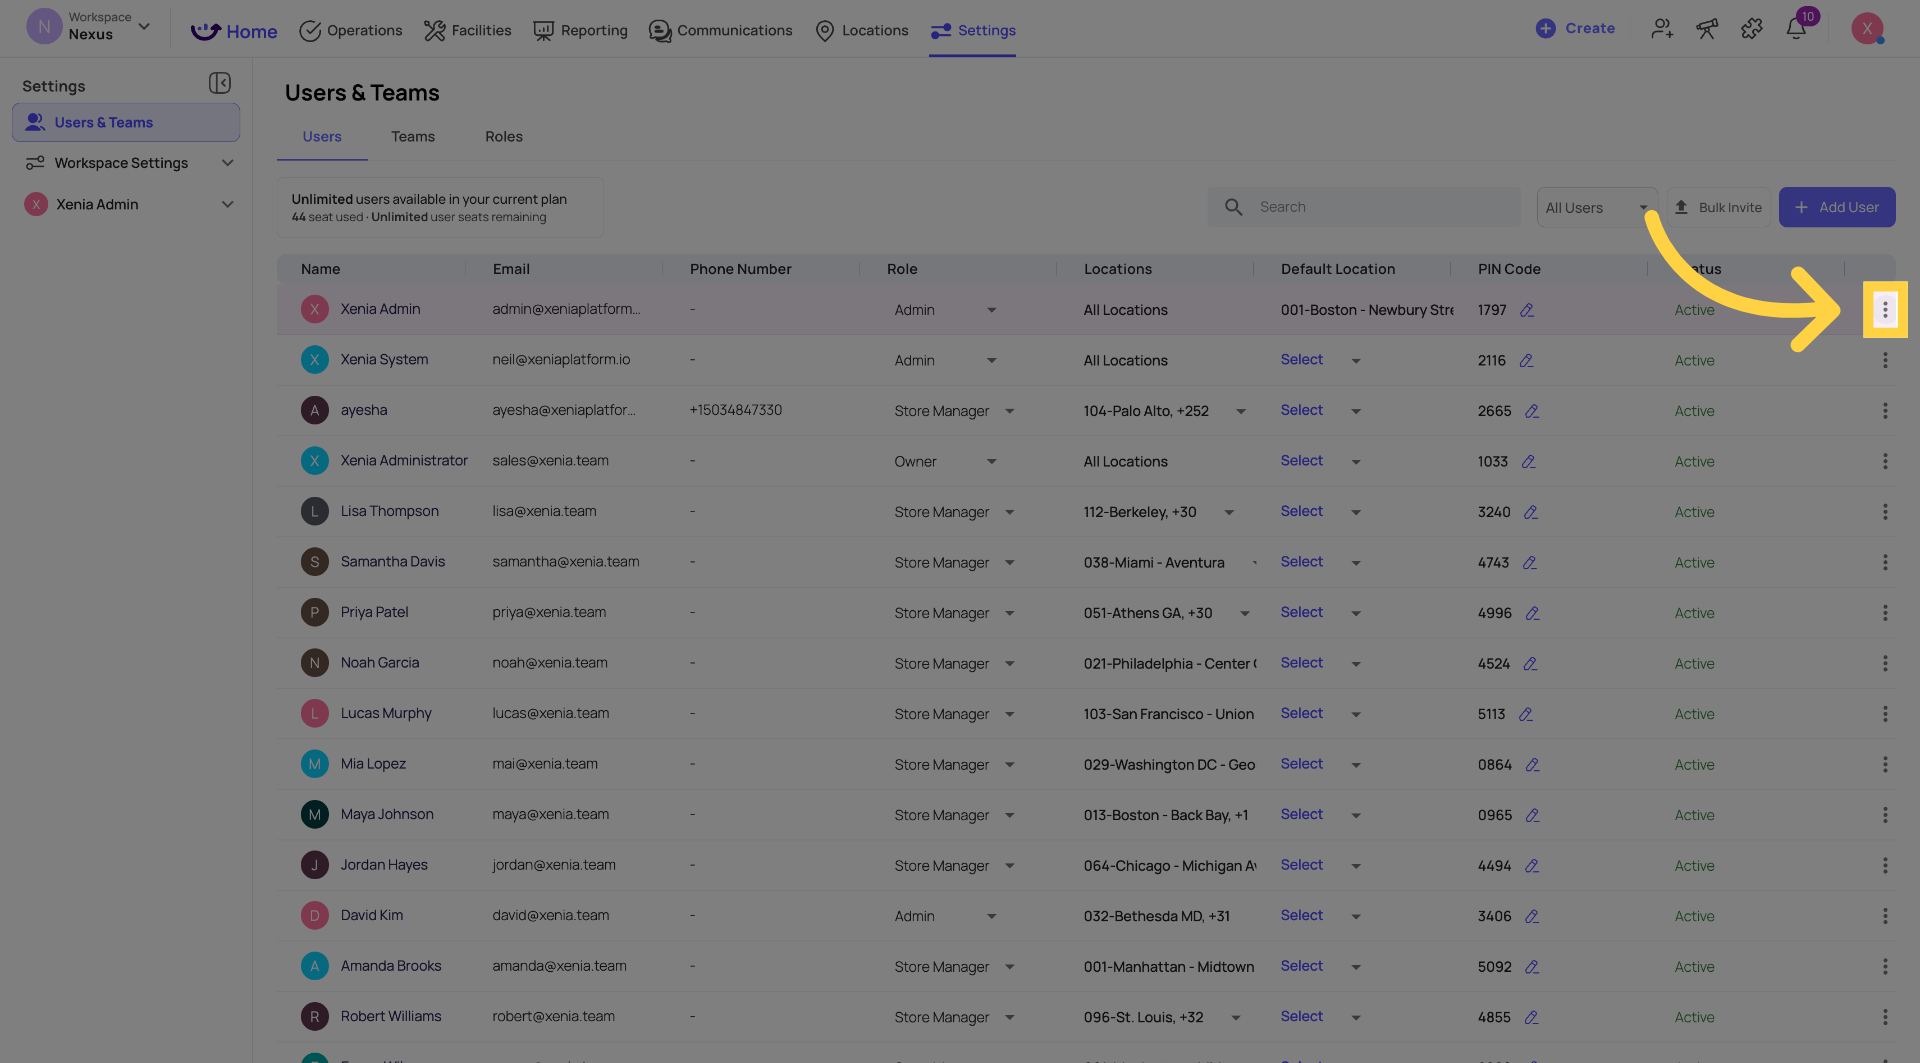
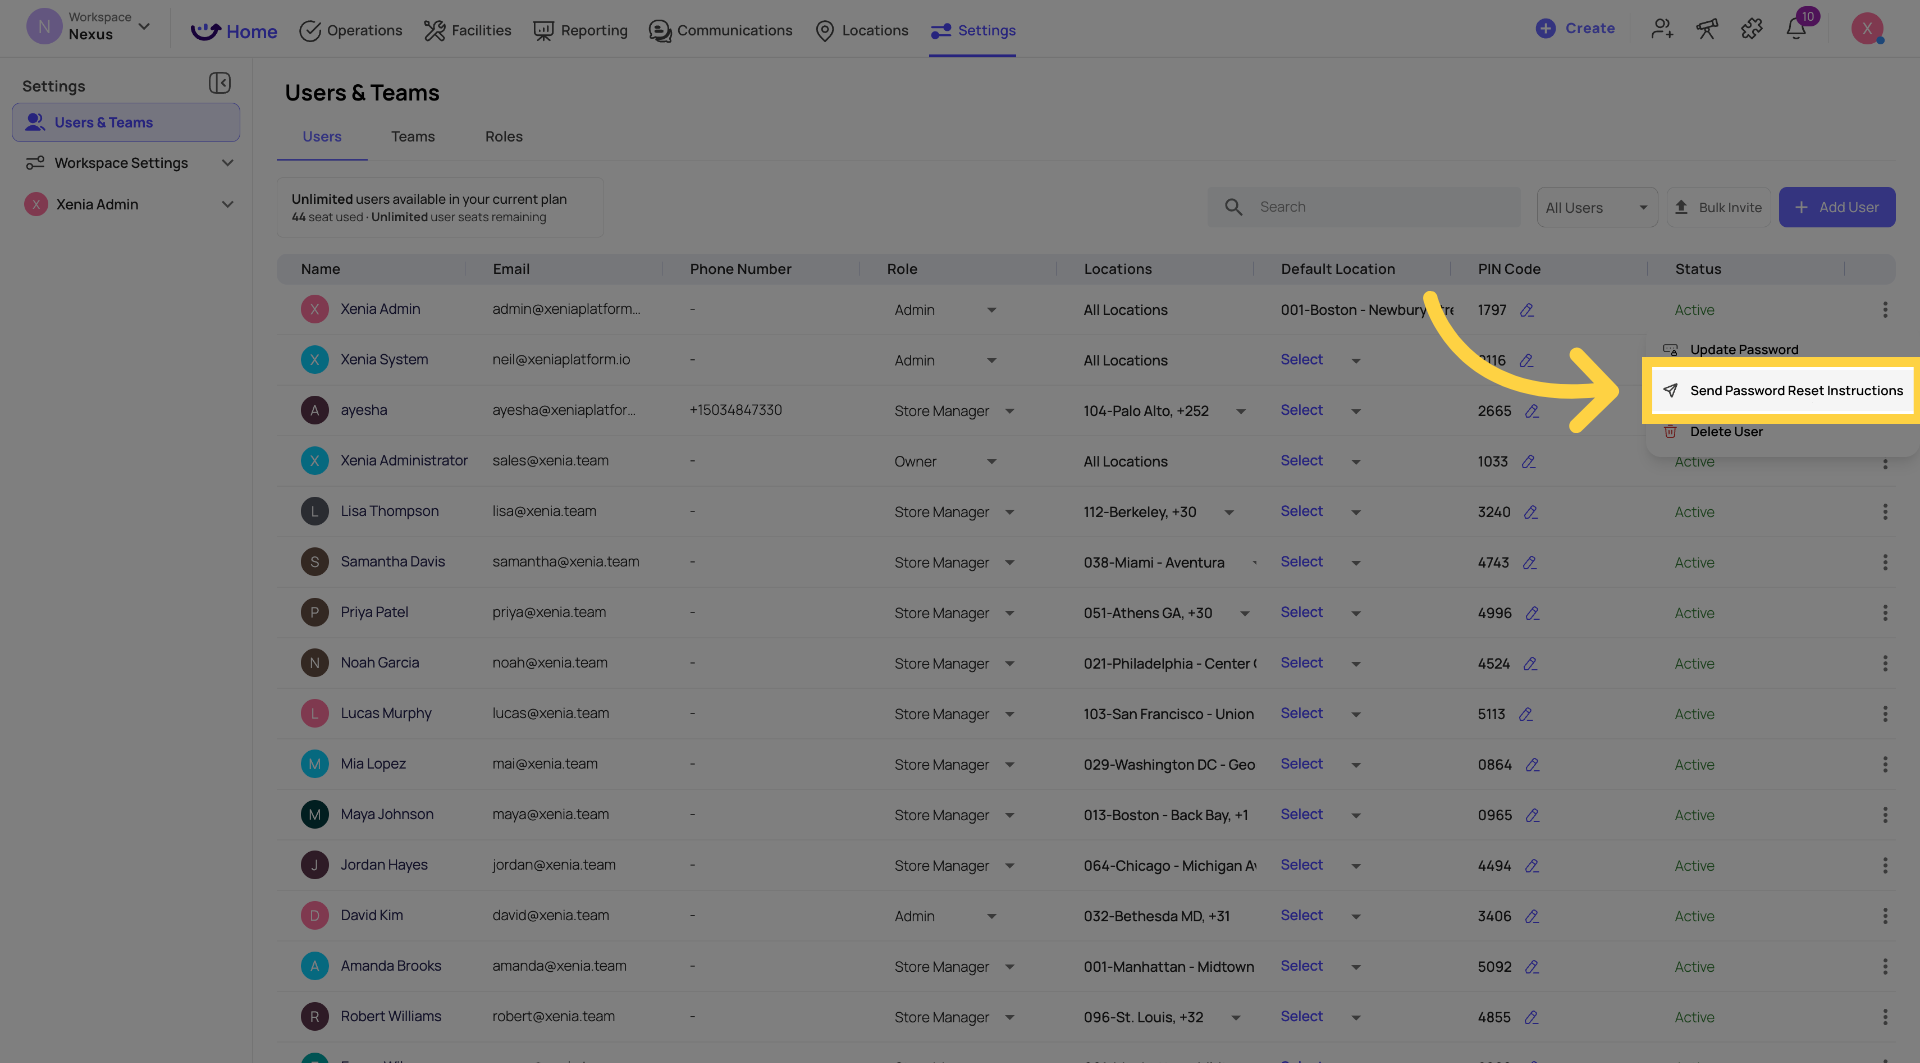
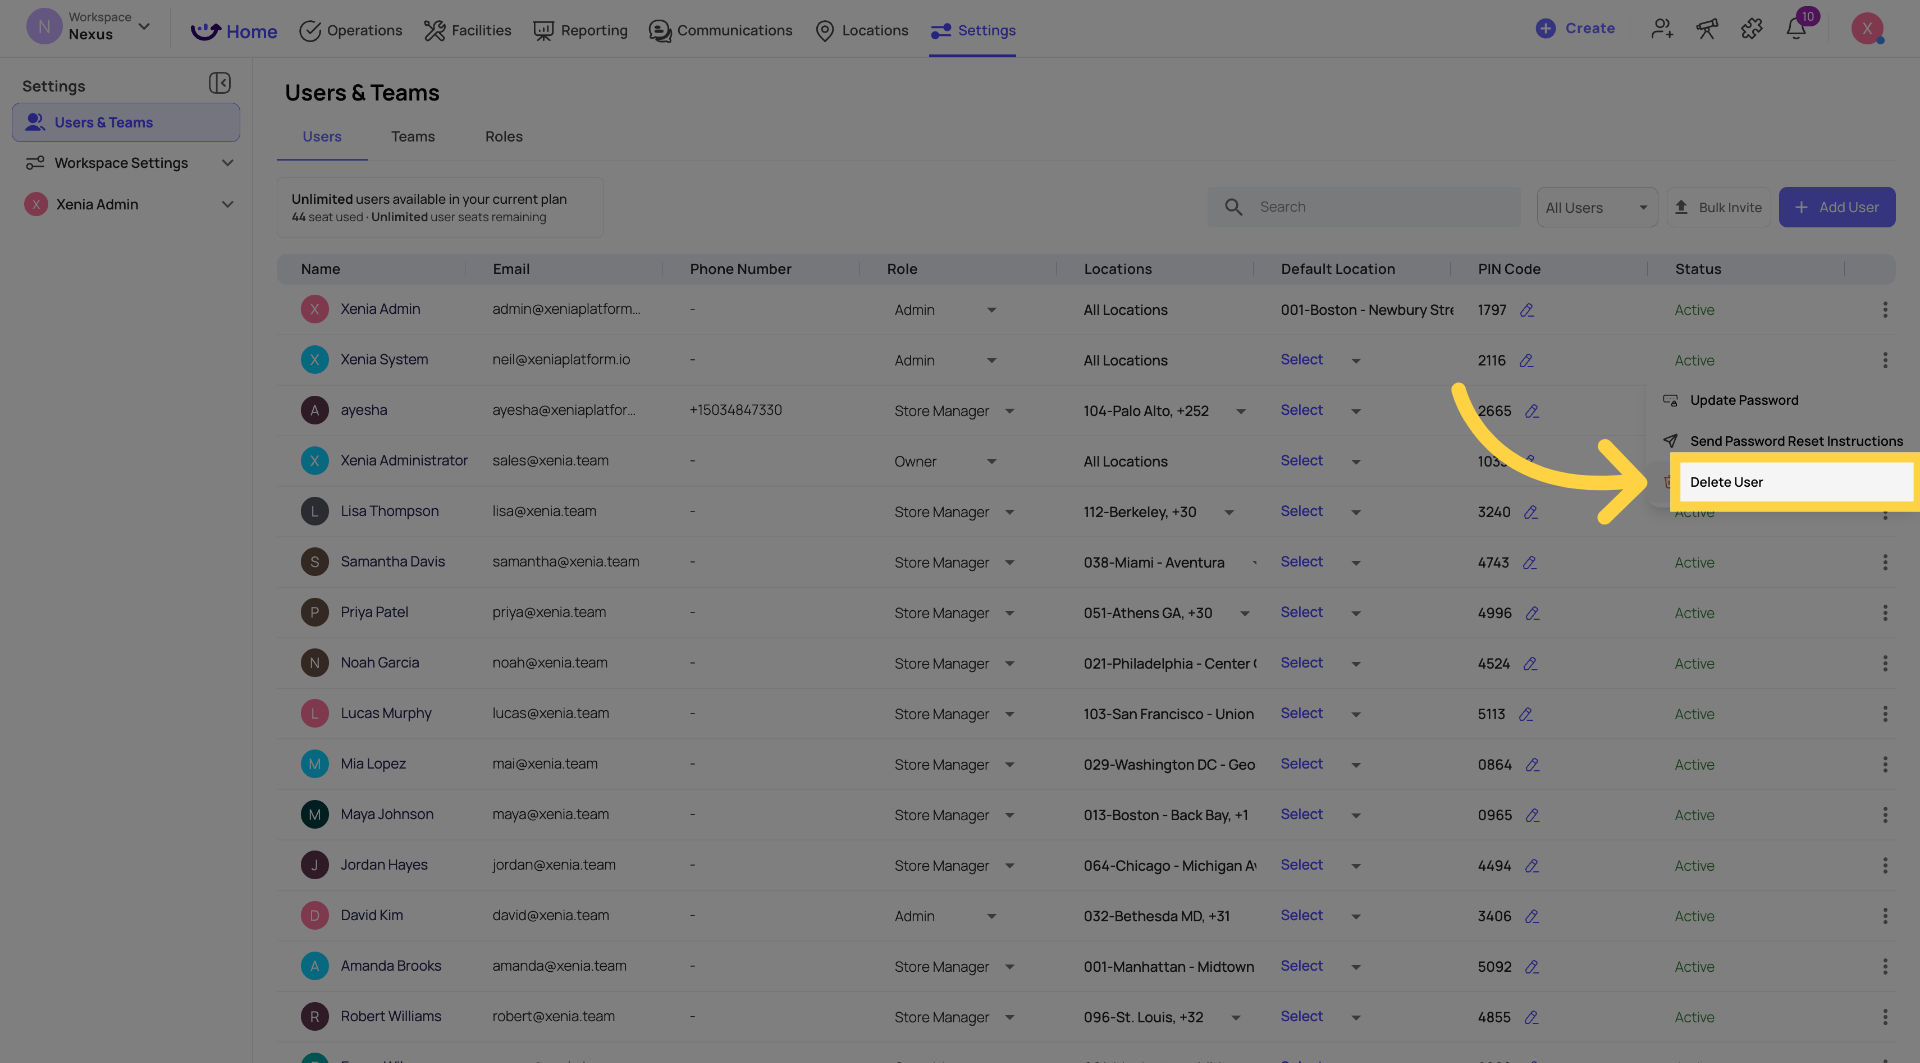
10. Step 8 — Password Management and Account Actions
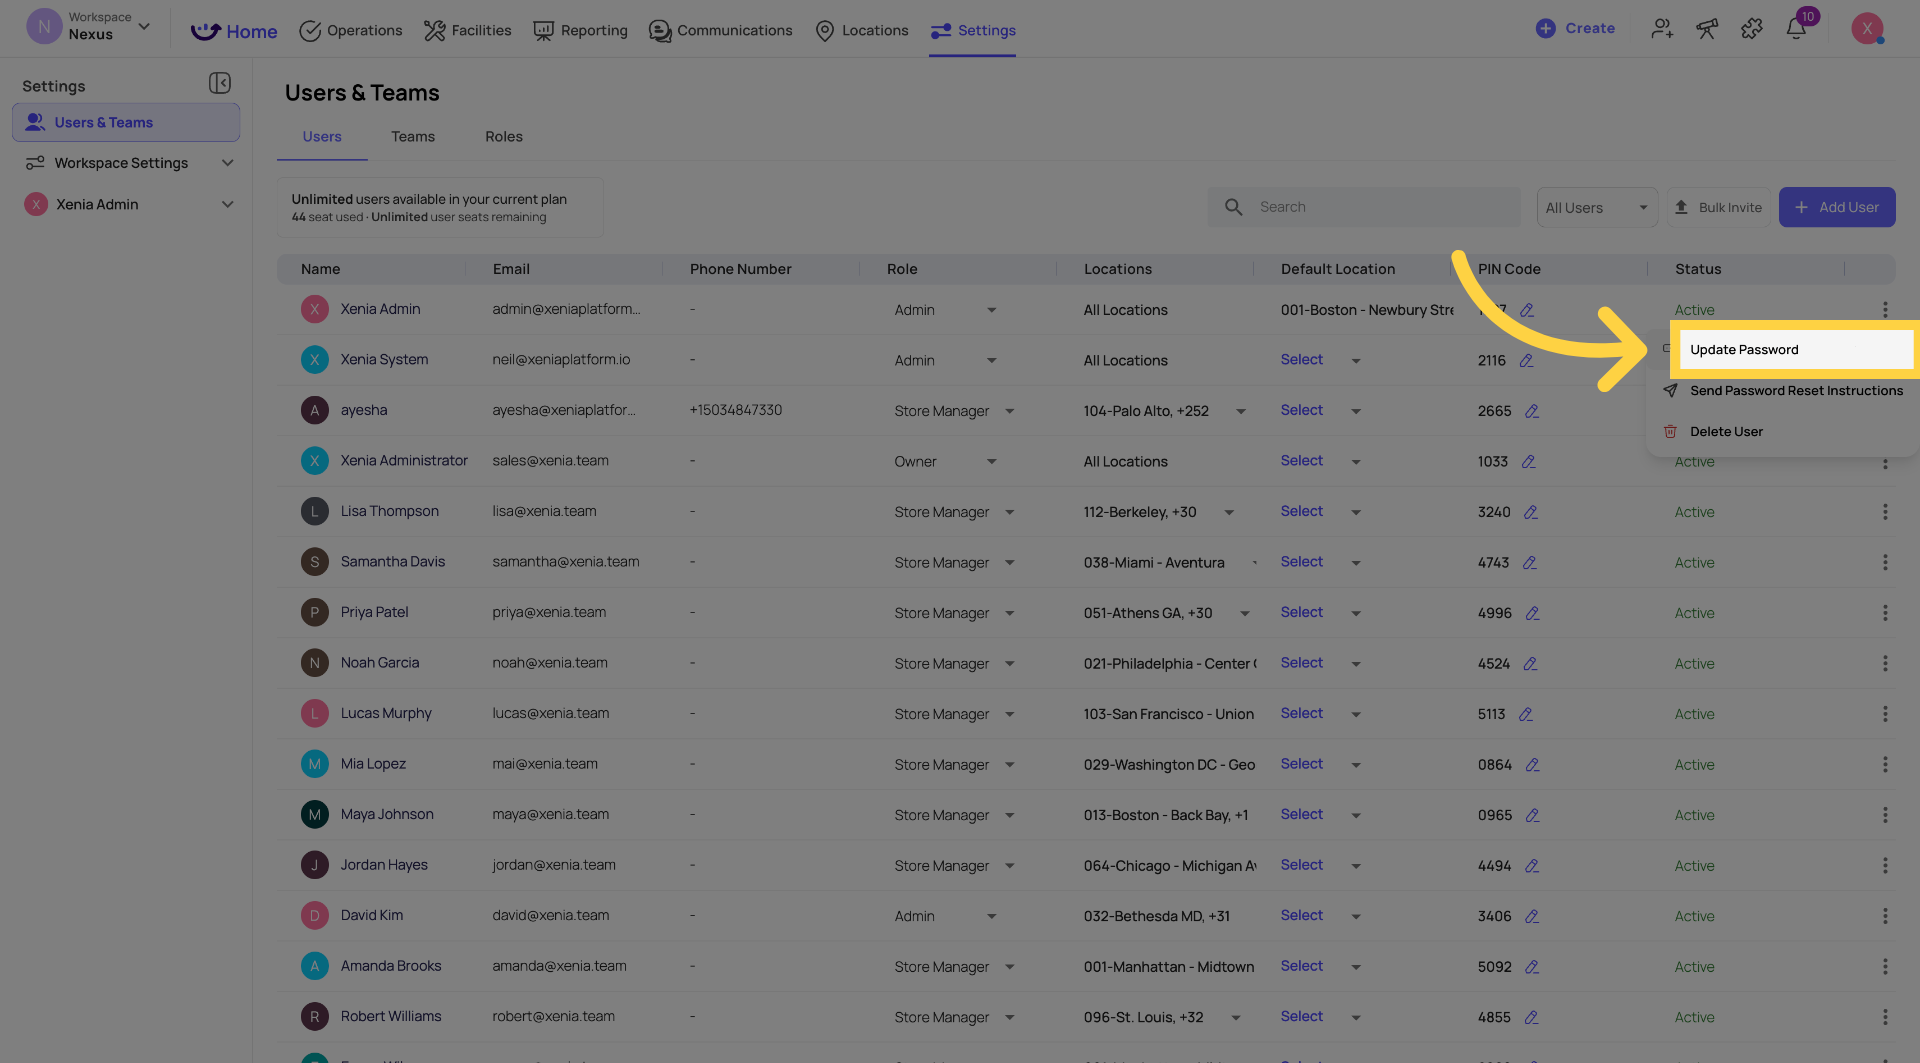
Click the three-dot menu (⋯) at the top of the profile sidebar to access account-level actions.
Update Password: Click Update Password to set a new password for the user directly — useful when a user is locked out and needs immediate access restored. Enter the new password and click Update Password again to confirm.
Send Password Reset Instructions: Click Send Password Reset Instructions to email the user a reset link. They can then set their own new password at their convenience.
Delete User: Click Delete User to permanently remove the user from the workspace. Their login access is revoked immediately. All submissions, tasks, and history they created are preserved — nothing in the record is deleted.
11. Quick Reference — What You Can Edit
| Section | What You Can Change |
|---|---|
| Contact Info | Name, phone number, email address, position/job title |
| Role & Location | Assigned role, default location |
| Location Membership | Add or remove locations from the user's access list |
| Notifications | Push, email, SMS, WhatsApp — enable/disable per channel |
| Password | Set directly or send reset instructions via email |
| Account | Delete the user from the workspace |
12. Important Notes
Changes take effect immediately — role changes, location updates, and notification preferences apply as soon as you save. The user may need to refresh the app or log out and back in to see the changes.
Deleting a user is permanent — their login is removed, but all their submission history and task records are preserved for compliance purposes.
For role-based shared accounts — when an employee using a shared store account leaves, reset the password using Update Password rather than deleting the account. The next person in that position uses the updated credentials.
Need Help?
Reach out to our Support Team at Support@xenia.team
Comments
0 comments
Please sign in to leave a comment.