
1. Why Targeting Matters
An announcement sent to everyone in a 50-location organization reaches hundreds of users — cashiers, cooks, district managers, HR teams, maintenance staff. Most announcements are relevant to a subset of those people, not all of them.
Sending a store-level SOP update to district managers clutters their notification feed. Sending a corporate policy change only to store managers misses the frontline employees who need to follow it. Targeting lets you match the announcement to the right audience.
2. Targeting Options
When configuring an announcement, you define the audience using one or more of these dimensions:
By Role: Select one or more roles. All users assigned to that role across your workspace receive the announcement. Use this when the update is relevant to a position type regardless of location — "All Store Managers" or "All Cashiers."
By Location: Select one or more specific locations, or select all locations. All users with membership at those locations receive the announcement — regardless of their role. Use this when the announcement is location-specific: "All users at Stores 101–105 only."
By Role AND Location (intersection): The most precise targeting. Example: "Store Manager role at Southeast Region locations only." Only users in the Store Manager role who have location membership at Southeast Region stores receive the announcement. Combines role-type precision with geographic or structural scope.
By Team: Select a configured team. All team members receive the announcement regardless of location. Use for cross-functional team communications.
By Specific Users: Select individual named users. Best for targeted communications to a small group where role or location filtering would be too broad.
All Users (workspace-wide): The announcement goes to every user in the workspace. Use sparingly — for organization-wide alerts, major policy changes, or announcements where every single user genuinely needs to see it.
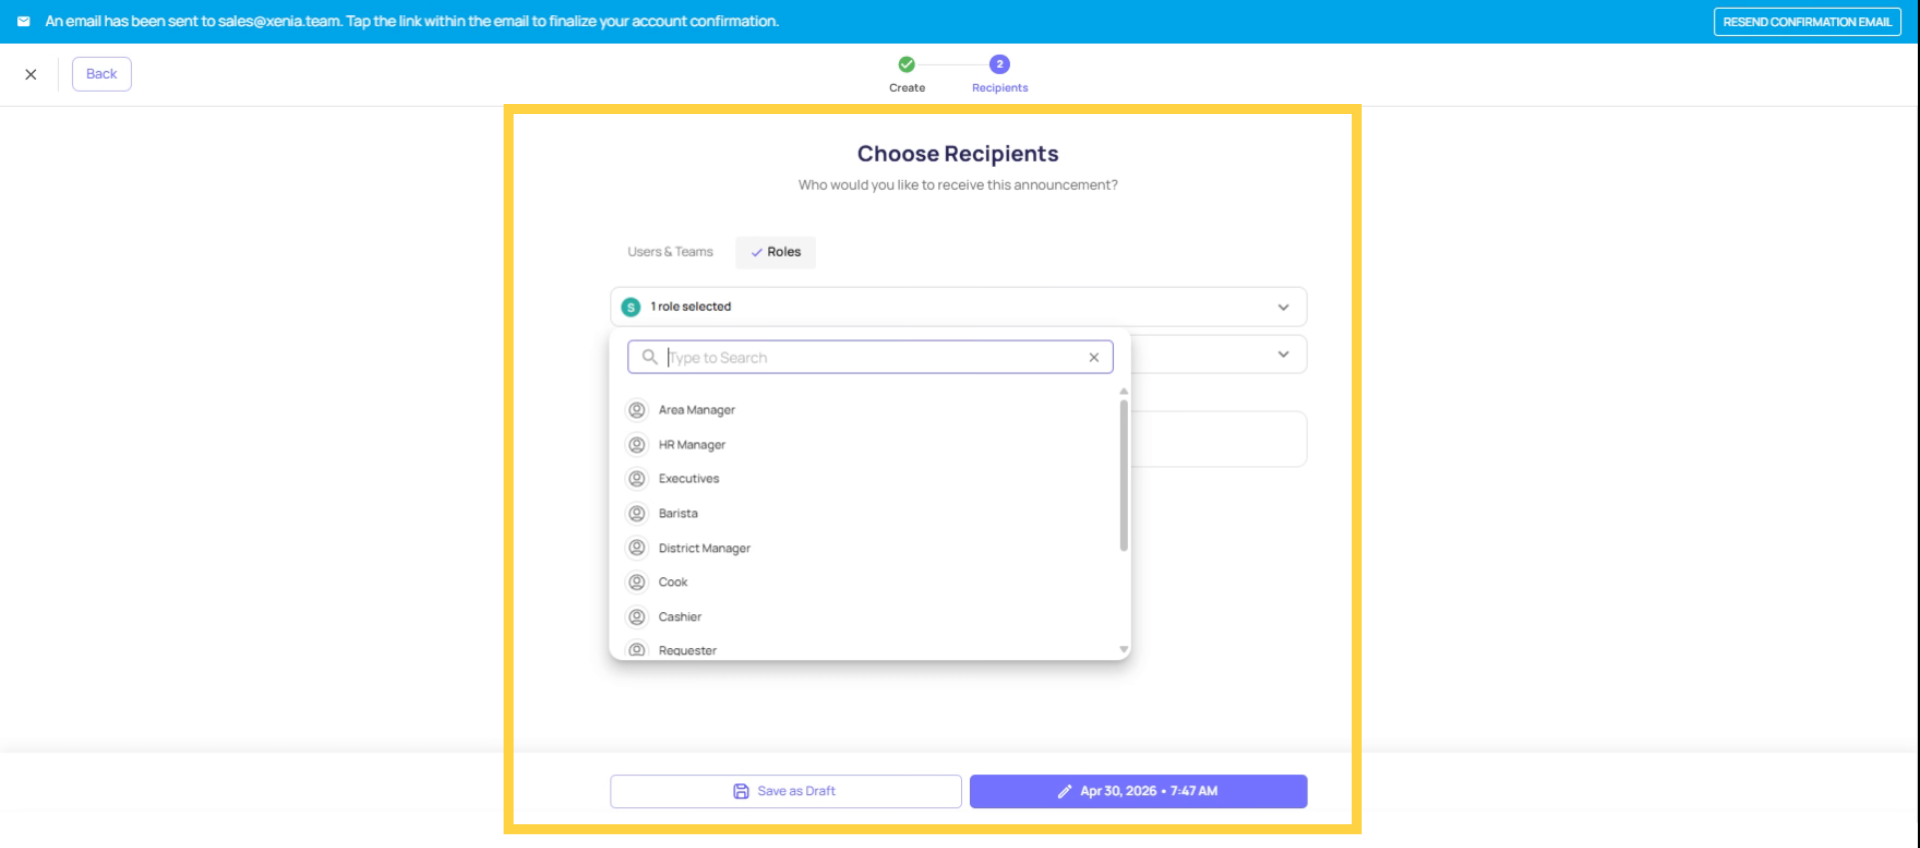
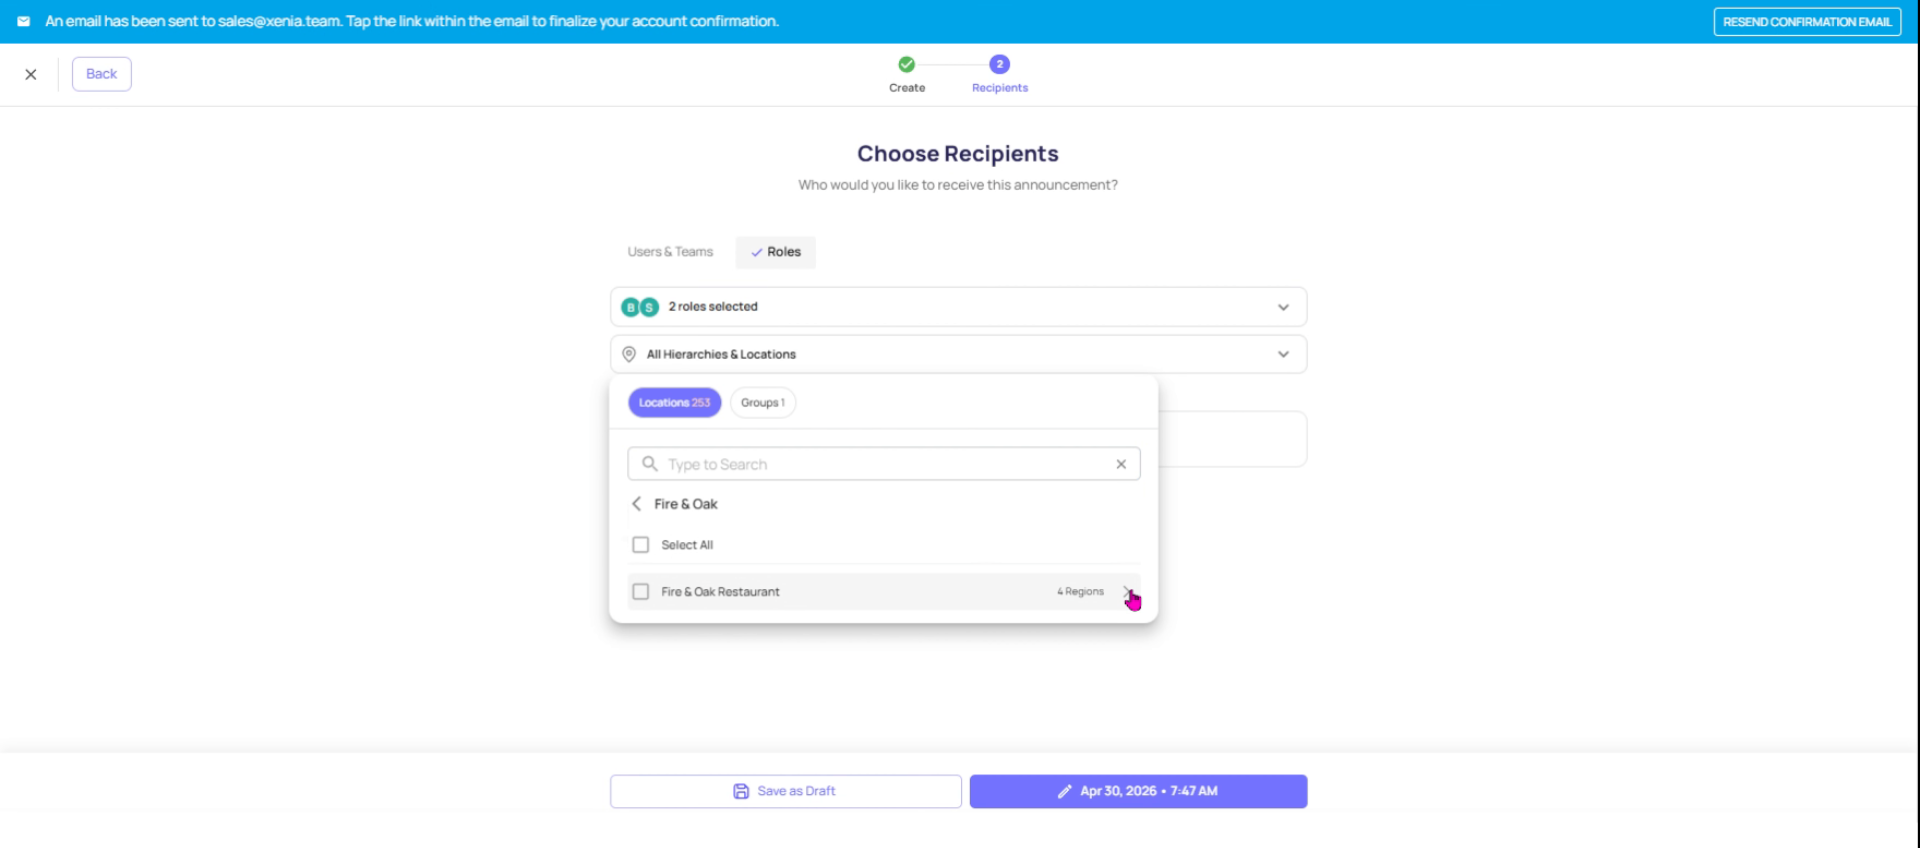 How to Configure Targeting
During announcement creation (or before publishing):
- Find the Recipients or Target Audience section
- Select your targeting method:
- Choose roles, locations, teams, or specific users
- Combine filters as needed (role + location for intersection targeting)
- Review the recipient count before publishing — most interfaces show how many users will receive this announcement based on your selections
- Publish
4. Targeting Scenarios
| Announcement | Right Target |
| New national food safety SOP | All users OR Cashiers + Kitchen roles at all locations |
| LTO launch instructions for front-of-house | Cashier role at all locations |
| Store 5 closing early on Friday | All users at Store 5 only |
| District manager reporting requirement change | District Manager role |
| HR policy update requiring signature | All employees at all locations |
| Specific city's new parking procedure | Store Manager role at all stores in that city |
5. Recipients Can't See Each Other
6. Editing Recipients After Publishing
Need Help?
Reach out to our Support Team at Support@xenia.team
Comments
0 comments
Please sign in to leave a comment.