1. Two Ways to Create a Work Orde
Method 1 — Direct creation (admin/manager): An admin or facilities manager creates the Work Order directly from the Facilities tab or Work Orders board. Used when a facilities coordinator identifies an issue directly, when creating a planned maintenance job, or when a checklist automation generates a Work Order via a workflow trigger.
Method 2 — Via Work Request acceptance: An employee submits a Work Request, a coordinator accepts it, and it converts to a Work Order automatically. The converted Work Order inherits all the information from the request (title, description, photo, location). Fields can be updated after conversion.
This article covers Method 1 — direct creation.
2. Where to Create a Work Order
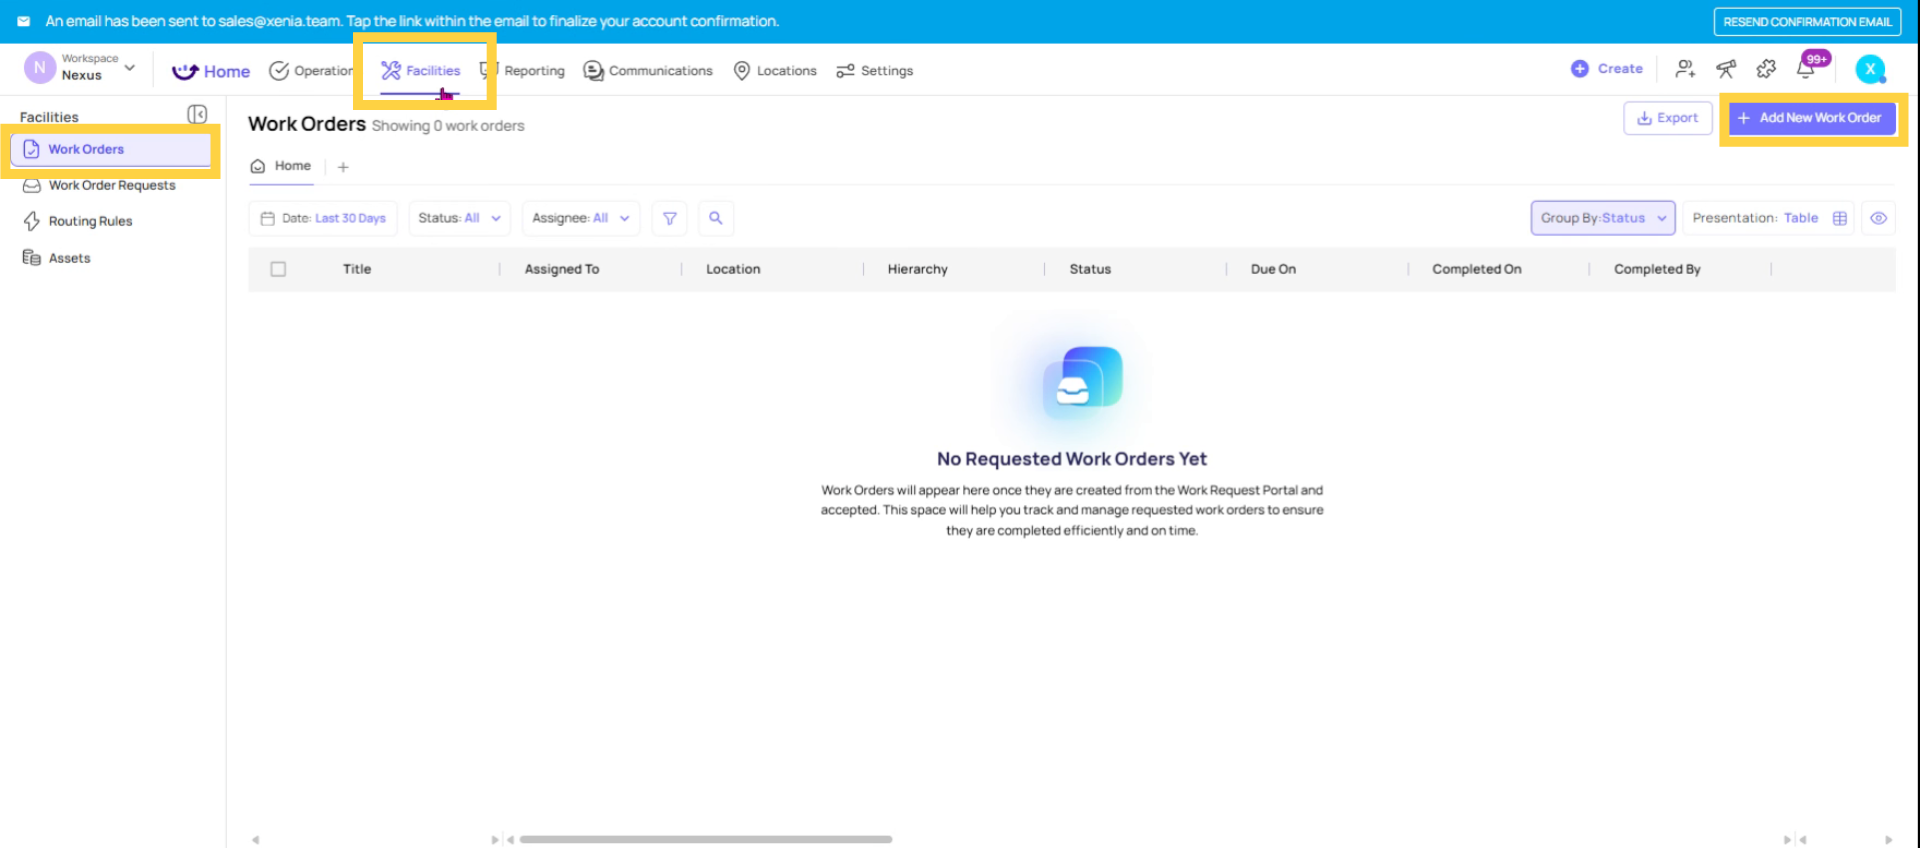
From the Facilities tab (web):
- Go to Facilities tab in the top navigation
- Click into Work Orders
- Click + Add (or the plus button within the Work Orders section)
- A creation form opens — note this creates a Work Order type item, not a general Task
From the + button (web or mobile): When clicking the + button from certain views, you're presented with three options: Create Task, Create Work Order, Create Work Request. Select Create Work Order.
On mobile: Work tab → Work Orders view → + button → Create Work Order. Items created through this interface are automatically tagged as Work Order type.
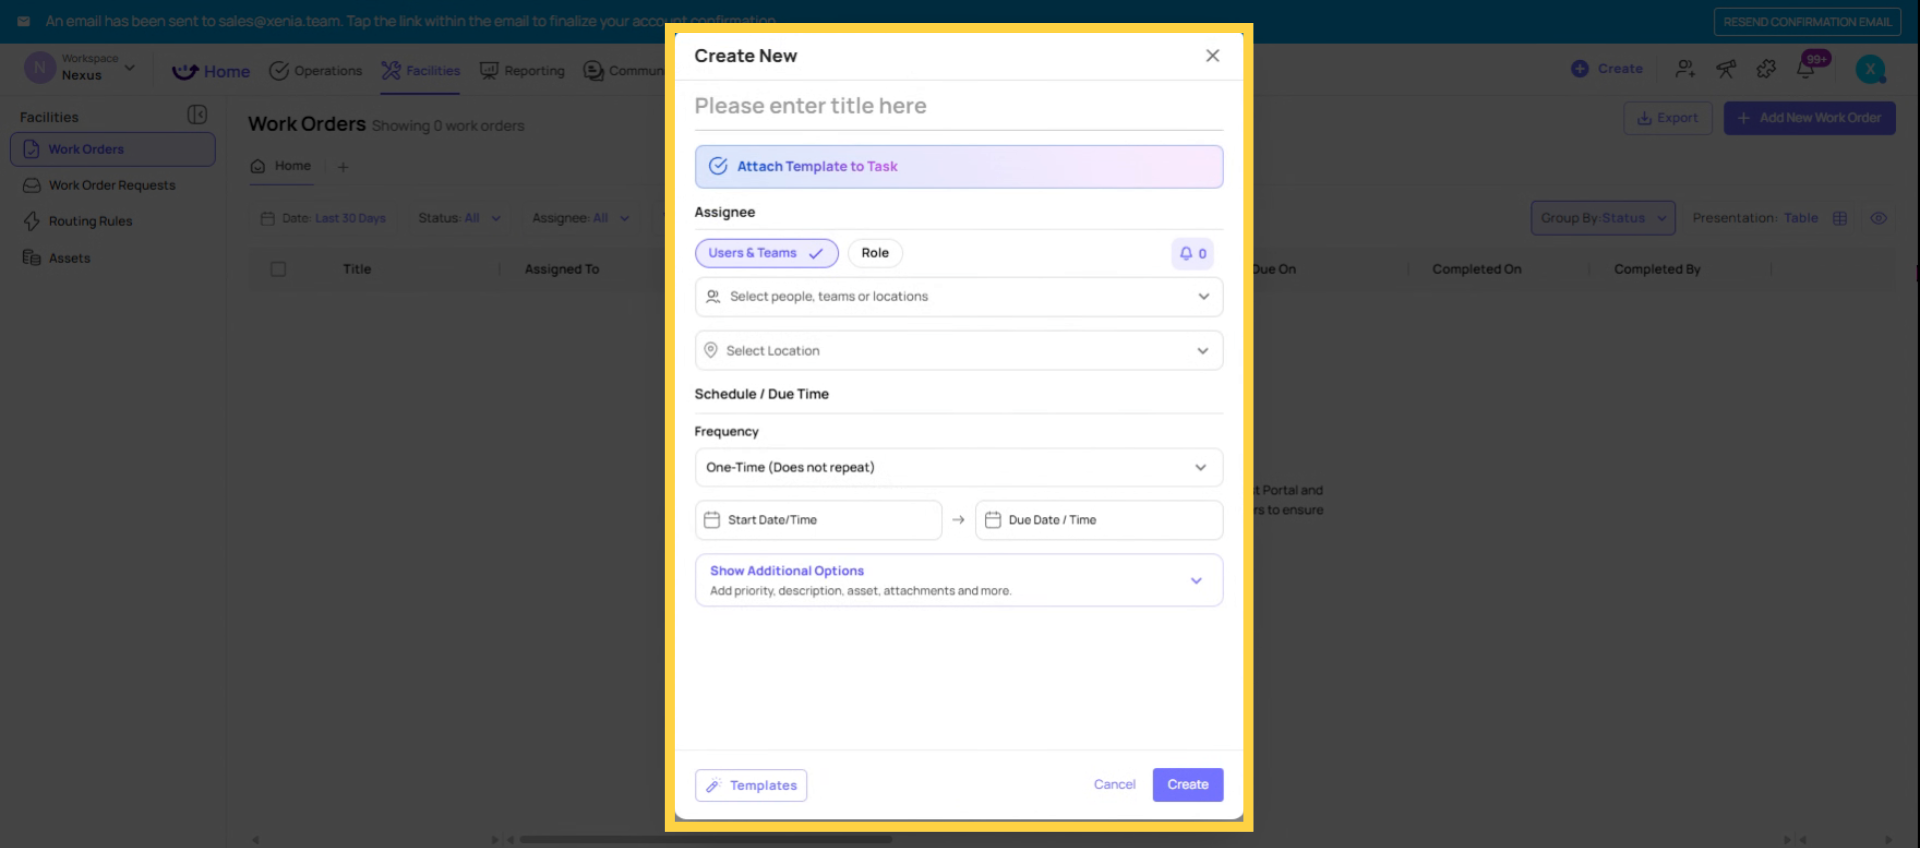
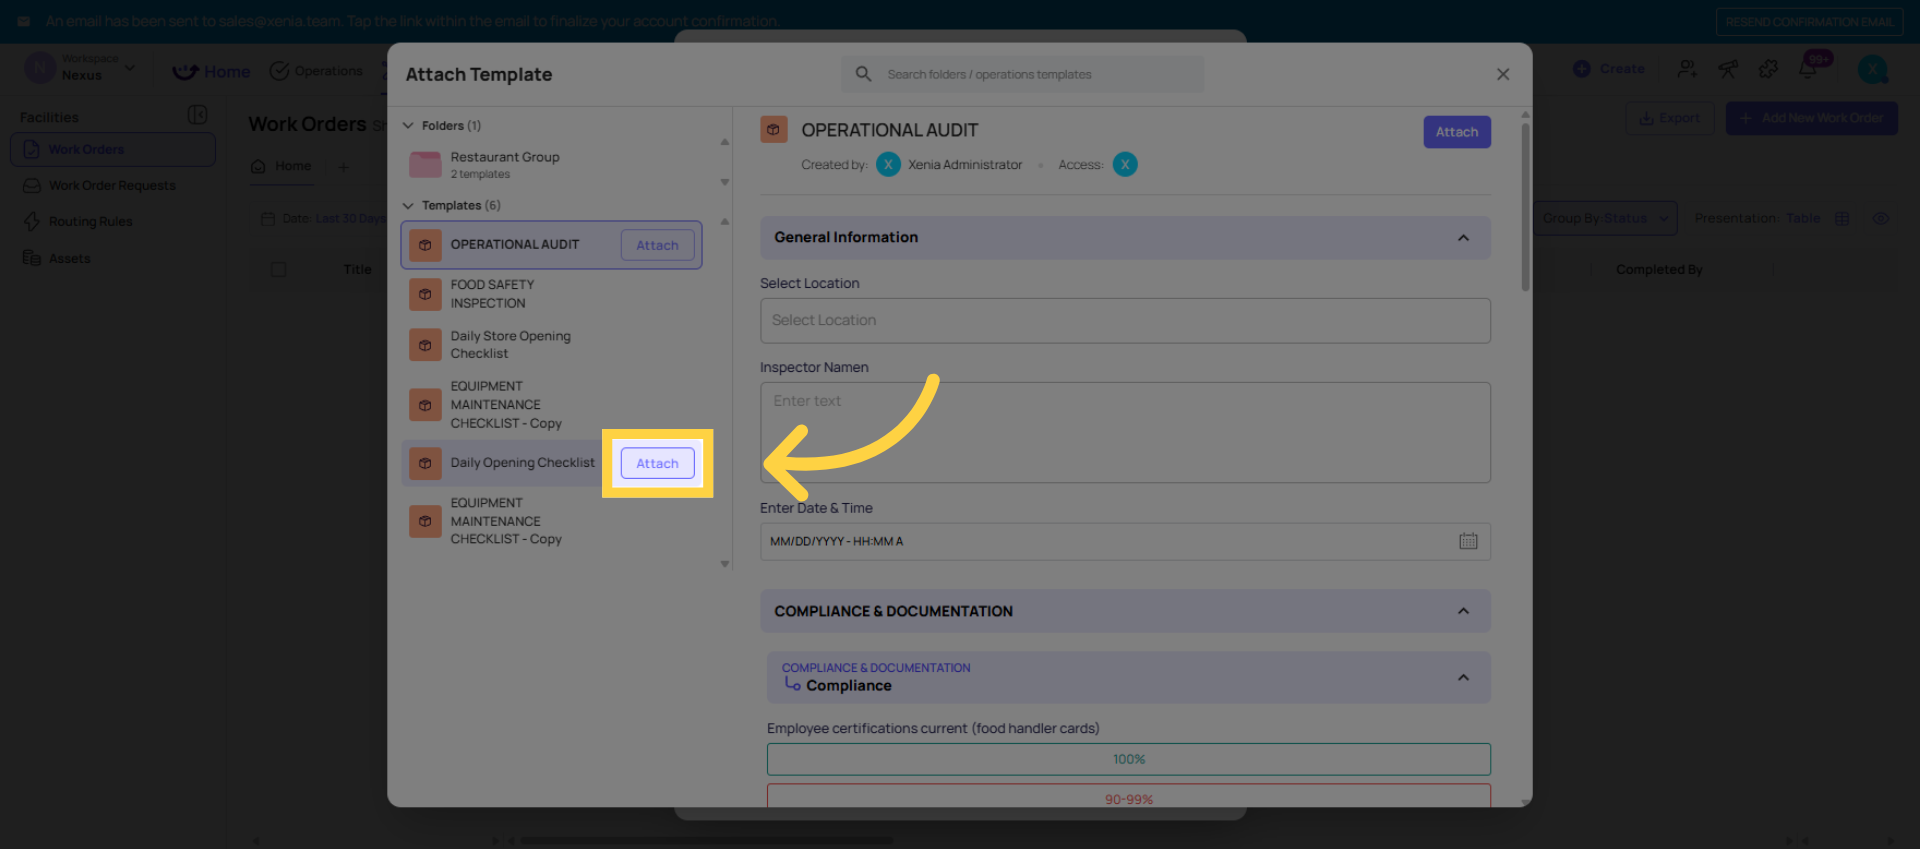
3. The Work Order Creation Form — Field by Field
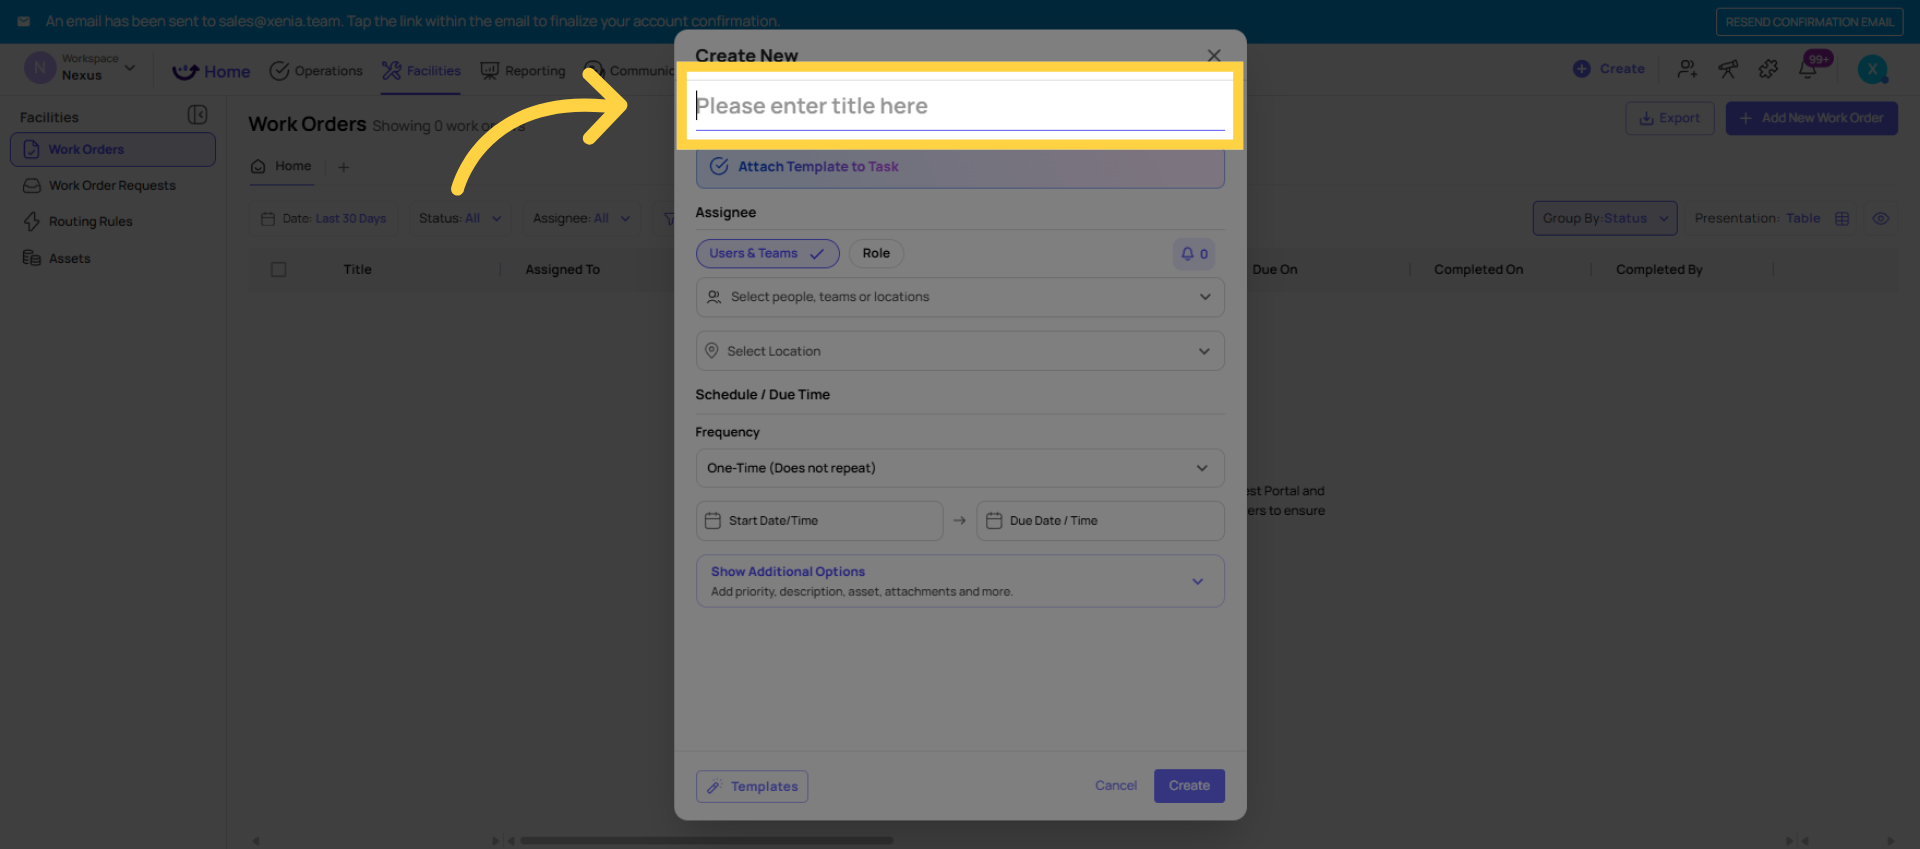
Title (required): The name of the Work Order. Be specific. "HVAC Unit Not Cooling — Kitchen" is better than "AC Problem." The title appears in the board, in notifications to the assignee, and in reporting.
Description: Additional context for whoever receives the Work Order. Include: what the problem is, where exactly, any relevant background (when it started, prior attempts to fix, any safety concerns). A detailed description reduces follow-up questions and speeds resolution.
Location: Tag the Work Order to the specific store or location where the work needs to happen. Critical for routing to the right team and for filtering in Work Order dashboards by location.
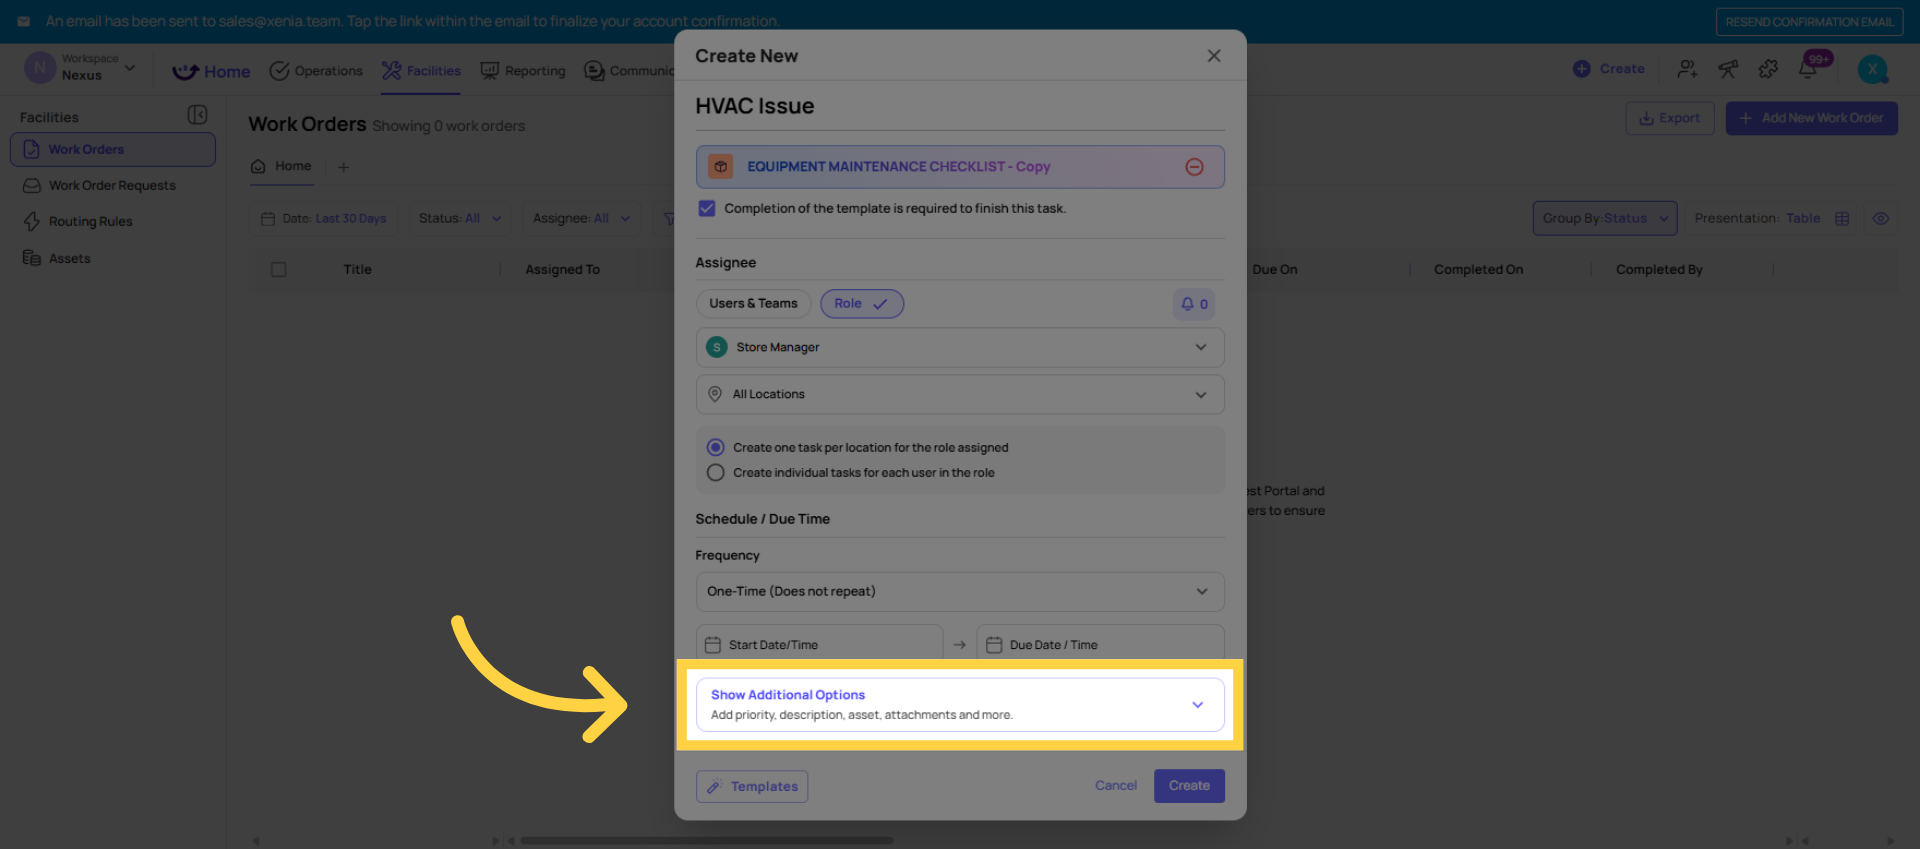
Assignee: Who is responsible for completing this Work Order. Options:
- Role — any member of that role at the selected location receives it
- Specific user — a named individual
- Team — all members of the selected team
Use a role for most facilities work — it ensures the task stays assigned even when individual team members change.
Priority: Low, Medium, High, or Critical. Sets urgency in the board and determines how the Work Order is sorted when the assignee reviews their list. For safety-related issues, always use Critical or High.
Category: Optional but important for reporting. Categories allow you to filter, group, and chart Work Orders by type — HVAC, Plumbing, Electrical, Equipment, Cleaning, IT. Configure your categories in Settings → Task Categories. With good category discipline, your Work Order dashboard can show you volume by issue type across all locations.
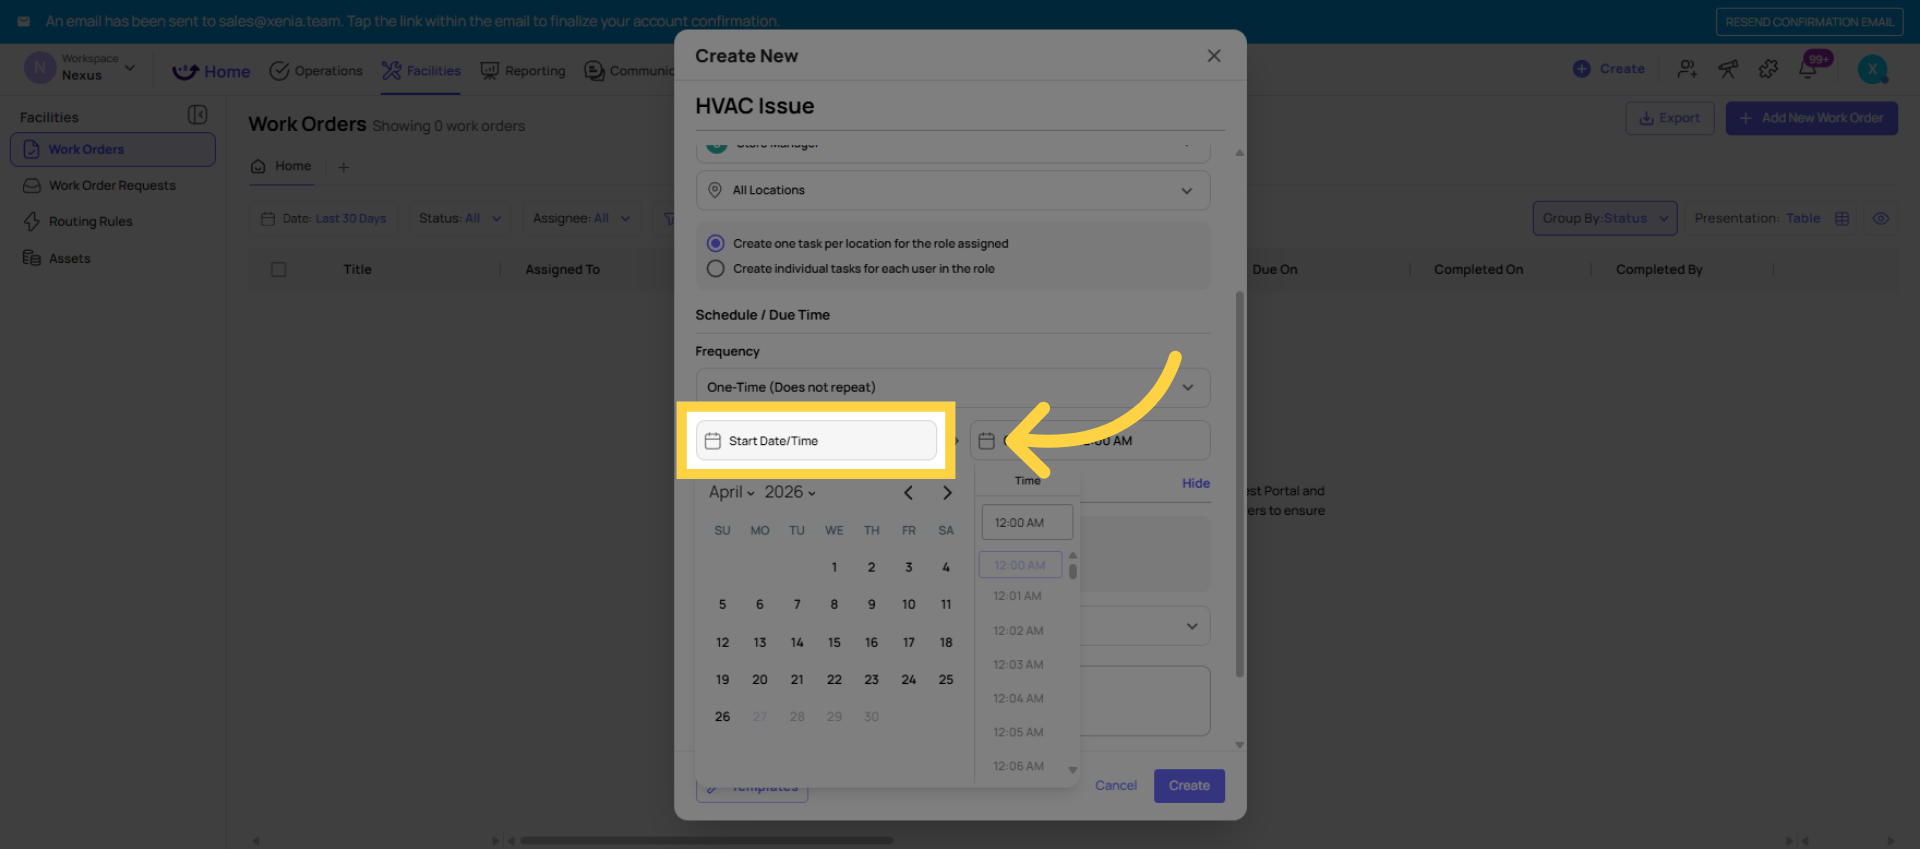
Due Date: When the Work Order must be completed. Sets the deadline for overdue tracking and notifications. For urgent repairs, set a same-day or within-hours deadline. For planned maintenance, set the appropriate future date.
Watchers: Users or roles who receive notifications on status changes for this Work Order without being the primary assignee. A facilities manager might add themselves as a watcher on critical Work Orders so they're notified when the status changes even if they're not the person doing the repair.
Attachments: Photos, documents, manuals, or reference files relevant to the Work Order. Useful for providing the assignee with context — a photo of the broken equipment, a maintenance manual, a previous repair record.
Custom Fields (if configured): If your admin has added custom fields to the Work Order form (asset ID, vendor name, estimated repair cost, warranty status), they appear here. See the Custom Fields article for configuration details.


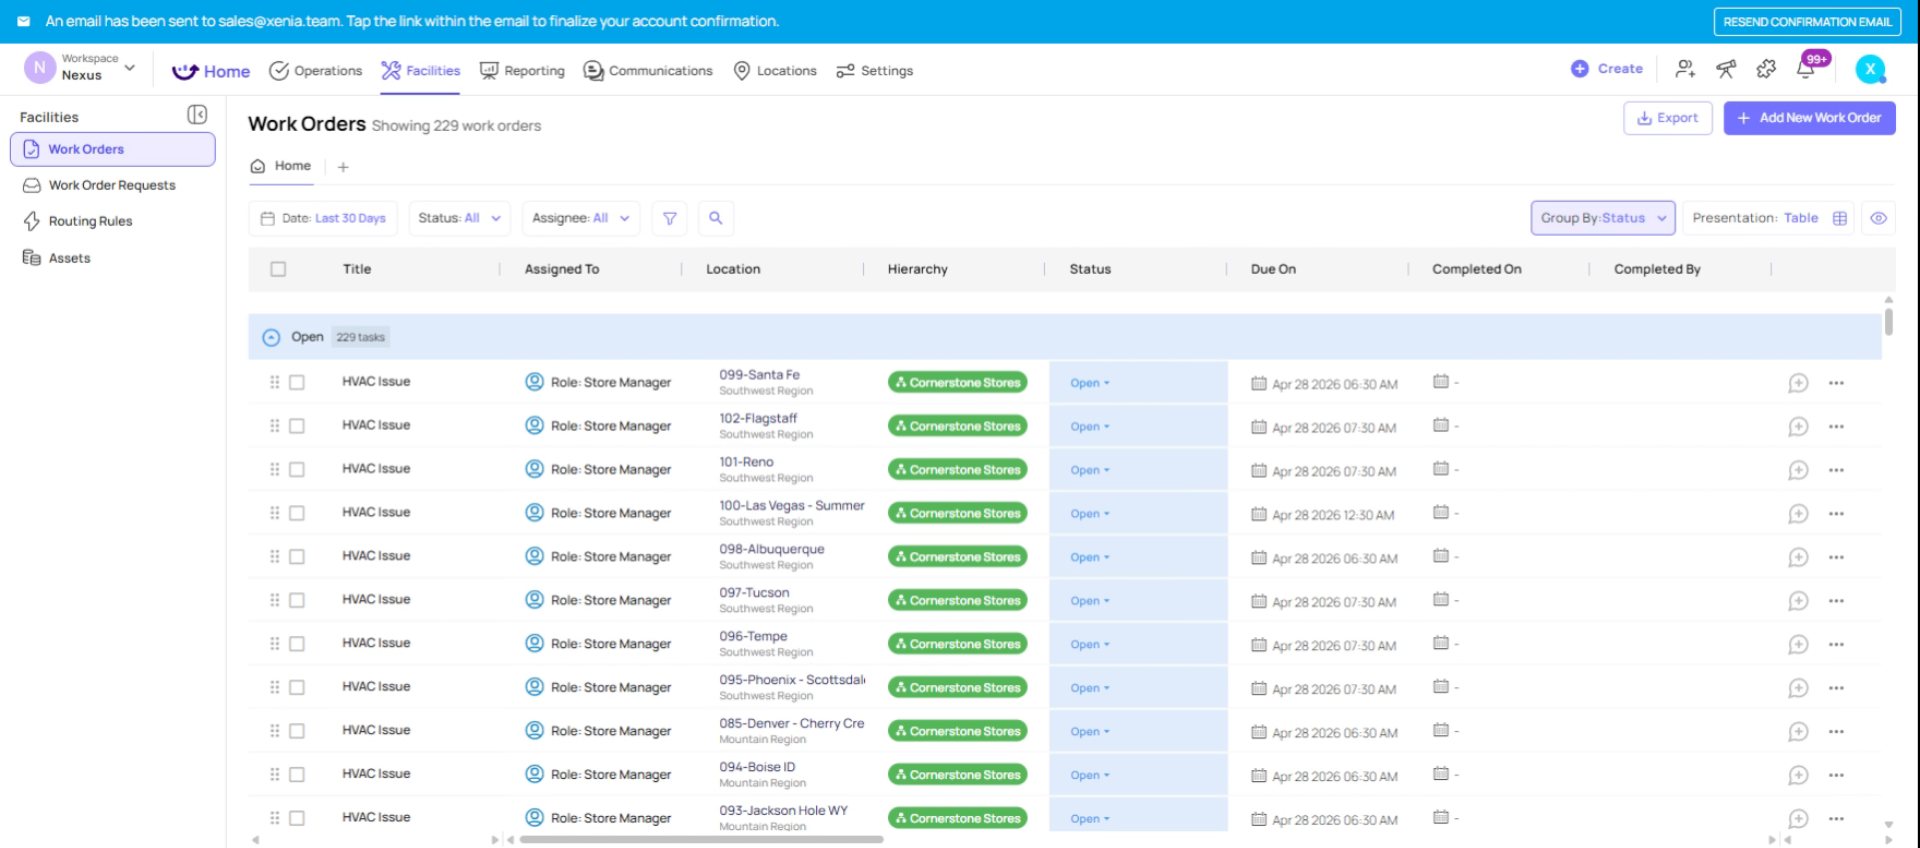
4. After Creating — What Happens
- The Work Order appears in the Work Orders board with Open status
- The assignee receives a notification (push/email based on their preferences)
- The Work Order appears on the assignee's mobile Work tab under Work Orders
- Any Watchers receive a creation notification
- The Work Order is visible to anyone with the appropriate permissions in the All Other Work Orders sub-tab
Need Help?
Reach out to our Support Team at Support@xenia.team
Comments
0 comments
Please sign in to leave a comment.