1. The Workflows Tab vs. Inline Conditional Logic — Which Surface to Use
Xenia has two places where you can build automation logic on a template. Both can create corrective tasks from checklist responses, but they serve slightly different purposes and offer different experiences:
Inline Conditional Logic (inside a step): Accessed by clicking into an individual step in the Build tab → Add Conditional Logic. Best for step-level actions you're configuring one step at a time — adding a photo requirement to a specific question, setting a follow-up question on a temperature step. Quick and contextual.
The Workflows Tab: A dedicated tab visible at the top of the template (alongside Build, Settings, and Publish). This is where you build named, standalone workflow rules that are managed separately from the step content. Better for:
- Multi-condition rules where the trigger depends on more than one answer
- Workflows you want to name, review, and manage as a set across the whole template
- Corrective task triggers that should be visible and editable at the template level, not buried inside individual steps
- Applying the same trigger logic to multiple answer options across a template
For most production Workflow setups — especially Vendor Issue forms, compliance audit triggers, and multi-location routing rules — the Workflows tab is the right surface to use. It's cleaner, easier to audit, and better for managing rules over time.
2. Navigating to the Workflows Tab
- Go to Operations → Templates
- Find and open the template you want to add the Workflow to (it must have at least the relevant steps already built)
- Look at the tabs at the top of the template — Build | Settings | Workflows | Publish
- Click Workflows
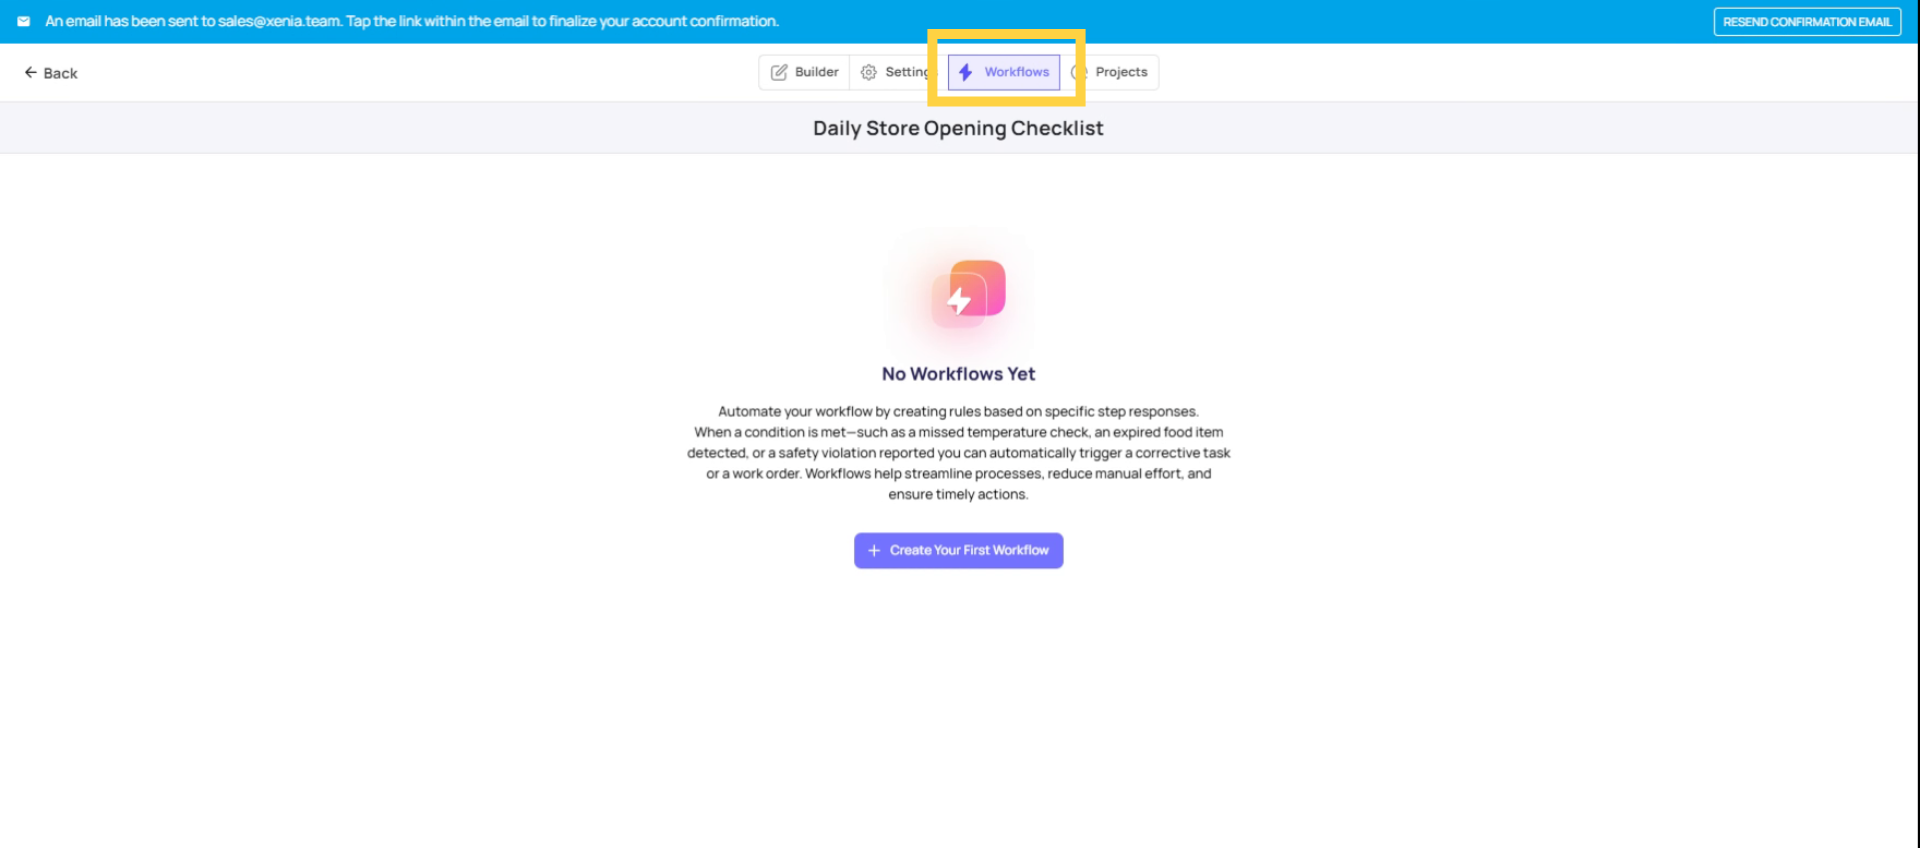
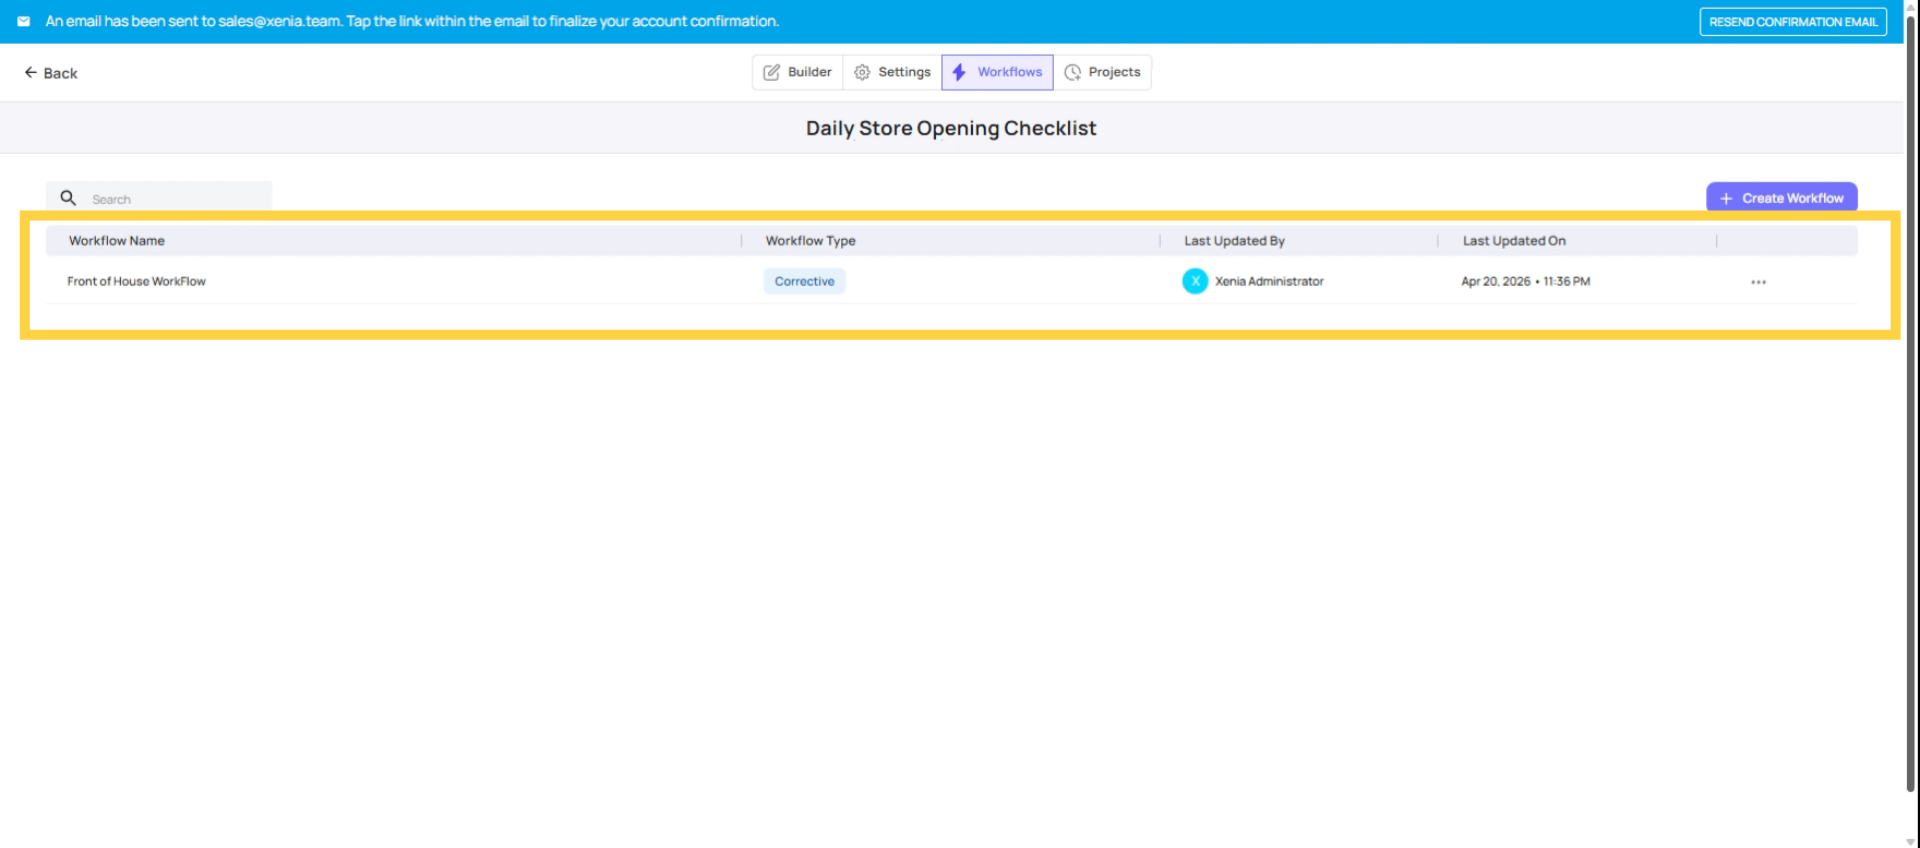
You'll see a list of any existing Workflows on this template (empty if this is the first). At the top right, you'll find an Add Workflow button (or similar Create/New Workflow option).
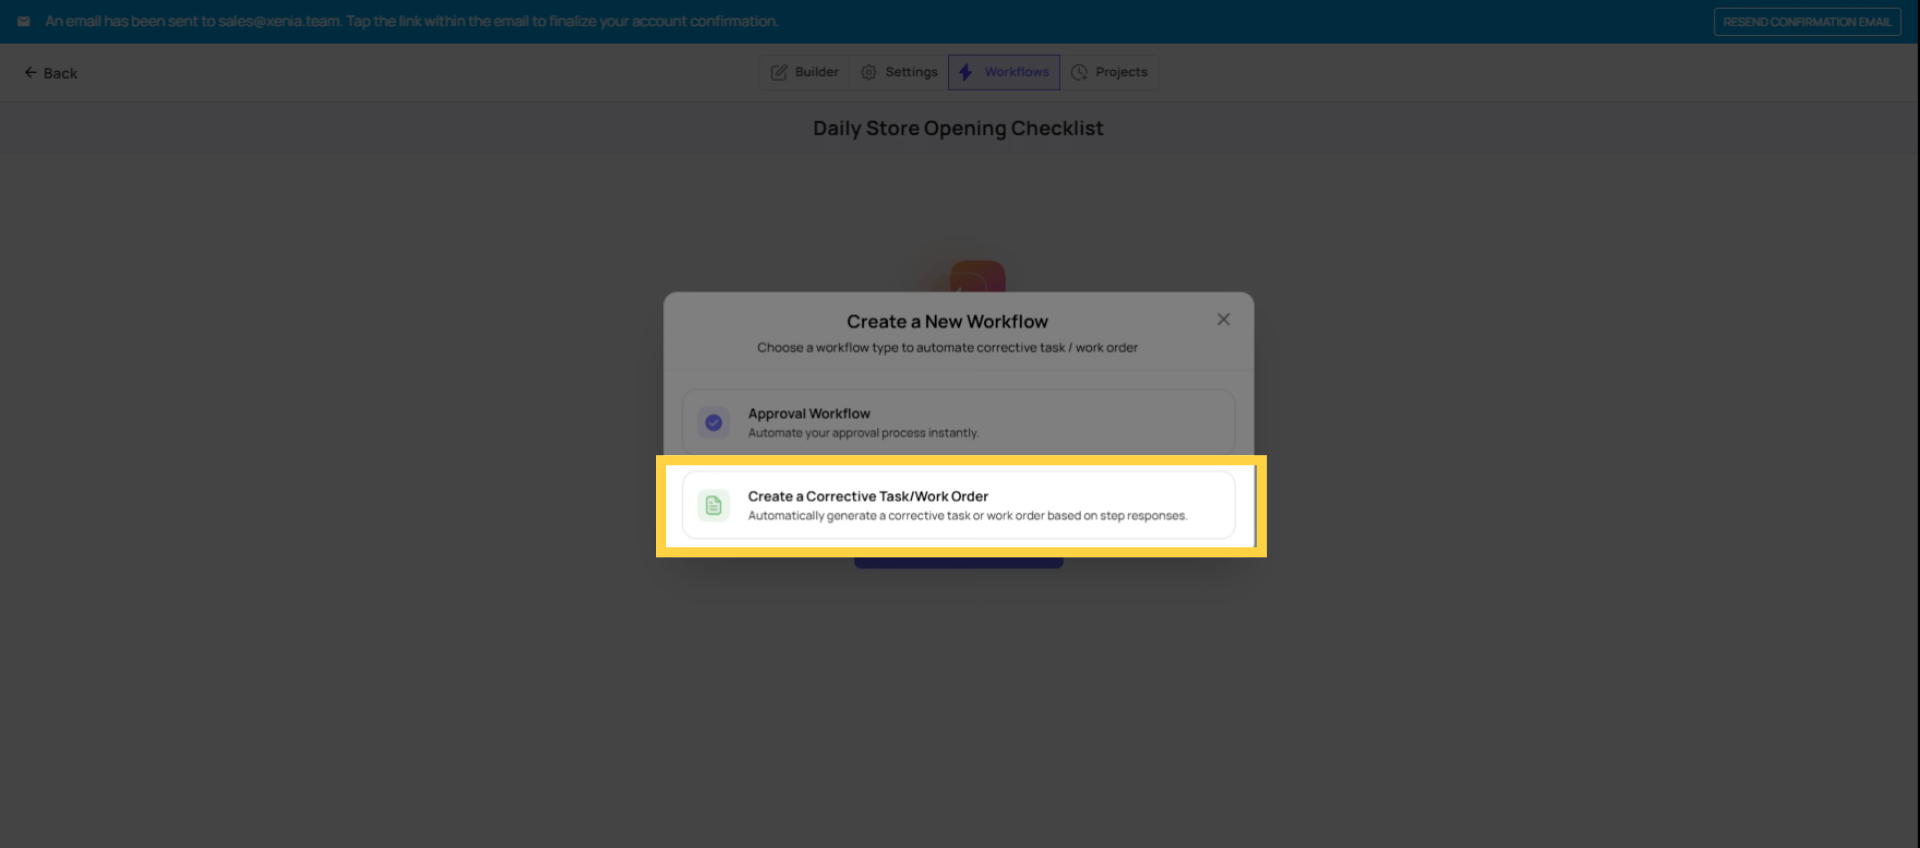
3. Create Corrective Task
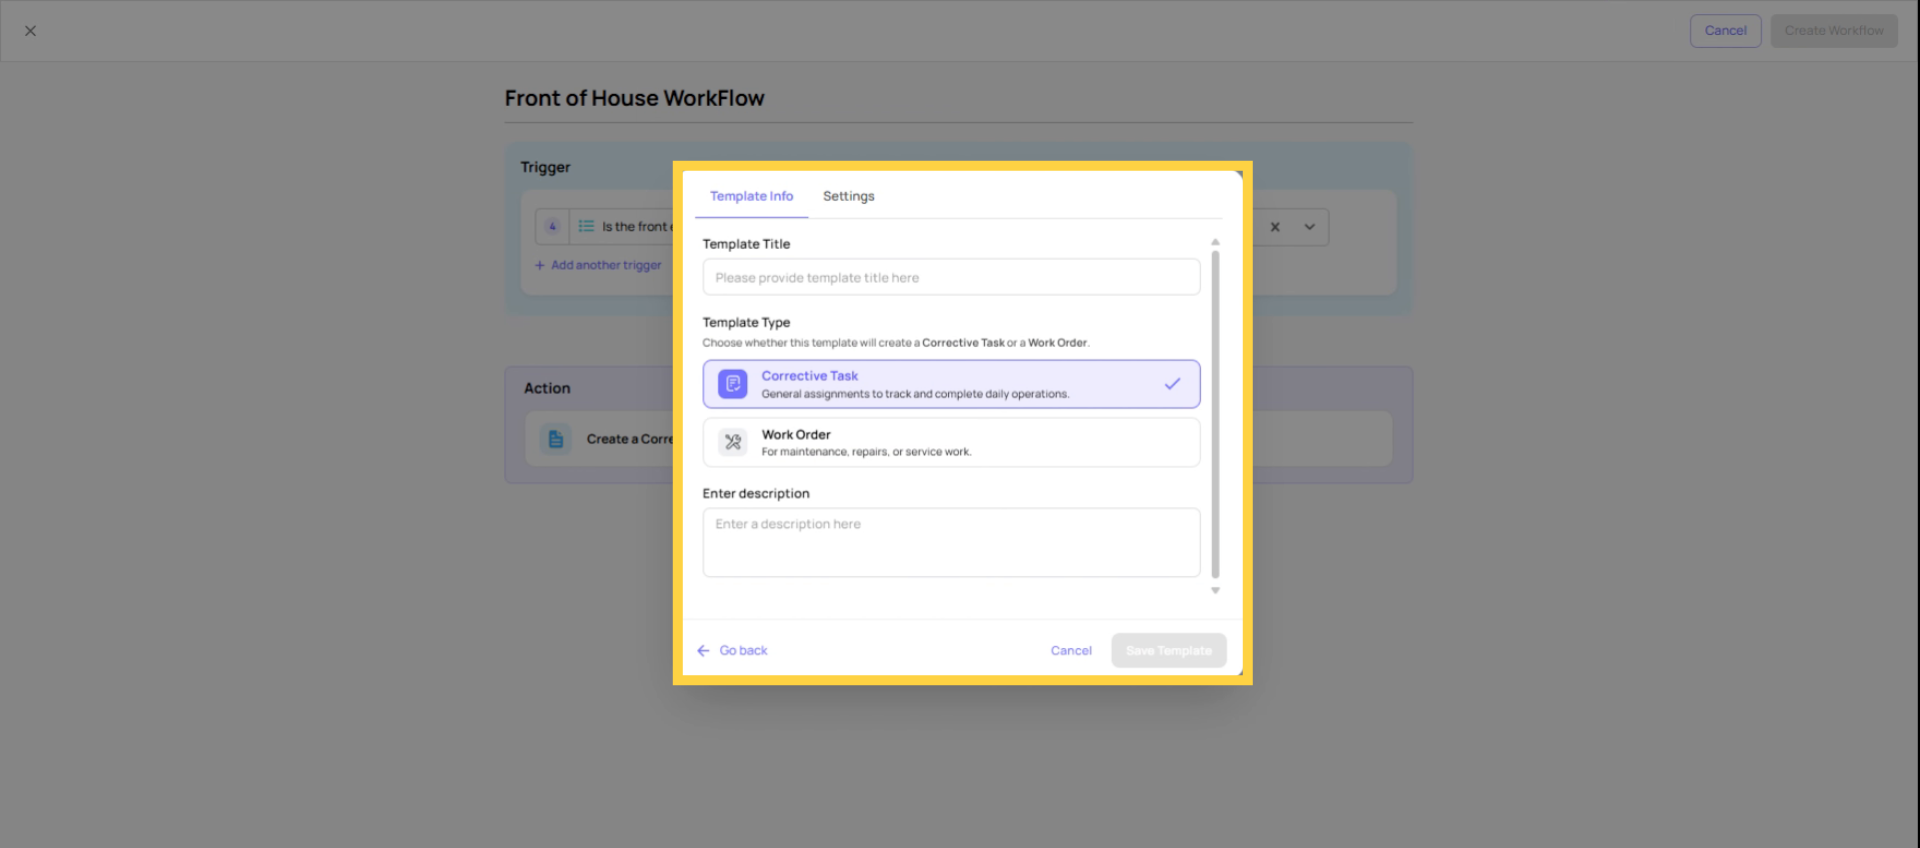
4. Step 1 — Create a New Workflow and Name It
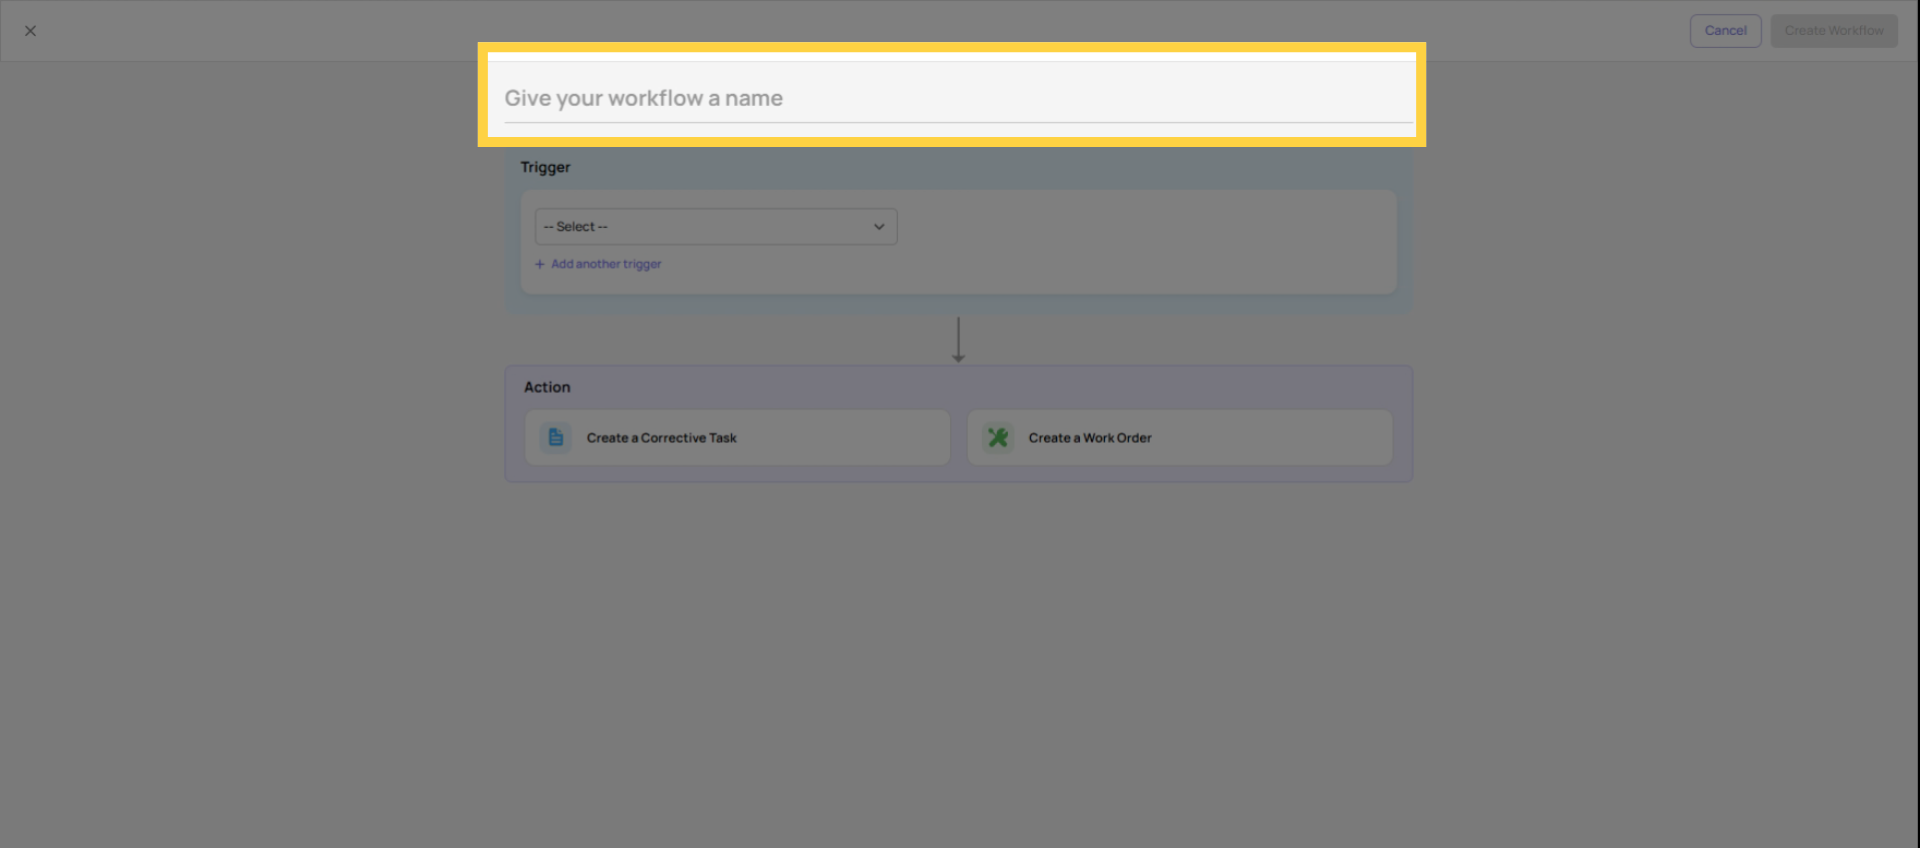
Click Add Workflow. The first thing you'll do is give the workflow a name.
Name it clearly — the name appears in the Workflows list and helps you manage multiple rules over time. Use descriptive names that identify what the workflow does:
- "Solar Array Issue → Electrical Team"
- "Vendor Issue — Delivery Problem → Operations"
- "Temperature Out of Range → Food Safety Task"
- "Robbery Emergency → Security + District Manager"
A clear name means that six months from now, when you're auditing your workflows, you immediately know what each one does without having to open it.
5. Step 2 — Set the Trigger Condition
The trigger condition defines what answer on what step fires this workflow.
Selecting the triggering step: Choose which step (question) in the template triggers this rule. For a Vendor Issue form, this might be a Dropdown step called "Vendor Type" — the workflow fires based on which vendor the submitter selects.
Selecting the condition: Define what the answer has to be to fire the rule:
- For Multiple Choice / Dropdown: "If answer is [specific option]" — e.g., "If Vendor Type = Solar Array"
- For Temperature: "If value is less than / greater than / between [range]"
- For Number: Same range conditions
- For Pass/Fail: "If step is failed"
Single vs. multi-condition: A simple workflow fires on one answer to one step. A multi-condition workflow adds additional conditions using AND/OR logic — e.g., "If Vendor Type = Solar Array AND if Delivery Issue = Yes." Multi-condition workflows are powerful for routing different types of issues differently within the same template without needing separate templates for each scenario.
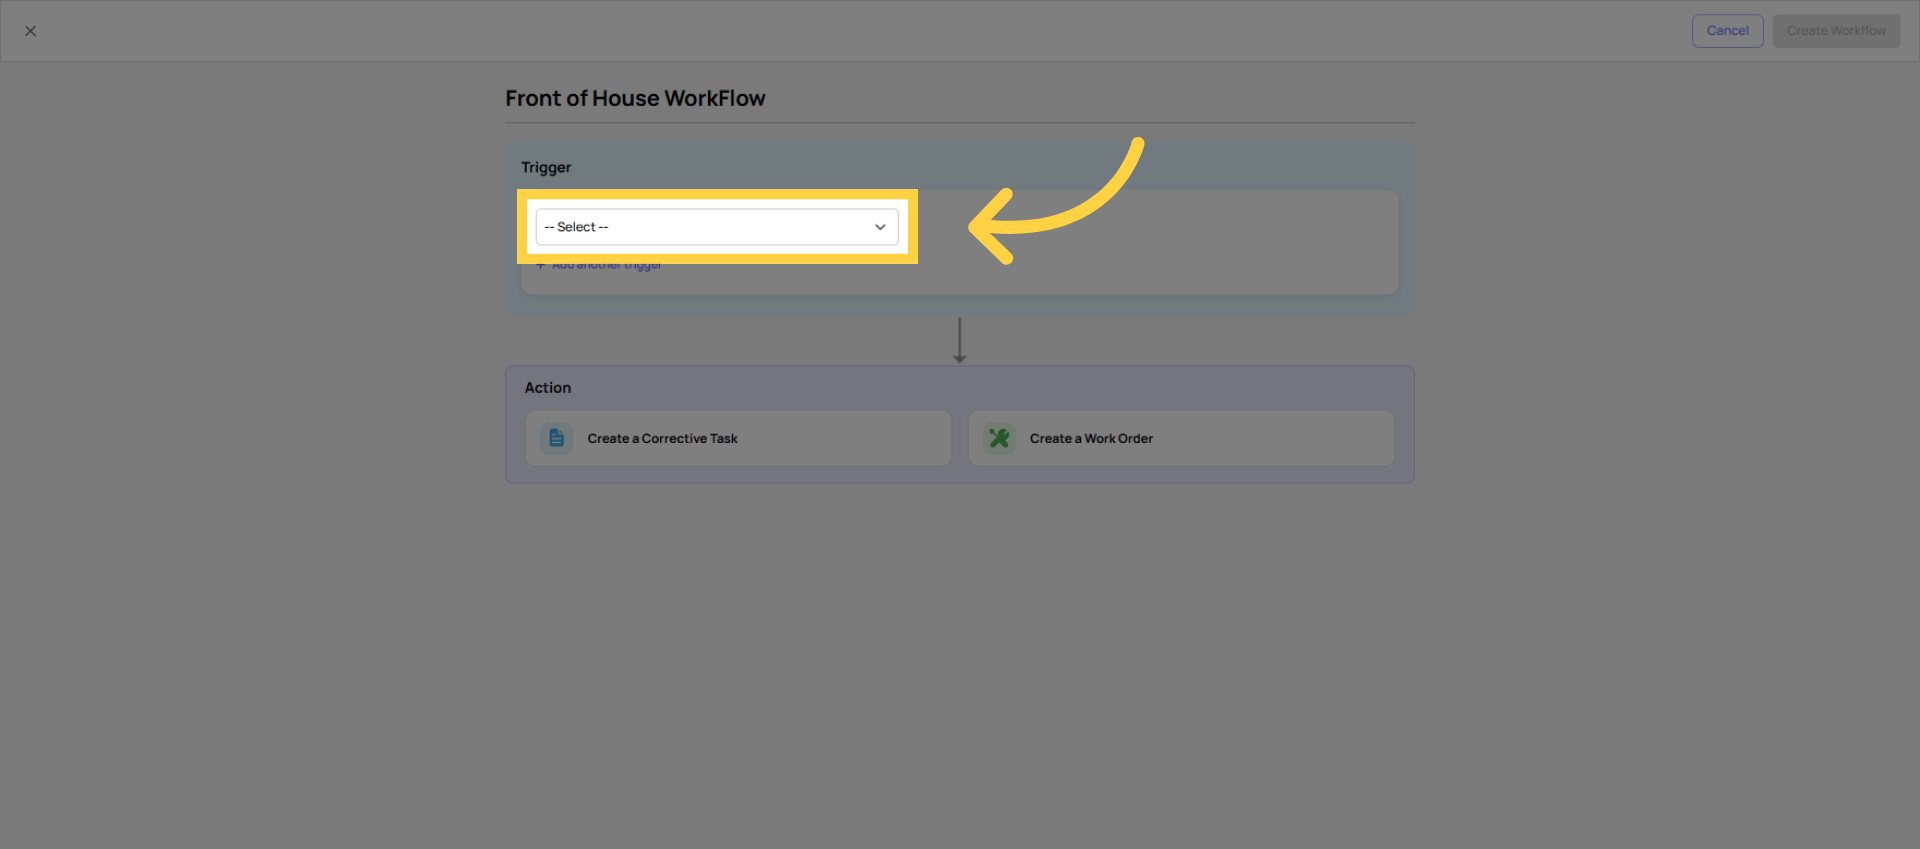 Selecting the trigger makes you select the trigger based on the step responses.
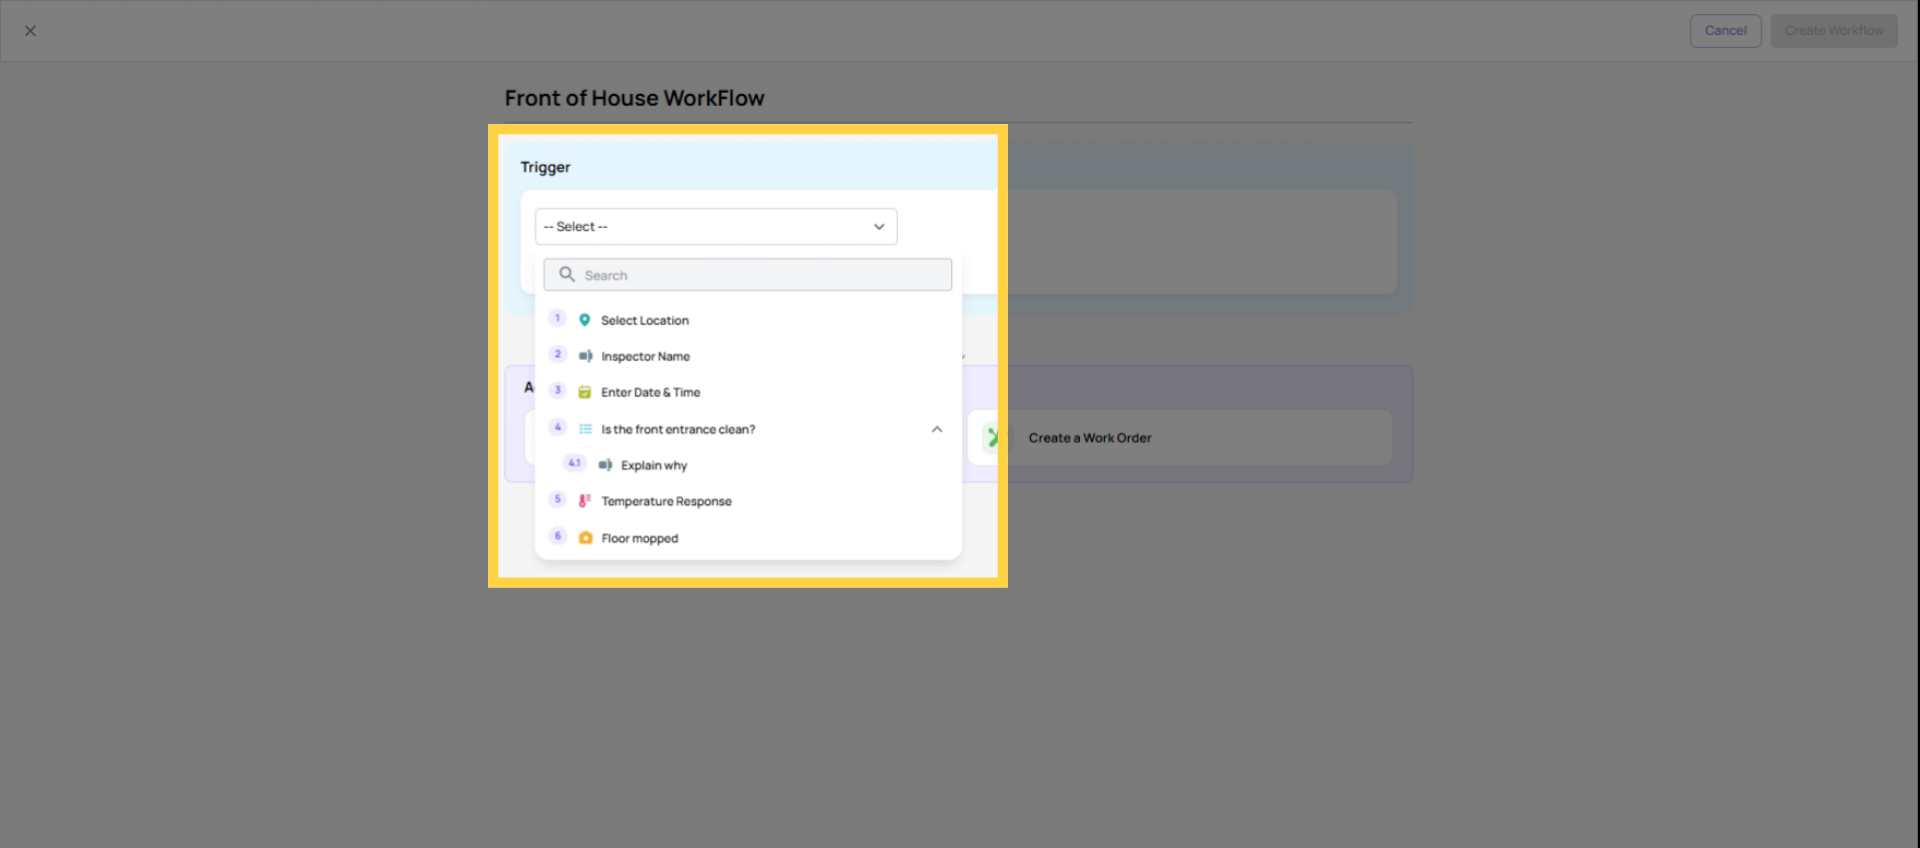 Click the dropdown to choose the trigger answer.
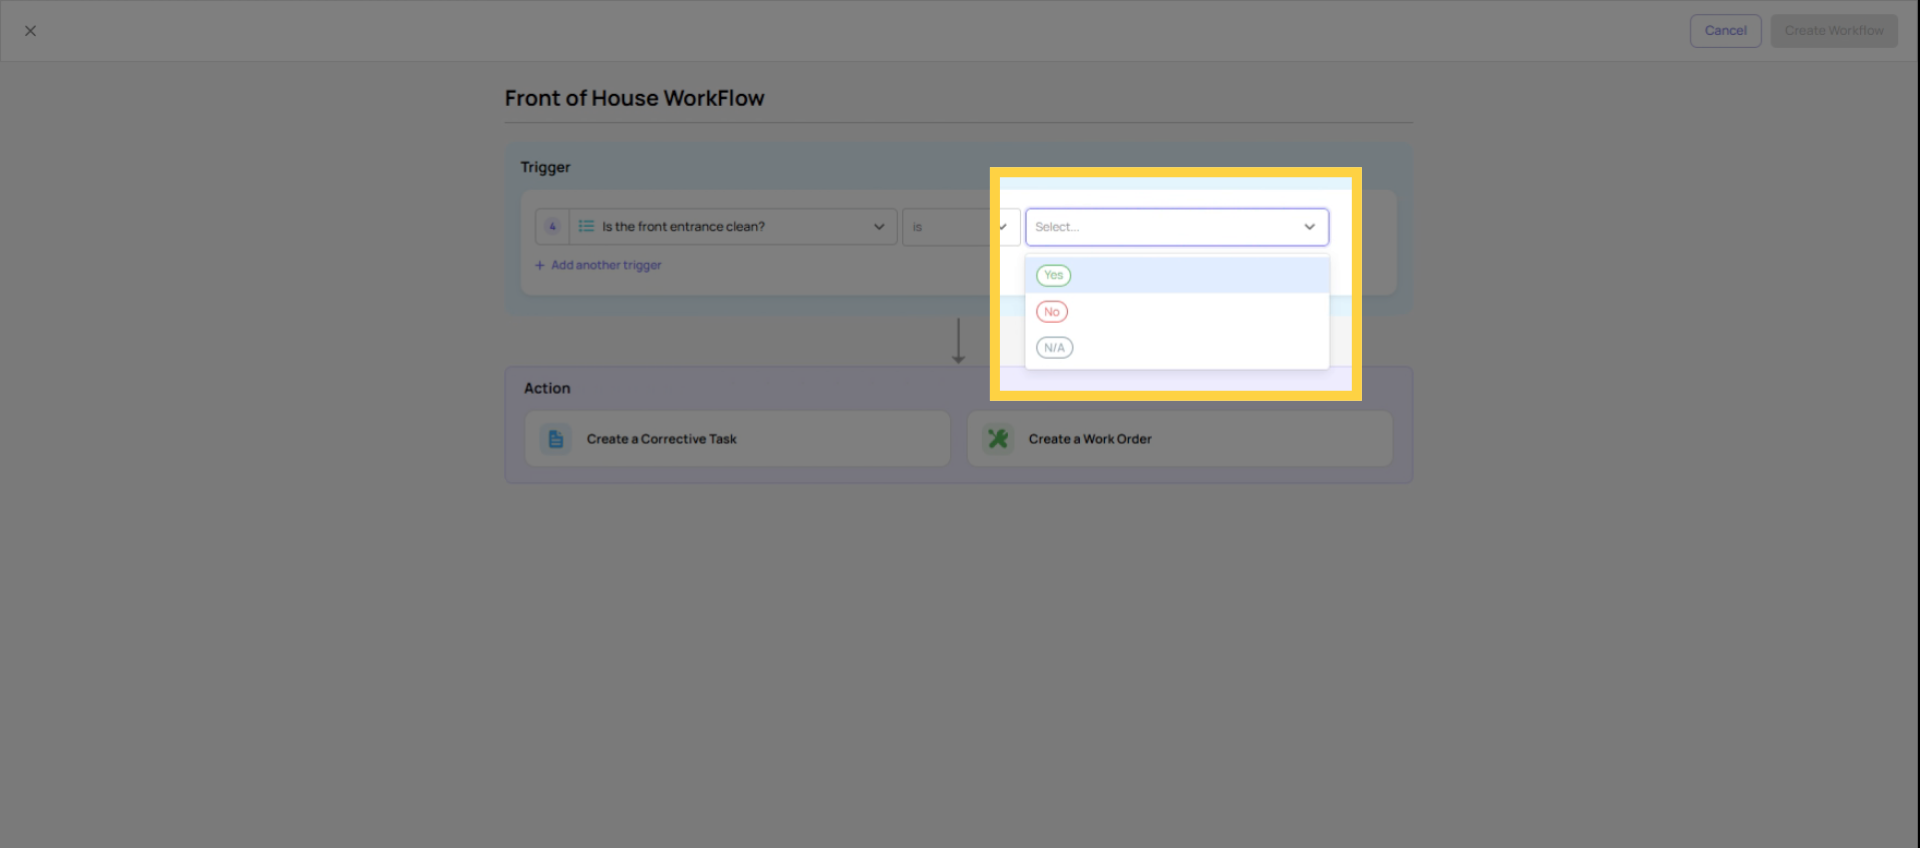
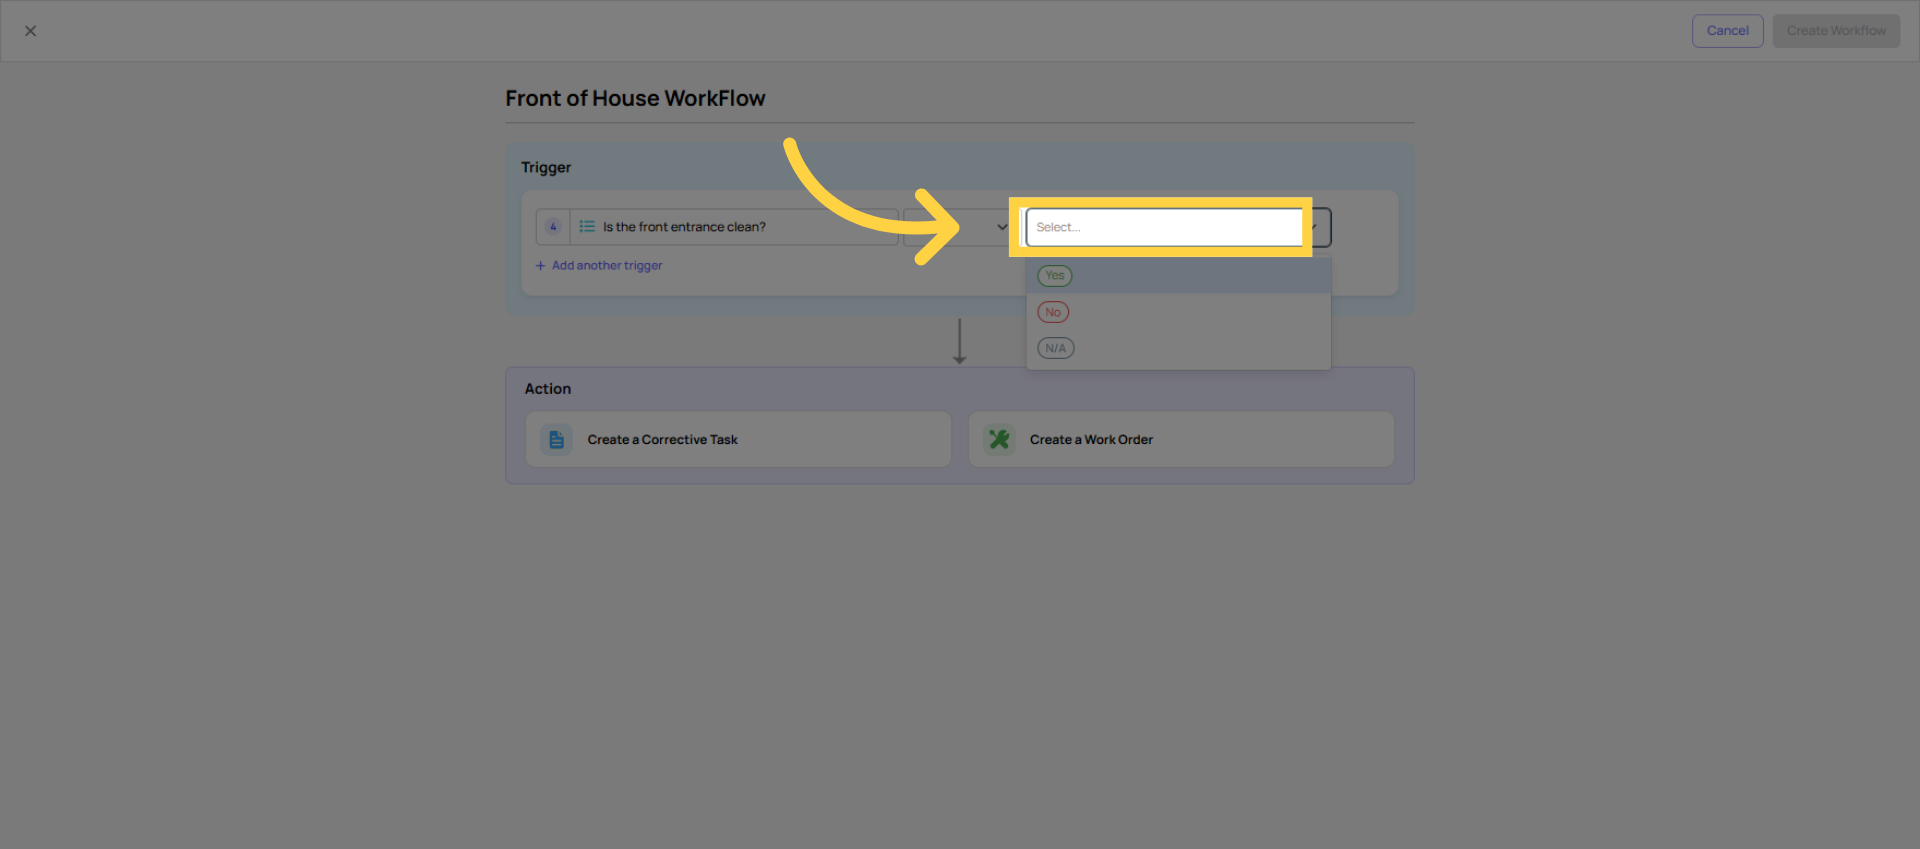 Select the answer. If it's yes or no, you can trigger a certain workflow based on the user responses.
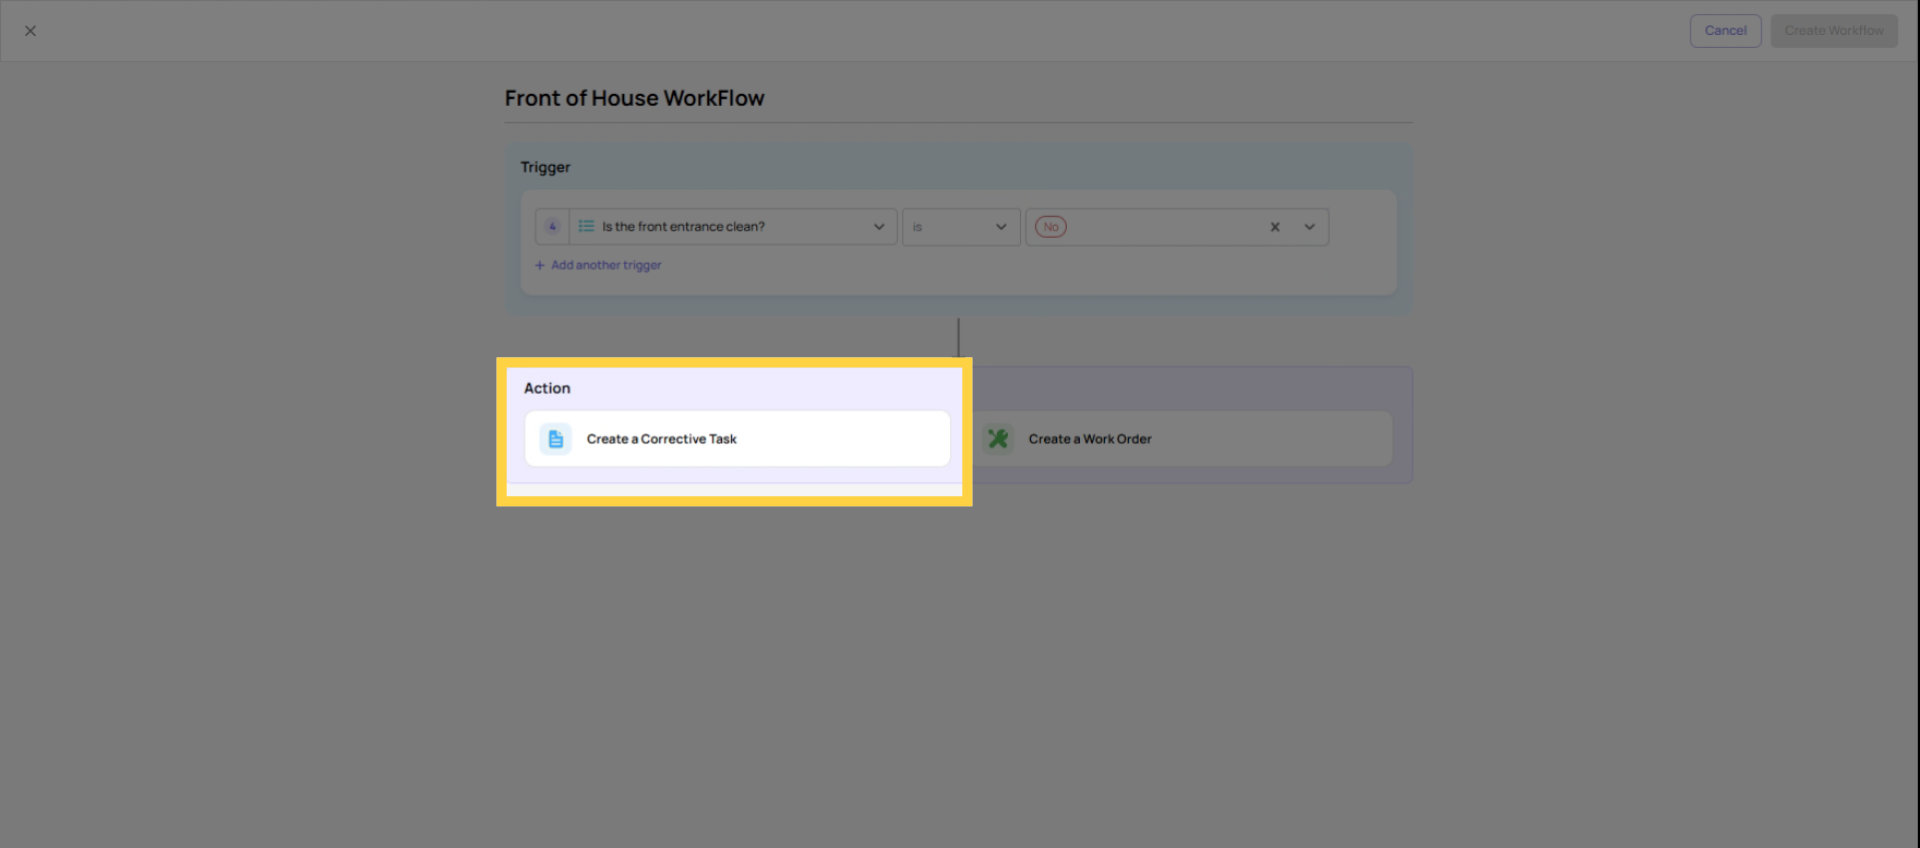
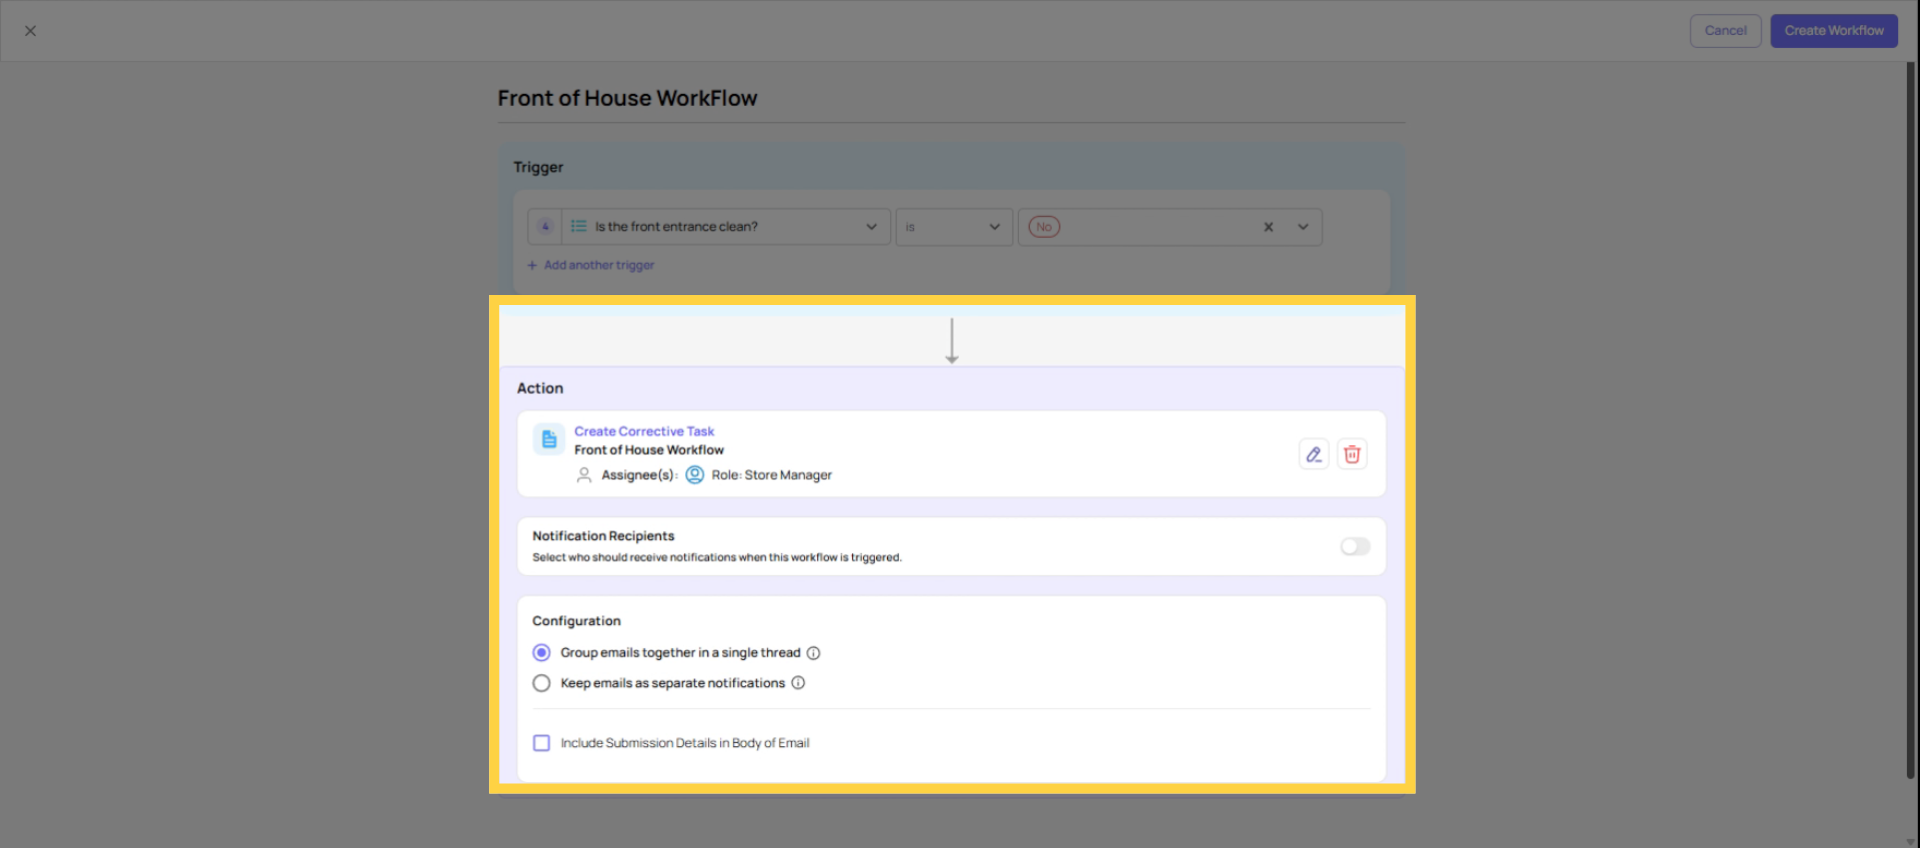
6. Step 3 — Configure the Corrective Task
The action that fires when the condition is met. Select Create Corrective Task (or the equivalent task creation action in the Workflows tab).
Configure the following fields:
Task Name: The title of the corrective task that appears in the task board. Make it specific enough that the recipient immediately knows what they're receiving: "Vendor Issue — Solar Array Delivery Problem" rather than "Corrective Task."
Task Description: Pre-filled text the assignee sees when they open the task. Include what the issue type is, what action is expected, and that this task was auto-generated from a checklist submission. Linking back to the original submission for context is often included automatically.
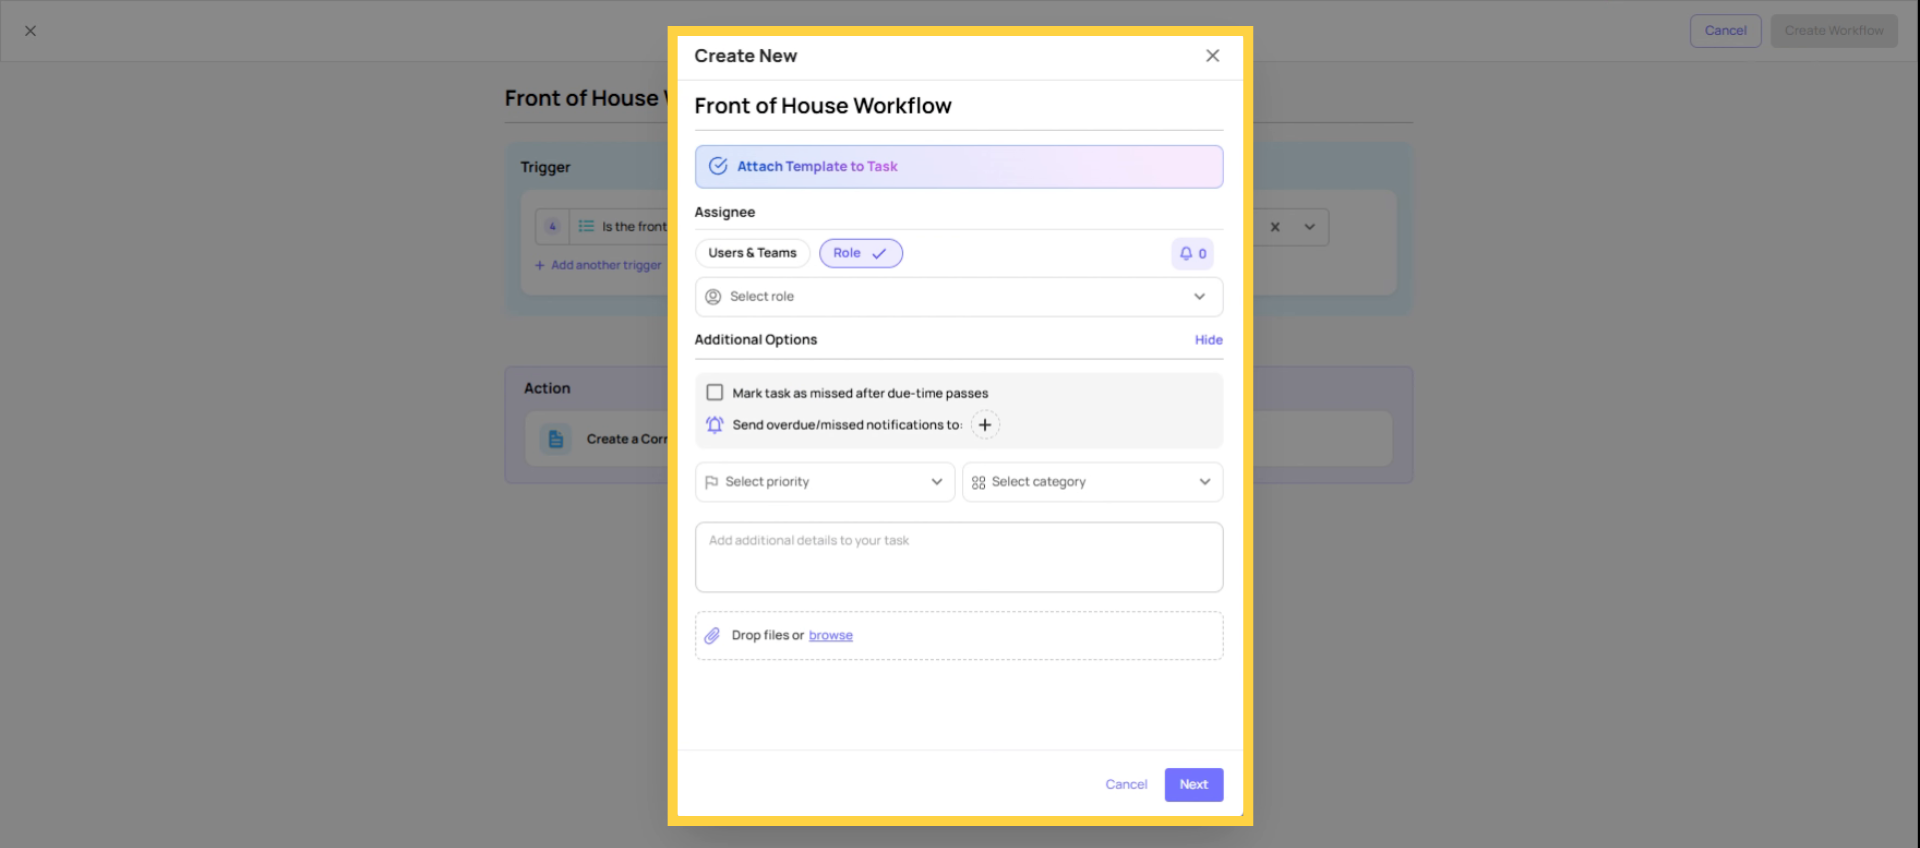
Assignee (Role): Which role receives this corrective task. For a Vendor Issue form, the Store Manager at the submitting location is the most common assignee — they own the vendor relationship at that store. Use a role, not an individual, so the task always routes correctly even when staff changes.
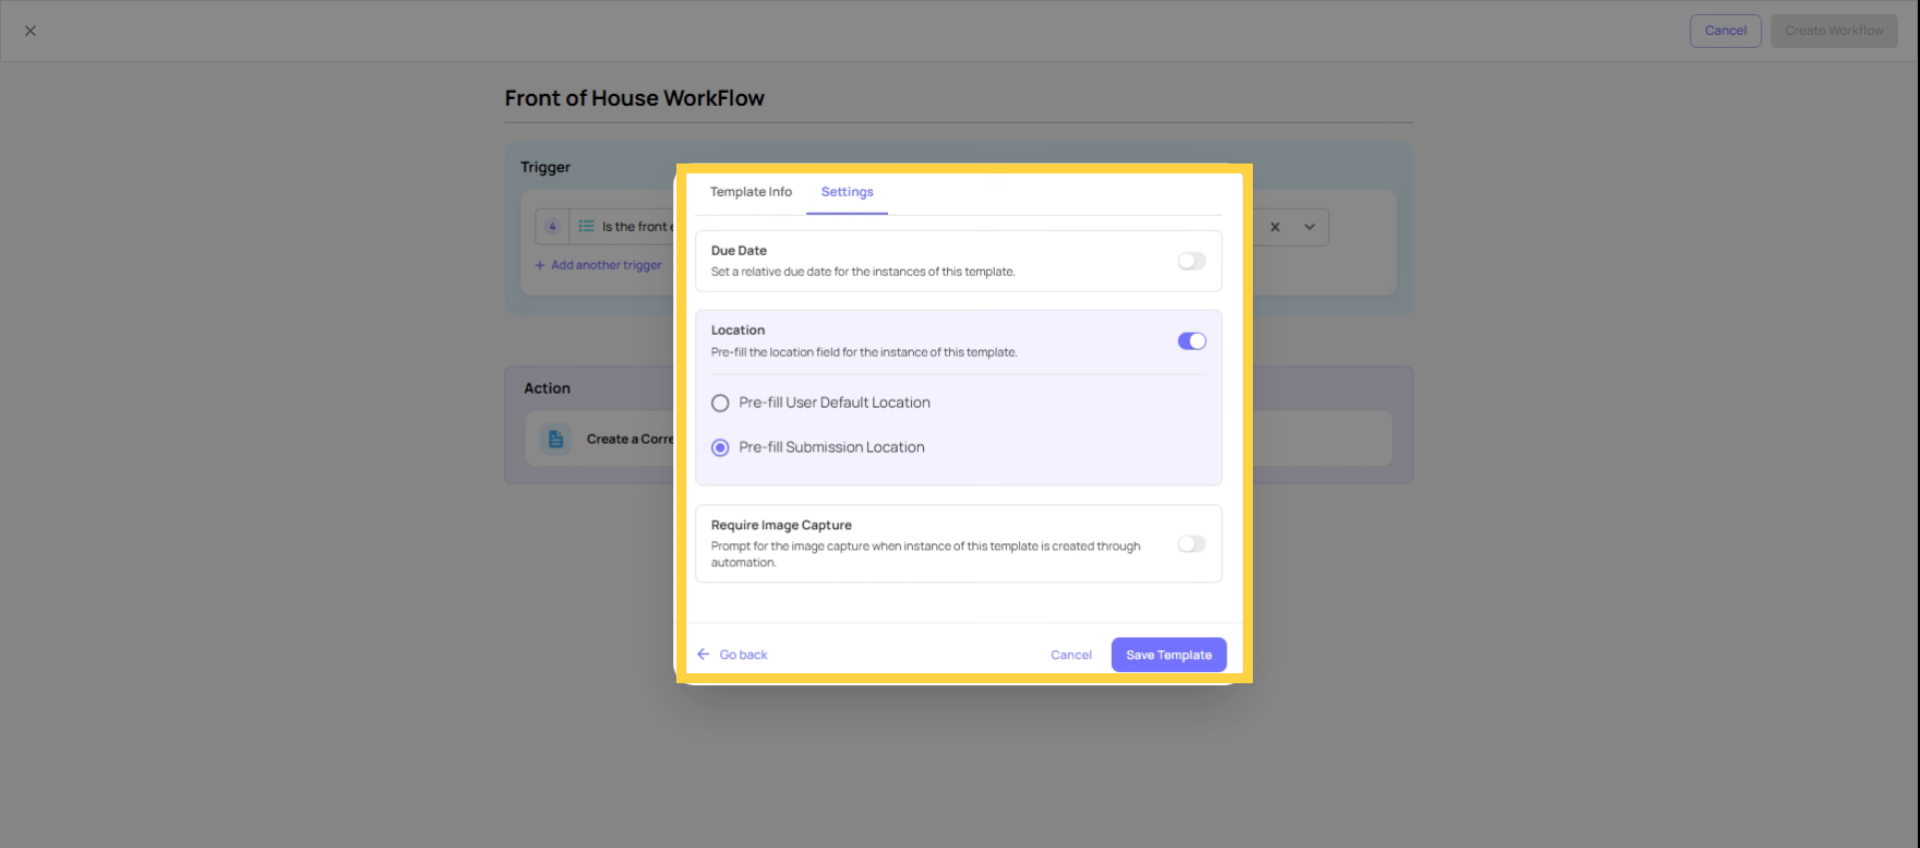
Use Submission Location: Always enable this. It tags the corrective task to the store where the form was submitted, which routes the task to the correct role member at that location and ensures the task shows up in that location's reporting. Without it, the task is untagged and effectively unroutable.
Priority: Set based on the urgency of the issue type being triggered.
Category: Assign a task category for reporting and filtering — Vendor Issue, Maintenance, Safety, etc.
Relative Due Date: How much time the assignee has after the task is created to resolve it. A vendor delivery issue might be due in 24 hours. An equipment failure might be due in 4 hours. Leave unset only if there's no meaningful resolution timeline.
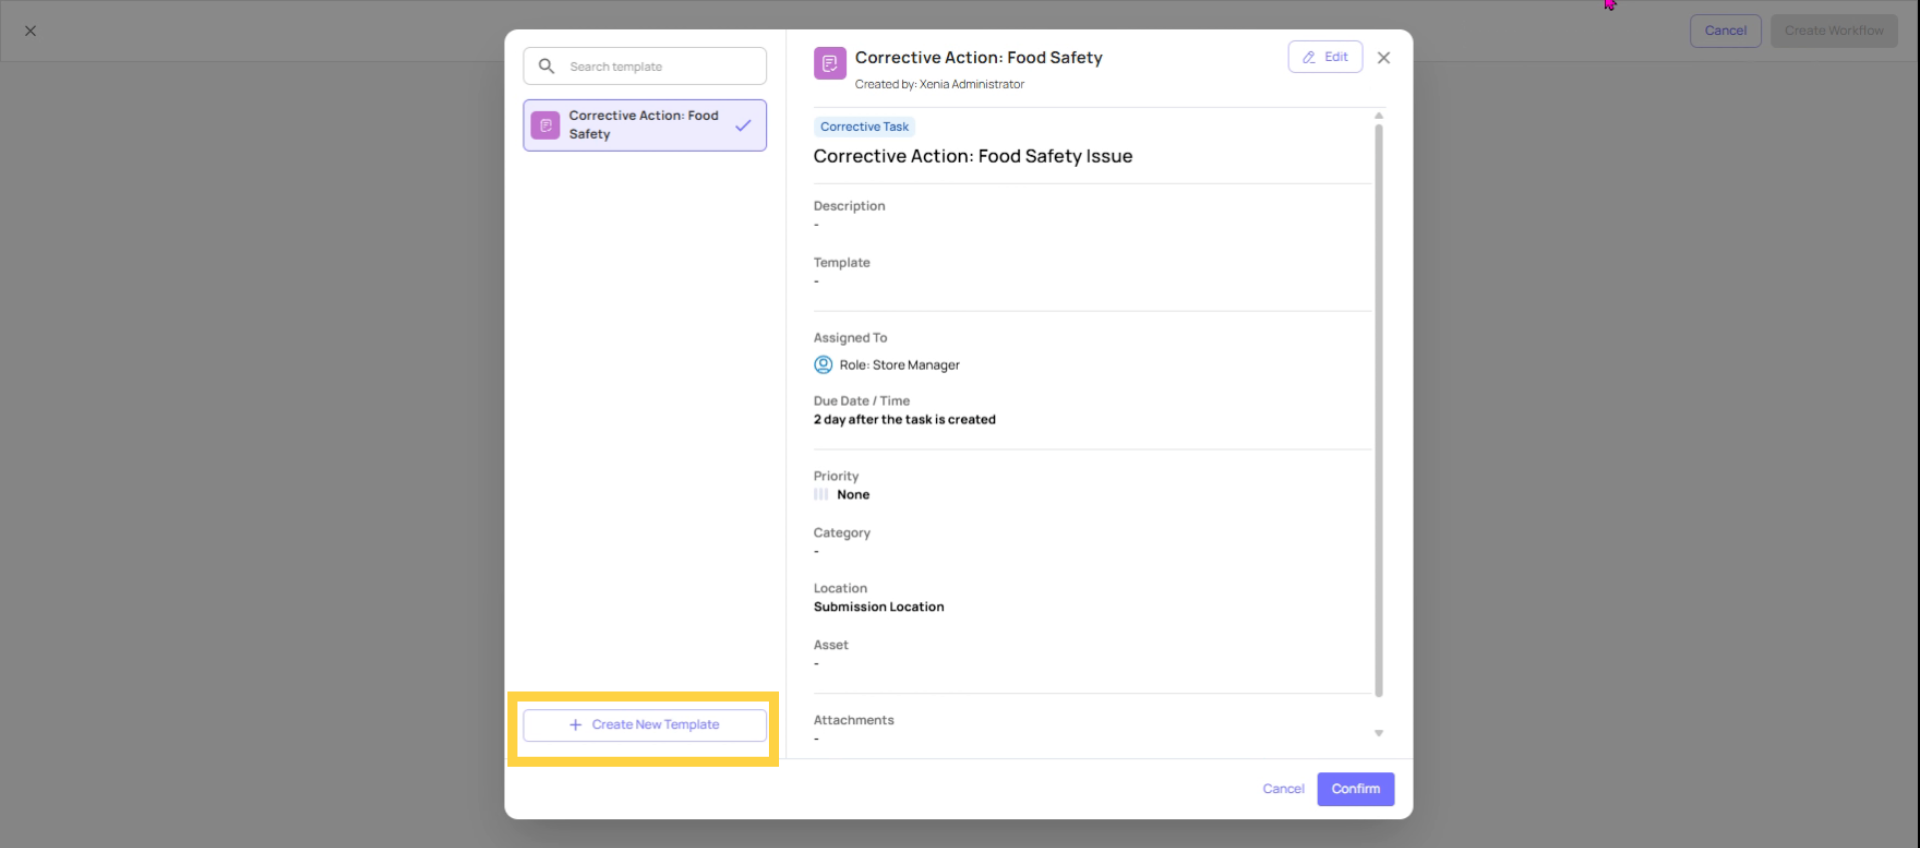
 This is the interface you will be seeing. Now click on create new template to build a new template for your workflow.
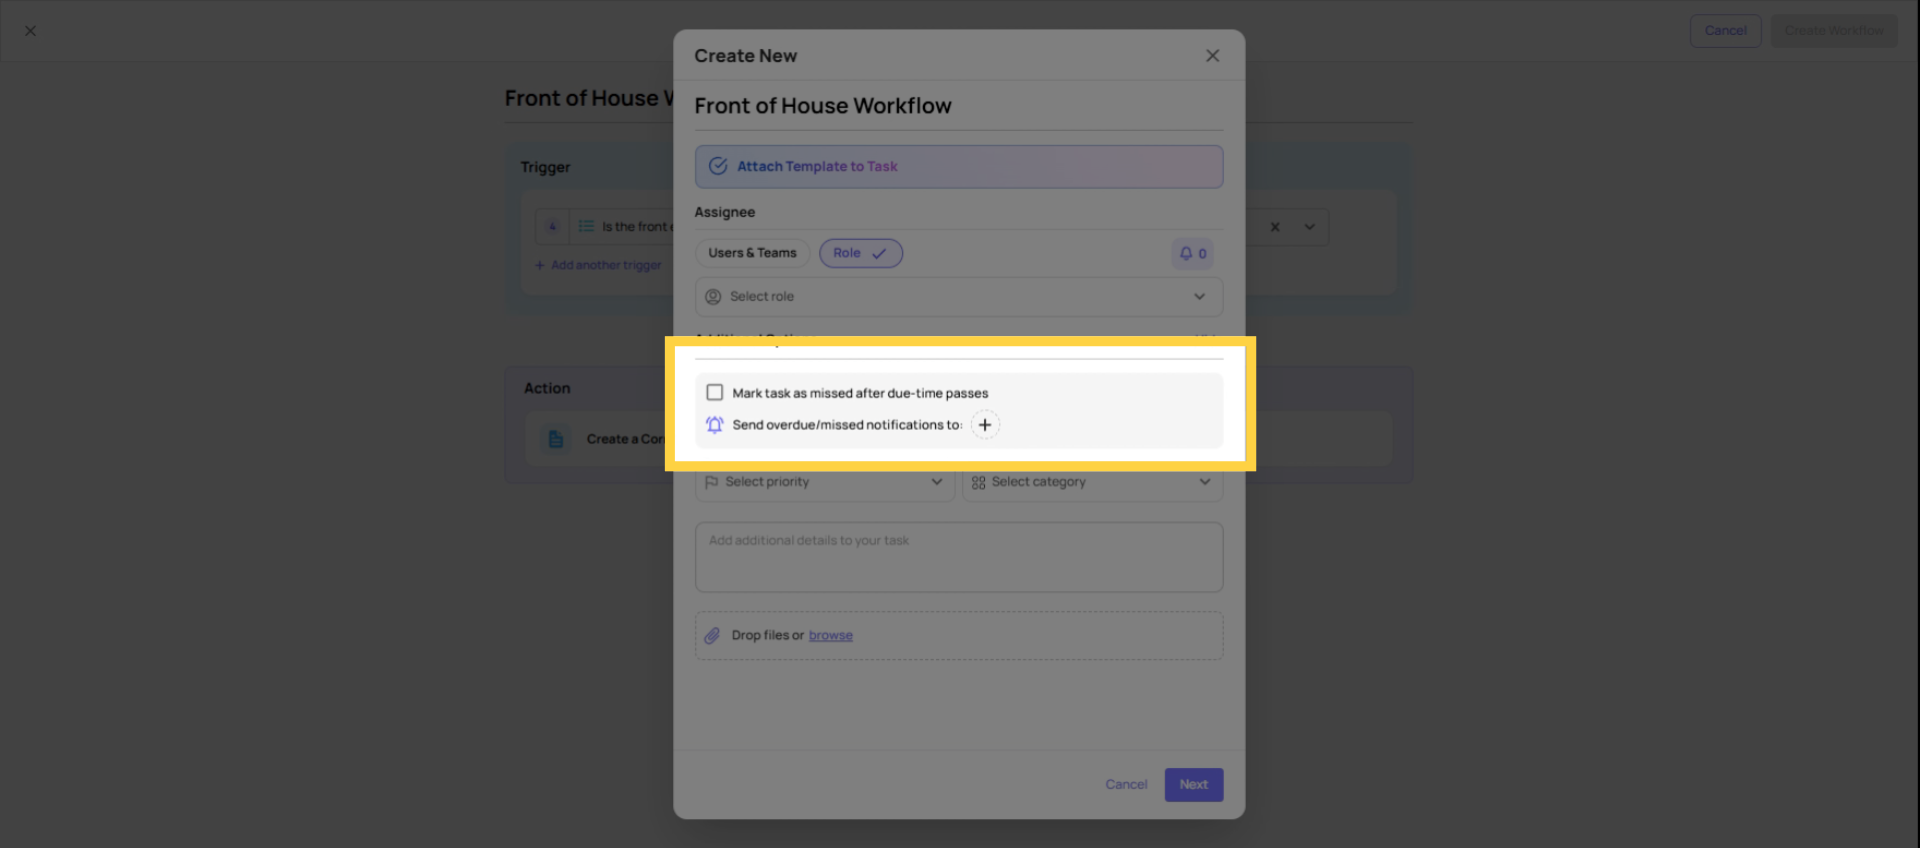
 Then you can also mark the task as missed after the due time passes. You can also add send or would you miss notification if this task is missed.
7. Step 4 — Add Notification Recipients
This is one of the most powerful features of the Workflows tab — you can add both internal and external notification recipients who are alerted when the corrective task is created.
Who can be notified:
- Roles (internal) — location-scoped, only the role member at the submitting location receives the email
- Specific users (internal) — named individuals within the Xenia workspace
- External email addresses — anyone outside Xenia, including vendor contacts, third-party teams, or external stakeholders
The vendor notification use case: When a Solar Array vendor issue is reported, you might notify: the Store Manager (role, location-scoped), your internal operations manager (specific user), and the vendor's designated point of contact (external email address). All three receive a notification the moment the corrective task is created at submission.
Email threading: Multiple notification recipients can receive notifications on the same email thread (grouped together) or separate threads. For vendor issues where you want the store manager and the vendor on the same communication chain, choose the grouped option. For notifications where recipients shouldn't see each other's replies, use separate threads.
Recommendation: Use roles for internal notifications wherever possible — they route correctly by location membership and don't require updating when staff changes. Use external email addresses only for contacts outside Xenia (vendors, contractors, third parties).
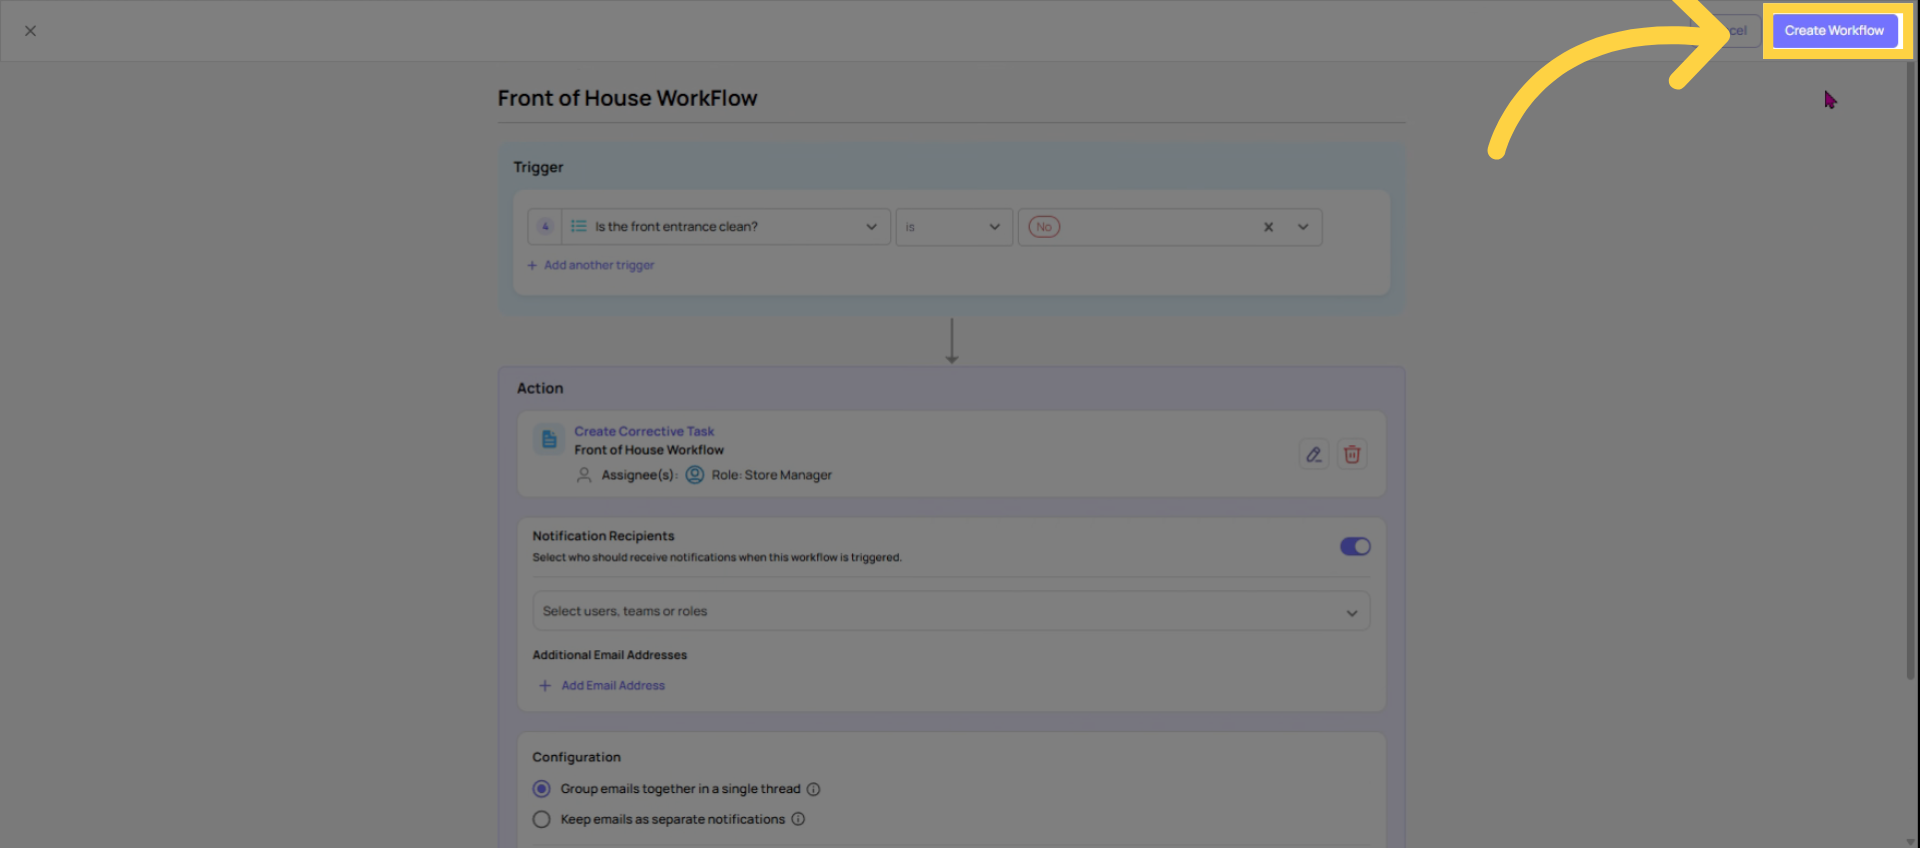
8. Step 5 — Save the Workflow
Click Save on the workflow configuration. The workflow now appears in the Workflows tab list with its name. You can click back into it at any time to edit, view, or archive it.
Repeat the process for any additional workflow rules on this template. A Vendor Issue form might have several workflows — one per vendor type, each routing to a different team or external contact.
17. Understand Workflow Automation Benefits
Testing is mandatory before a workflow goes live for real submissions.
How to test:
- Make sure the template is published
- Open the template as if you were an employee submitting it
- Fill in the form with the triggering answer — select the option or enter the value that should fire the workflow
- Submit the form
- Go to Tasks & Work Orders and look for the corrective task
- Confirm: task name is correct, location is tagged to the store you submitted from, assignee role is correct, due date is set
- Check that notification recipients received their email or push notification
If the task doesn't appear:
Need Help?
Reach out to our Support Team at Support@xenia.team
Comments
0 comments
Please sign in to leave a comment.