1. Understand Location Change Management
1. Why You'd Change Locations on a Running Project
Projects are designed to run indefinitely. As your organization changes — opening new stores, closing locations, restructuring territories — you need to update your projects without disrupting what's already running.
The two most common scenarios:
- Adding a location: A new store opens and needs to be included in the daily opening checklist project immediately
- Removing a location: A store closes, is temporarily suspended, or moves to a different project
Both can be done on any running project without recreating it from scratch.
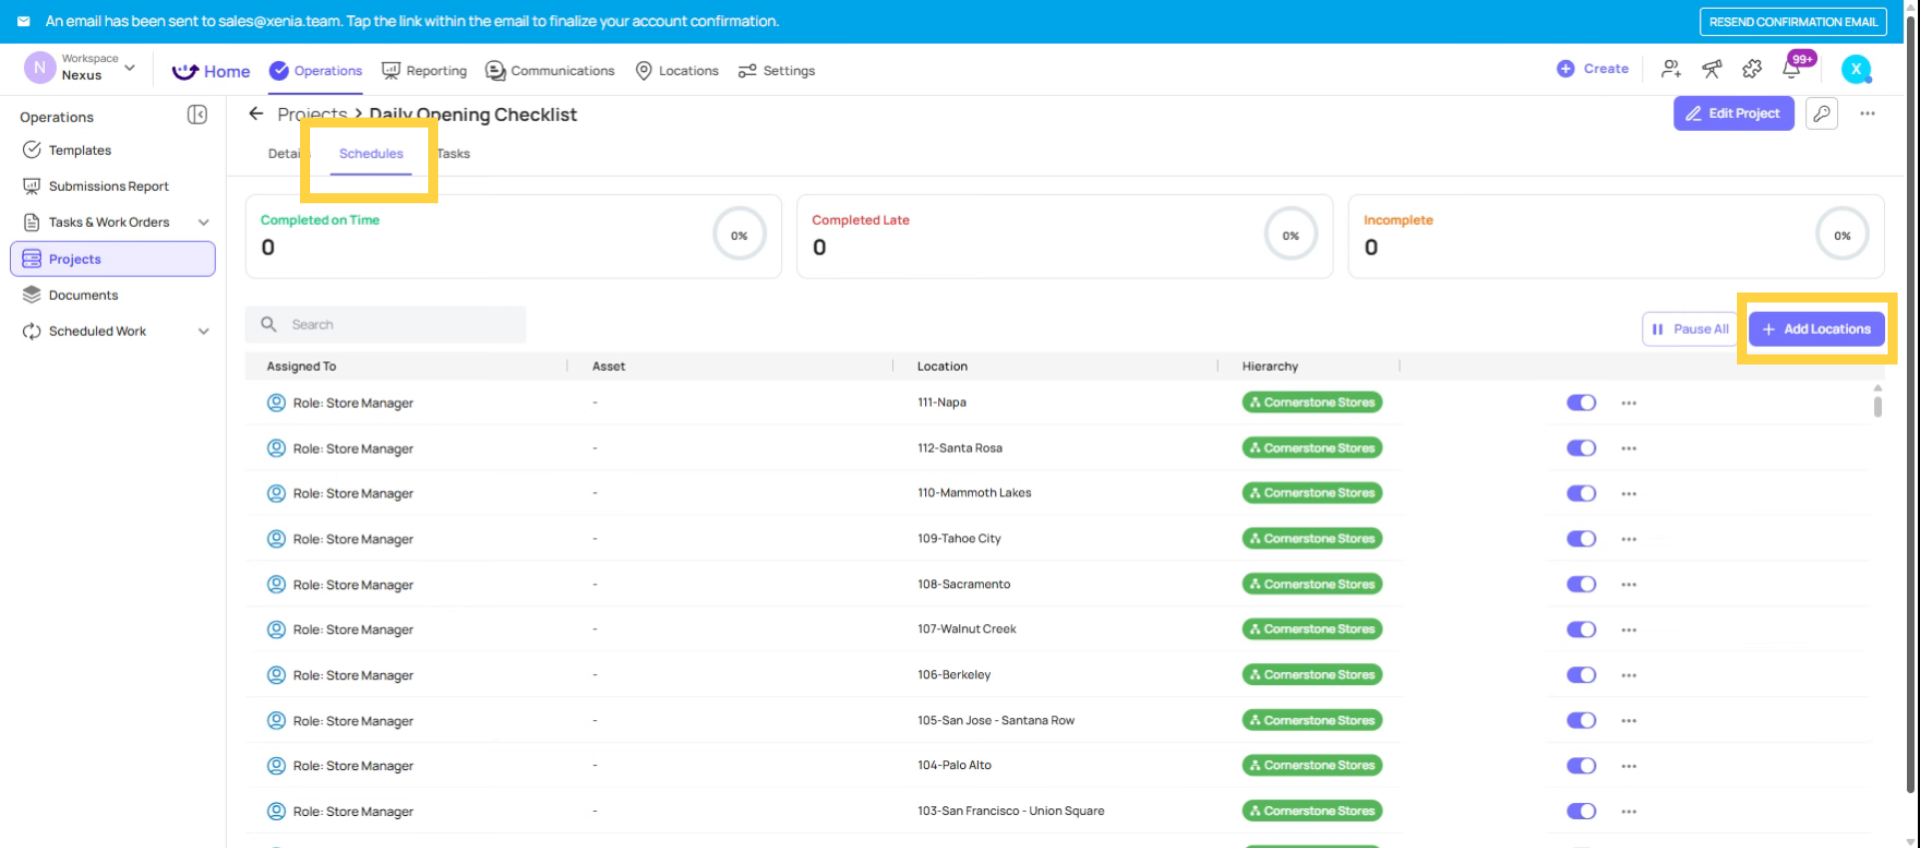
2. Add Locations To Projects
2. Adding a Location to a Running Project
- Go to Operations → Projects
- Click into the project you want to update
- Navigate to the Schedules tab (or click Edit/Add Assignee)
- Click Add Location or Add Assignee
- Select the new location(s)
- Save
3. Activate New Location Schedules
What happens immediately: A new schedule is created for each added location starting from the current date forward. If the project runs daily, the new location's first task will generate at the next scheduled time after you added it. There's no retroactive backfilling — historical tasks are not created for the new location for dates before it was added.
Best practice for new store onboarding: Add the new location to all relevant running projects as part of the store launch checklist. With role-based projects, as long as the right users are in the role and assigned to the new location, they'll start receiving tasks automatically from the moment you add the location.
4. Pause Location Task Generation
3. Removing a Location from a Running Project
- Go to Operations → Projects → [Project Name]
- Navigate to the Schedules tab
- Find the location you want to remove
- Click to pause or remove that location's schedule
What Never Changes When You Modify Locations
No matter how you change location assignments on a running project:
- All historical submissions from existing locations are preserved
- Completed tasks are never deleted
- The project's template, cadence, and timing settings stay the same
- Reporting data from before the change remains fully accessible
Modifying locations is a forward-looking change only. It affects what generates going forward, not what already happened.
This article explains how to manage location changes in live projects, including adding, pausing, reactivating, and deleting locations. It clarifies that all changes affect only future task generation, preserving historical data. For more information, see related articles on project scheduling and task management.
Need Help?
Reach out to our Support Team at Support@xenia.team
Comments
0 comments
Please sign in to leave a comment.