1. Overview of Role-Based Project Setup
Before You Start
Have these things ready before opening the project creation form:
- The template you want to deploy (it must be published — unpublished templates cannot be assigned to projects)
- The role that will receive the tasks (the role must exist and have the right users assigned to it with location membership)
- The locations you want to include
- The schedule: daily, weekly, or monthly? What time should it appear? What time is it due
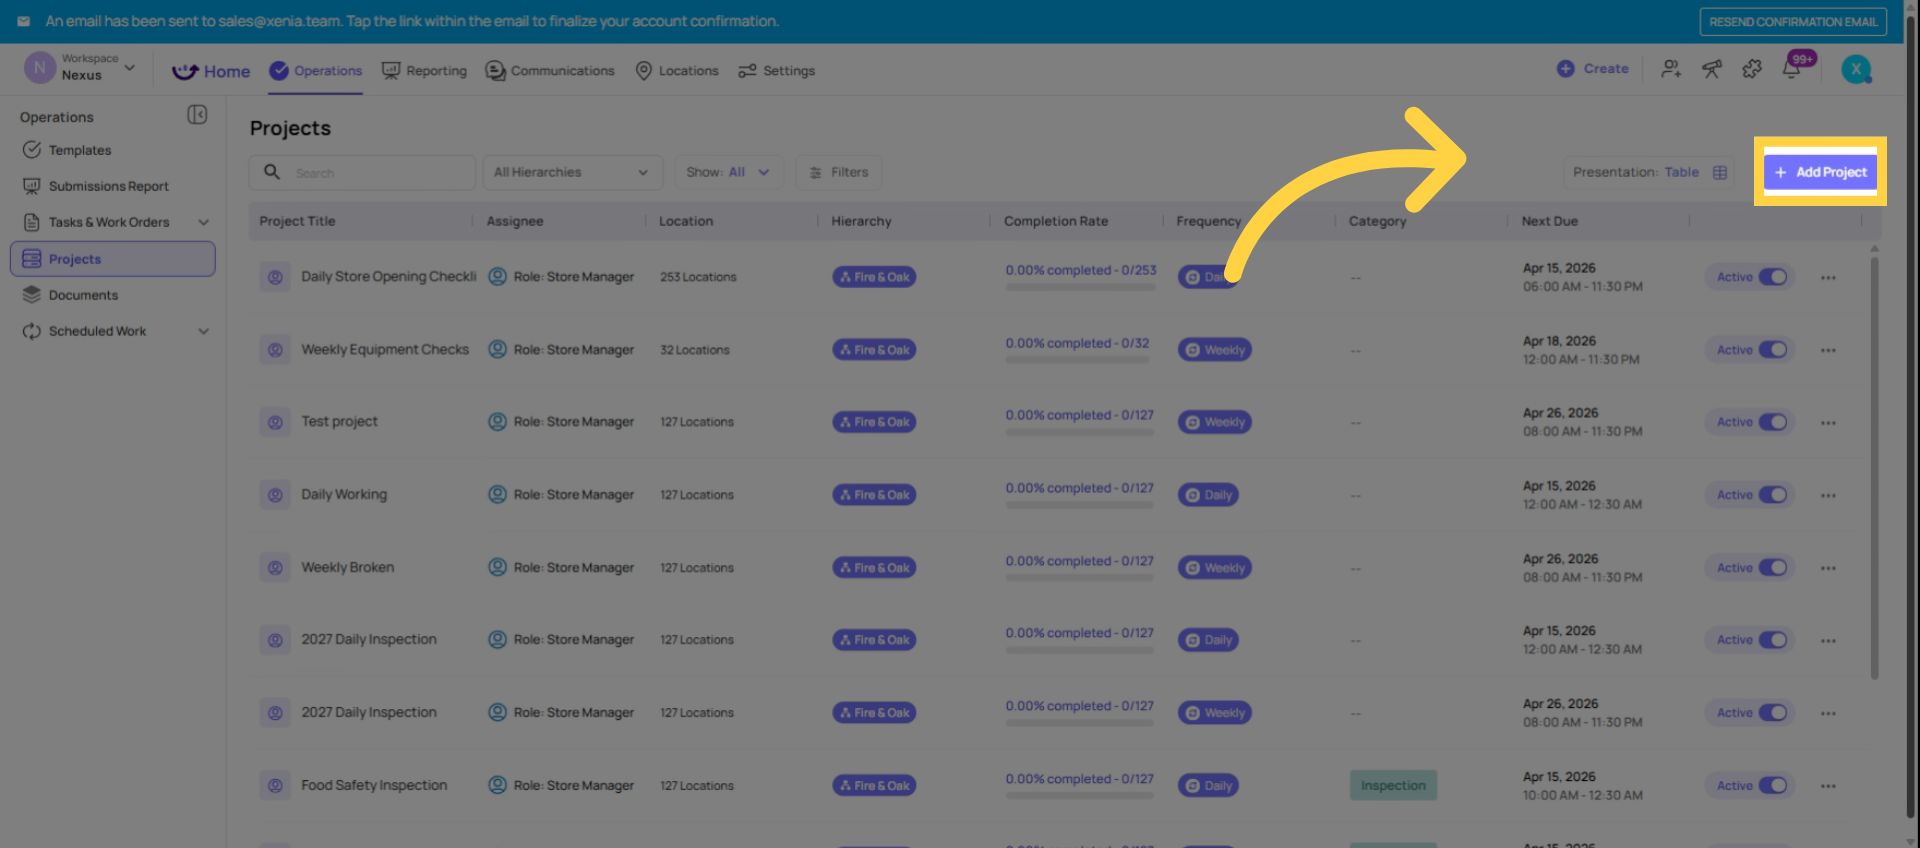
2. Add New Role-Based Project
Step 1 — Open the Create Project Flow
- Go to Operations → Projects
- Click Add Project or the + button
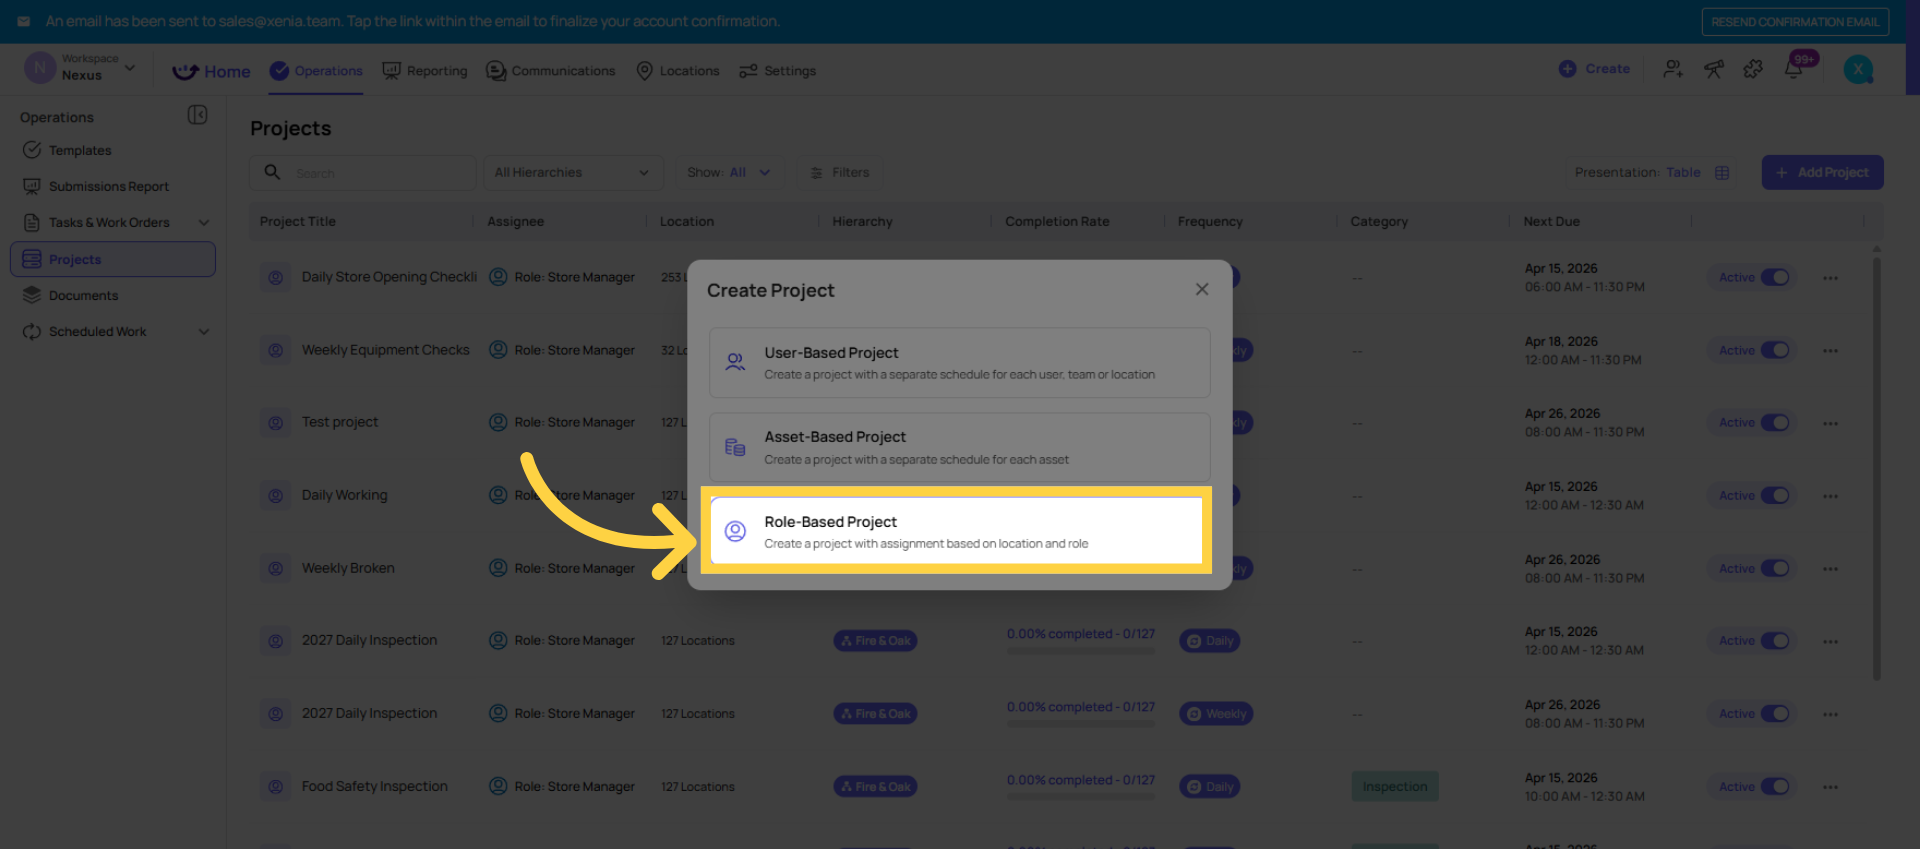
3. Select a role-based project.
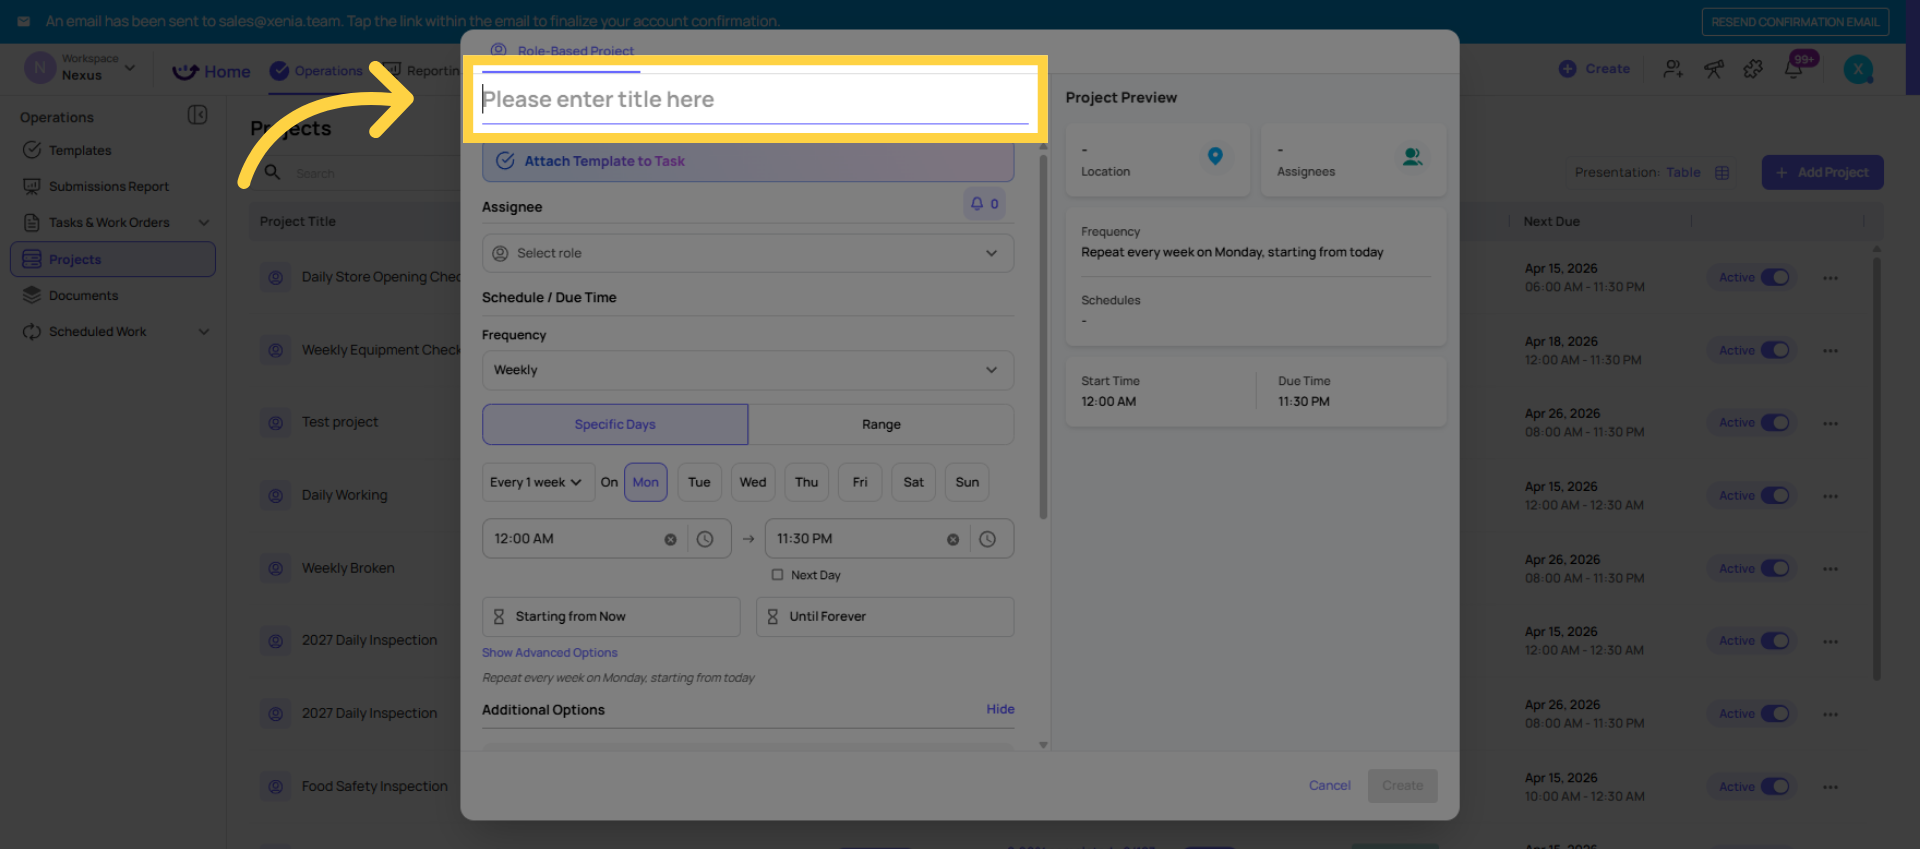
4. Enter Project Title
Step 2 — Name the Project
Give the project a clear, descriptive name. The name appears in the project list, in completion reporting, and in task dashboards. Good names: "Daily Opening Checklist — Store Role" or "Weekly Kitchen Deep Clean — Cook Role." Bad names: "Project 1" or "Daily."
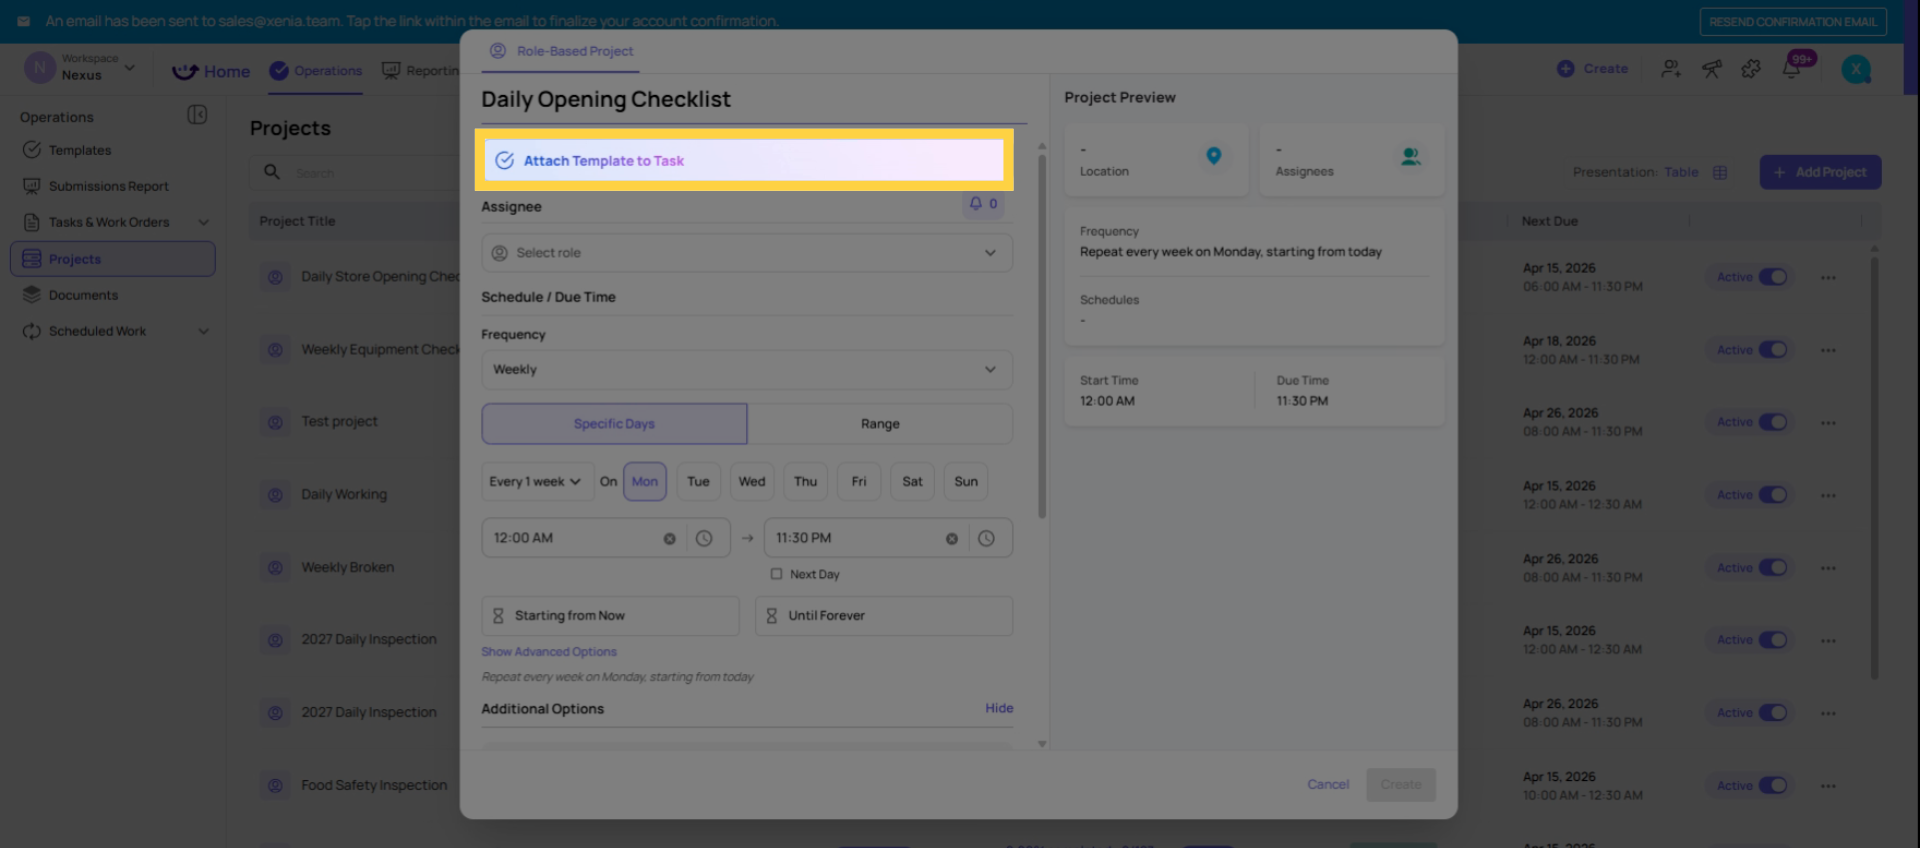
5. Attach Templates to Tasks
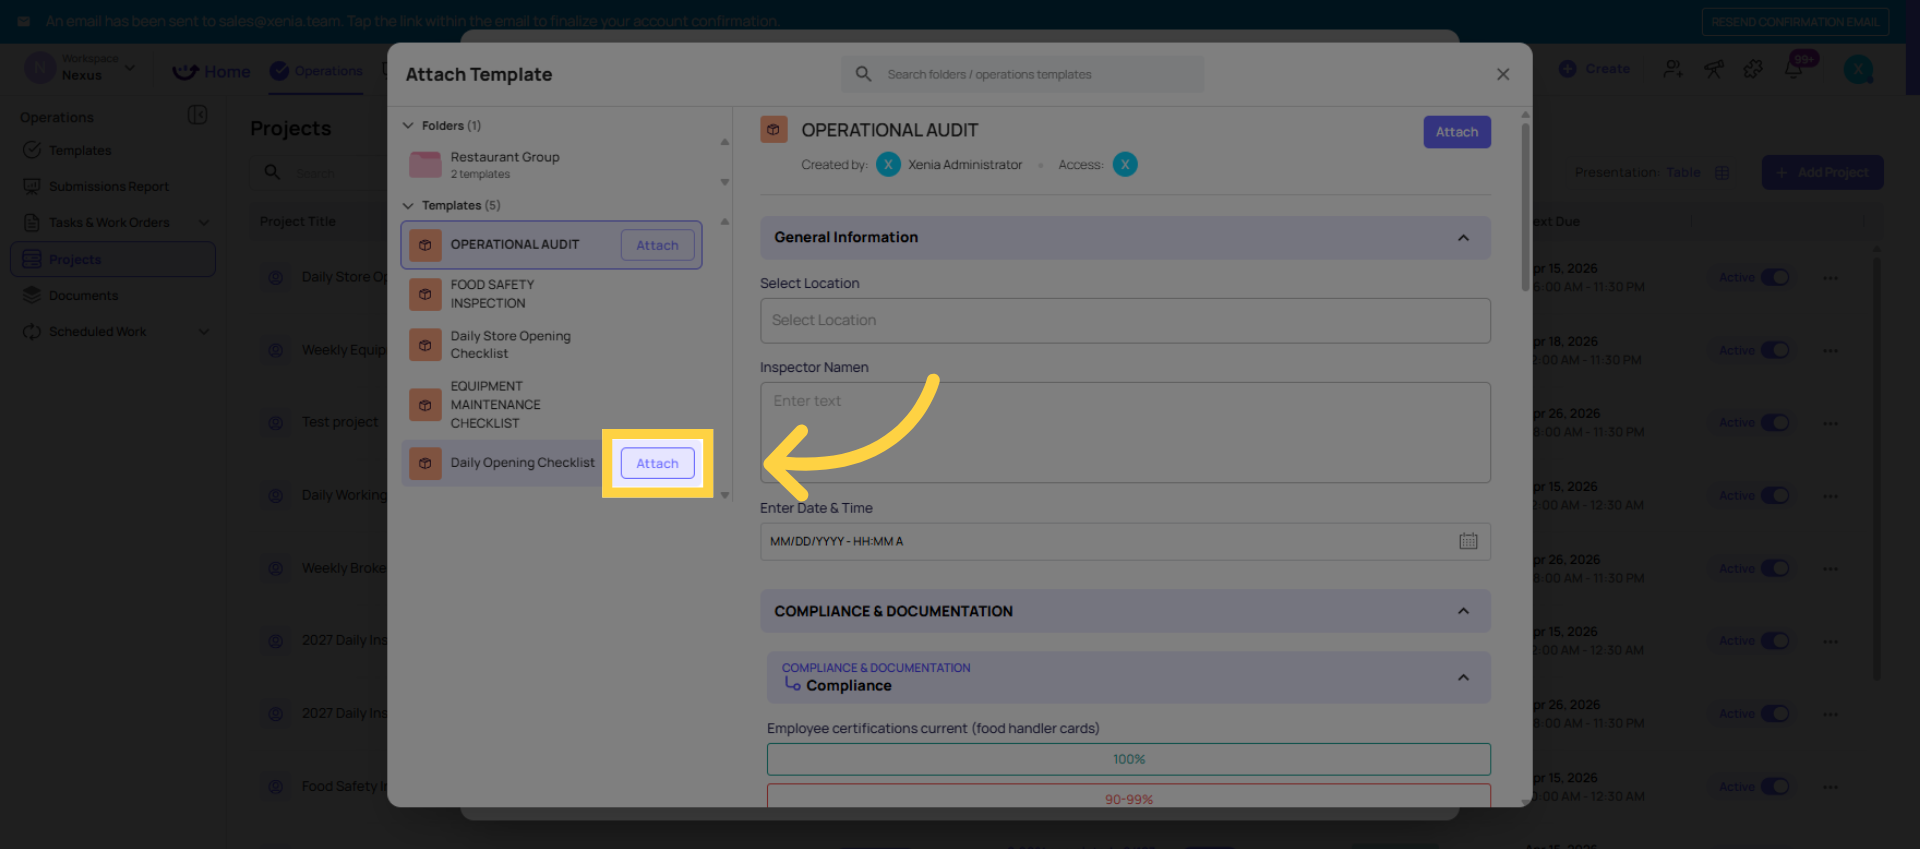
Step 3 — Attach the Template
Select the template this project will deploy. This is the checklist that employees will complete each time a task is generated.
Only published templates appear here. If your template isn't showing up, go to the template → Publish tab → Publish it first, then return to the project.
6. Open Role Selection
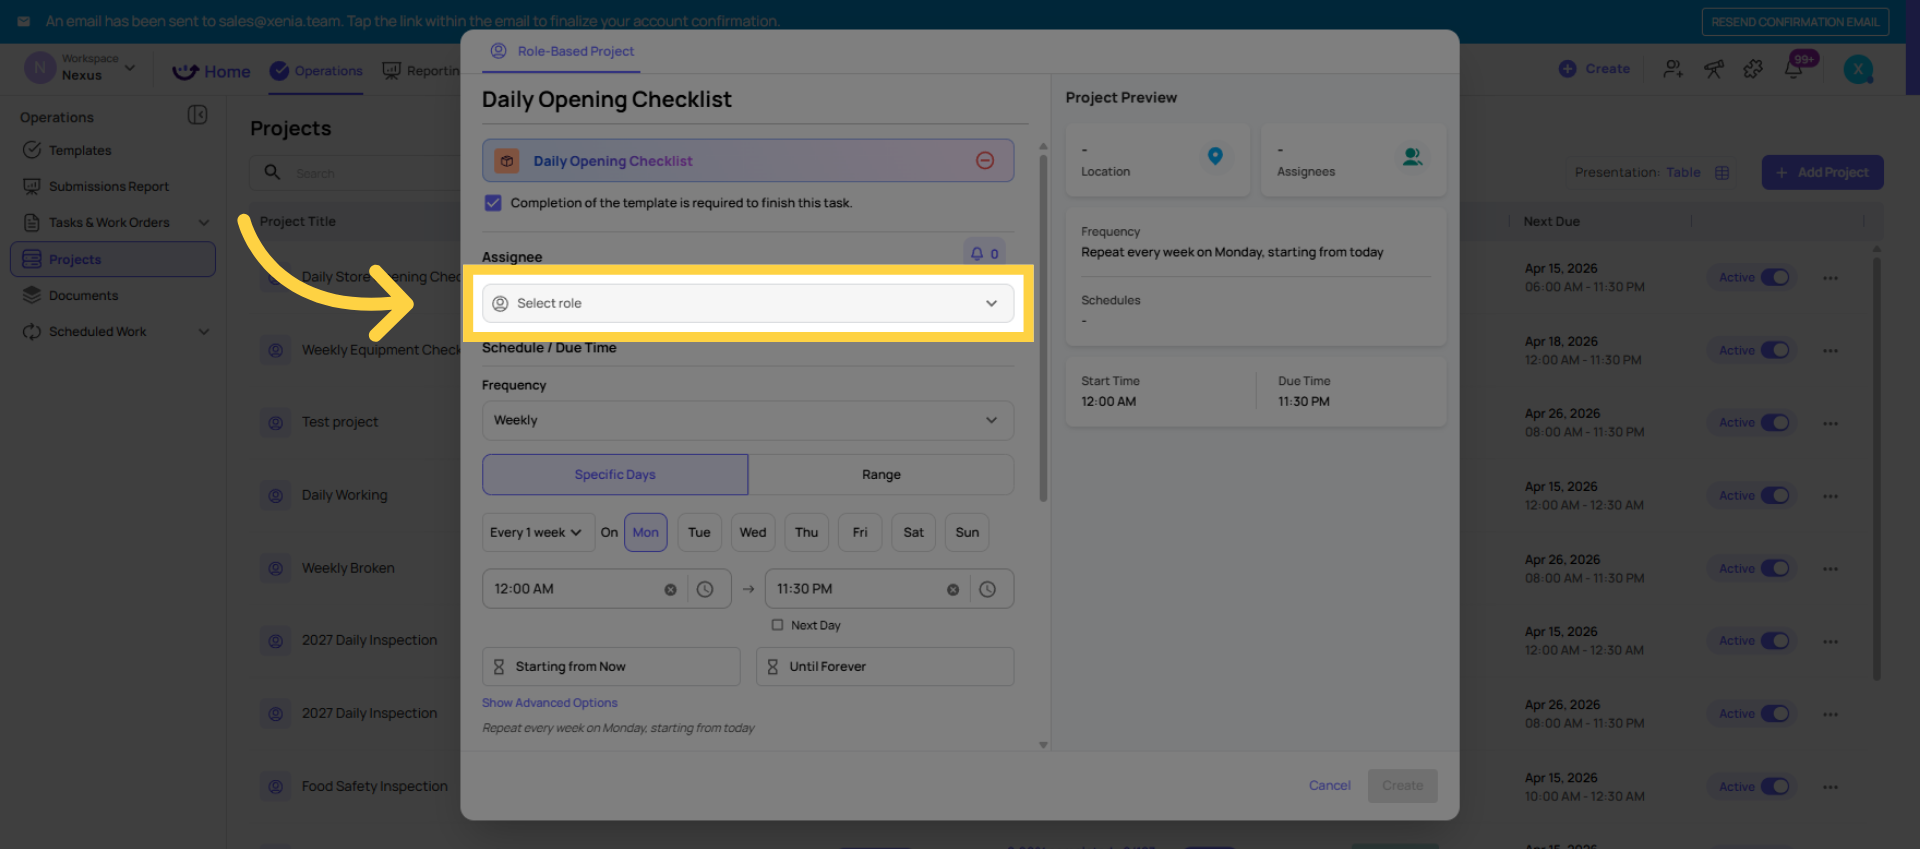
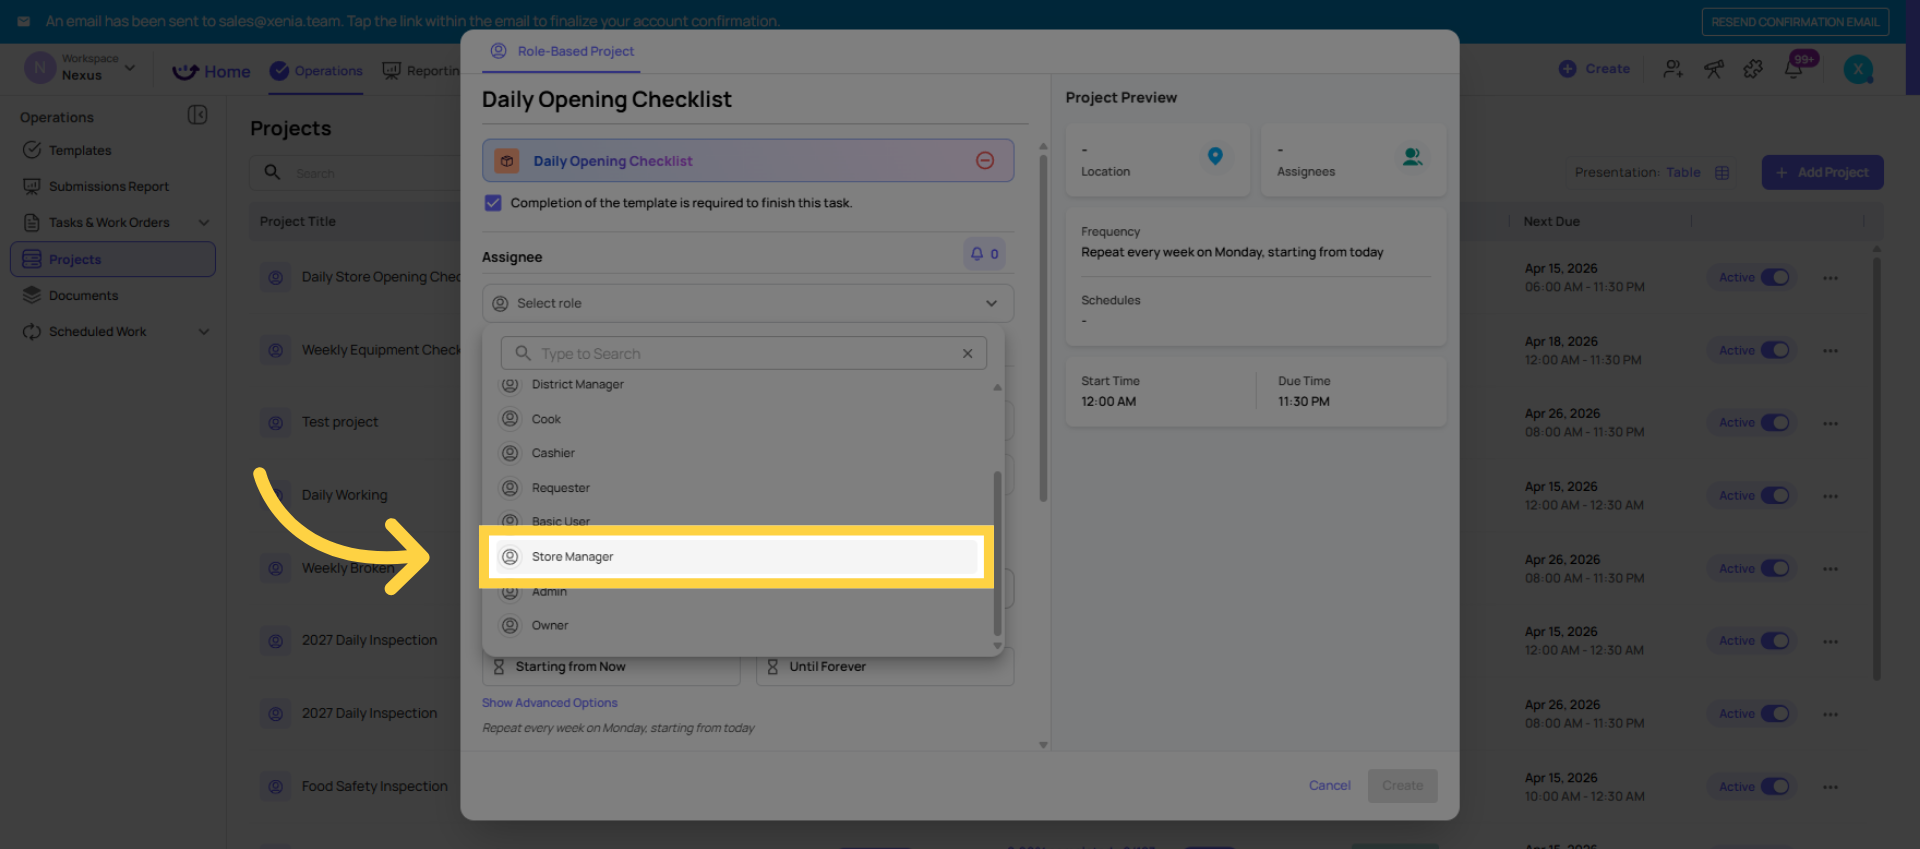
Step 4 — Select the Role
Select the role that will receive the tasks. All users with that role at the selected locations will receive a task (in site-based mode: one task per location; in user-based mode: one task per person).
7. Open Location Hierarchies
Step 5 — Select Locations
Choose which locations this project should deploy to.
- Click Select All to include every location in your workspace
- Or select specific locations, location groups, or a subset of your hierarchy
- You can add or remove locations after the project is running — this is a live edit
Time zone note: Xenia uses each location's timezone (set by the address on the location) to determine when tasks appear and are due. A project set to run at 6:00am will generate tasks at 6:00am in each location's local time — automatically. No separate configuration needed per location.
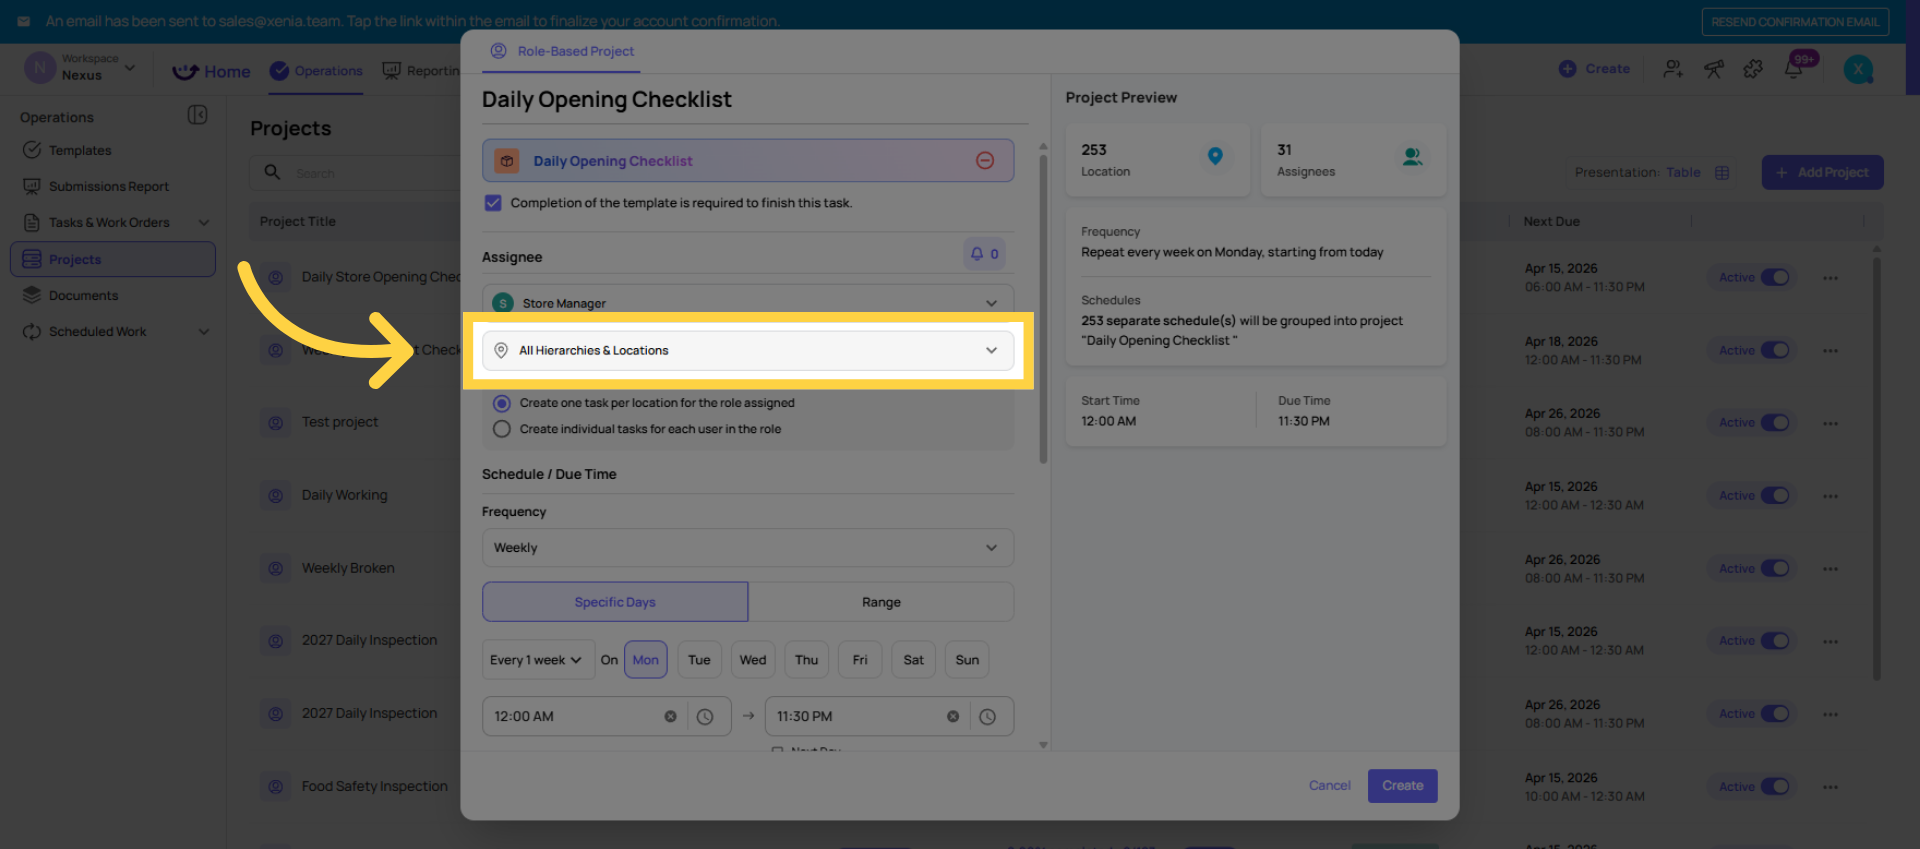
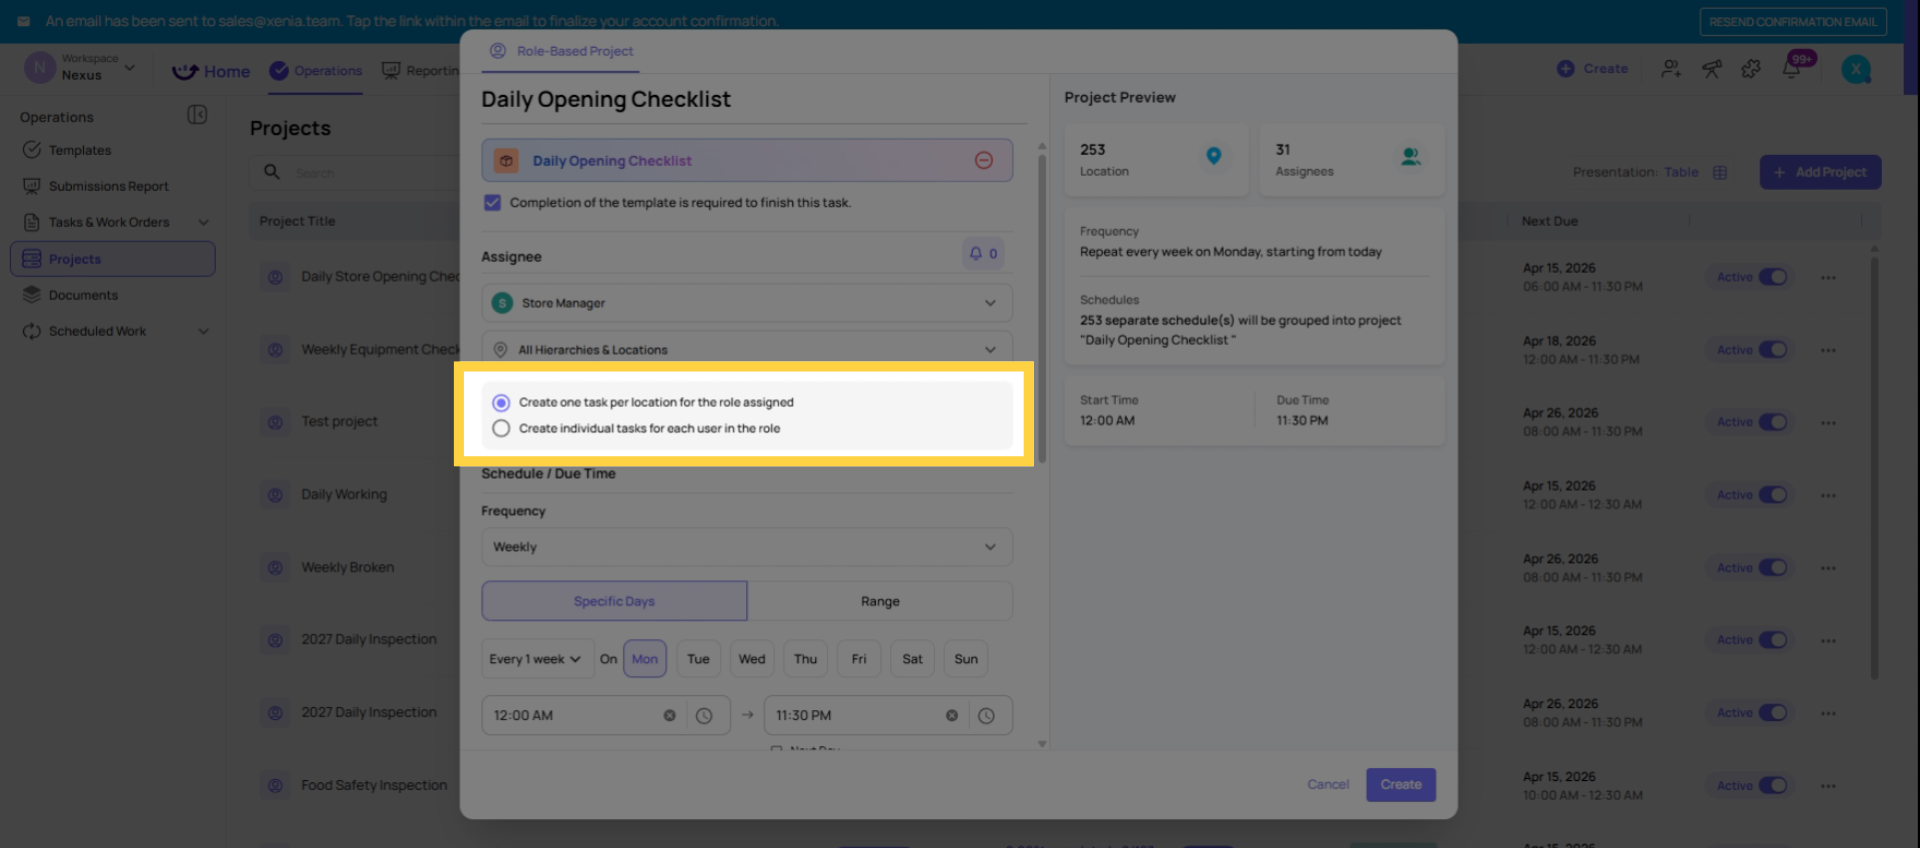
8. Choose Assignment Mode
The assignment mode (site-based vs. user-based):
- One task per location (site-based): One task is created per selected location. Any user in that role at the location can complete it. Right for: most daily operational checklists where "the store" needs to complete it, not "each individual person."
- One task per role member (user-based): One task is created per individual user in that role at the selected locations. Right for: tasks where each person must confirm their own work individually.
For most daily checklists — opening procedures, temperature logs, cleaning checklists — use site-based. One task per store per day.
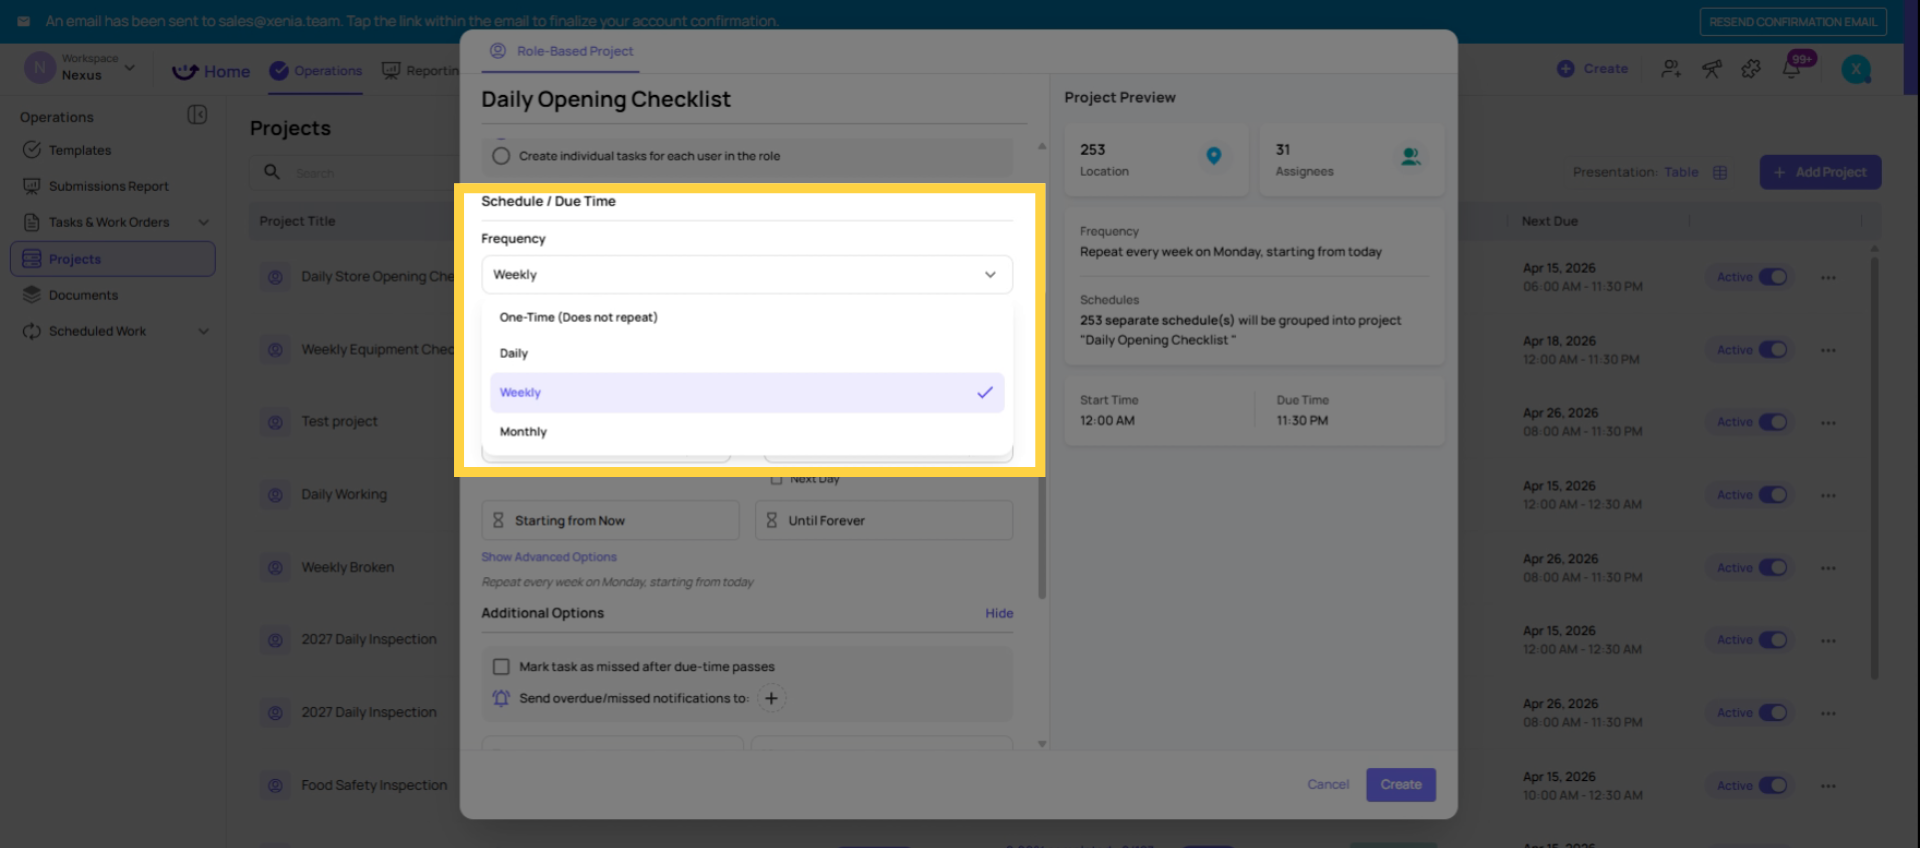
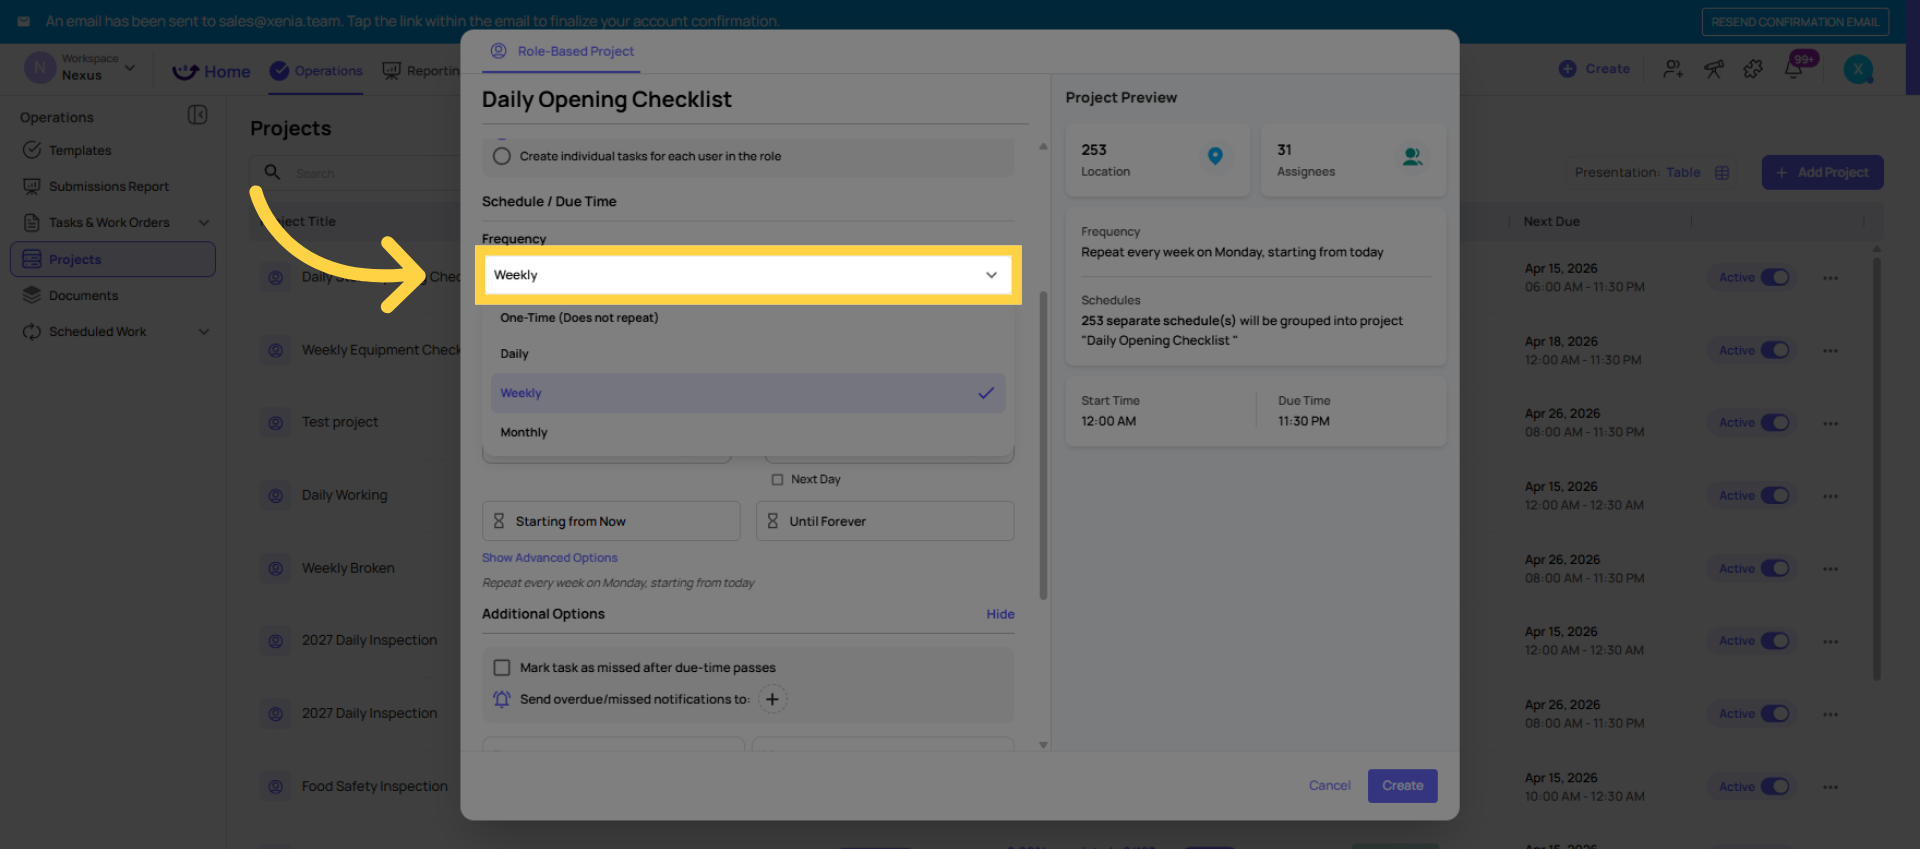
9. Set Task Frequency
Step 6 — Set the Frequency
Frequency: Daily, Weekly, or Monthly
For daily: Tasks are generated every day. Set the days of the week if it shouldn't run on weekends.
For weekly: Select which day(s) of the week. The task appears on those days on the configured schedule.
For monthly: Select which day of the month (e.g., the 1st, the 15th, the last day).
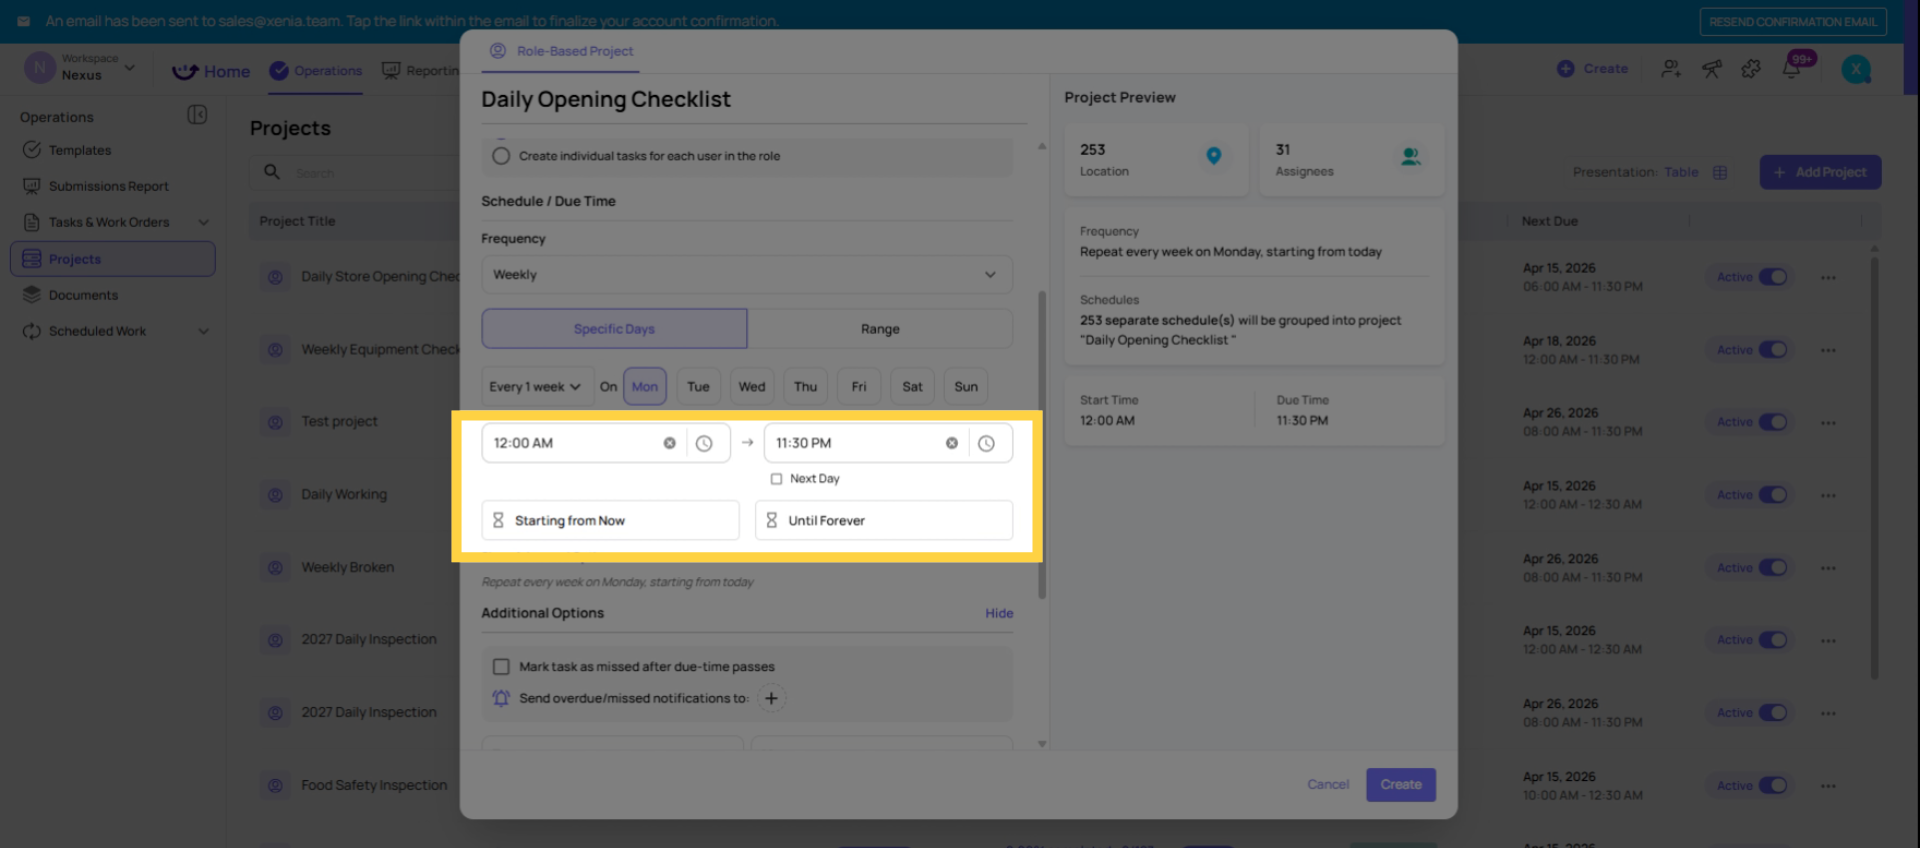
10. Set Task Visibility and Due Times
Step 6 — Set the Schedule
Start Time: When the task becomes visible on the employee's device. This is when they can begin working on it.
Due Time: When the task must be completed by. After this time, the task status changes based on what you configure below.
Tip on time windows: Make the start time before when employees need to start working on it — give them enough runway. A task due at 8:00am that becomes available at 7:45am is a bad experience. A task due at 8:00am that becomes available at 6:30am gives adequate time.
Project Start Date: When the project begins generating tasks. You can set this to start immediately or on a future date.
11. Configure Missed Task Marking
Step 7 — Configure Missed/Overdue Behavior
Mark as Missed after due time: Toggle this on if you want tasks to be locked (cannot be completed) after the due time passes. The task is marked "Missed" and counts as incomplete in reporting.
Toggle this off if you want tasks to remain completable after the due time (they become "Overdue" but not locked — employees can still submit).
General guidance:
- For daily operational checklists with hard deadlines (opening checklist must be done before store opens), turn this ON
- For checklists with flexible windows (a monthly audit where submission a few hours late is acceptable), leave it OFF

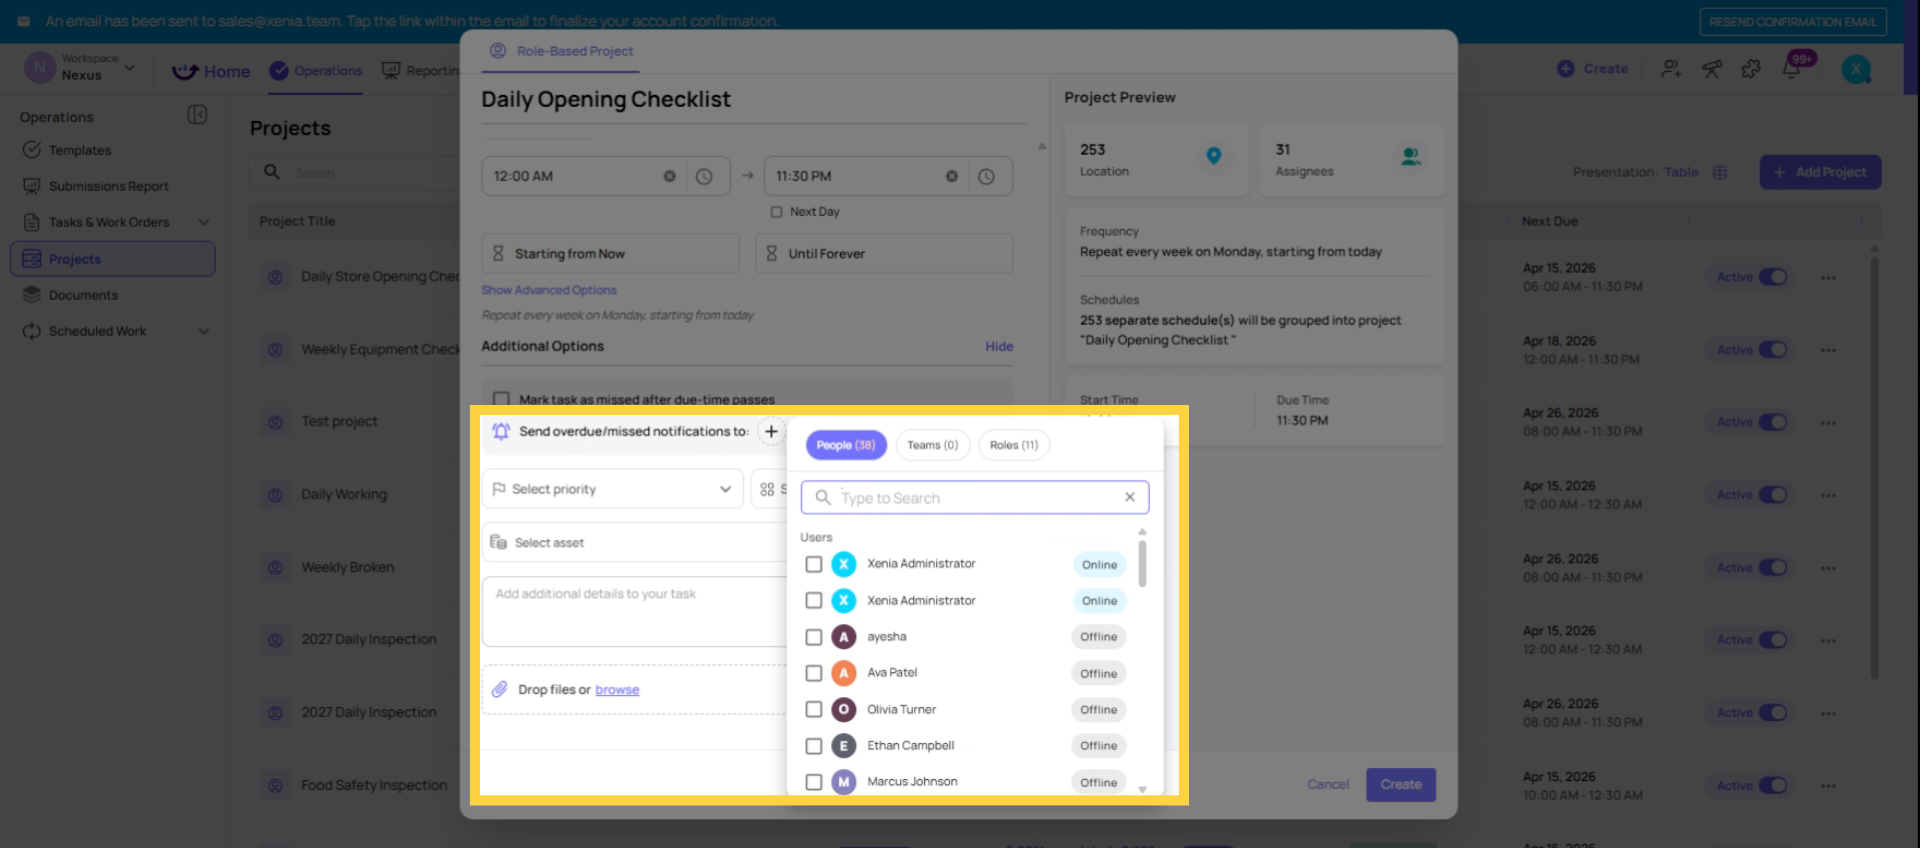
12. Set Overdue Notifications
Step 8 — Set Overdue/Missed Notifications
Add who should be notified when a task is not completed on time.
Use roles, not individuals: If you add a specific person as the notifier, they'll receive notifications for every location in the project — all 50 stores. That's almost never the right configuration.
When you add a role as the notifier, Xenia uses location membership to route the notification. If the District Manager role is listed as the notifier and a task at Store 5 is missed, only the District Manager who has Store 5 in their location membership gets notified — not all District Managers.
This is the correct configuration for multi-location organizations. Role-based notifications scale automatically as you add stores and update location memberships.
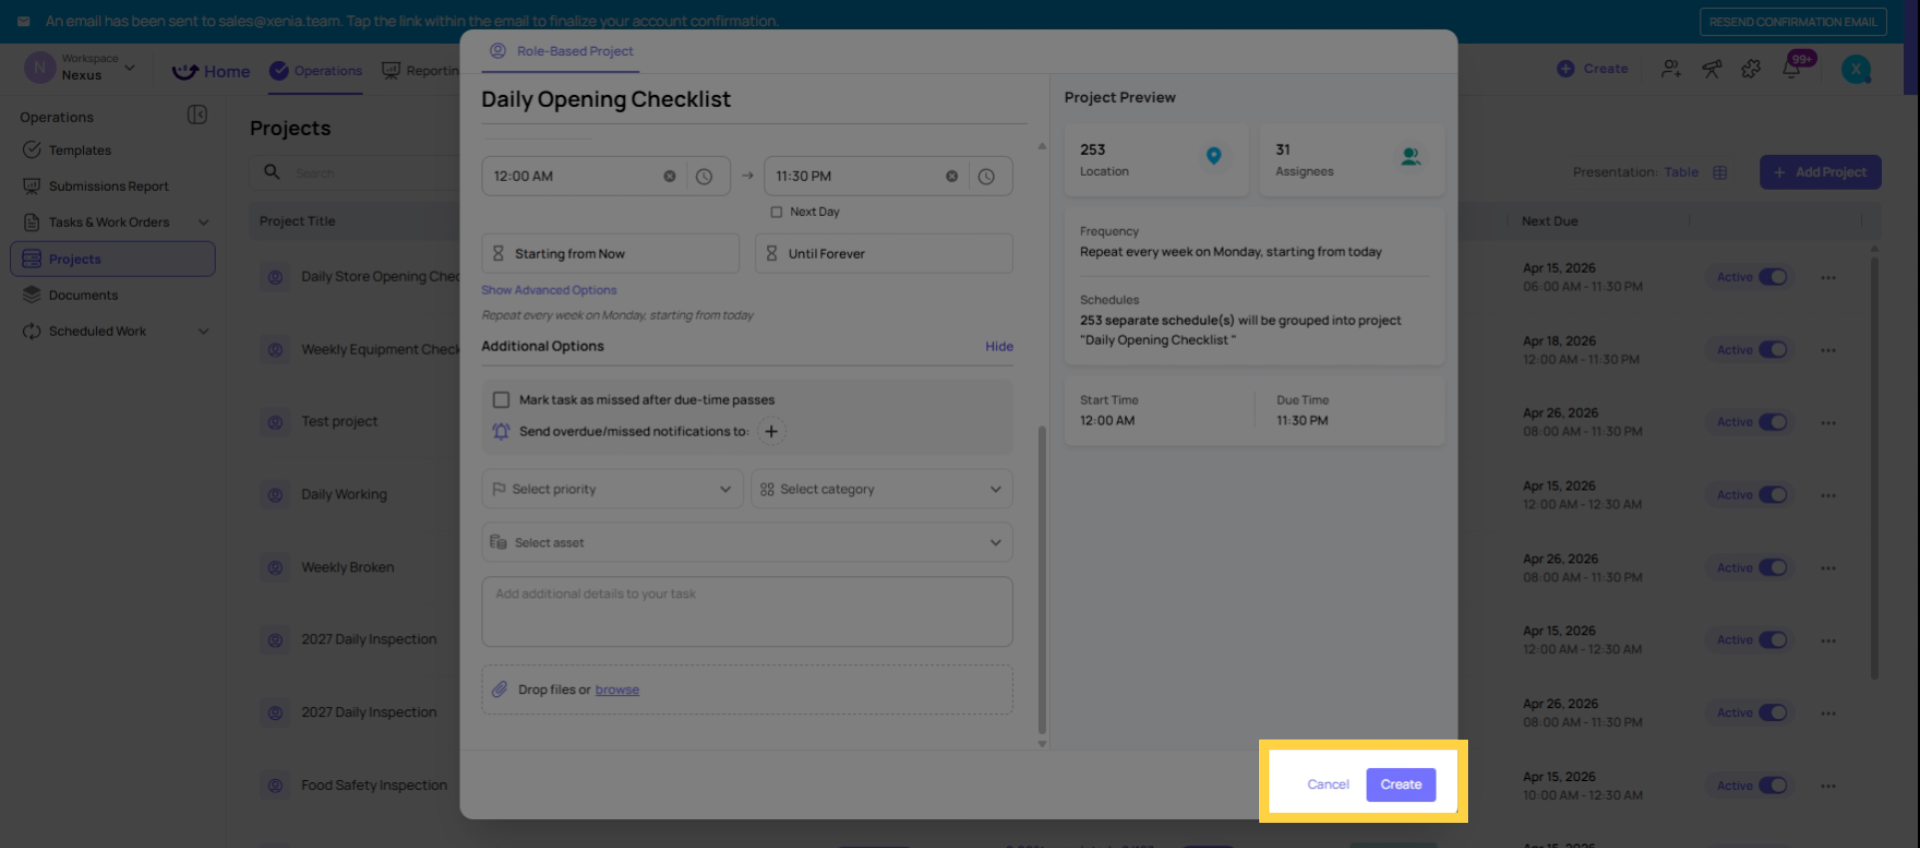
13. Create Project
Step 9 — Create the Project
Click Create. The project is now active. Tasks will start generating at the configured start date and time, timezone-adjusted for each location.
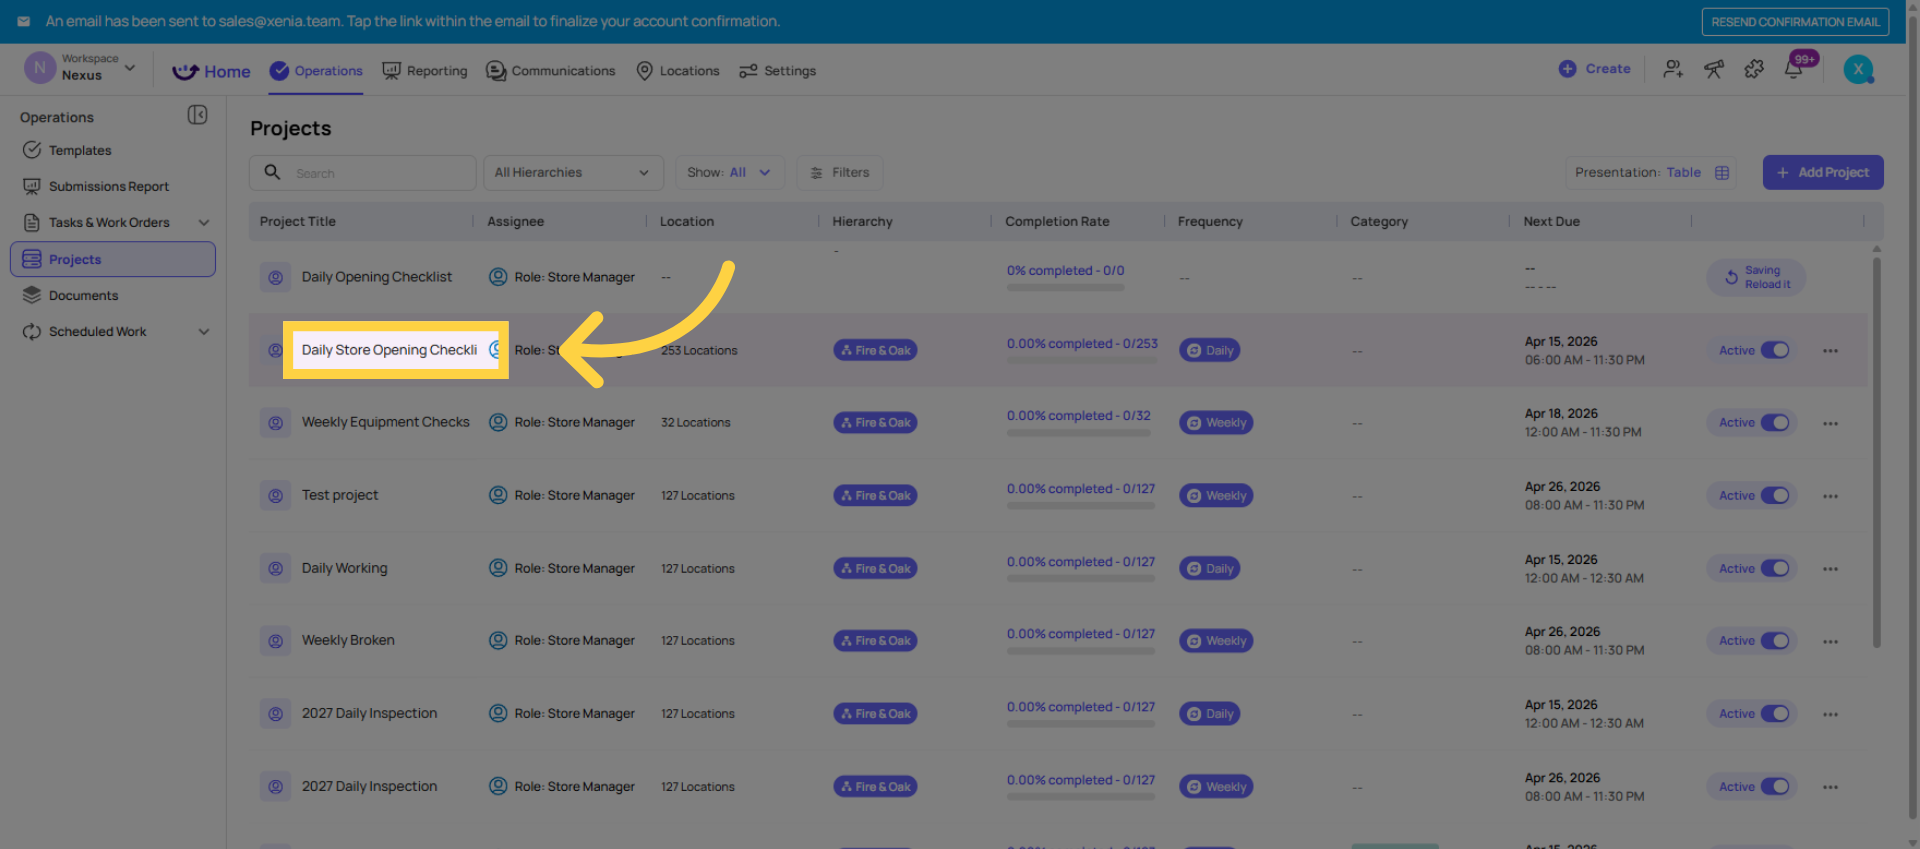
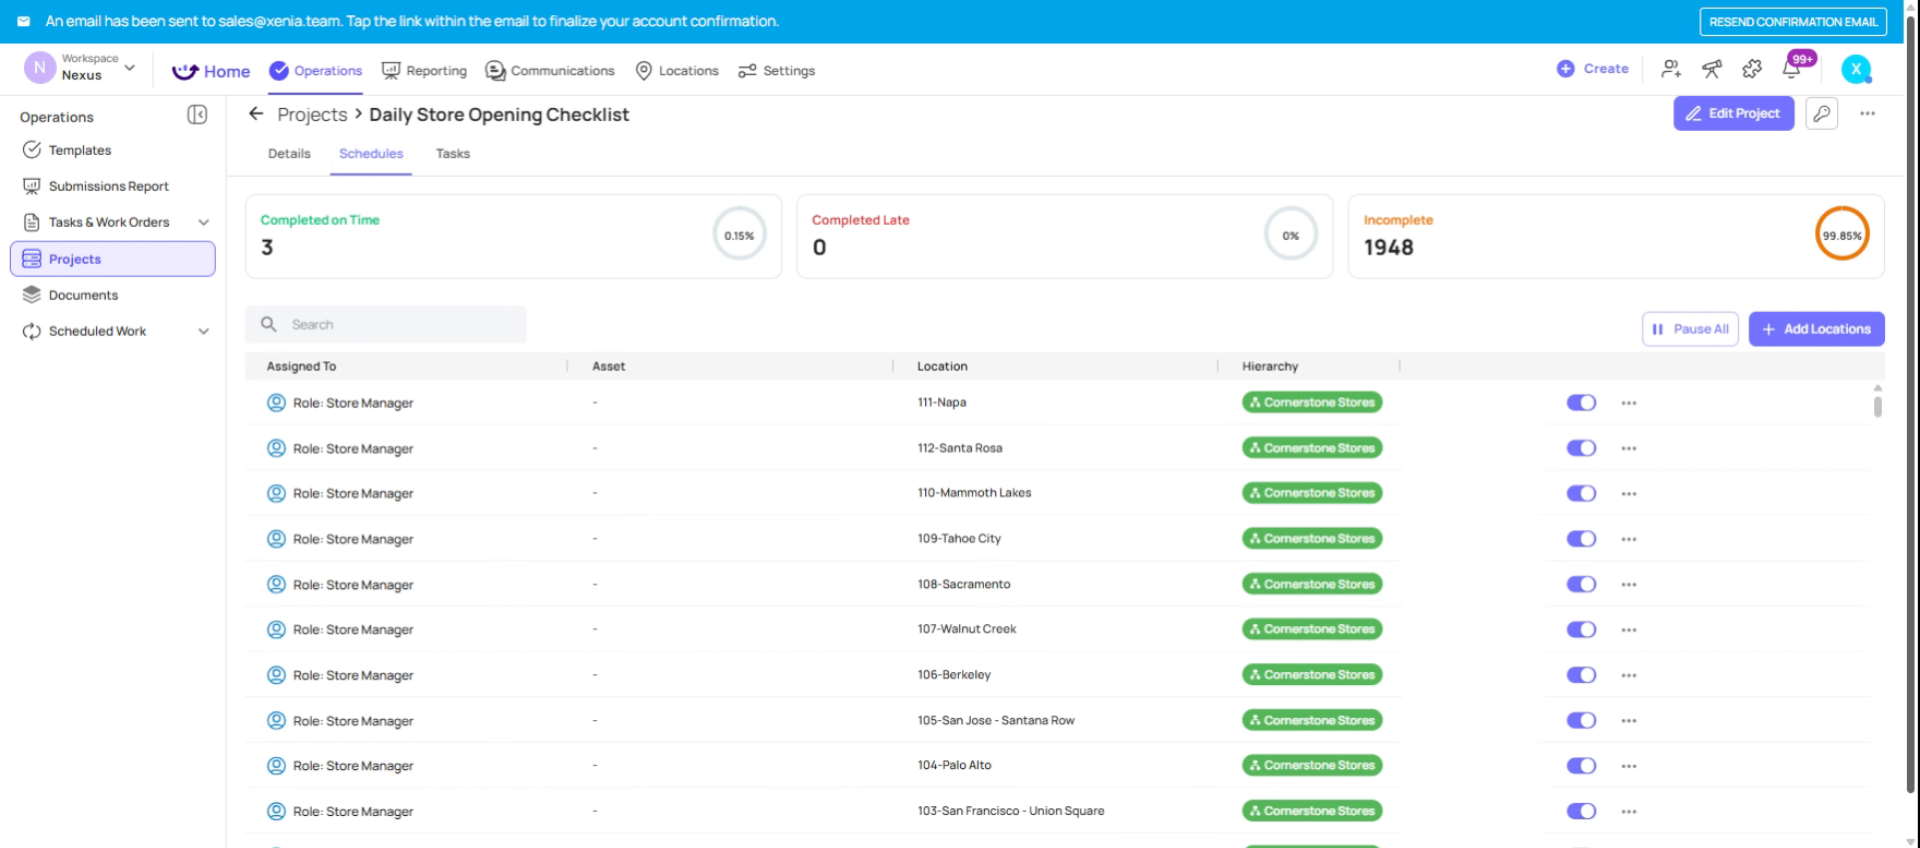
14. Open Project
After creating, click into the project to see:
- The Schedules tab — showing each location and its active schedule
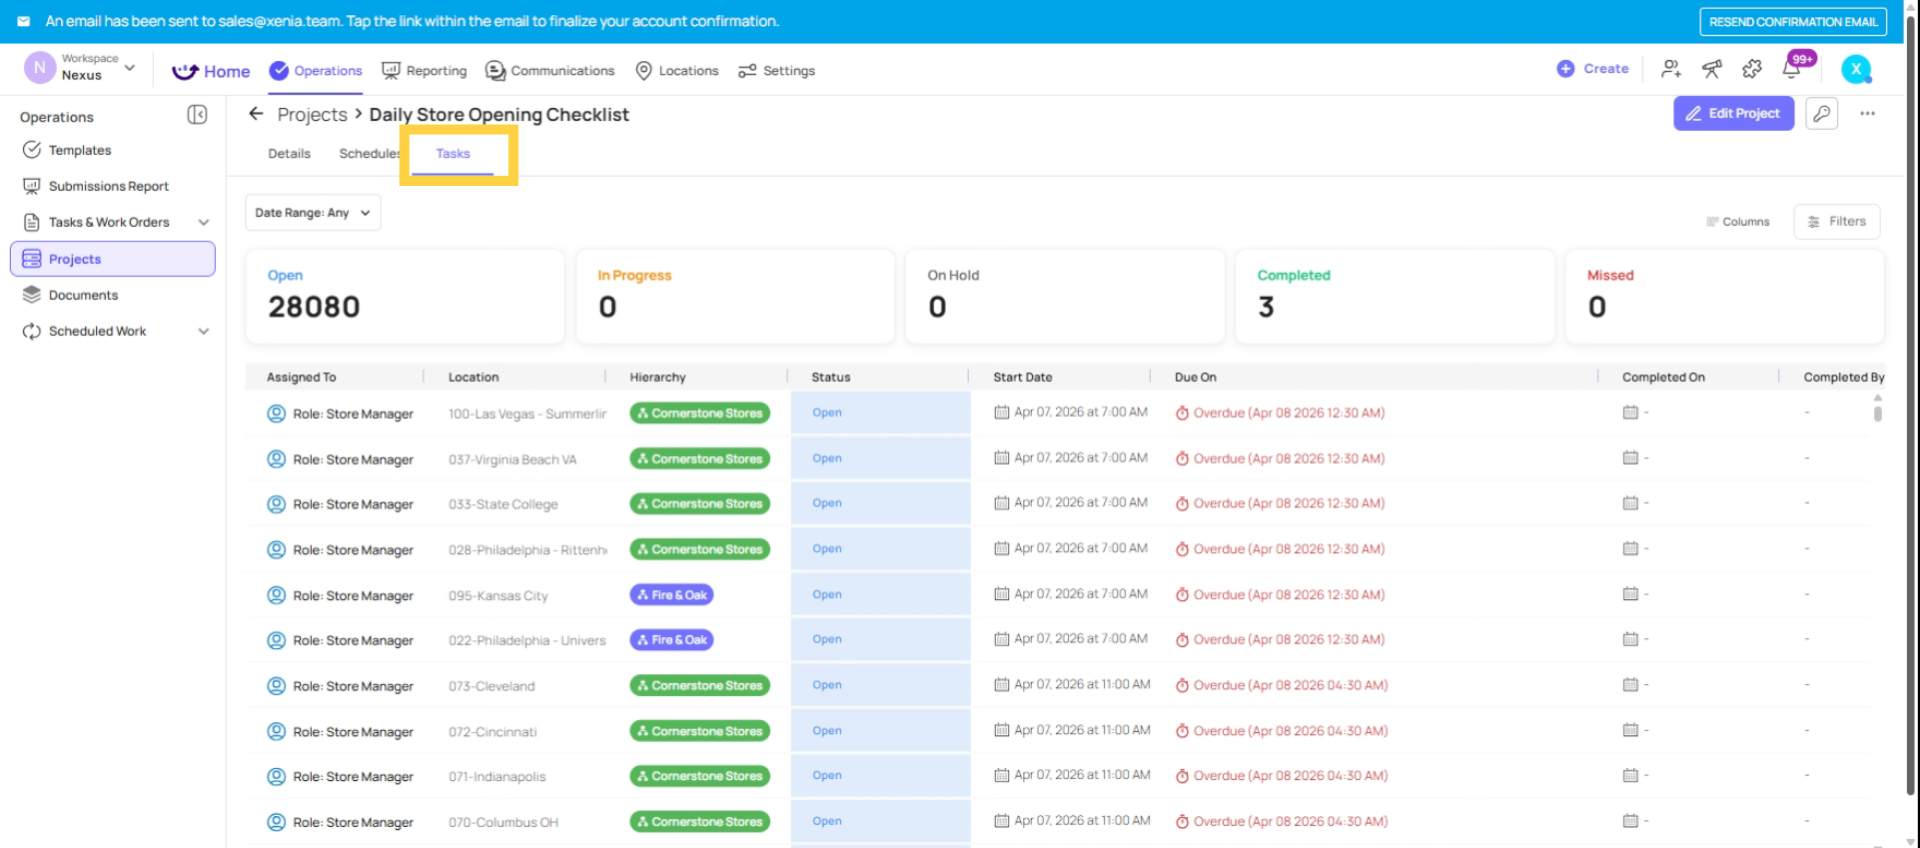
- The Tasks tab — showing all tasks generated so far with completion status
The Metrics — completed on time, late, incomplete counts
 Click Schedules to view task schedules for each location.
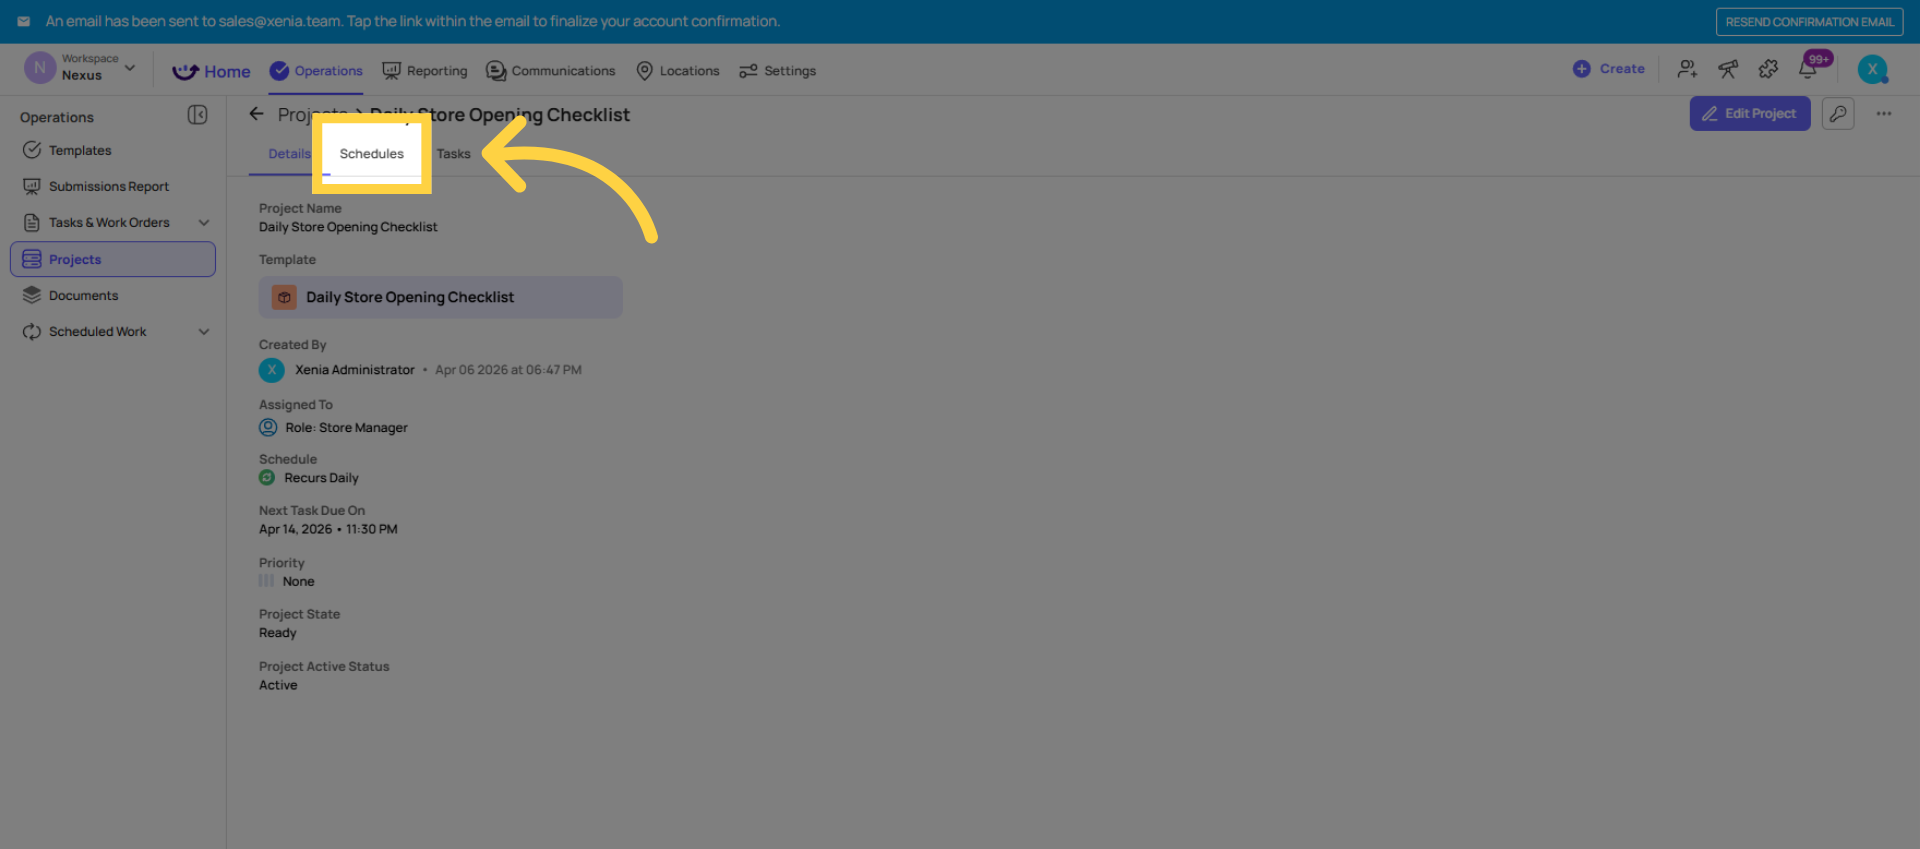 The project is now live. You click into it and check the schedules tab. You will see a schedule entry per location. As soon as the start time hits, the tasks start appearing on employee devices.
 Check back after the first run and look at the task tab to confirm everything is generating correctly.
15. Avoid Common Setup Mistake
Common Project Setup Mistakes
| Mistake | Impact | Fix |
| Using an unpublished template | Template won't appear in the selection dropdown | Publish the template first |
| Setting start time too close to due time | Employees don't have enough time to complete the task | Move start time earlier or extend due time |
| Adding a specific person as notifier instead of a role | That person gets notified for all 50 locations | Remove the individual; add the right role |
| Making tasks Missed immediately if the window is flexible | Employees get locked out when a small delay is acceptable | Turn off Mark as Missed; let them be Overdue instead |
| Selecting "each role member" for a shared store account | Multiple tasks generated per location when only one is needed | Use site-based (one task per location) |
| Not adding any locations | No tasks are generated | Return to project and add locations |
Need Help?
Reach out to our Support Team at Support@xenia.team
Comments
0 comments
Please sign in to leave a comment.