Identify Stakeholder needs
A Read-Only Reporting User is anyone who needs visibility into Xenia's data but has no operational responsibilities within the platform. Common examples:
- Executives / C-suite: CEO, COO, CFO who want to see operational health without managing day-to-day work
- Investors or Franchisors: Stakeholders who need visibility into compliance, completion rates, or quality scores
- Data/Analytics users: Someone whose job is to pull reports and build insights but who isn't part of daily operations
- Finance or Legal observers: People who need access to specific submission records for compliance or audit purposes
- Regional VP: Someone who reviews data across all locations but doesn't personally complete tasks
The defining characteristic: they look at data, they don't create it. They should see dashboards and reports scoped to their locations, but they should never see task assignment flows, template builders, or operational controls.
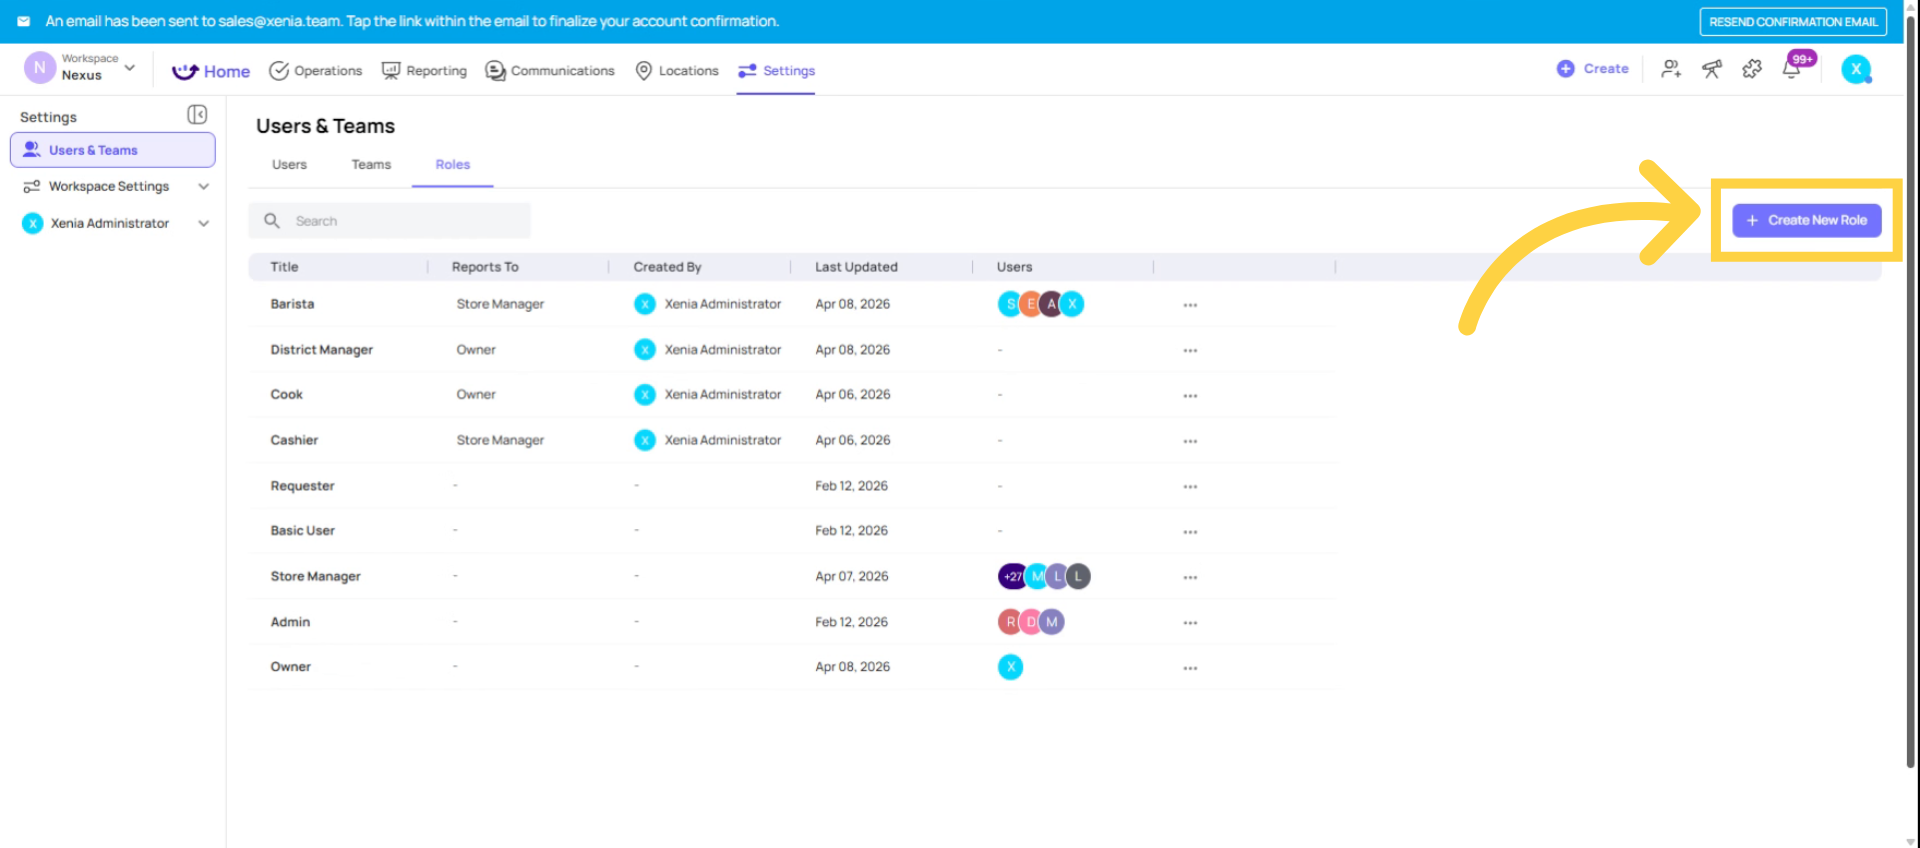
Start Role Creation
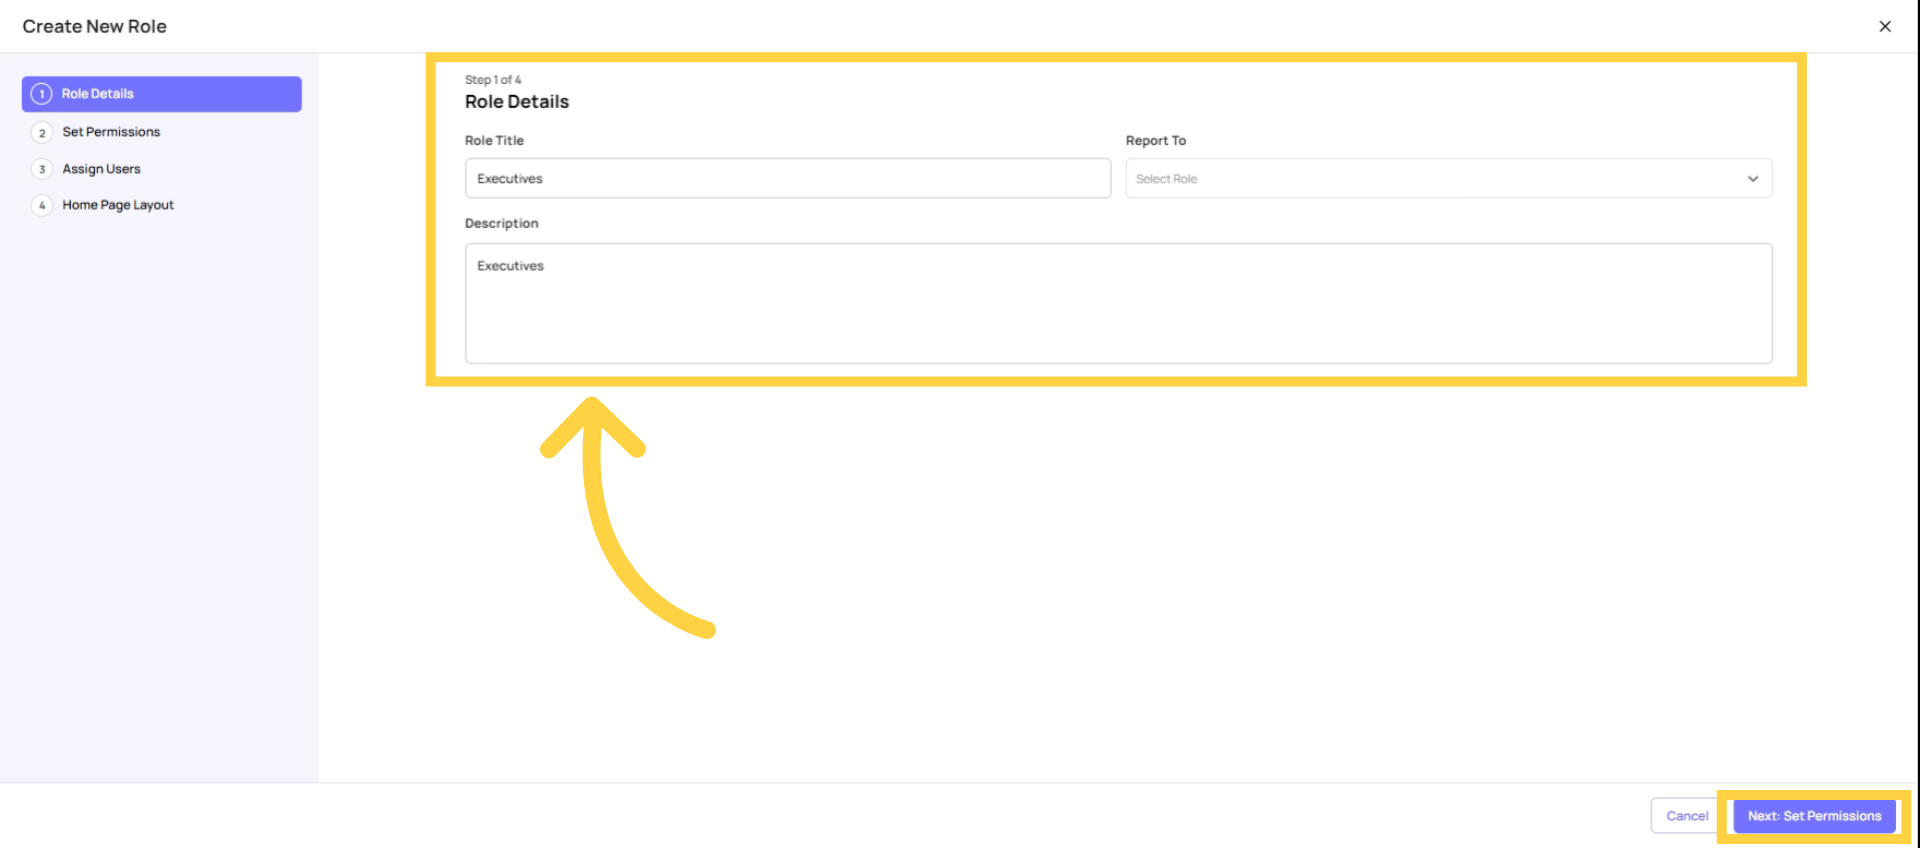
Set Role Title and Description
Role Details:
- Name: "Reporting Viewer," "Executive Viewer," "Analytics User," or your org's preferred title
- Reports To: Leave blank or set to Admin/Owner — this role doesn't participate in operational escalation chains
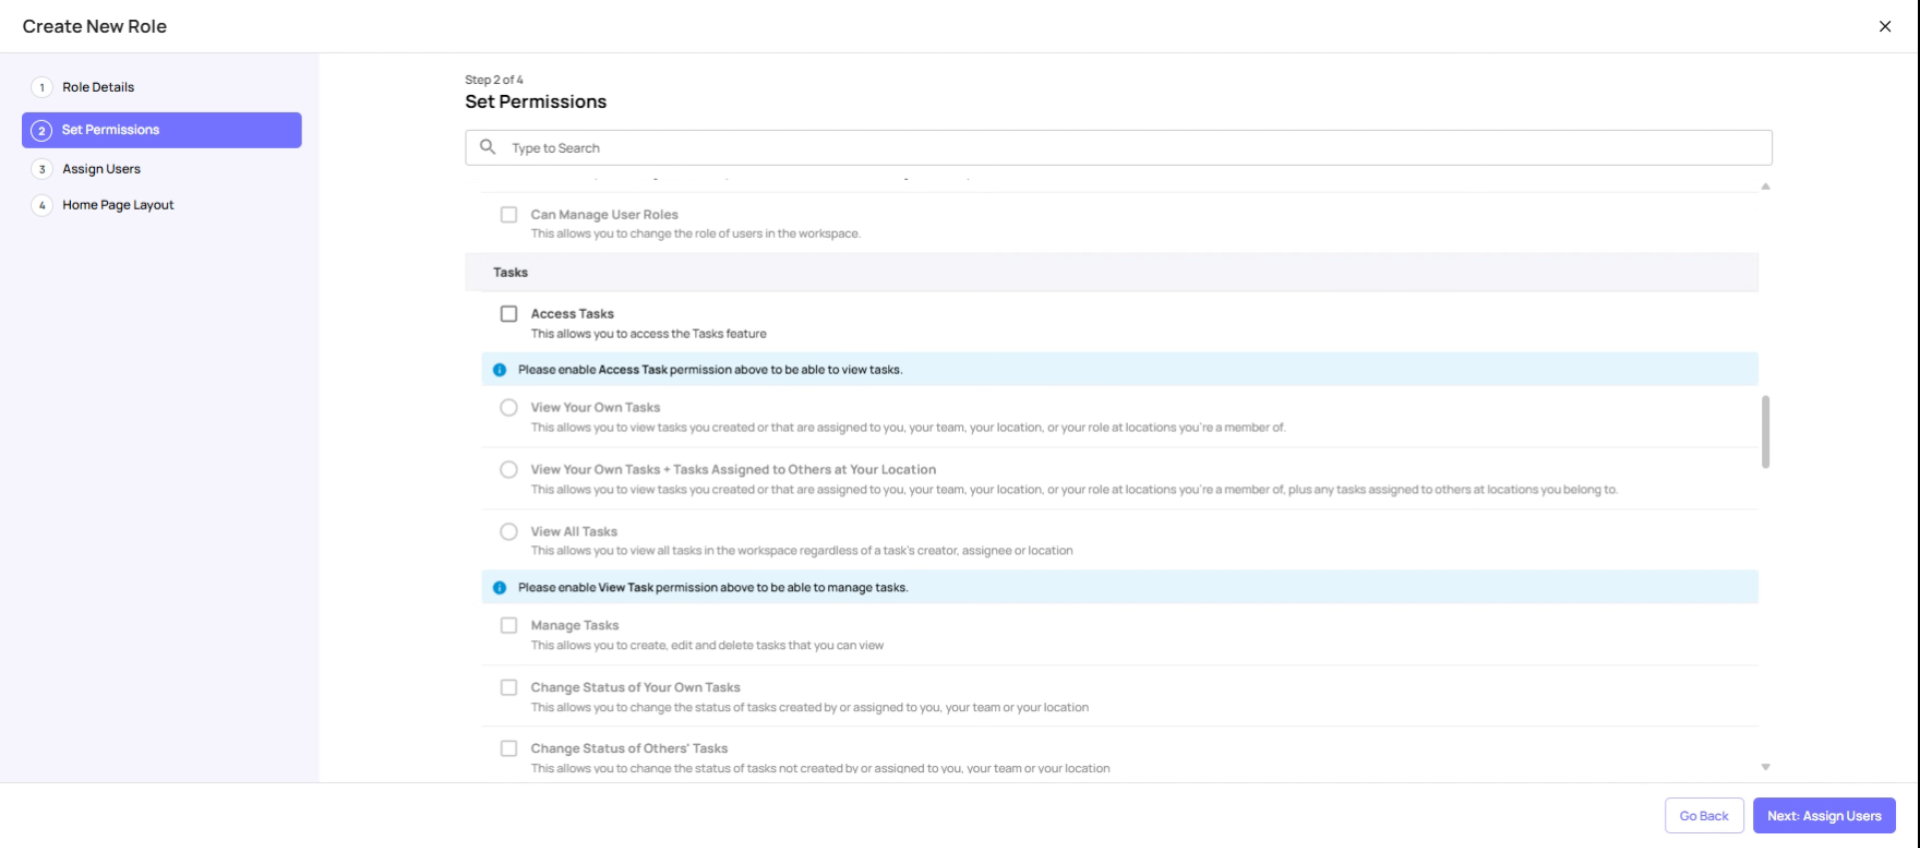
Turn OFF Task and Template Access
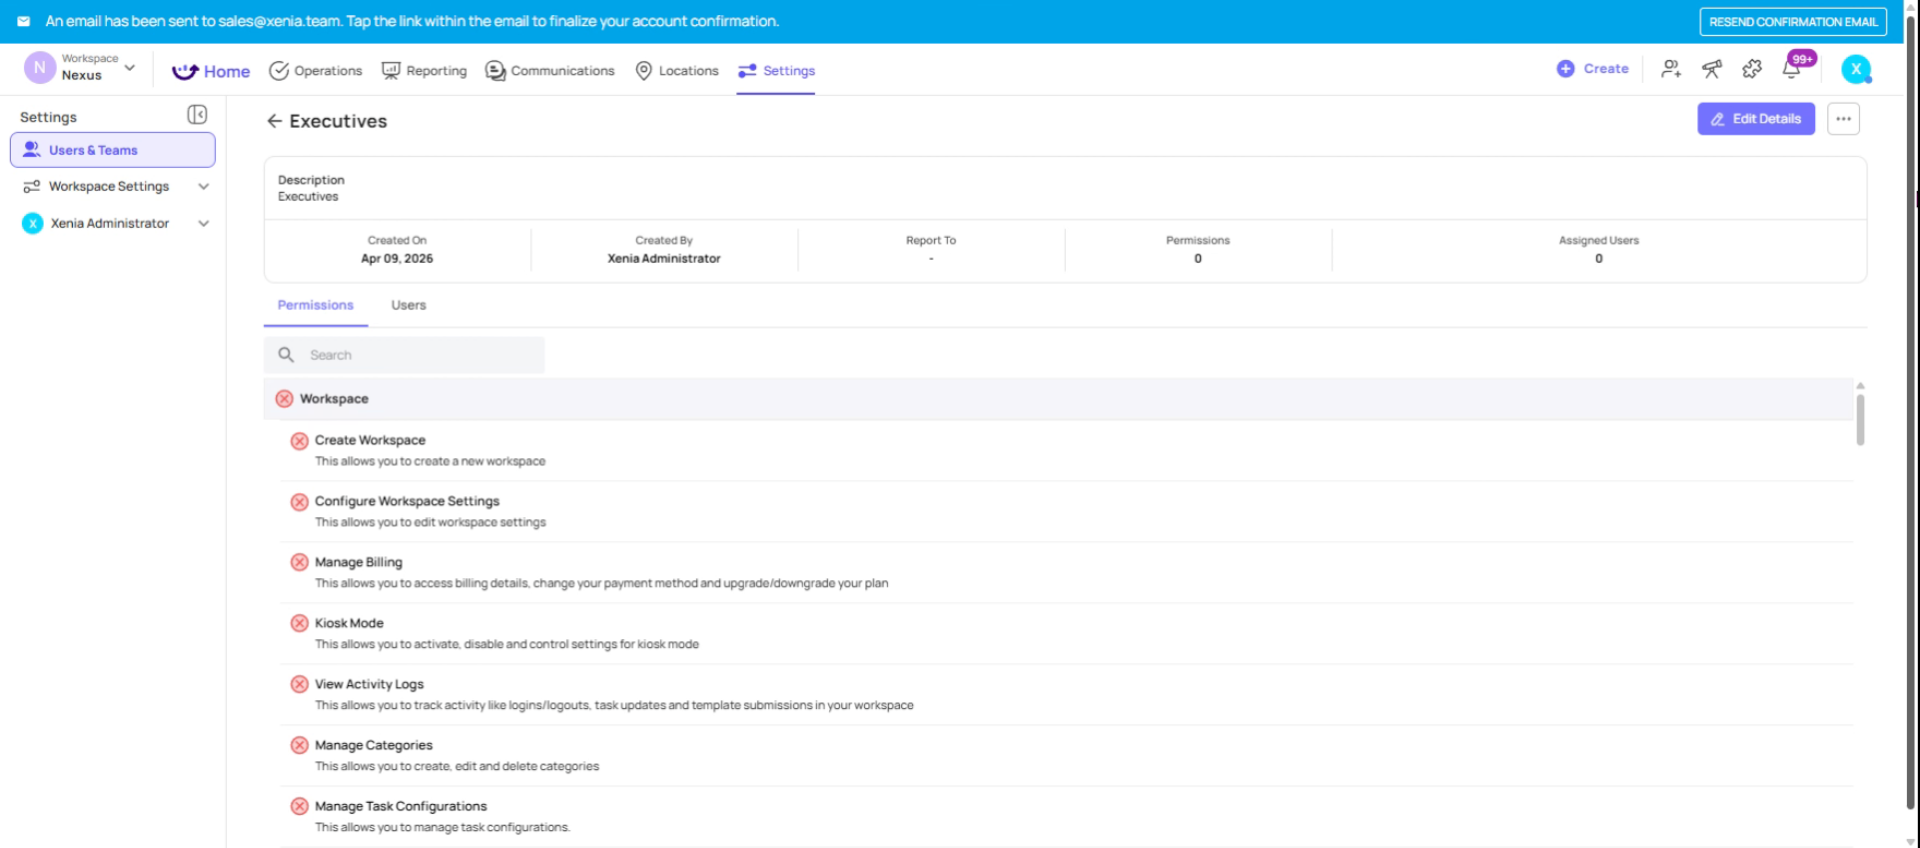
Permissions — turn OFF everything operational:
| Permission | Setting | Why |
| Access Tasks | ❌ OFF | Hides the Tasks tab entirely — they have no task work to do |
| Access Work Orders | ❌ OFF | No work order involvement |
| Access Operations Templates | ❌ OFF | Hides the Templates tab — they don't submit checklists |
| Manage Templates | ❌ OFF | No template editing |
| Add/Remove Users | ❌ OFF | Admin only |
| Manage Teams | ❌ OFF | Admin only |
| Manage Custom Roles | ❌ OFF | Admin only |
| Add/Edit/Delete Locations | ❌ OFF | Admin only |
| Assign to Any User | ❌ OFF | Not applicable |
| Configure Workspace | ❌ OFF | Admin only |
| Manage Billing | ❌ OFF | Admin only |
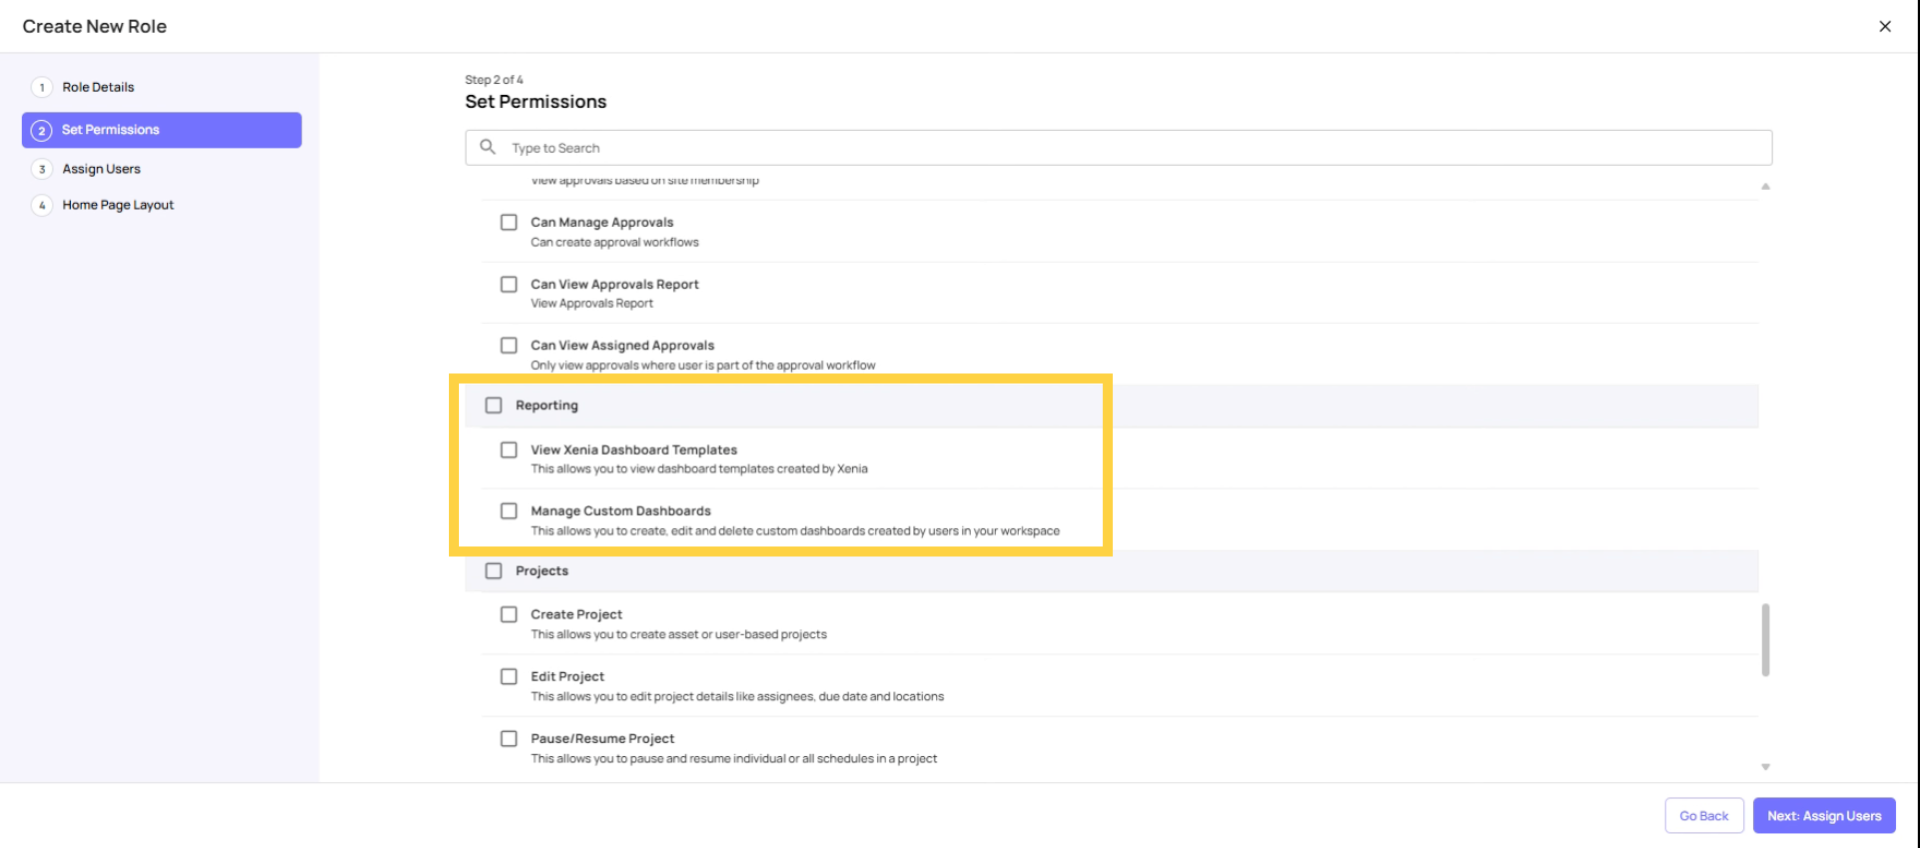
Enable Reporting Permissions
Permissions — turn ON only reporting:
| Permission | Setting | Why |
| View Dashboard Templates (Preset Dashboards) | ✅ ON | Access to Xenia's built-in reporting dashboards |
| Manage Custom Dashboards | ✅ ON (view only) | Access to custom dashboards built for their role |
| Access Locations (view) | ✅ ON (optional) | If they need to see location details in reports |
| Access Announcements | ✅ ON (optional) | If announcements are company-wide |
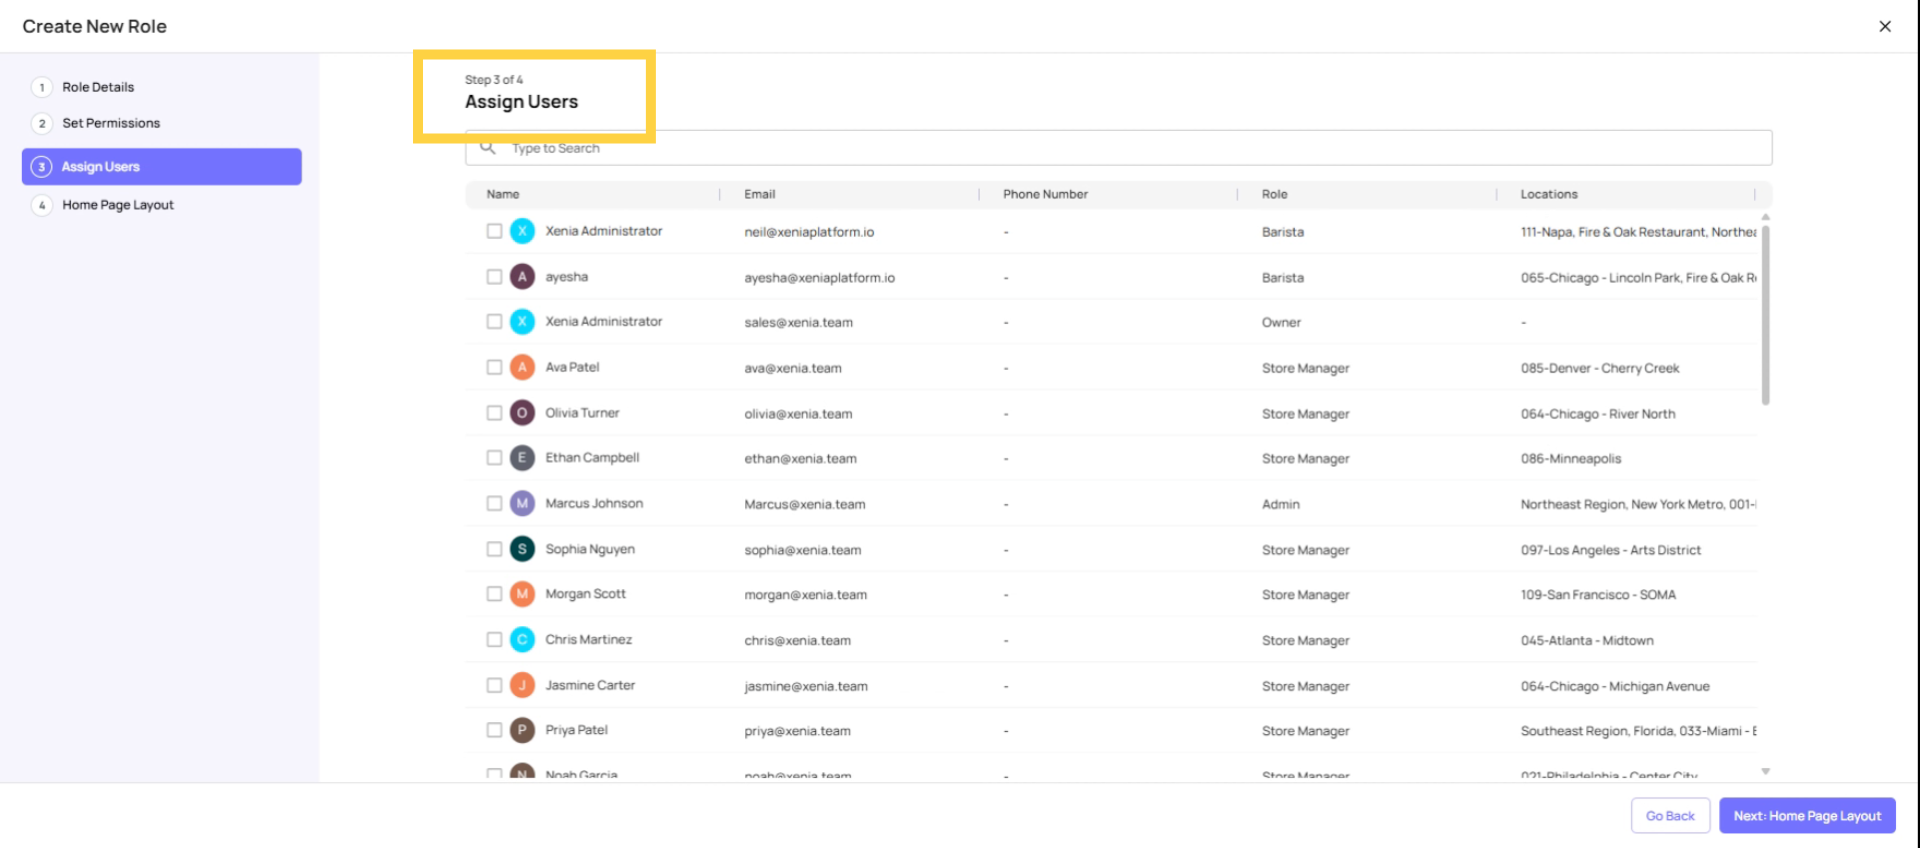
Assign Users
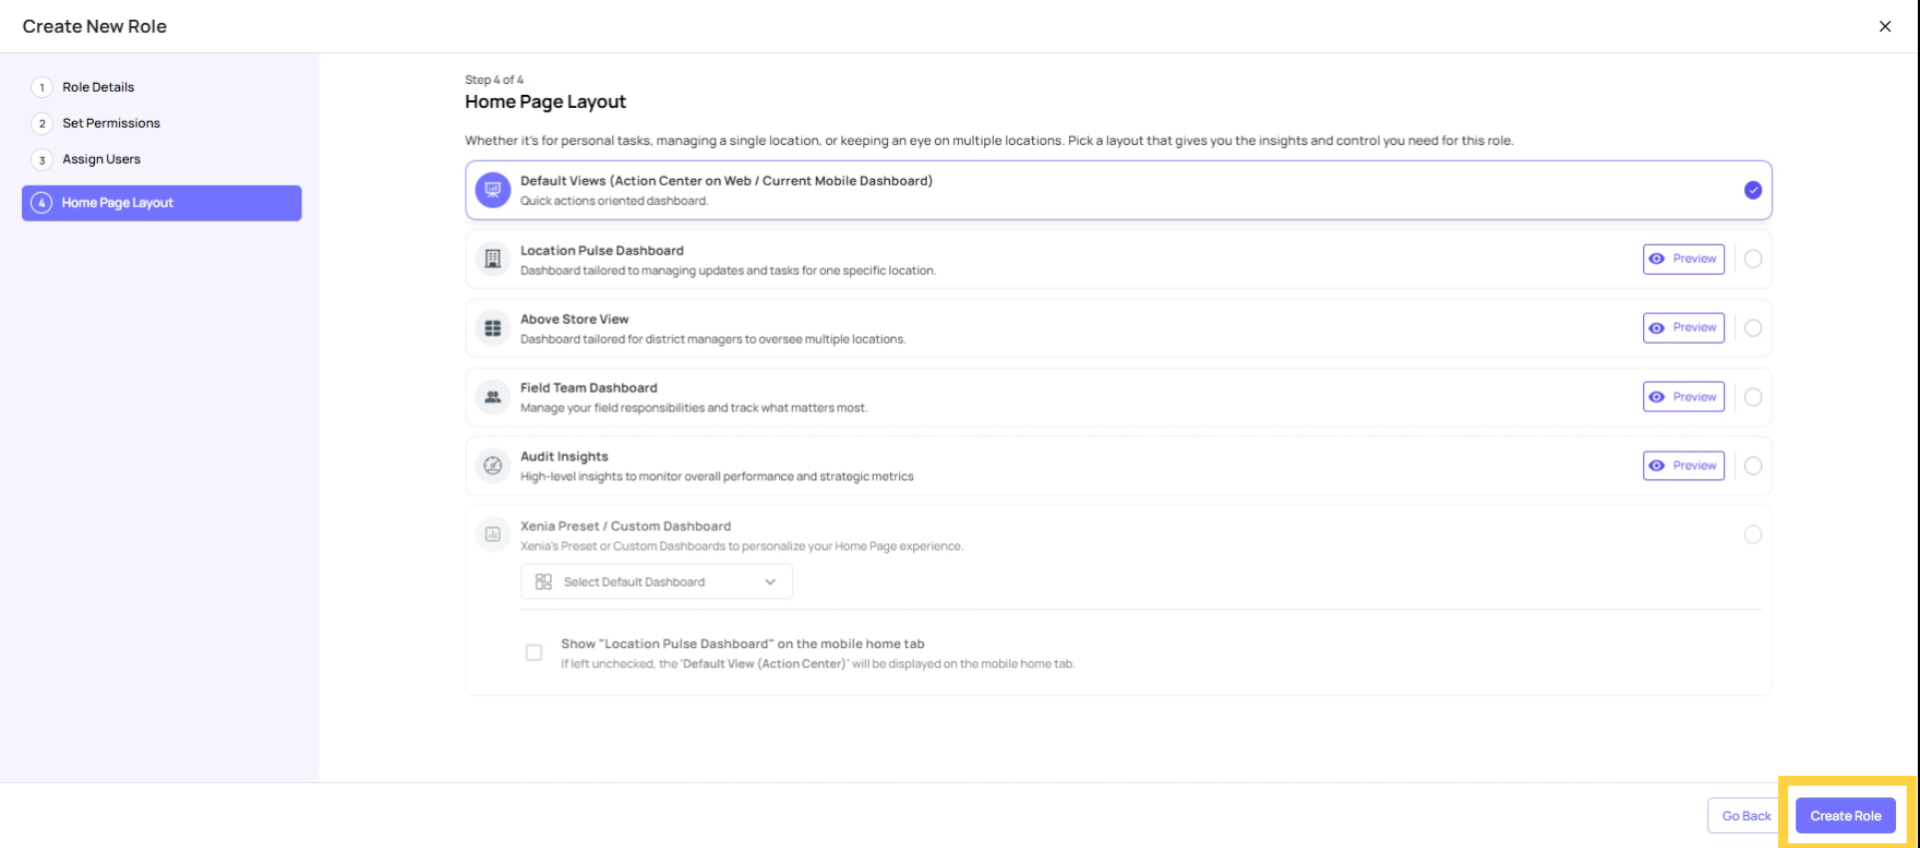
Assign Homepage Layout
Homepage Layout: Select a Custom Dashboard built specifically for this role — a leadership or executive dashboard showing the KPIs they care about (completion rates, flagged items, audit scores, benchmark comparisons across locations). This becomes the first thing they see when they log in.
If you don't have a custom dashboard yet, set it to the Preset Custom Dashboard view and build theirs over time.

Create Role
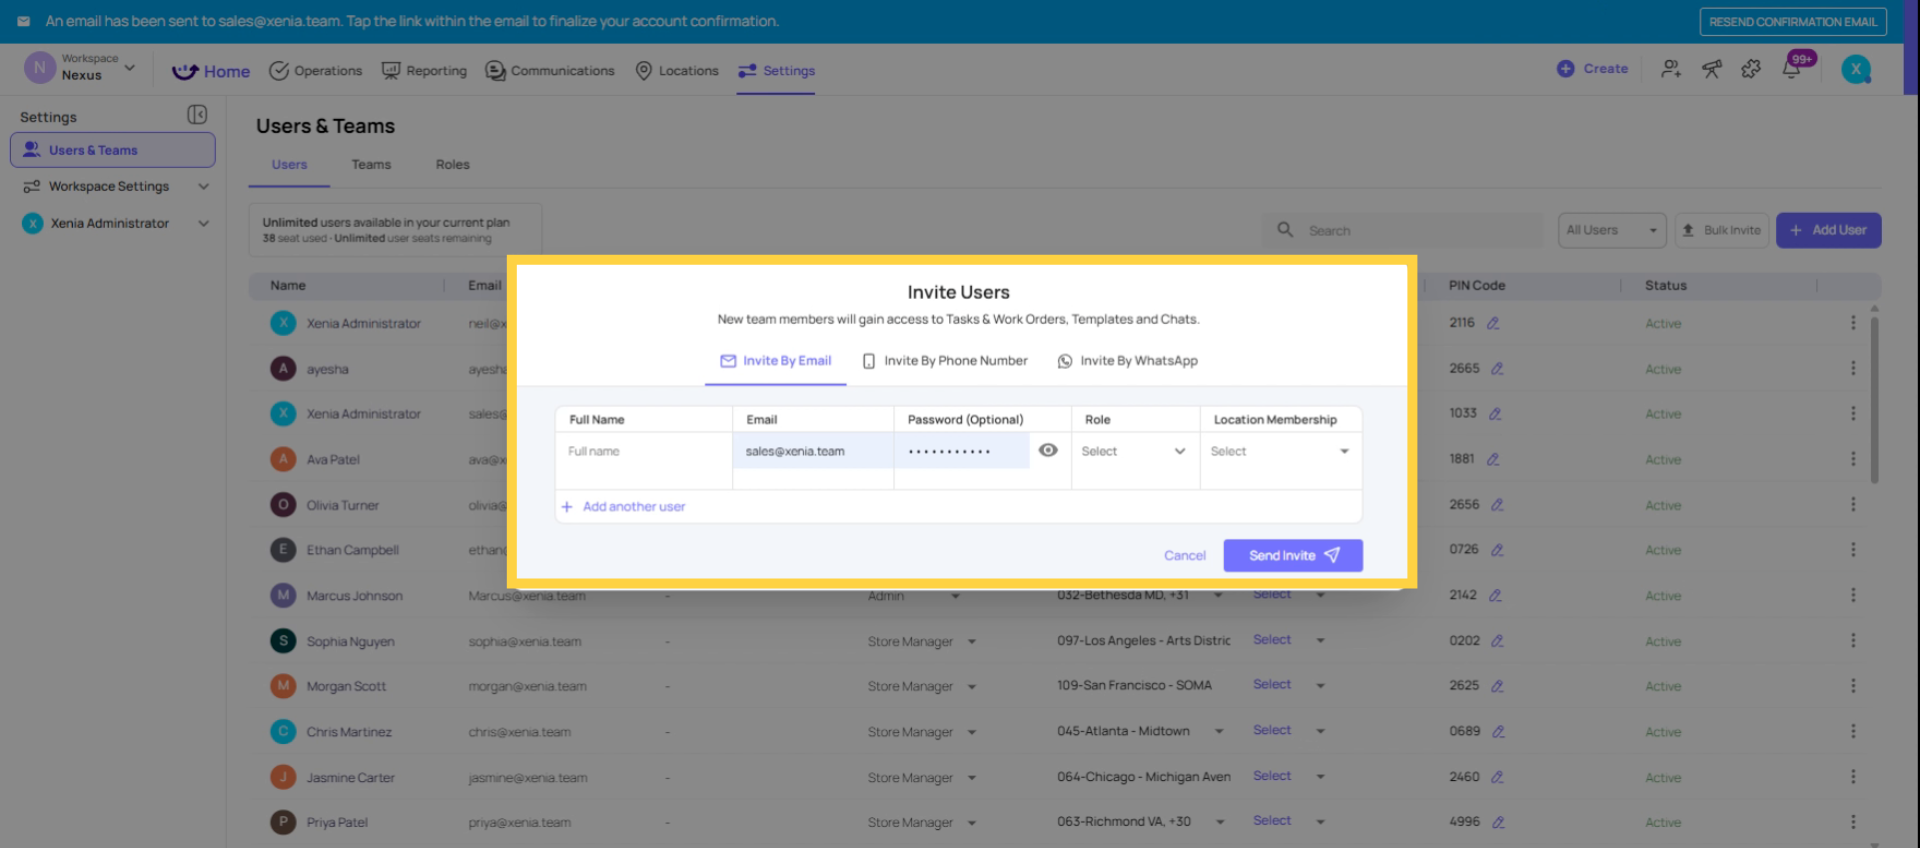
Invite Users after Role Creation
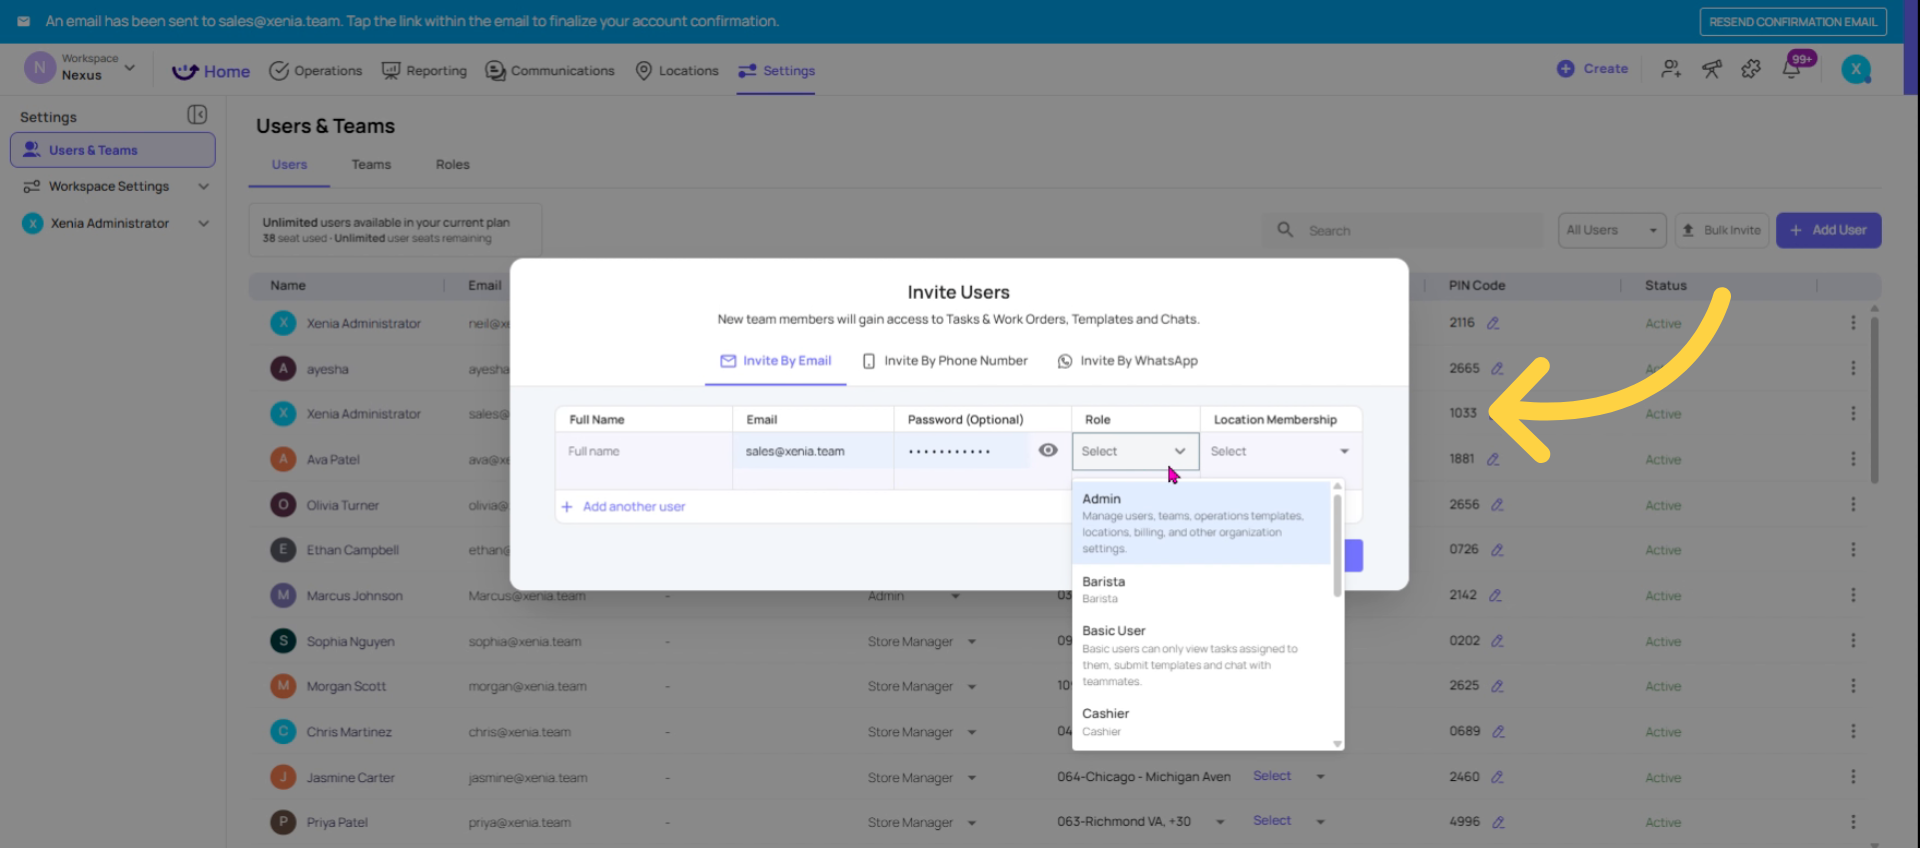
Invite the User and Set Location Membership
- Assign the Reporting Viewer role
- Location Membership: Assign all locations this person needs visibility into
- For an executive who oversees everything: all locations
- For a regional executive: all locations in their region
- For a franchisee: only their franchise locations
Their dashboard will automatically scope to their location membership. One executive will see all data; a regional viewer will see only their region's data — no configuration difference needed between them. Just adjust location membership.
Enable All Submission View
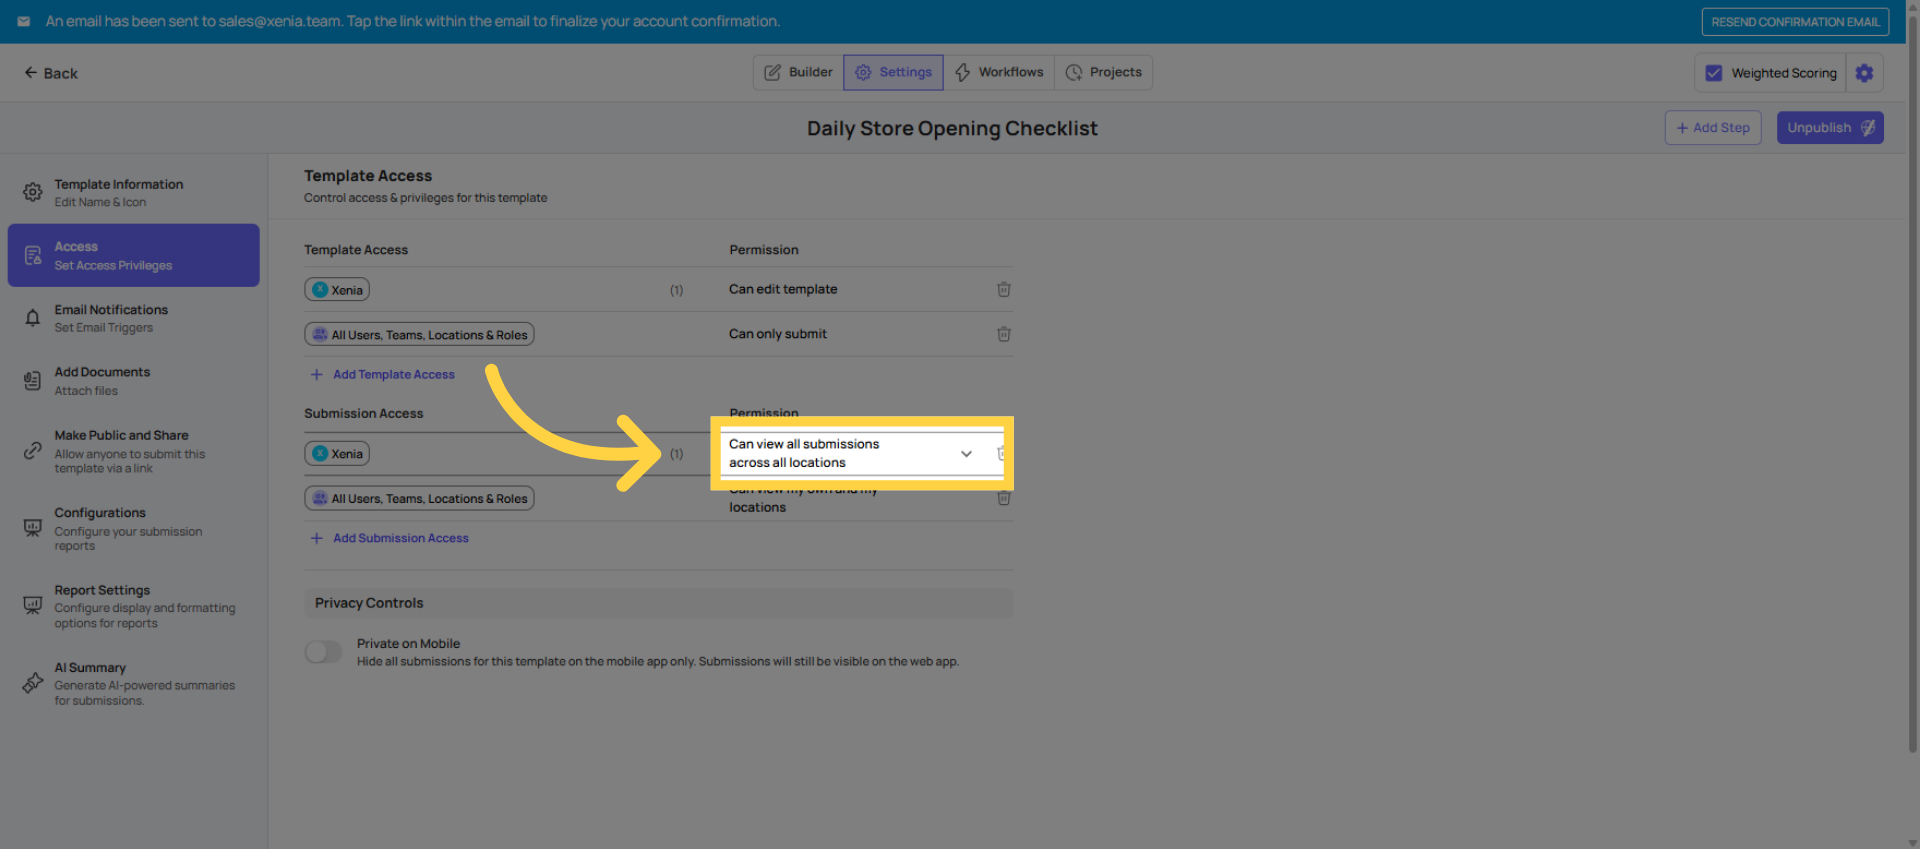
For any template whose submission data this person should be able to see:
Operations → Templates → [Template Name] → Settings → Access → Submission Access
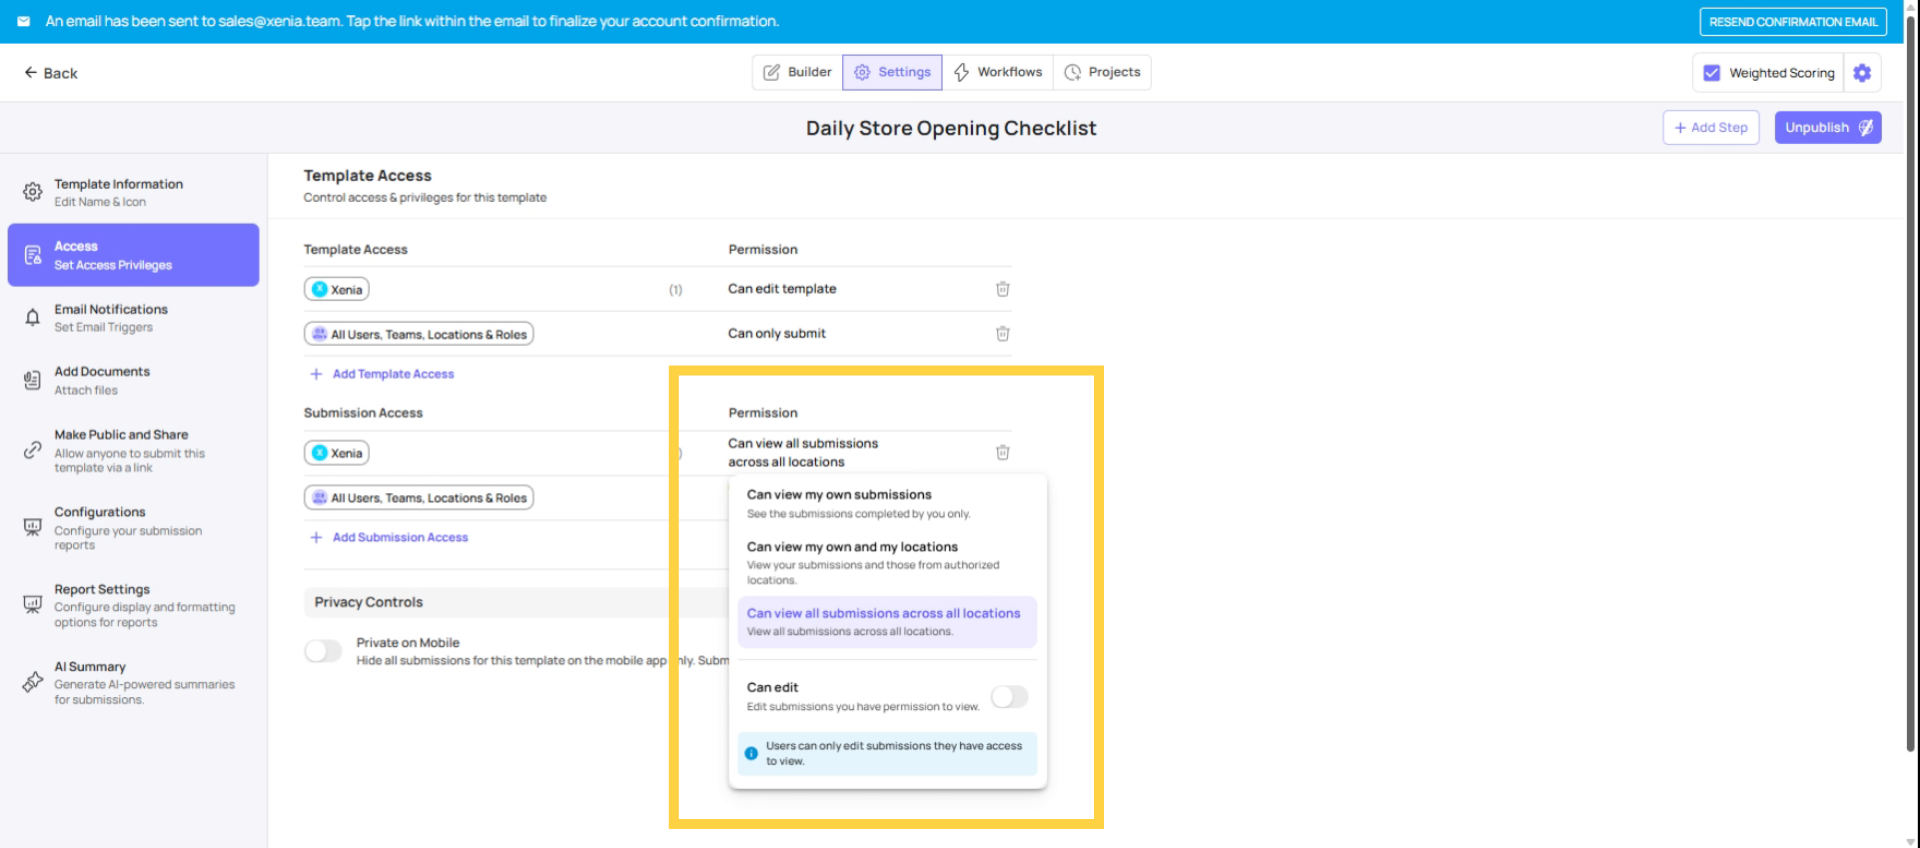
Add the Reporting Viewer role and set it to:
- Tier 3 (View all) if they need cross-org visibility
- Tier 2 (Own + at their locations) if their visibility should be scoped to their location membership
They won't be able to submit the template (their role isn't in Can Submit), but they can view all completed submissions.
Confirm Read-Only User Setup
What the Read-Only Reporting User Sees
When logged in:
- ✅ Their custom dashboard as the home screen — KPIs, completion rates, charts
- ✅ Reporting section — preset dashboards and any custom dashboards assigned to them
- ✅ Submission data from templates where they have Submission Access configured
- ❌ No Tasks tab
- ❌ No Templates tab (no checklist builder or submission form)
- ❌ No Settings, Users, or admin controls
- ❌ No ability to create, edit, or change anything
It's a clean, read-only view of operational health scoped to exactly the locations they oversee.
Use Cases for Reporting Role
The most common error when setting up reporting users is accidentally leaving operational permissions on — giving them Access Tasks or Access Templates out of habit. This adds confusing empty tabs (the user has no tasks to see, so Tasks just shows nothing) and can allow accidental submissions.
Keep it clean: reporting users get reporting permissions only. Turn off every operational permission.
Need Help?
Reach out to our team at support@xenia.team
Comments
0 comments
Please sign in to leave a comment.