Understand District Manager Setup Importance
A District Manager (DM) — also called Area Manager, Field Manager, or Regional Manager in different orgs — has a distinct set of needs:
- Visibility across multiple locations: They need to see tasks, completion rates, and submission data from all stores in their district — not just one store
- No visibility outside their district: They should not see data from other districts they don't manage
- Management-level oversight: They need to see what their store-level teams are doing, not just their own assignments
- Actionable home screen: When they open Xenia, they need a multi-location overview, not a single-store task list
- No template editing: They shouldn't be modifying checklists — that's admin work
- Reporting access: They need dashboards and submission reports scoped to their district
The right setup makes a DM's Xenia experience a clean operational oversight tool. The wrong setup gives them either too little (they can only see one store) or too much (they see data from across the whole org).
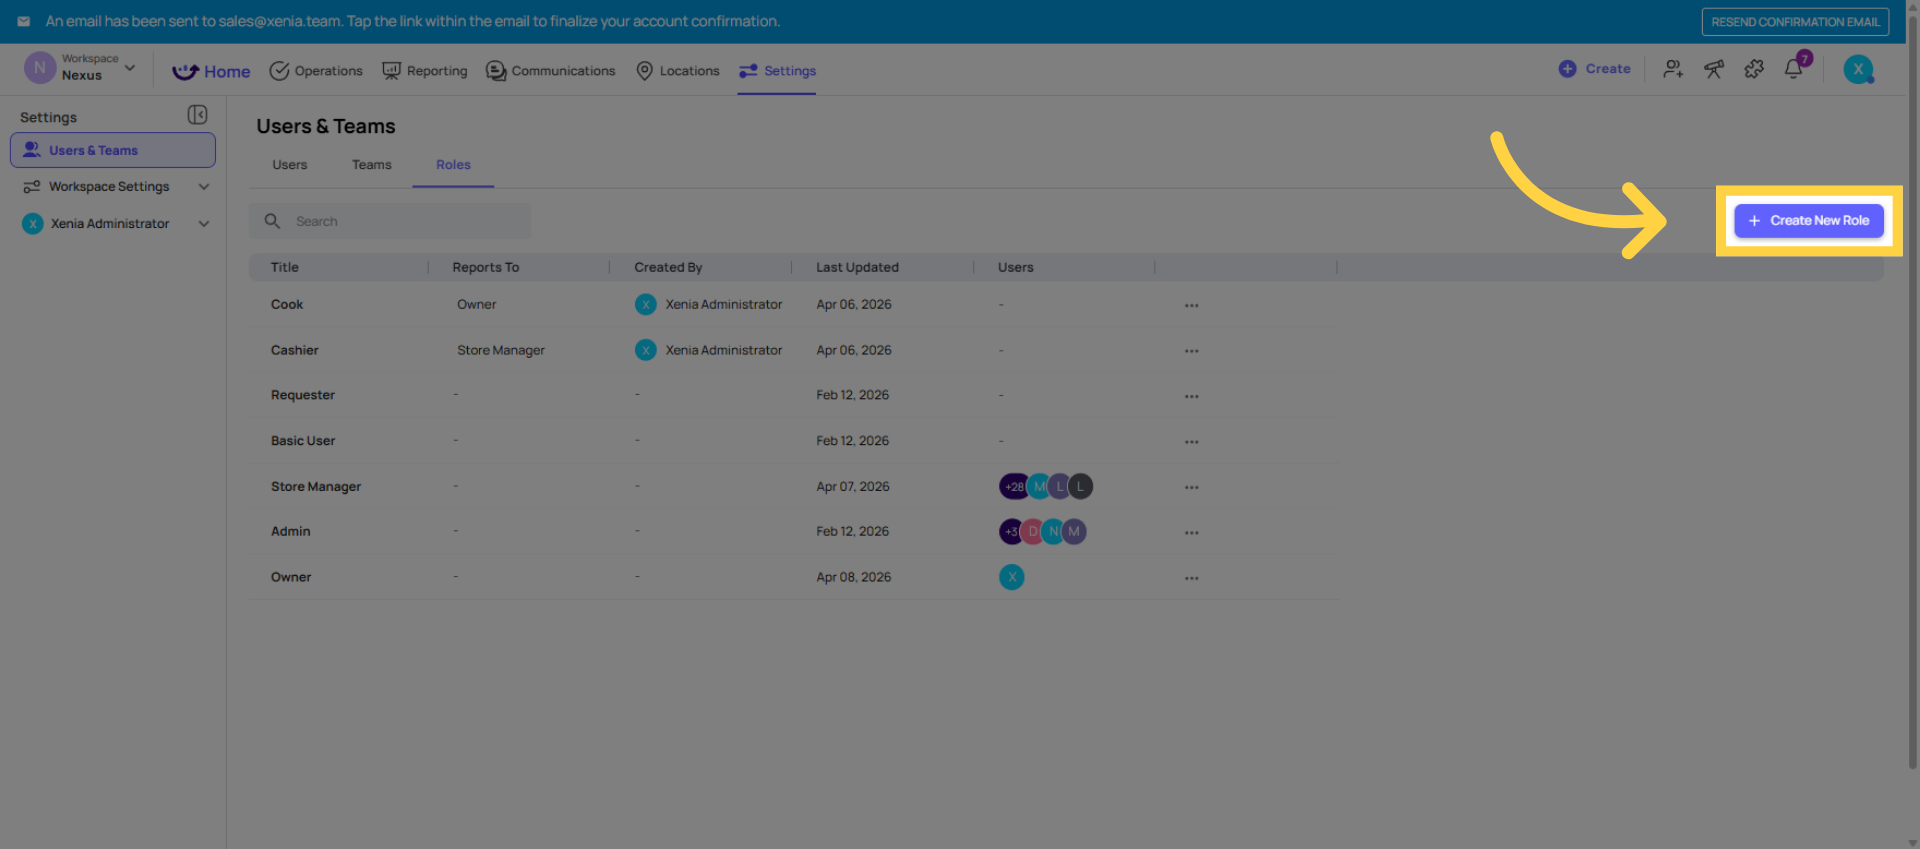
Create New Role
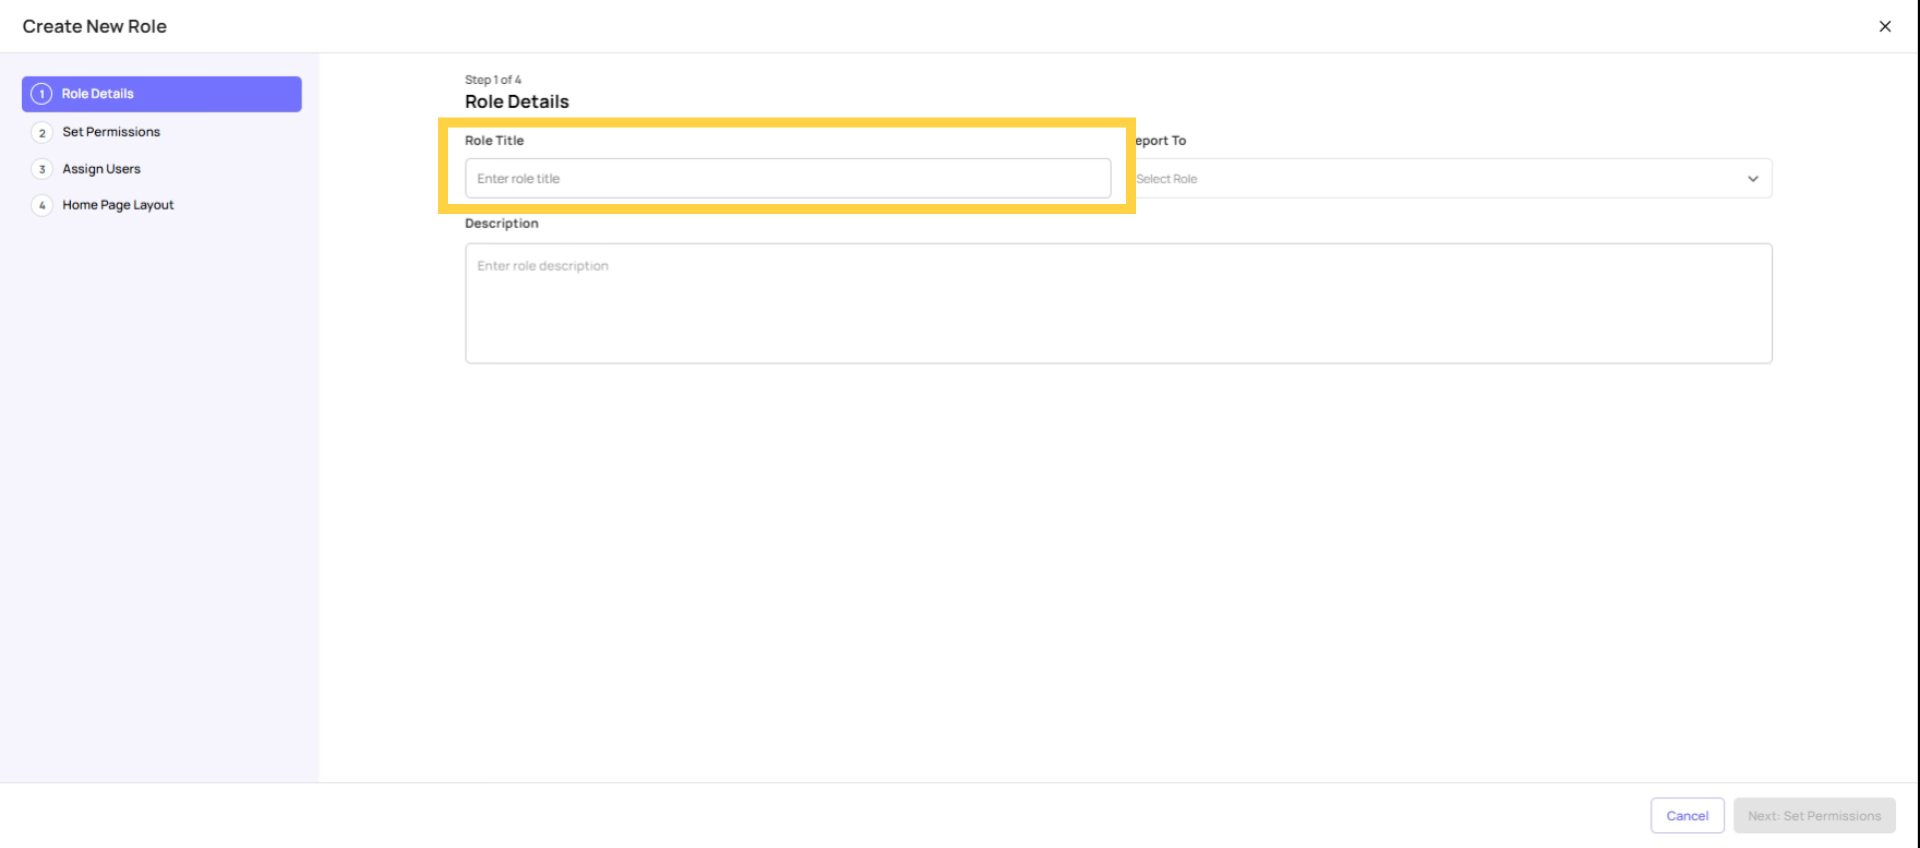
Name the Role
Role Details:
Name: "District Manager" (use your org's actual title — Area Manager, Territory Manager, etc.)
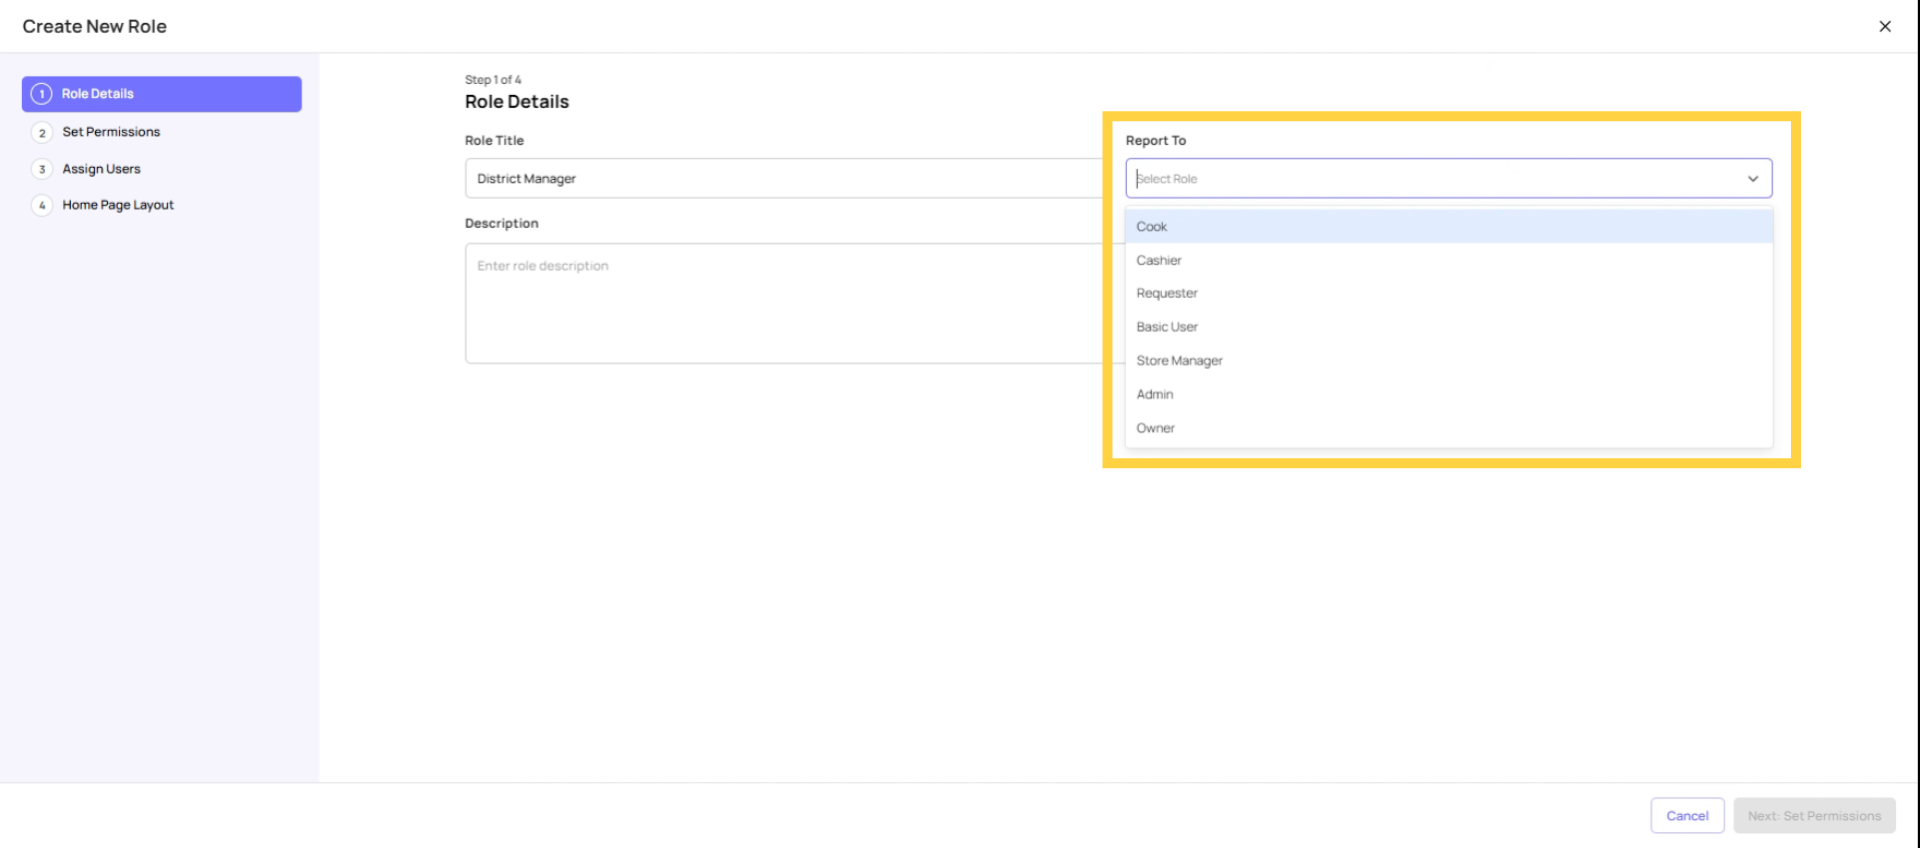
Set Reports to Field
Role Details:
Reports To: Regional Director or VP of Operations (whoever is above the DM in your hierarchy — this enables escalation notifications)
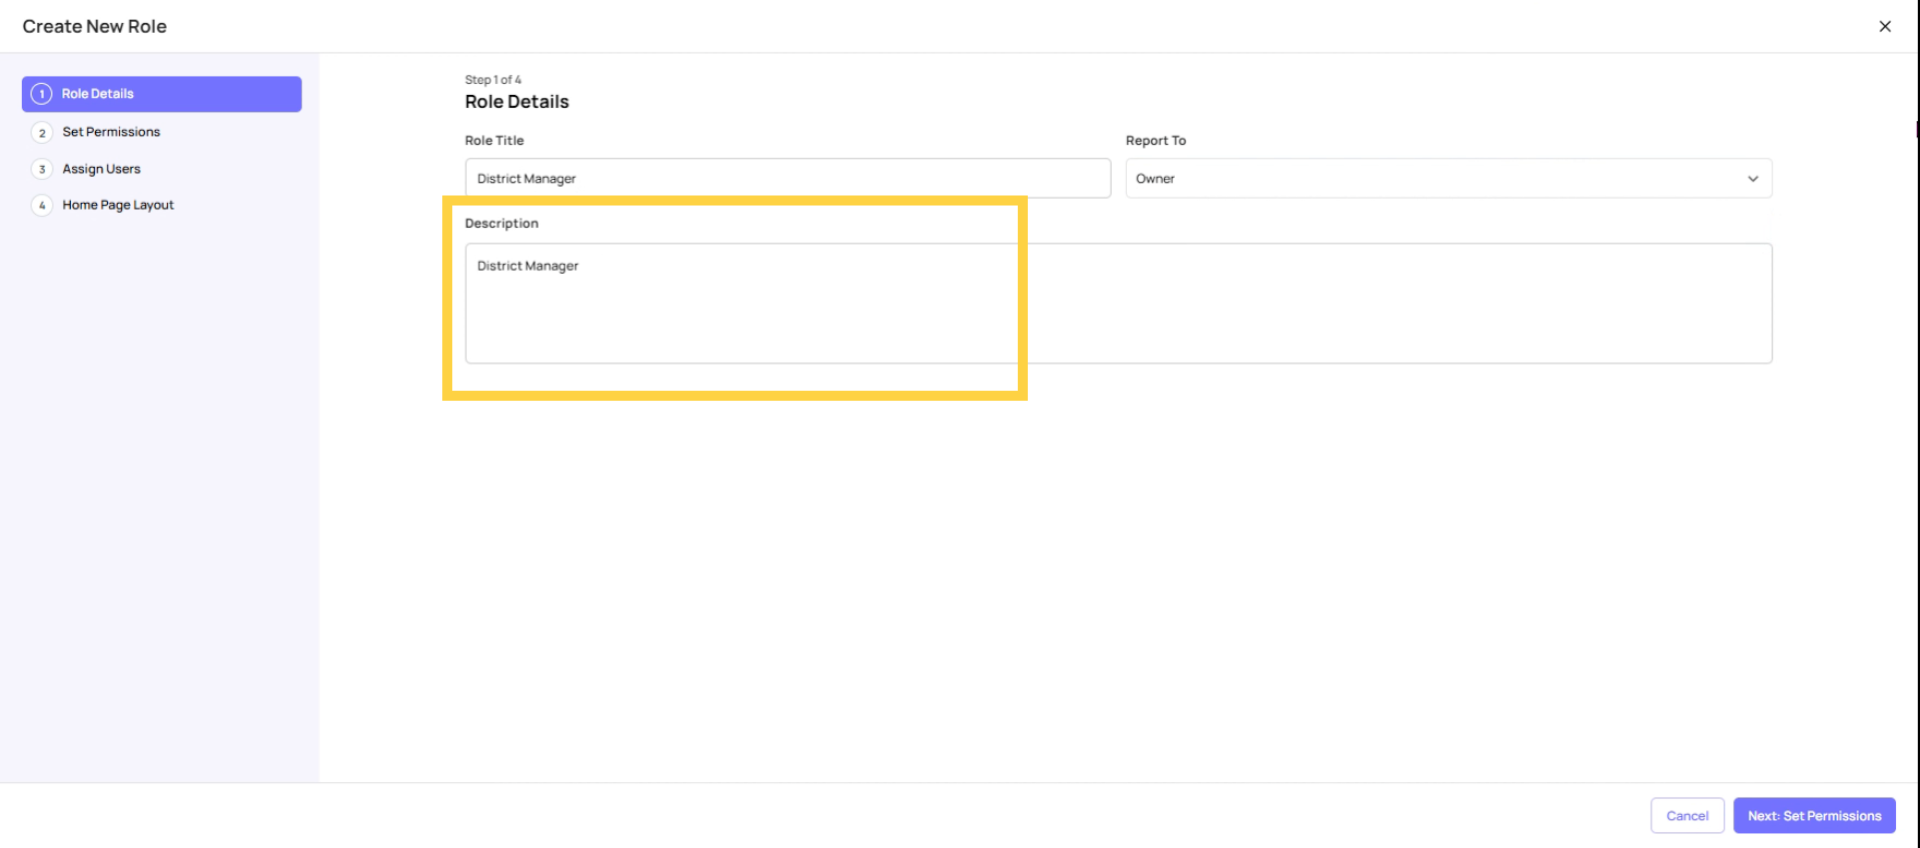
Add Role Description
Role Details:
Description: "Oversees operations across district locations"
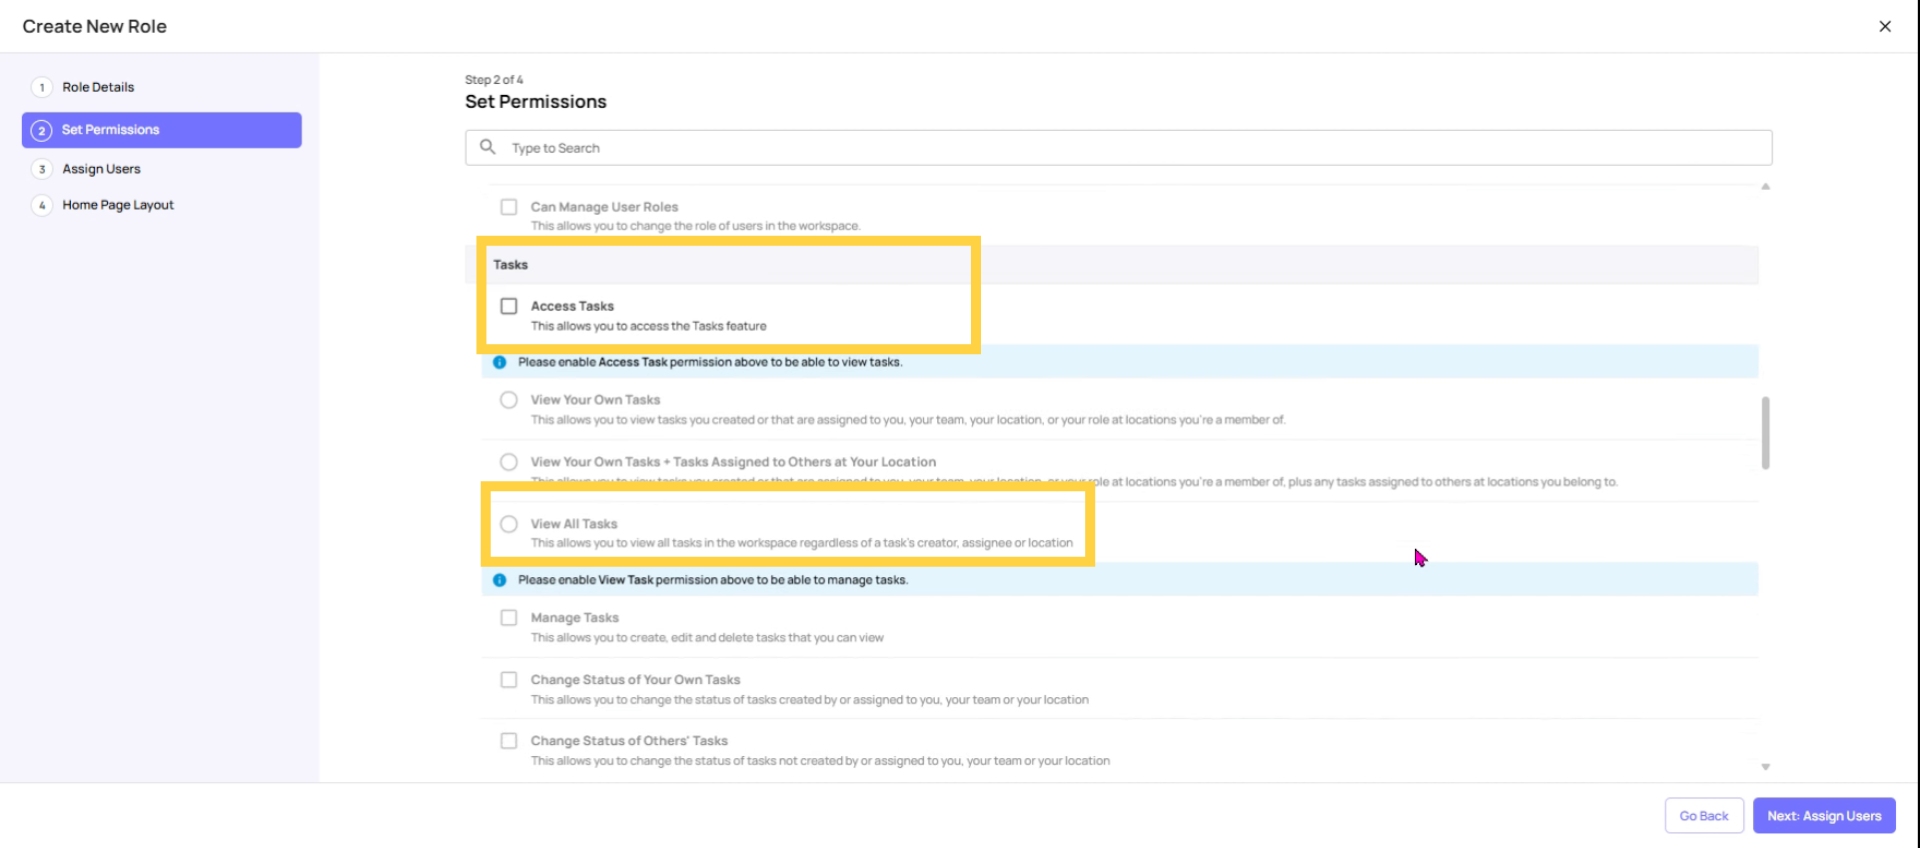
Configure Task Visibility Permissions
Permissions to configure:
| Permission | Setting | Why |
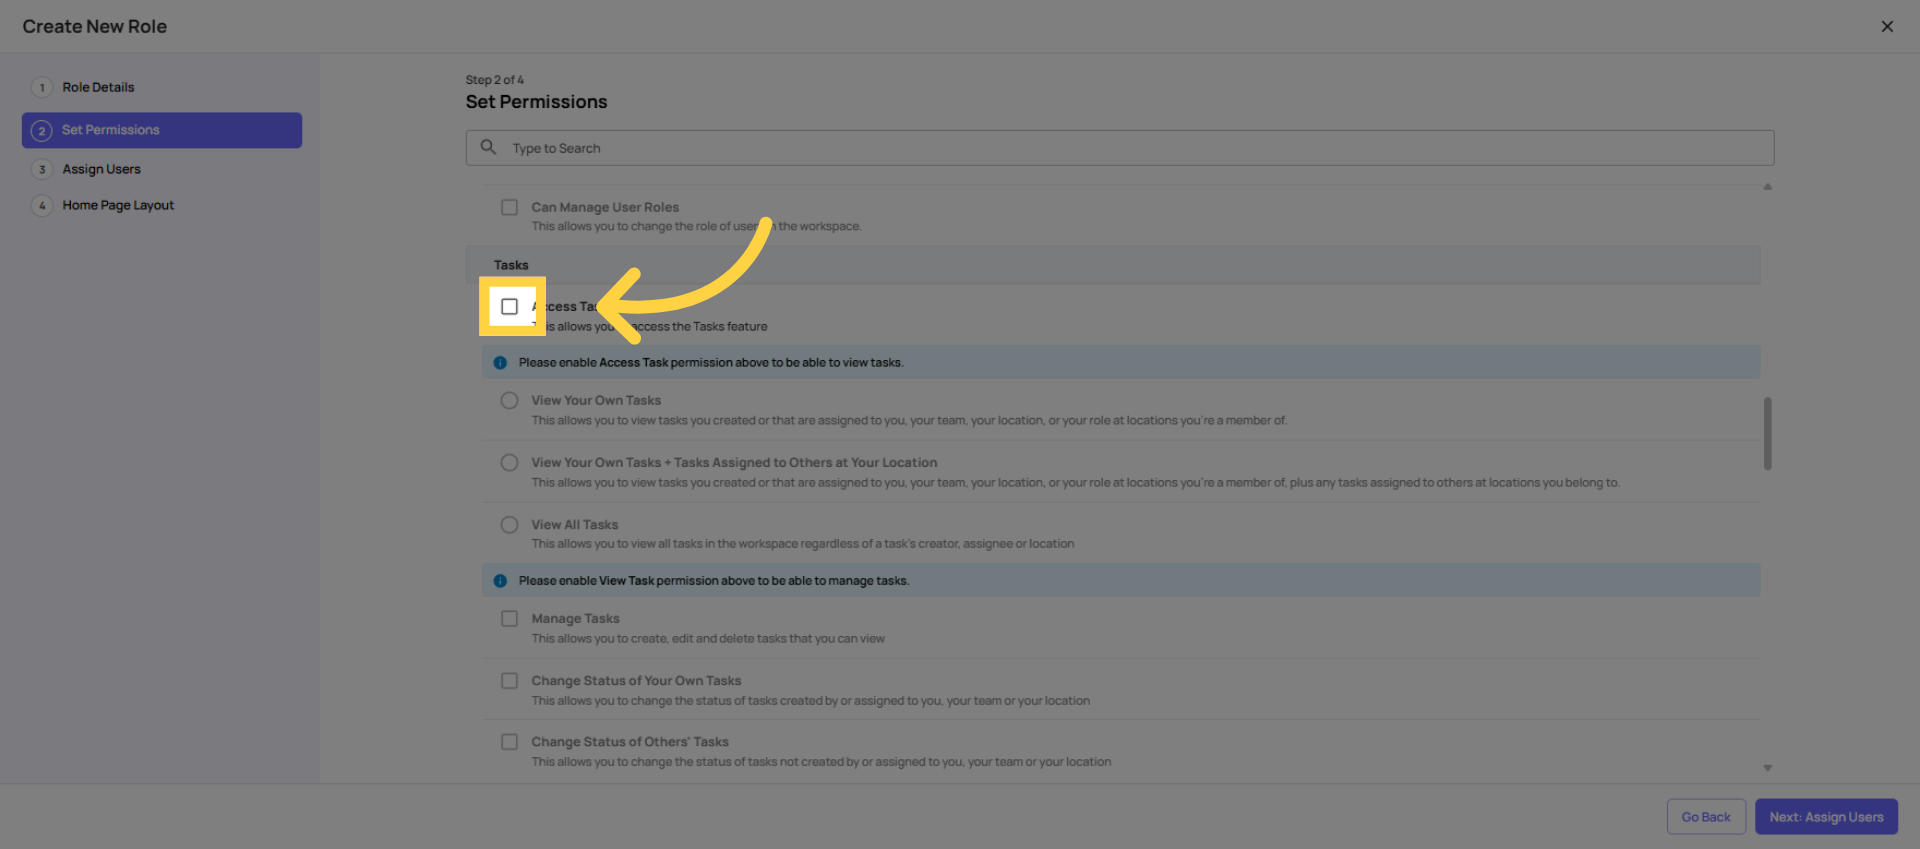
| Access Tasks | ✅ ON | DMs need to see task activity |
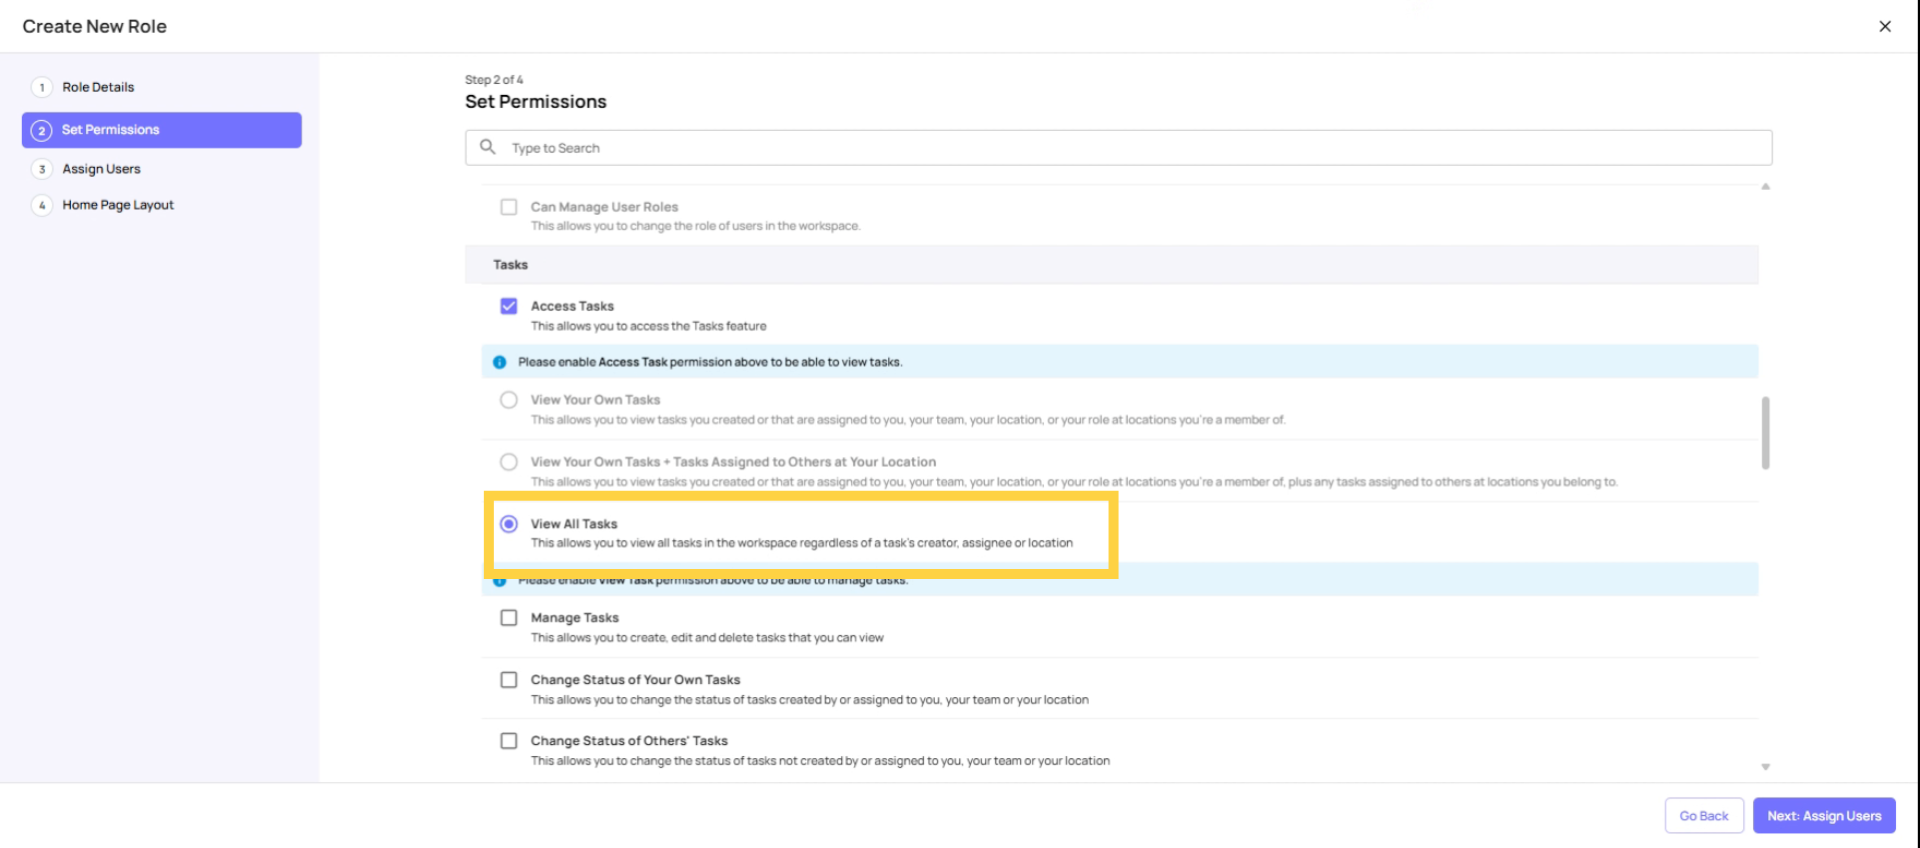
| Task Visibility | View Own + At Their Locations | See all tasks across their district's stores |
| Manage Tasks | ✅ ON (optional) | Allow DMs to create one-off tasks if needed |
| Change Status (Others' Tasks) | ✅ ON | DMs may need to update task statuses |
| Assign to Any User or Location | ❌ OFF | DMs assign within their district, not workspace-wide |
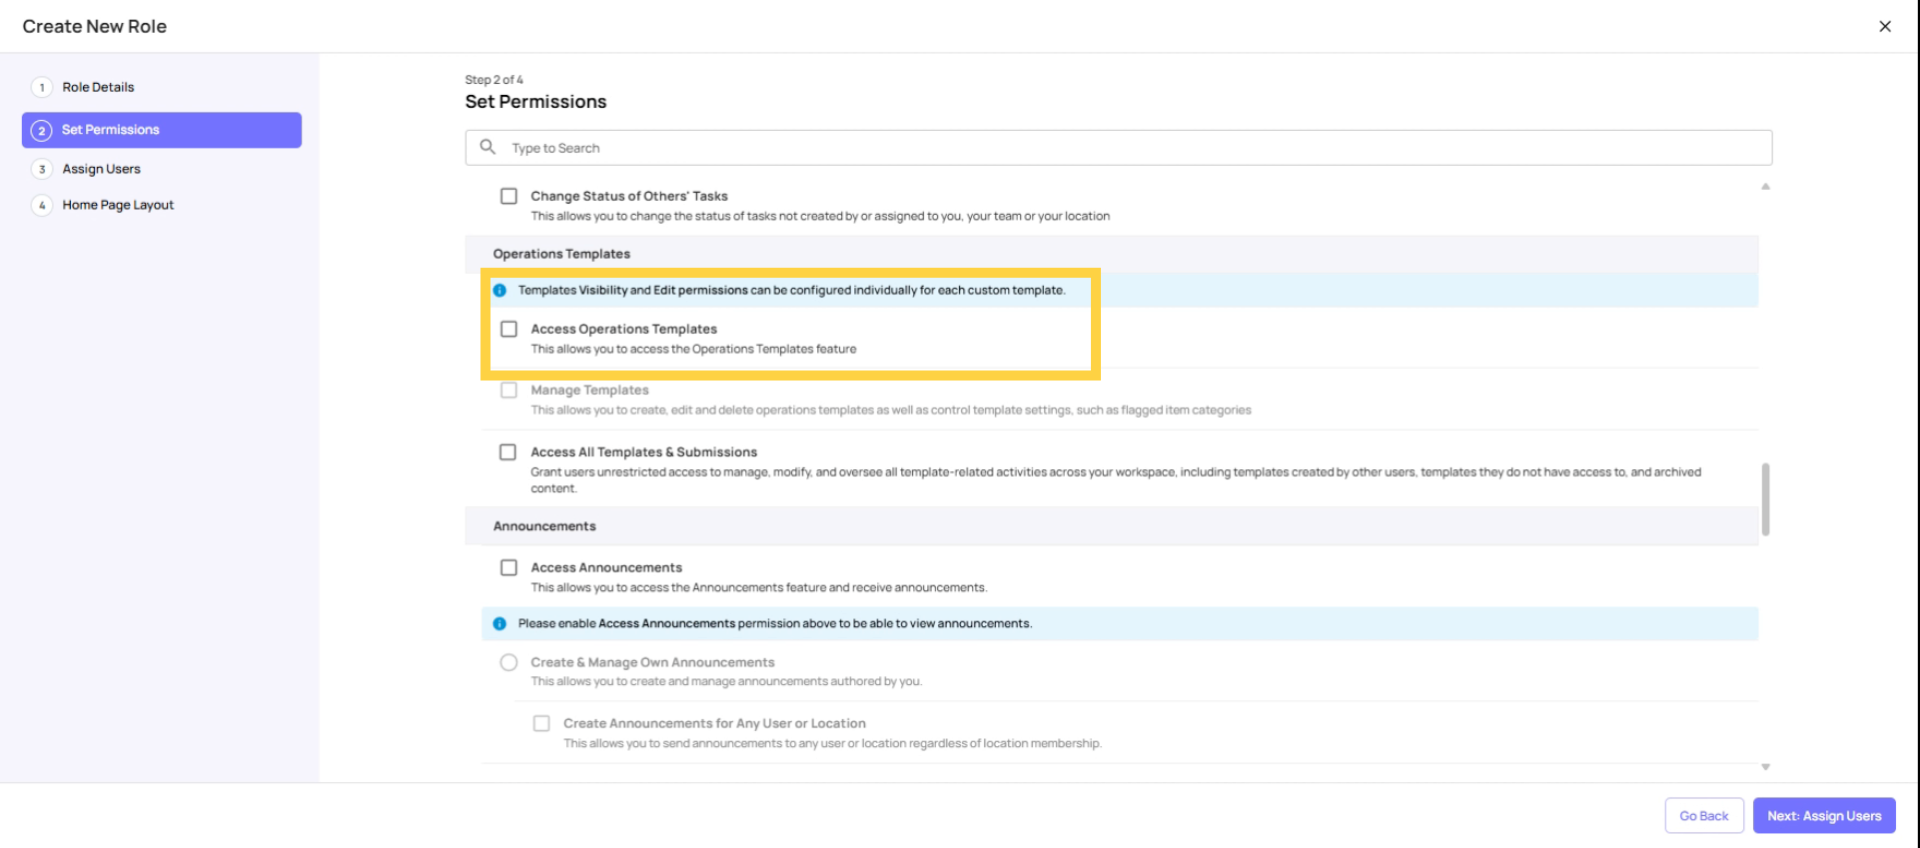
| Access Operations Templates | ✅ ON | DMs should access checklists |
| Manage Templates | ❌ OFF | DMs should not edit checklists — admin only |
| Access Locations | ✅ ON | DMs may need to view location info |
| Add/Edit/Delete Locations | ❌ OFF | Admin only |
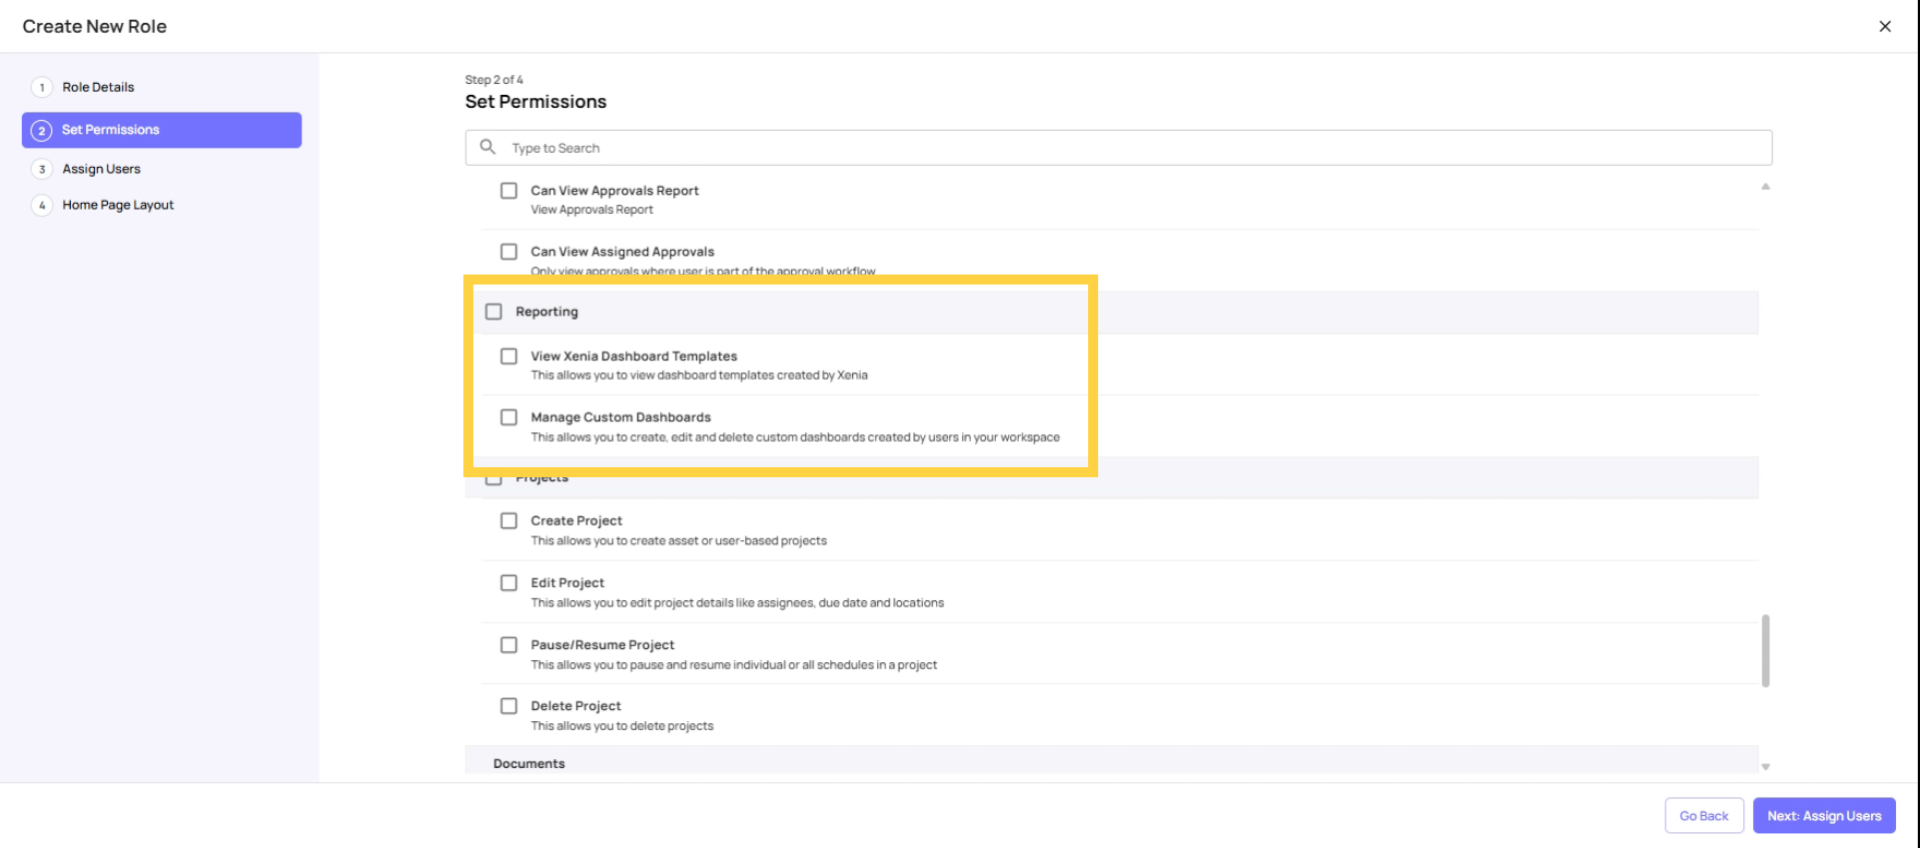
| View Dashboard Templates | ✅ ON | DMs need reporting access |
| Manage Custom Dashboards | ❌ OFF | Admin only |
| Add/Remove Users | ❌ OFF | Admin only |
 Turn On reporting access so they can see dashboards.
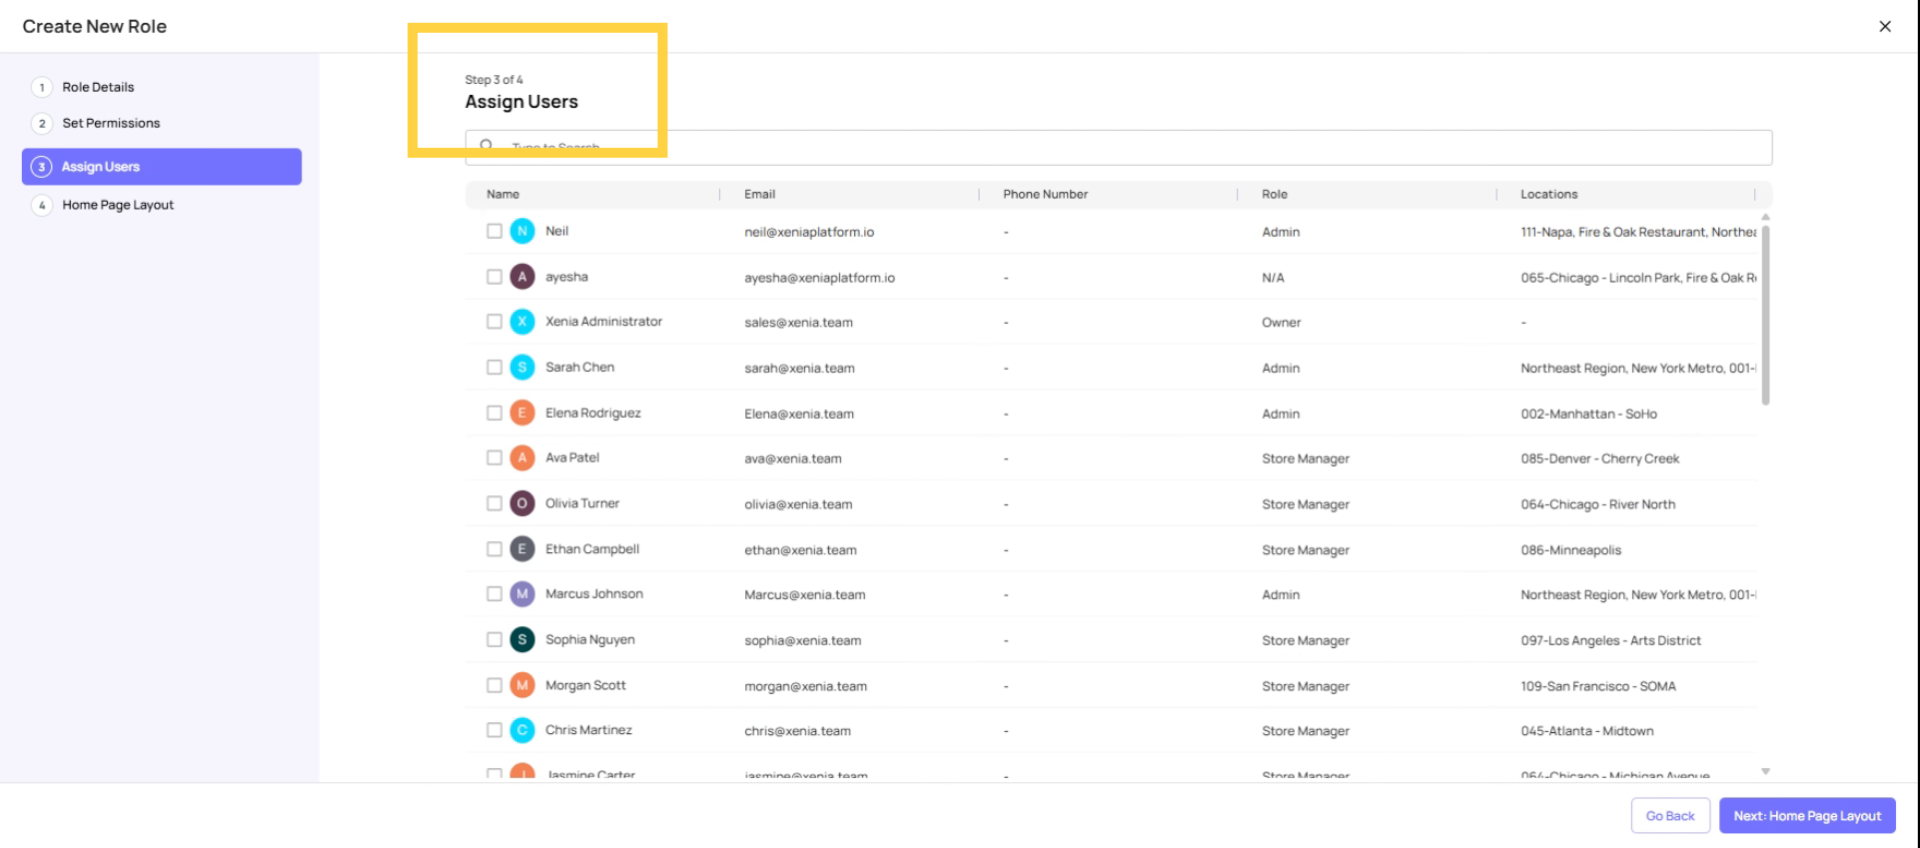
Assign Users to Role
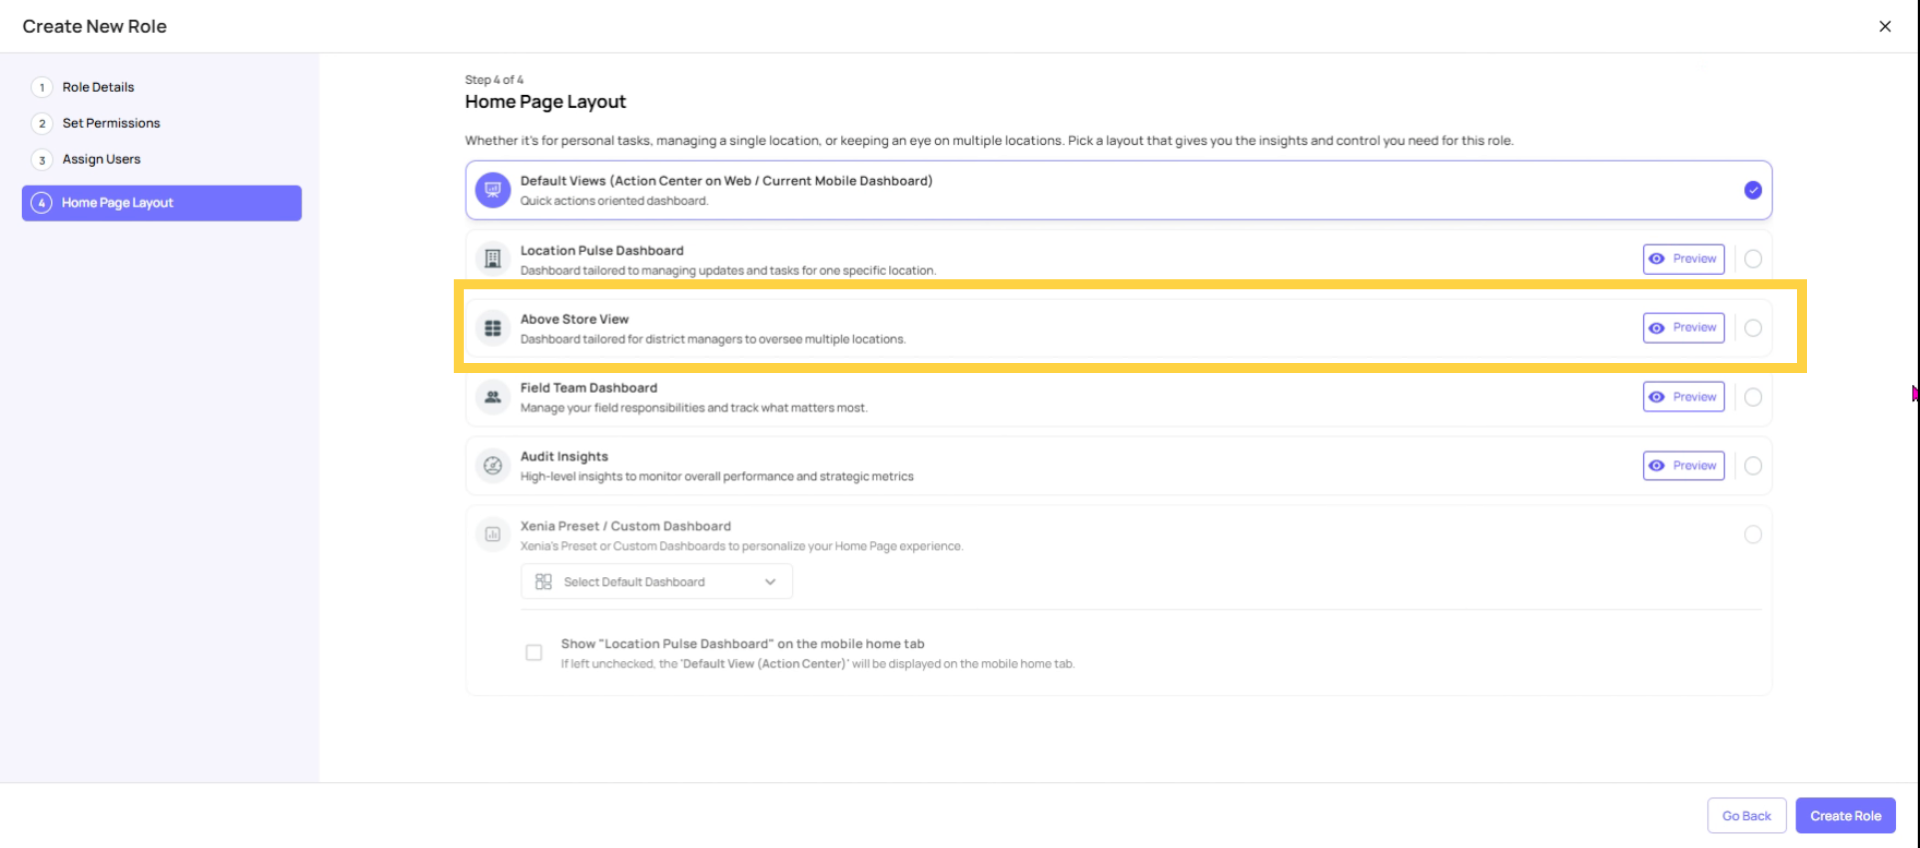
Select Homepage Layout
Homepage Layout: Select "Above Store View" — this gives the DM a multi-location overview when they open Xenia, showing completion status and operational health across all their district's stores. This is the view designed specifically for above-store management roles.
Alternatively, if you've built a custom dashboard with district-level analytics, you can assign that as the homepage instead.
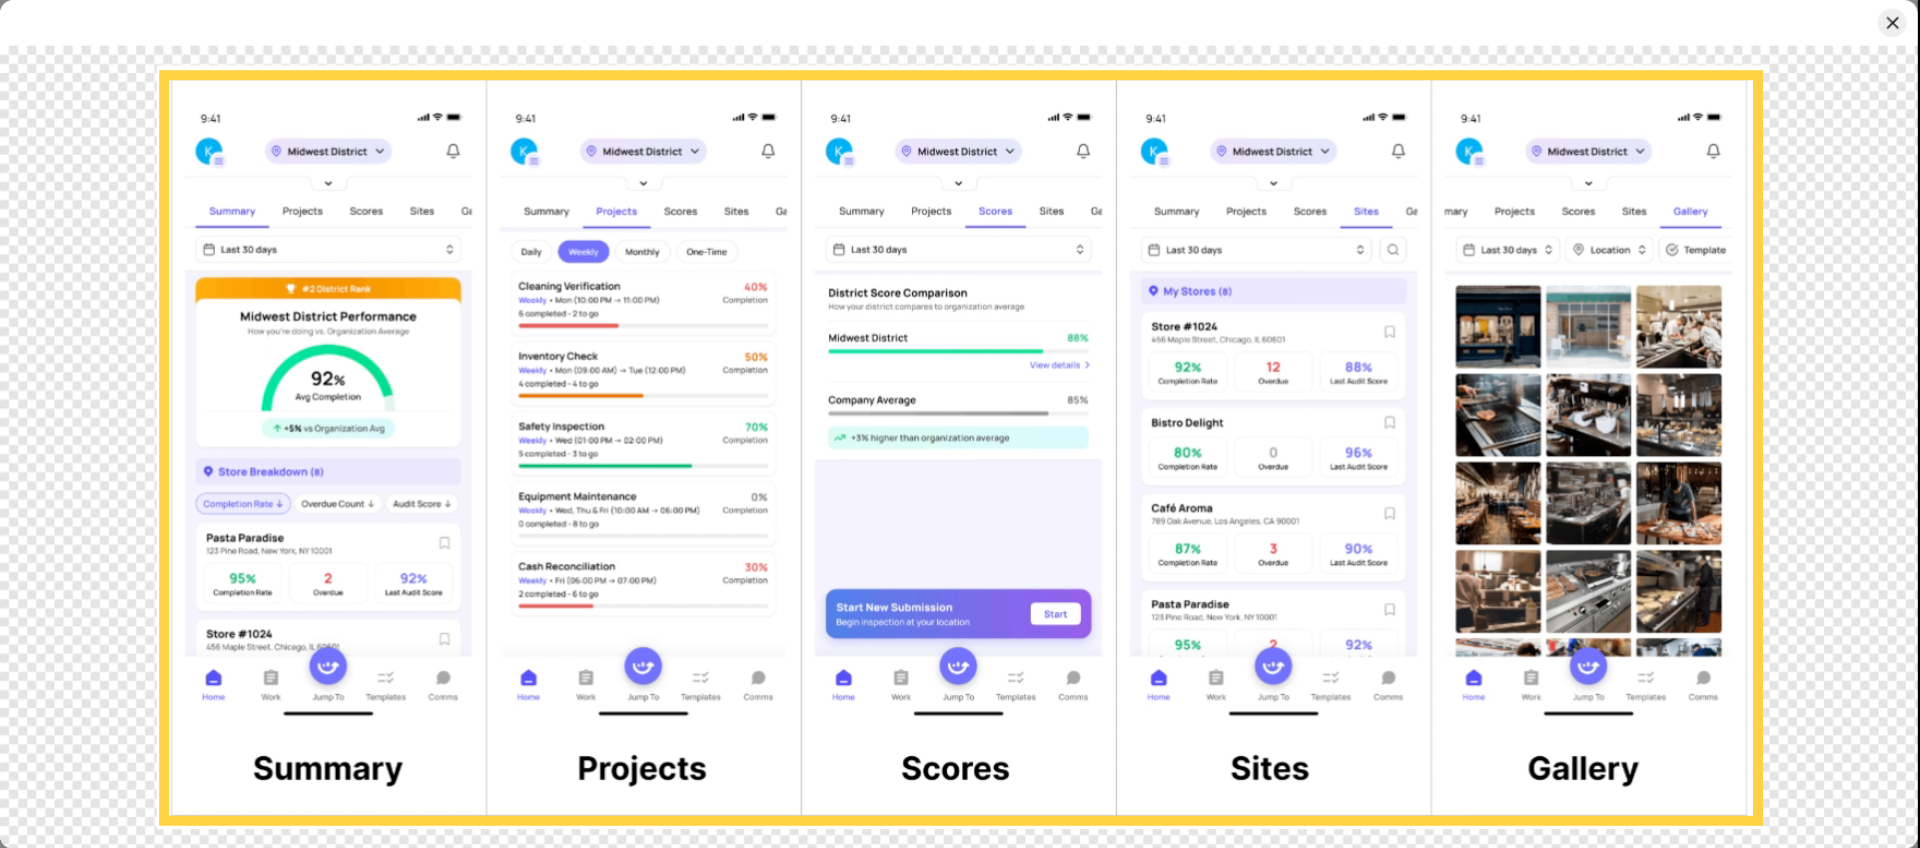
Understand Above Store View Features
Invite District Manager
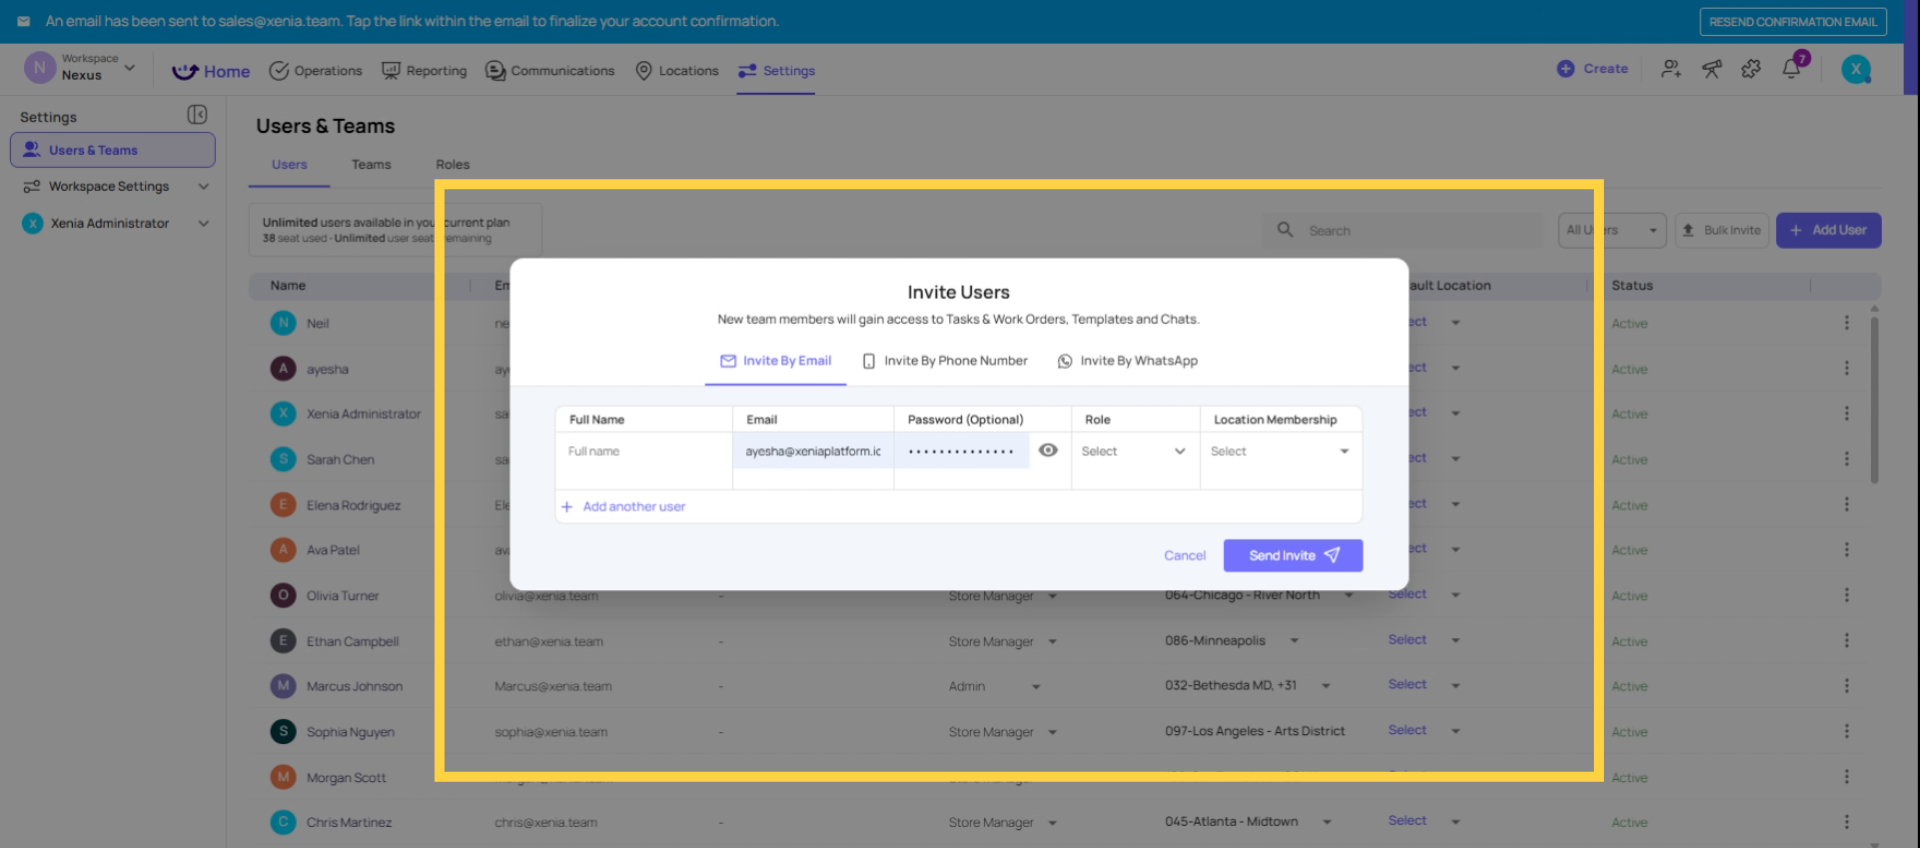
Go to Settings → Users → Add User (or update an existing user)
Role: District Manager
Location Membership: Add all stores in this DM's district.
This is the critical step. The DM's location membership determines which stores appear in their Above Store View, which tasks they see, which submissions they can access, and which notifications they receive.
If a DM covers 8 stores, add all 8. If they're temporarily covering for another DM, add those stores temporarily too.
What not to do: Don't add stores from other districts. A DM should only see their district — adding extra locations means they see data they have no accountability for.
Configure Template Submission Access
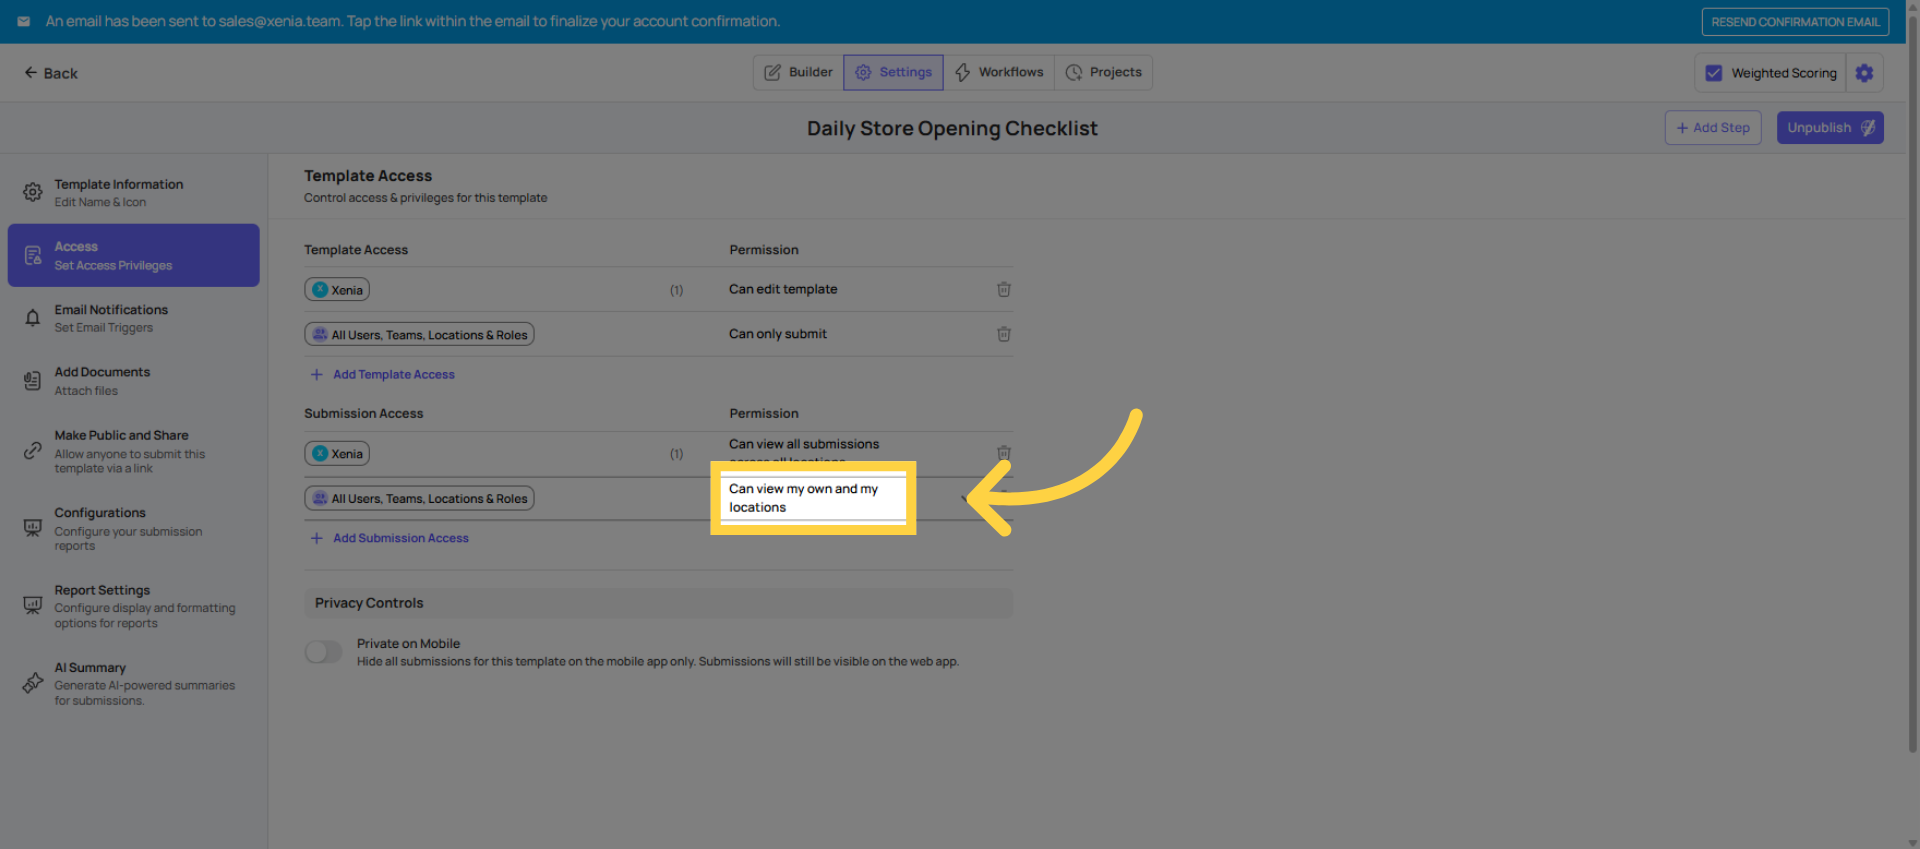
For each checklist your DMs need visibility into, go to: Operations → Templates → [Template Name] → Settings → Access → Submission Access
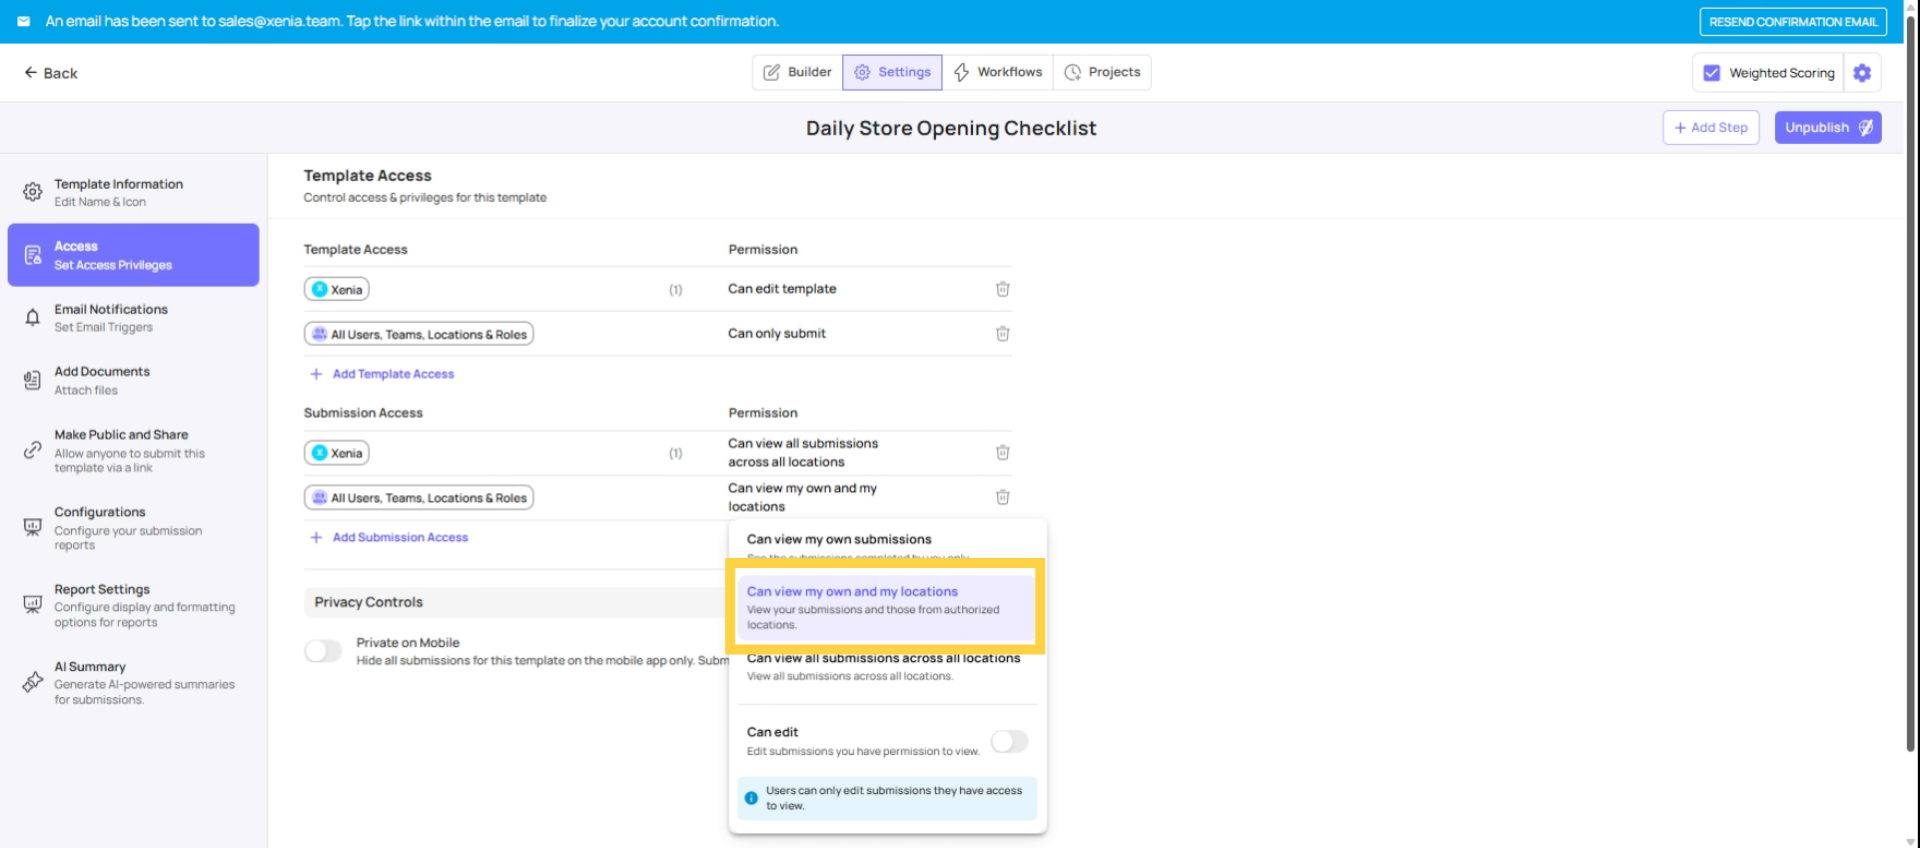
Set the District Manager role to: "View own + submissions at their locations" (Tier 2)
This means the DM sees all submissions from their district's stores, filtered by their location membership. Add or remove a store from their membership, and their submission visibility automatically adjusts.
Verify the template has a Select Location step — otherwise Tier 2 won't function correctly.
For sensitive templates (HR forms, performance notices), you may want to give the DM Tier 3 (View All) if they need cross-district oversight, or keep them at Tier 2 if each DM should only see their district.
What the District Manager Experience Looks Like
When configured correctly, this is the DM's experience:
On web/desktop:
- Opens Xenia → sees the Above Store View home screen showing completion rates, overdue items, and operational health across all their district stores
- Can drill down into specific stores, see individual task statuses, and view submission reports for their locations
- Reports and dashboards show only their district's data
On mobile:
- Can see tasks, submission data, and reports for their stores from their phone
- The home screen shows multi-location data, not a single-store view
Notifications:
- Receives escalation notifications when tasks at their district's stores go overdue or missed (if their role is set as the "Reports To" for store-level roles)
6. Checklist: Is the District Manager Set Up Correctly?
Before finalizing, verify:
- Role is named correctly and "Reports To" is set (for notifications)
- Task visibility is set to "View own + at their locations" (not "View own" or "View all")
- Manage Templates is OFF
- Homepage layout is set to Above Store View (or custom dashboard)
- Location membership includes all district stores
- Location membership does NOT include stores from other districts
- Submission Access is set to Tier 2 on all relevant templates
- All relevant templates have a Select Location step
Need Help?
Reach out to our support team at support@xenia.team
Comments
0 comments
Please sign in to leave a comment.