Overview of Key Role Permissions
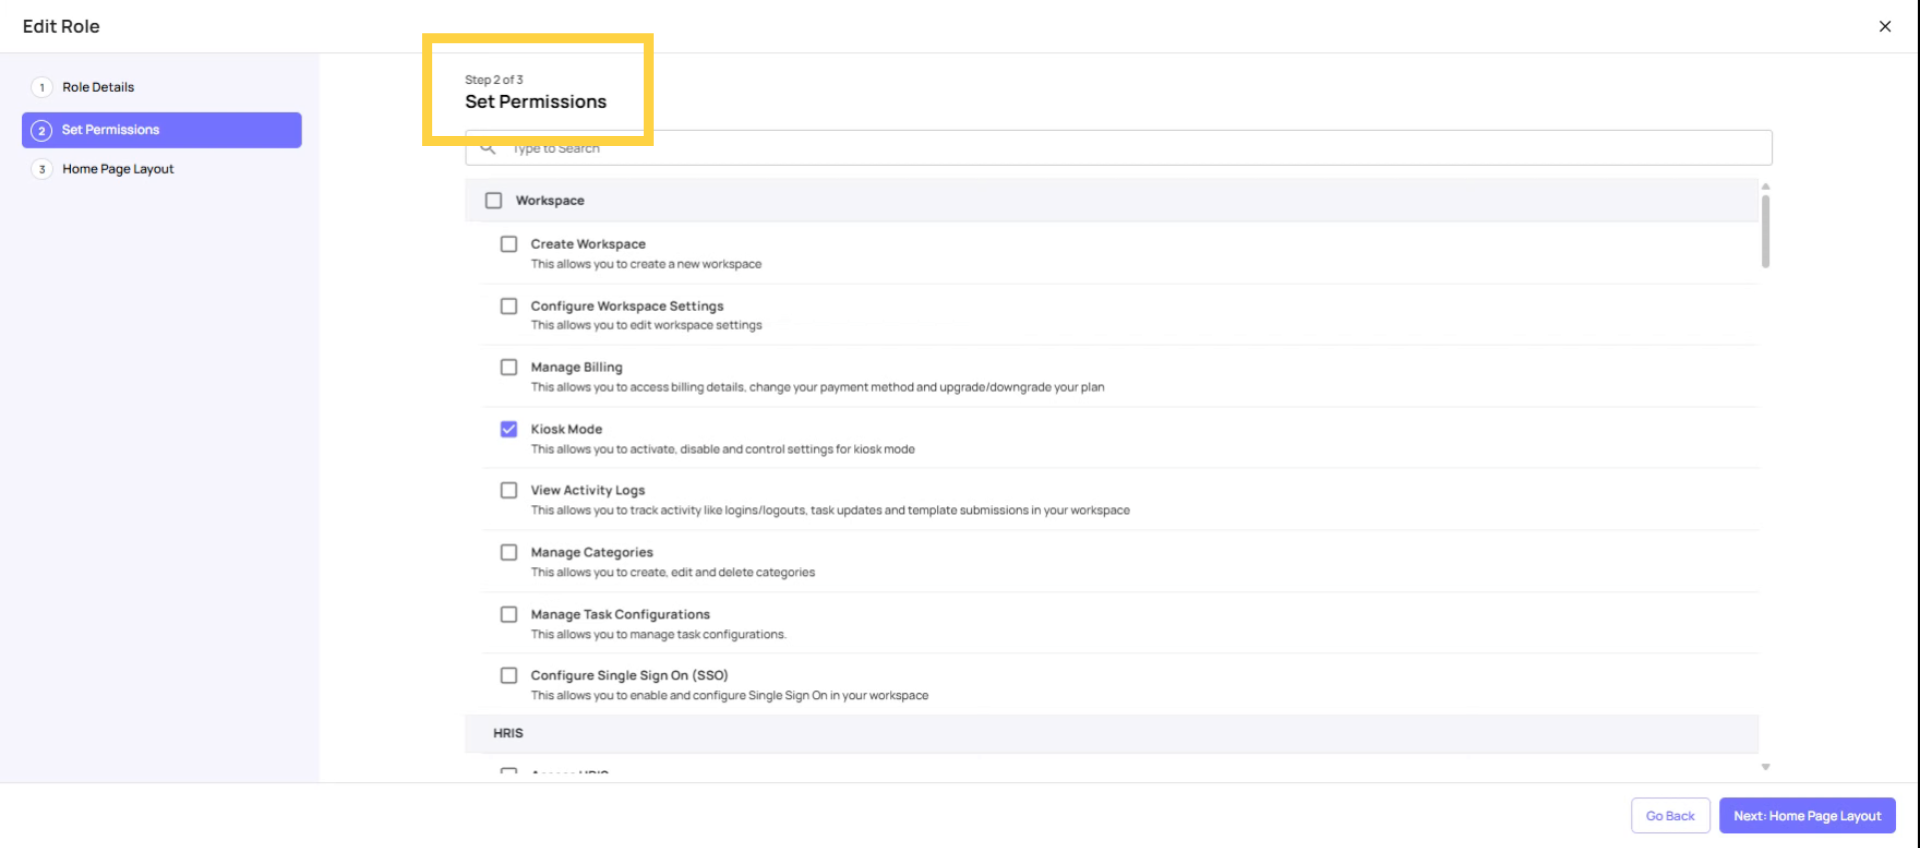
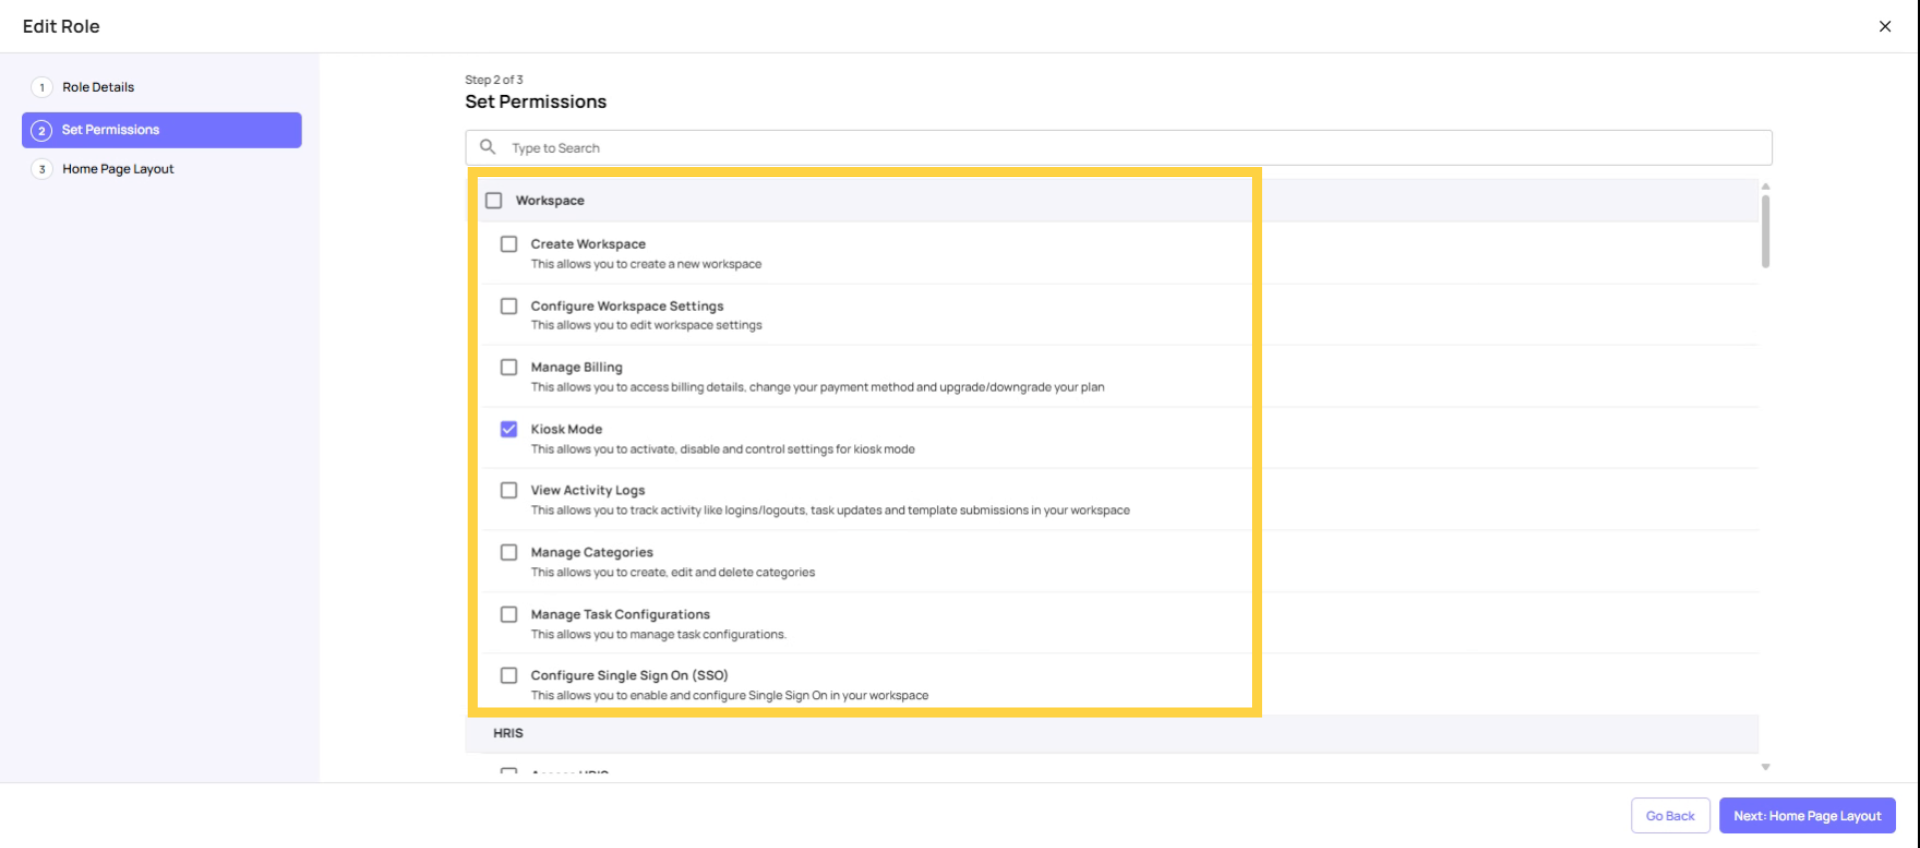
Limit Workspace Permissions to Admin
Configure Workspace Settings Controls access to workspace-level settings (timezone, currency, workspace name, working hours). Toggle this on for admins and owners only. Frontline and store-level roles do not need this. Who should have it: Admin, Owner only
Manage Billing Gives access to the billing page — the user can upgrade, downgrade, or cancel the subscription. Keep this extremely restricted. Who should have it: Owner only (or one designated billing admin)
Kiosk Mode (Mobile & Tablet) Controls the ability to enable/disable kiosk mode and configure PIN settings on both the web settings page and store devices. Users with this on can toggle kiosk mode on any device they're logged into. Who should have it: Admin, Owner (and possibly store-level accounts if you use kiosk mode)
Configure Single Sign-On (SSO) Allows the user to enable and configure SSO settings for the workspace. Admin/Owner only. Who should have it: Admin, Owner only
Activity Logs Gives access to the activity logs view in Settings — a record of actions taken in the workspace. Who should have it: Admin, Owner only
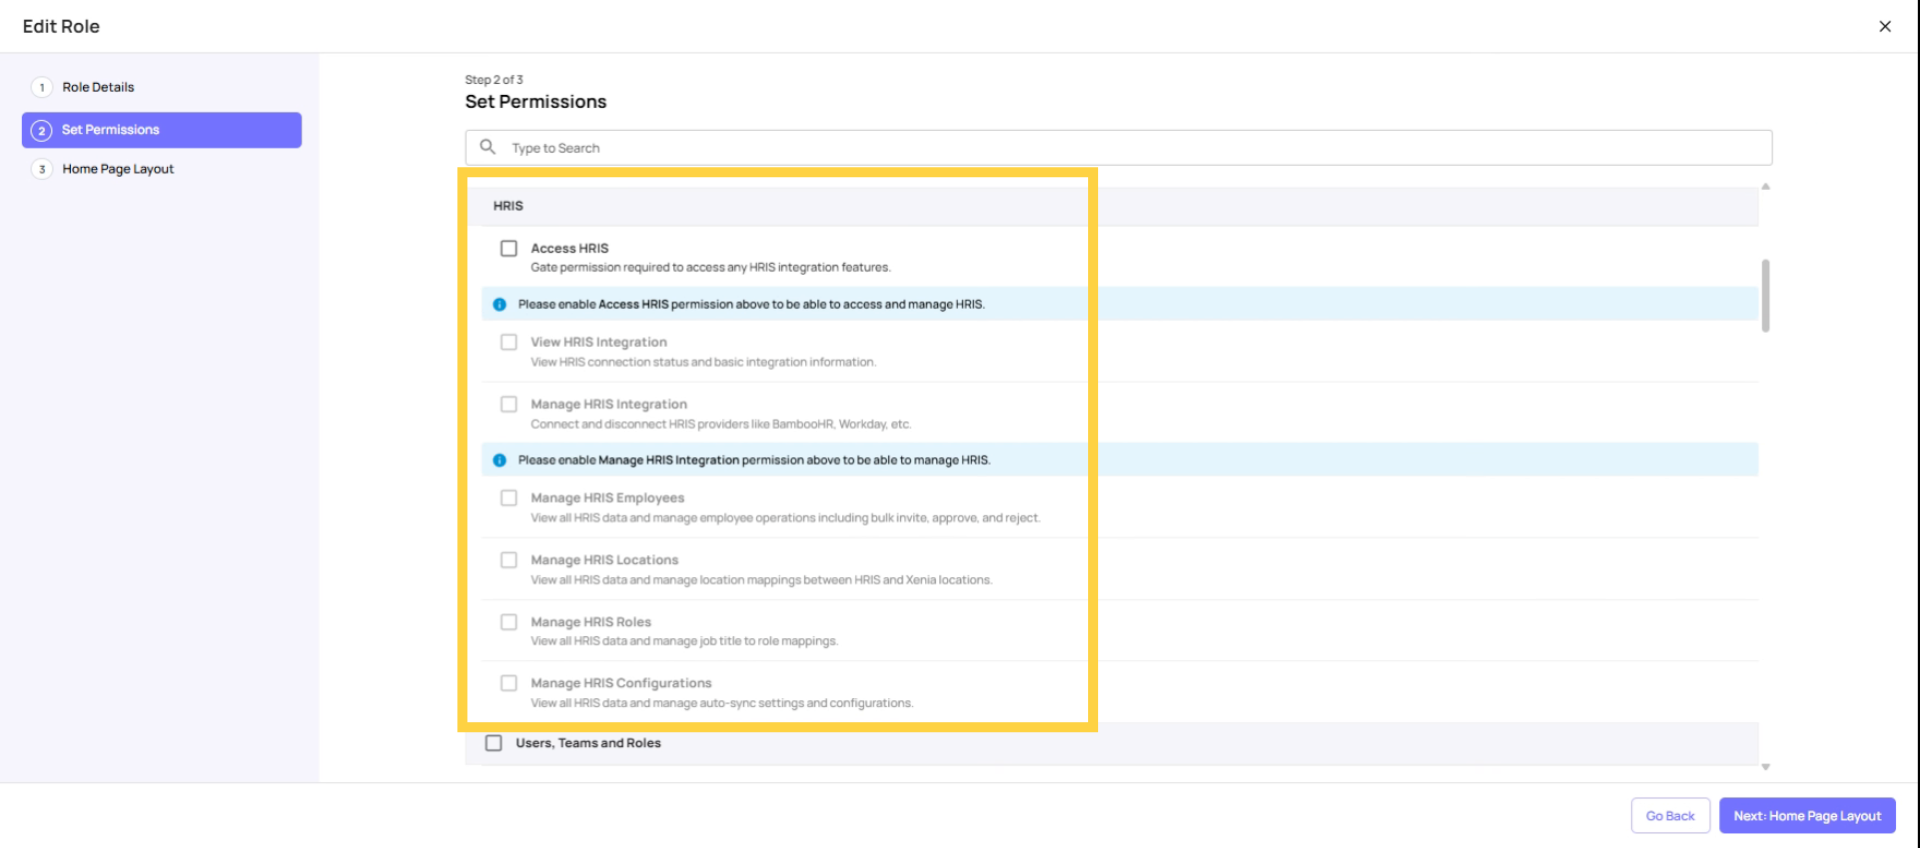
Restrict HRIS Permissions to Admins and Managers
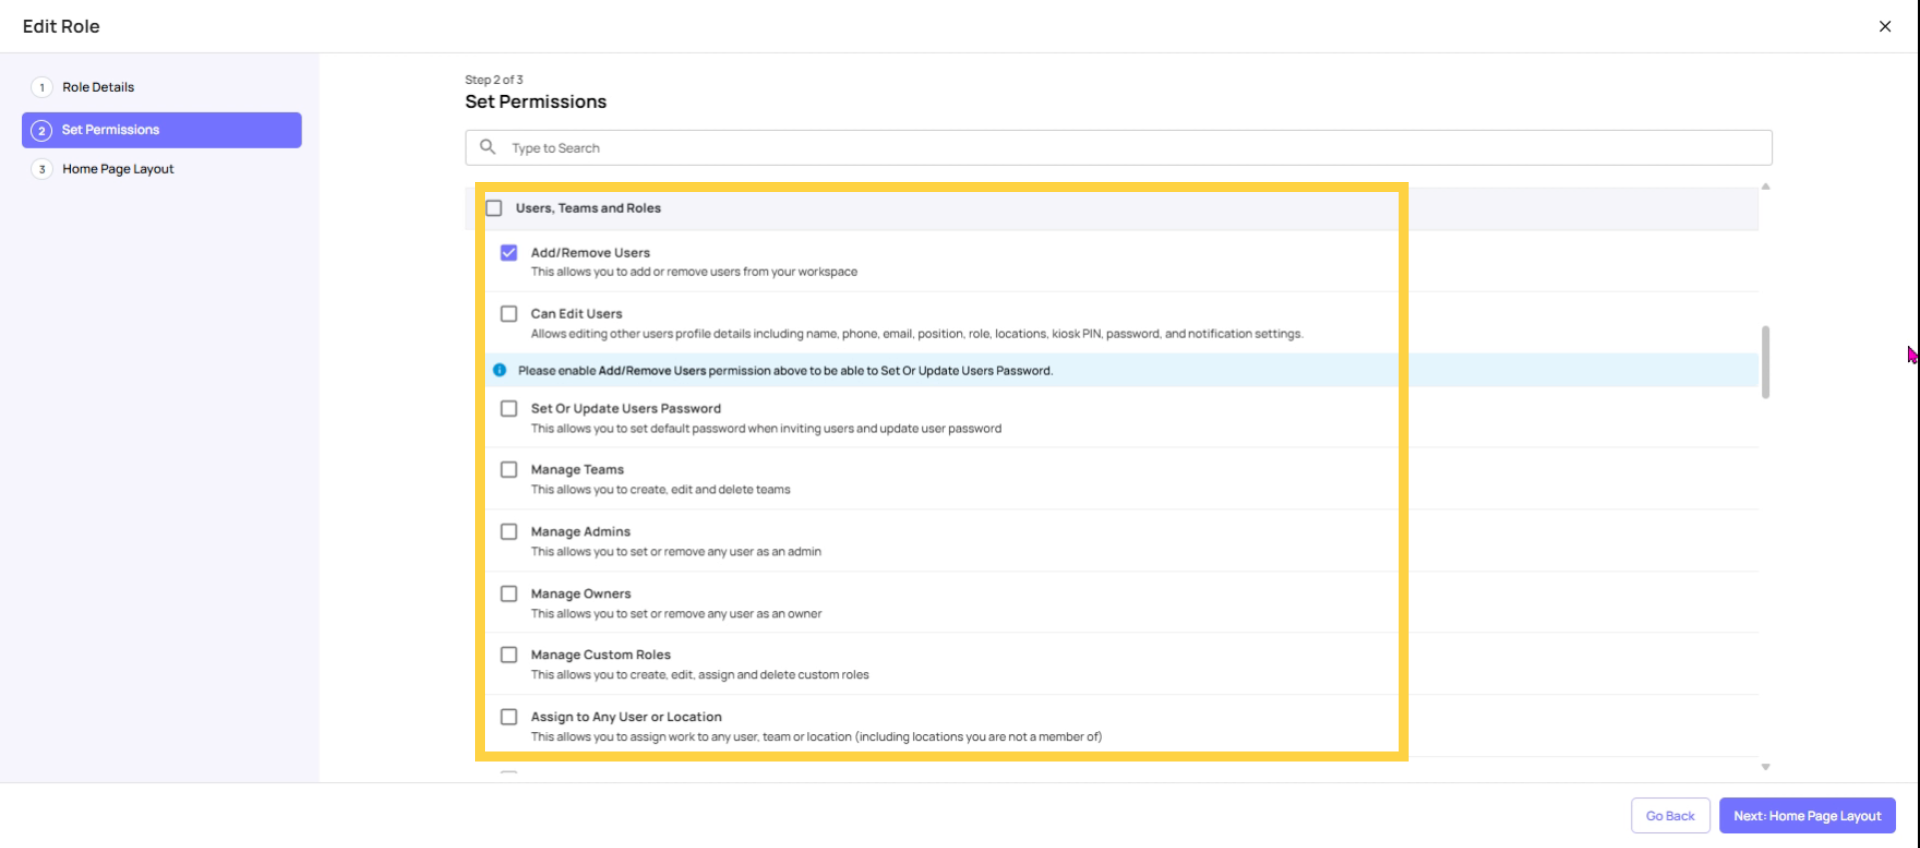
Restrict User Management to Admins
Add or Remove Members (Users) Controls the ability to invite new users and delete existing users. Hides the invite/delete functions when off. Who should have it: Admin, Owner. Optionally for HR Manager roles.
Manage Teams Shows or hides the Teams tab entirely. When off, the Teams section disappears from the navigation. Who should have it: Admin, Owner. Optionally for managers who need to create and manage teams.
Manage Custom Roles Controls the ability to create, edit, and delete custom roles. When off, the Roles tab management options are hidden. Who should have it: Admin, Owner only
Manage Admins Controls the ability to promote or demote a user to the Admin role. Also controls the "All Locations" toggle on user profiles. Who should have it: Owner only (or senior admin)
Manage Owners Controls the ability to promote or demote a user to the Owner role. Who should have it: Owner only
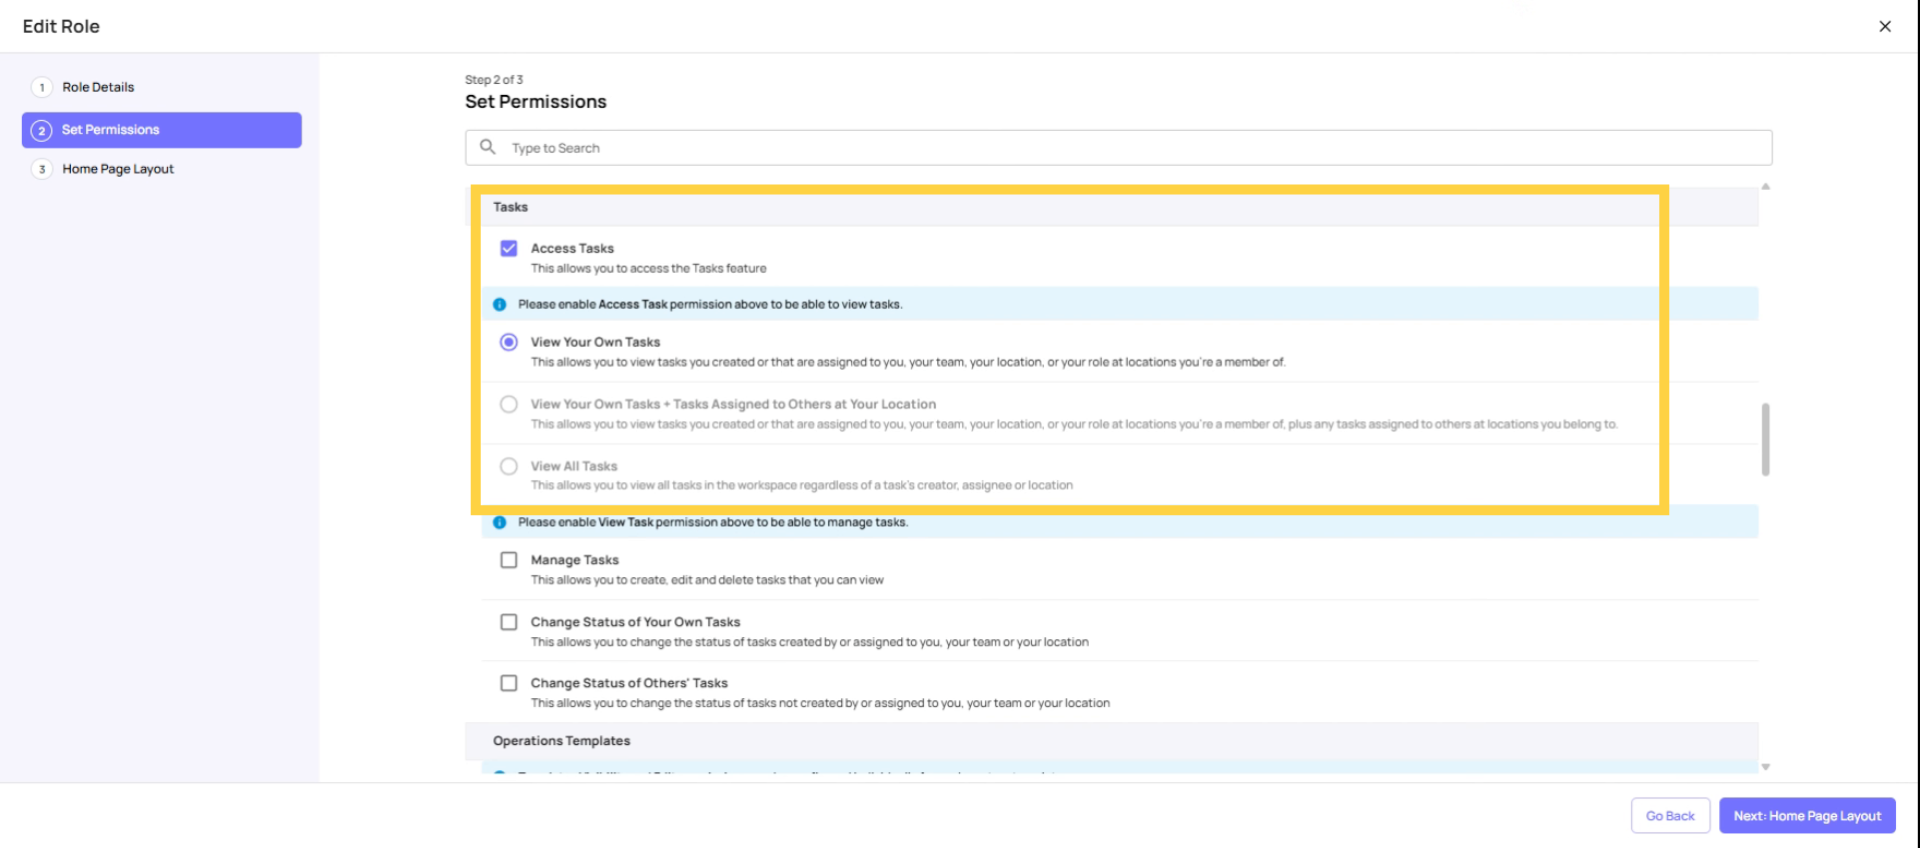
Task permissions and Visbility
Access Tasks The master on/off switch for the Tasks feature. When off, the Tasks tab is hidden entirely on web and mobile. Who should have it: All roles that need to complete or view tasks (essentially everyone except pure requesters)
View Your Own Tasks (single-select — choose one of the three) Shows only tasks directly assigned to this user, their team, their role, or their location. Who should have it: Frontline employees, cashiers, cooks, basic operators
View Your Own Tasks + Tasks Assigned to Others at Your Location (single-select) Shows own tasks plus all tasks tagged to any location the user is a member of. Who should have it: Store managers, shift managers, GMs, district managers
View All Tasks (single-select) Shows every task in the workspace. Location membership becomes irrelevant for task visibility. Who should have it: Admin, Owner only
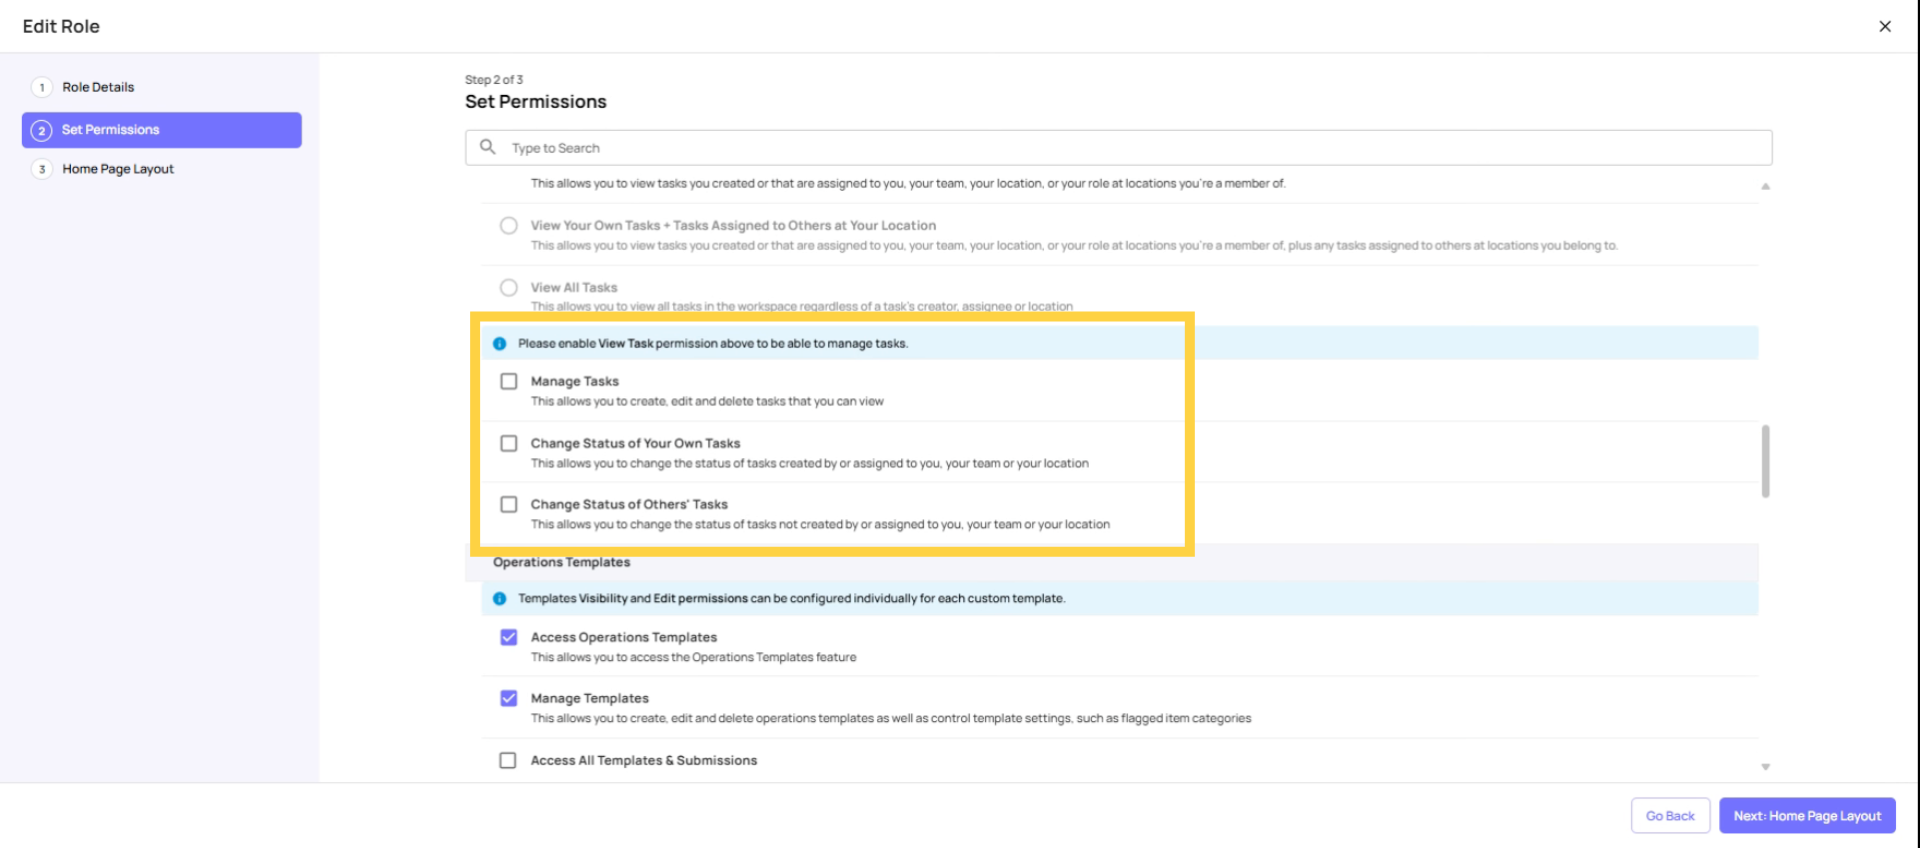
Manage Tasks and Project Visbility
Manage Tasks Controls the ability to create, edit, and delete tasks. Also shows/hides bulk action options. Note: works in conjunction with task visibility — you can only manage tasks you can see. Who should have it: Store managers and above. Off for basic frontline roles. ⚠️ Important: Manage Tasks also controls visibility of the Scheduled Work / Projects tab. If this is off, users cannot see or access Projects — even if they have the Create Projects permission.
Change Status of Your Own Tasks Controls the ability to change the completion status of tasks assigned to or created by this user. Who should have it: All roles that complete tasks — should be on for everyone
Change Status of Others' Tasks Controls the ability to change the status of tasks not personally assigned to this user. Who should have it: Store managers and above. Off for frontline roles.
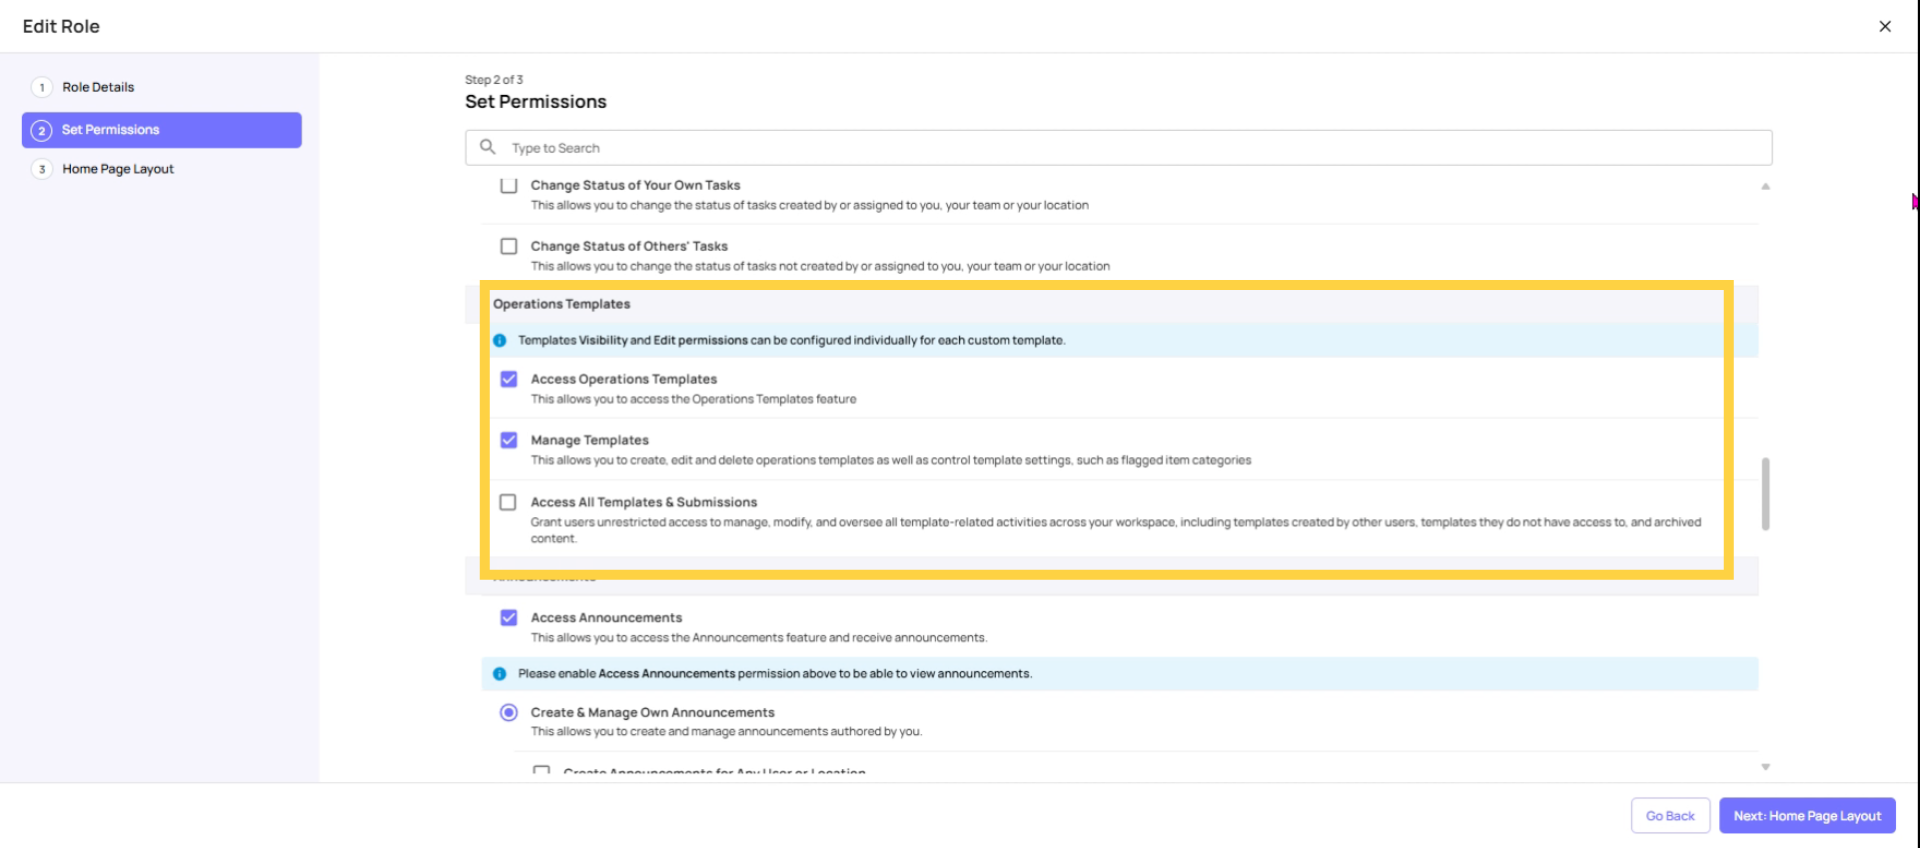
Control Operation Template Access
Access Operations Templates Master on/off for the Templates module. When off, the Templates tab is hidden entirely on all devices. Who should have it: All roles that need to complete or view checklists — turn this on for virtually everyone except pure task-only roles
Manage Templates Controls the ability to create, edit, archive, and delete templates in the template builder. Also controls access to template configurations like flagged item categories. When off: user can still complete and submit templates, but cannot modify the template structure. Who should have it: Admin, Owner only. ❌ OFF for all store-level and frontline roles. ⚠️ This is the most important permission to restrict. Frontline staff with this on can accidentally archive or edit your production checklists.
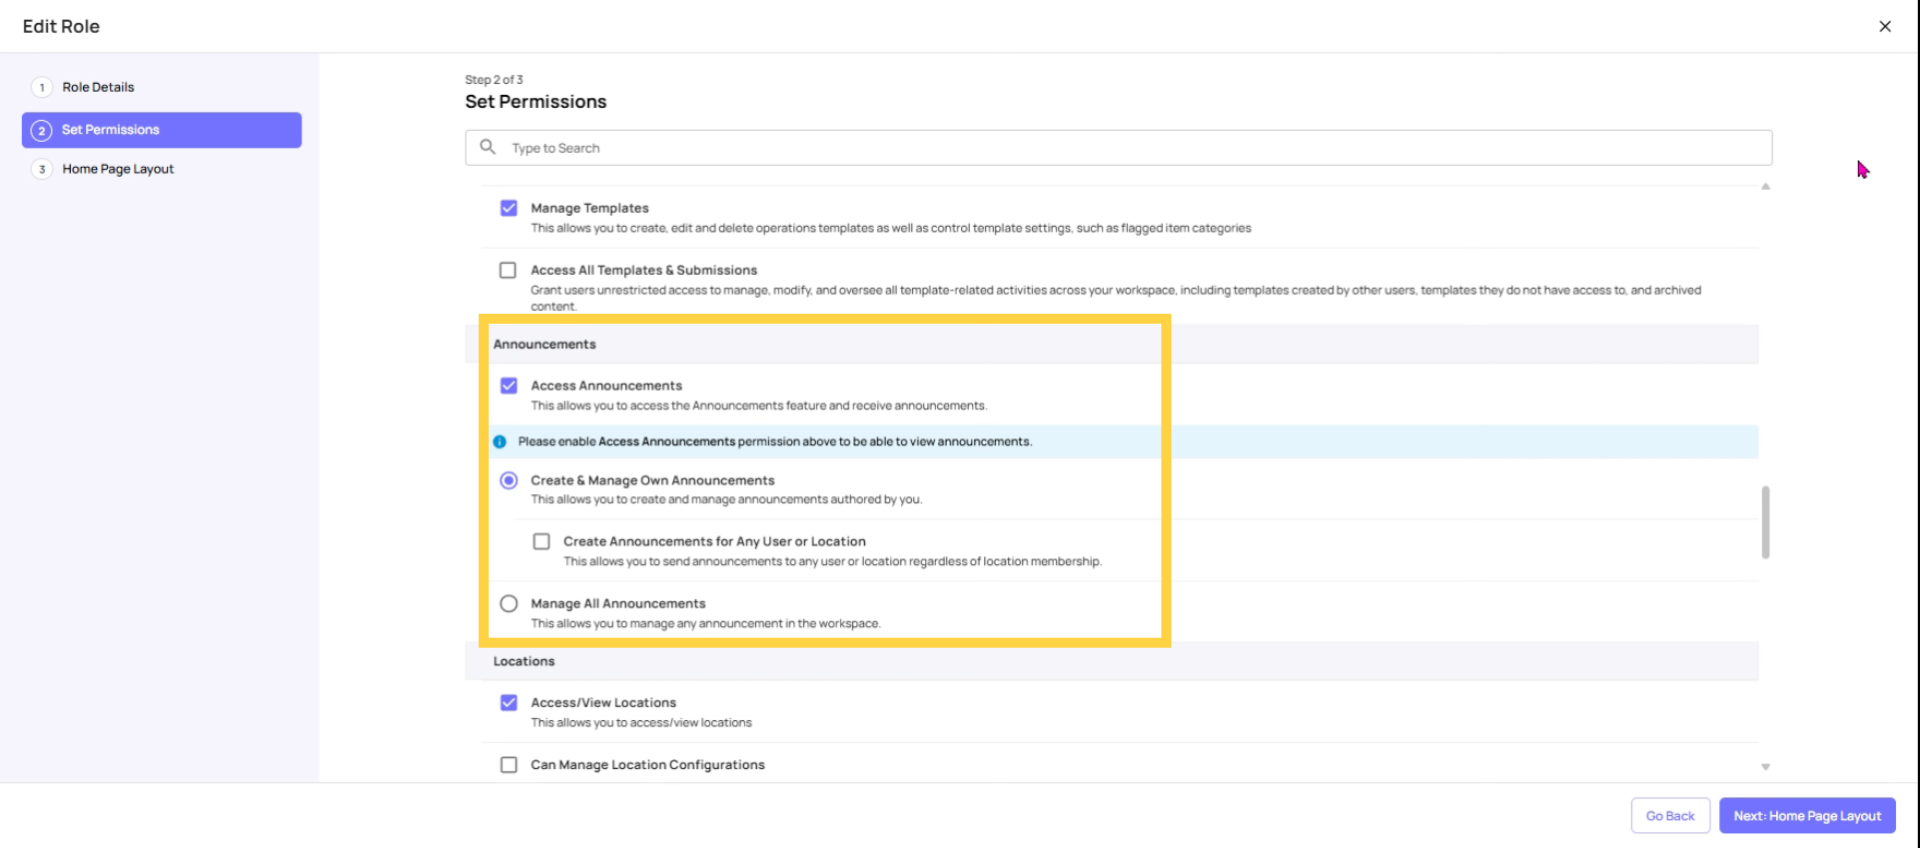
Manage announcement Feature Permissions
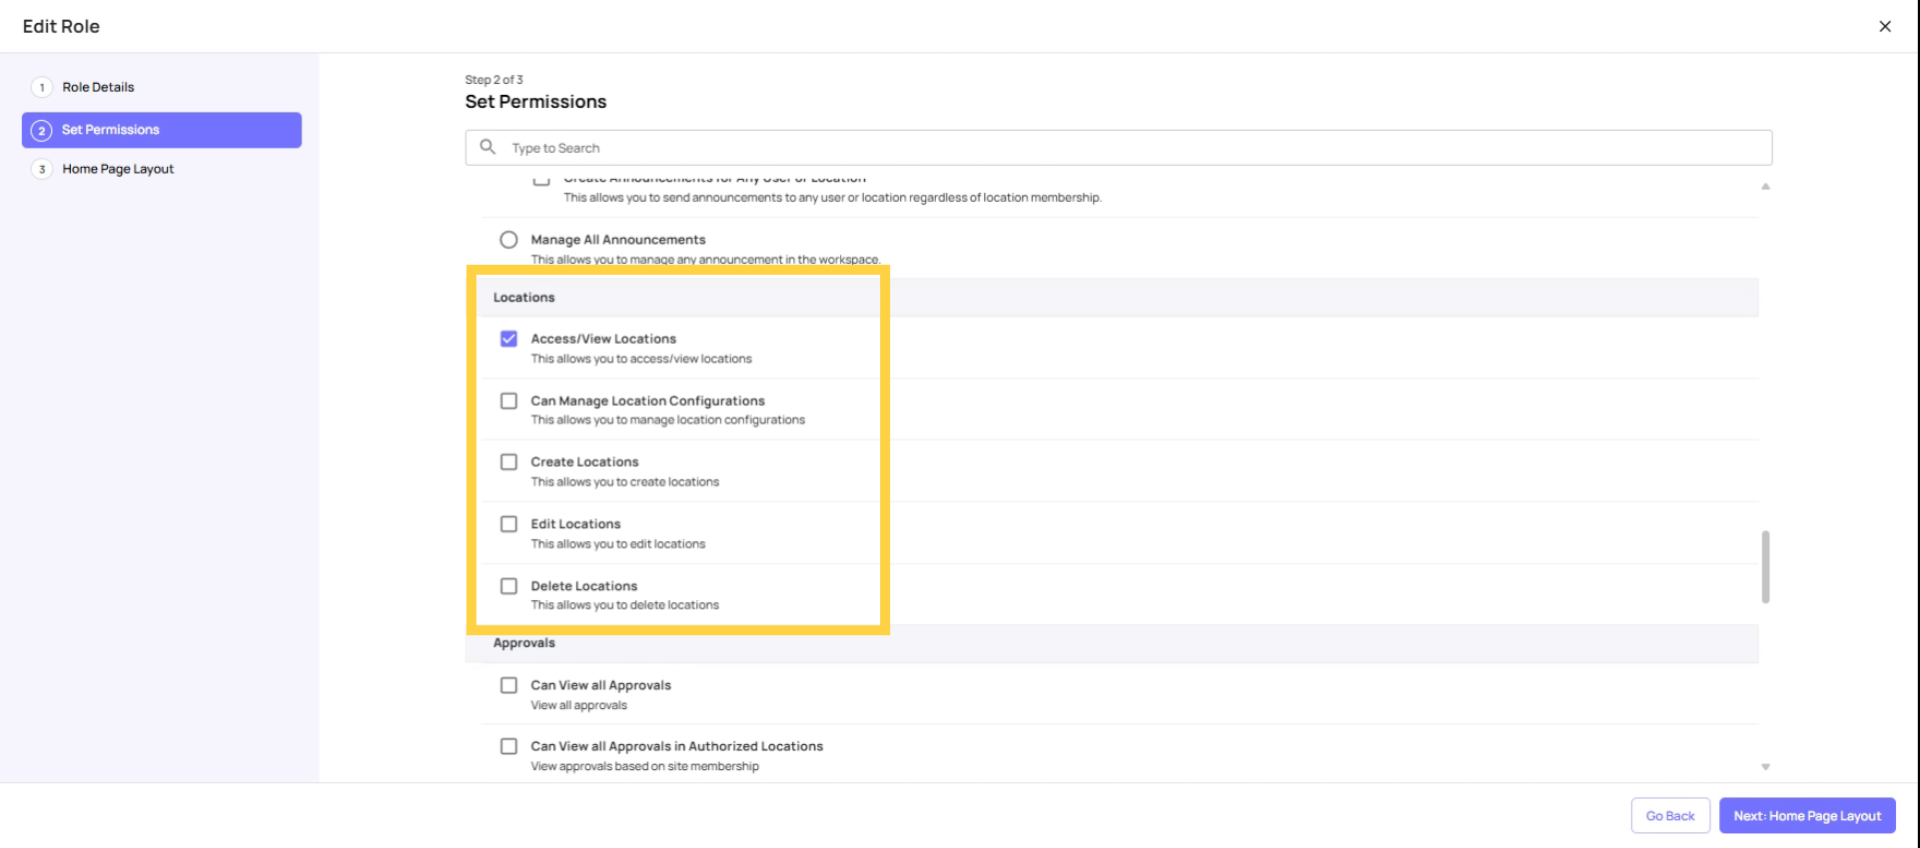
Restrict Location Permission to Admin
Access Locations Controls whether the user can view the Locations tab and see location details. Who should have it: Admin, Owner, District/Regional managers who need location visibility
Add Locations Controls the ability to create new locations in the hierarchy. Who should have it: Admin, Owner only
Edit Locations Controls the ability to edit existing location details (name, address, hierarchy placement). Who should have it: Admin, Owner only. Keep this off for all other roles to prevent accidental hierarchy changes.
Delete Locations Controls the ability to remove locations from the workspace. Who should have it: Admin, Owner only. ❌ Keep this off for everyone else. Deleting a location doesn't delete historical data but makes it much harder to filter.
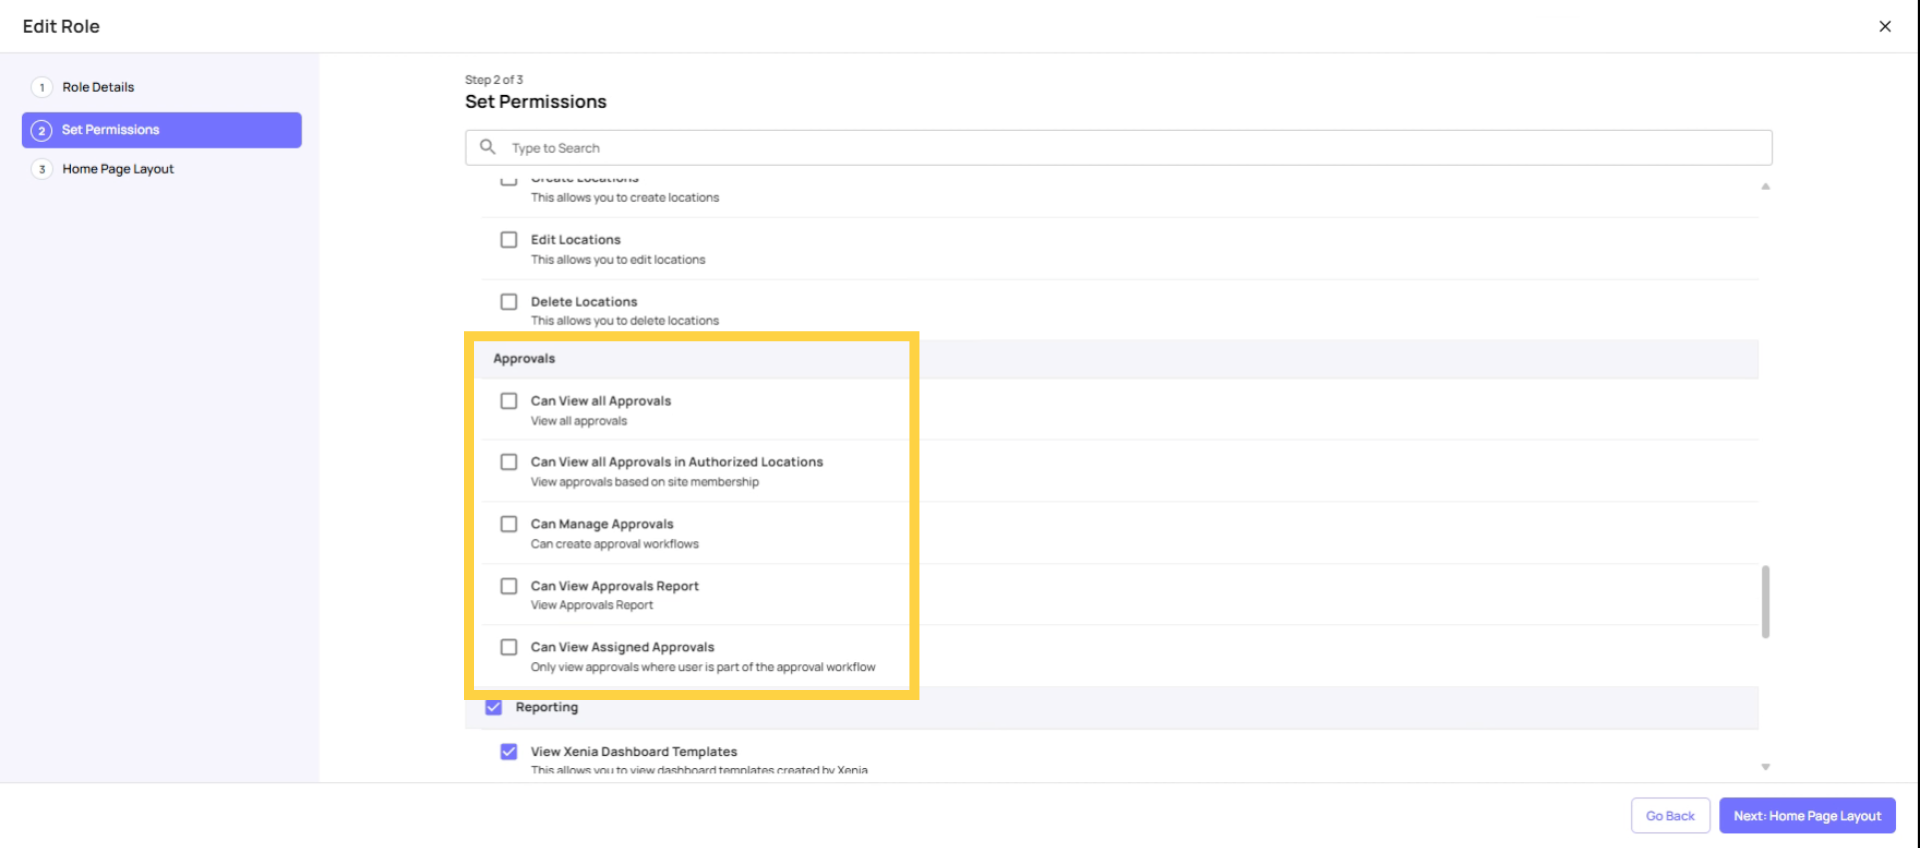
Assign Approval Permissions
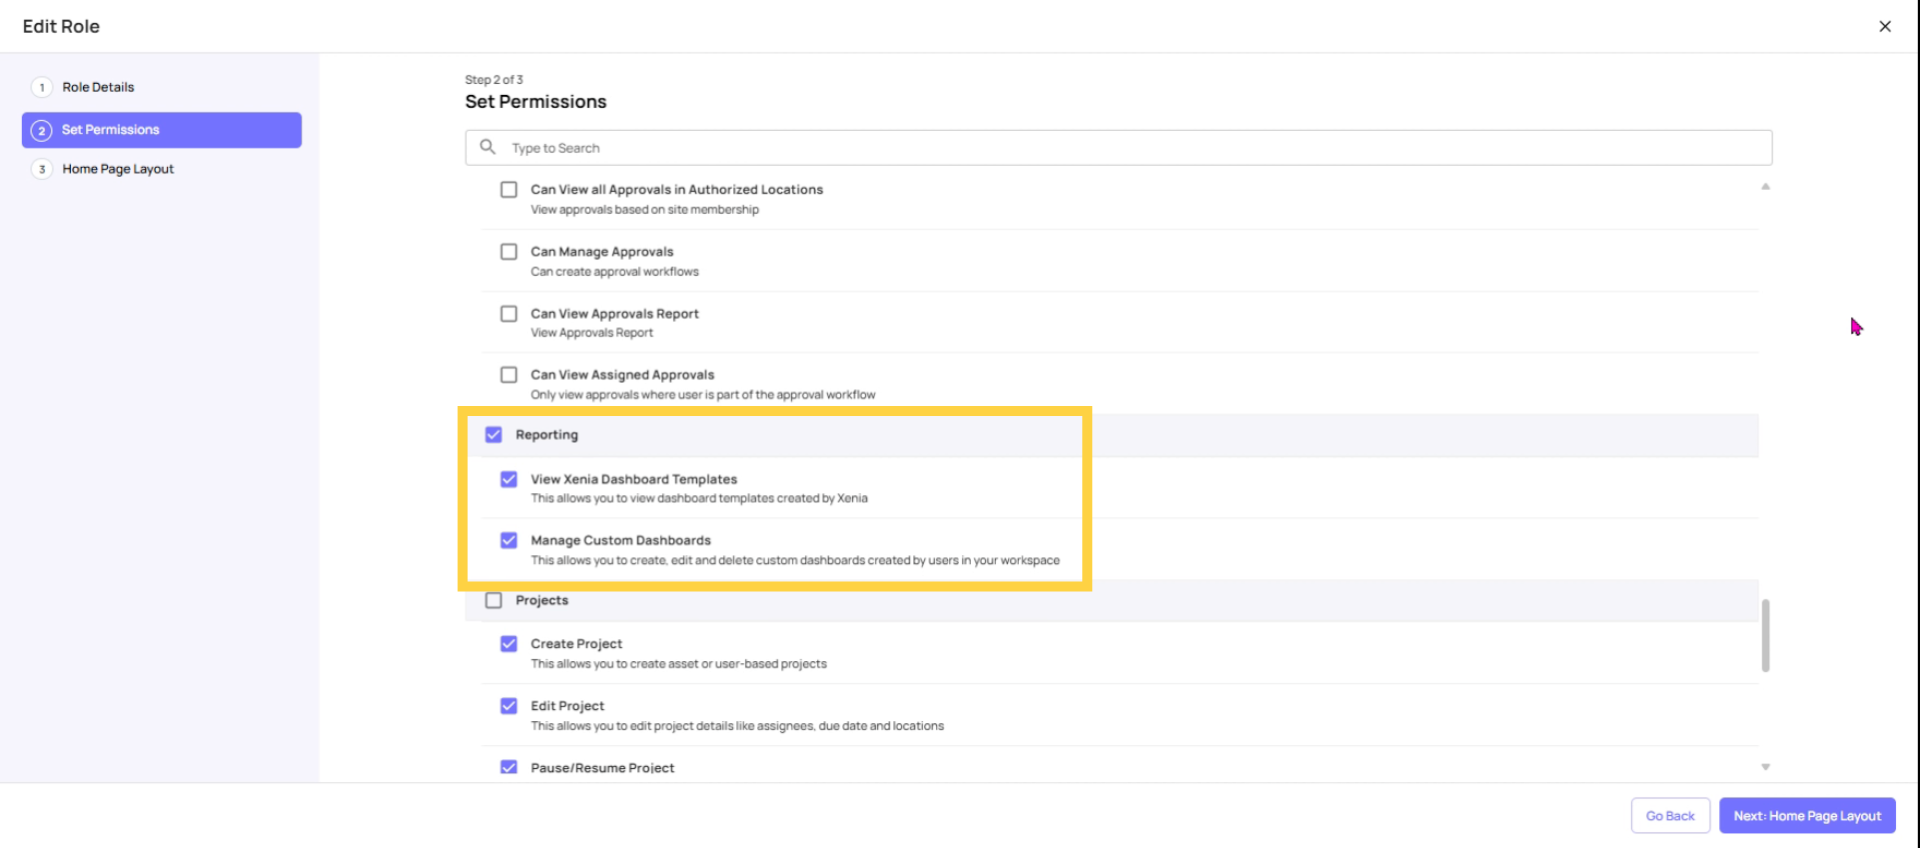
Set Reporting Permissions
View Dashboard Templates (Preset Dashboards) Controls access to Xenia's built-in preset reporting dashboards. When off, the preset dashboards tab is blank. Who should have it: Any role that uses reporting — managers and above
Manage Custom Dashboards Controls the ability to create, edit, and share custom dashboards. Also affects visibility of the reporting tab in some configurations. Who should have it: Admin, Owner. Optionally for senior analytics users.
Configure Project Permissions

Optional Permission settings
Access Assets Controls access to the Assets module (equipment tracking, asset QR codes). Who should have it: Roles involved in facilities/maintenance work. Off for frontline operational roles that don't interact with assets.
Access Chat / Messaging Controls access to the internal messaging and team chat features. Who should have it: Any role that needs team communication
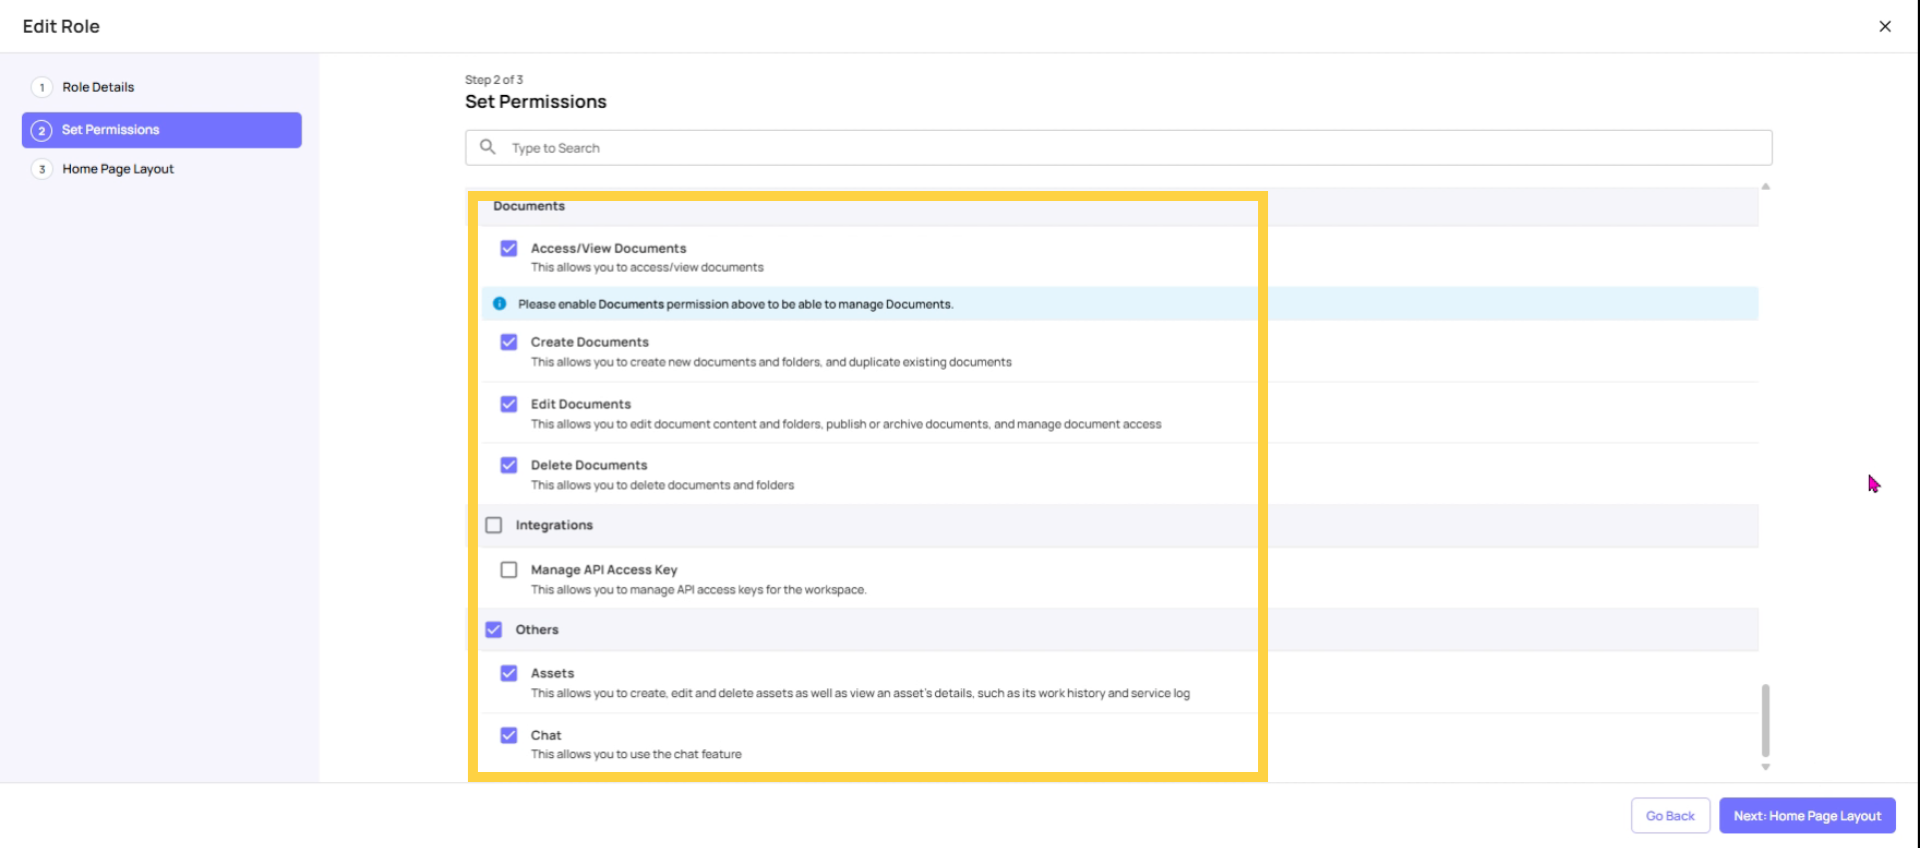
Access Documents / Docs Controls access to the Docs/knowledge base module. Who should have it: Any role that needs to reference SOPs, training materials, or company documents
Access All — Unrestricted Access (Admin Bypass) The master bypass permission. When on, this user can bypass almost all template-level restrictions and access controls across the platform. Even if a template is locked down to specific submitters, a user with this on can still access and edit it. Who should have it: Admin, Owner only. Extremely restricted. This is the failsafe that ensures an admin can always fix access problems.
Complete permission Guide
Quick Reference: Recommended Settings by Role Type
| Permission | Frontline/Crew | Store Manager | District Manager | Admin |
| Access Tasks | ✅ | ✅ | ✅ | ✅ |
| Task Visibility | Own Only | Own + At Locations | Own + At Locations | View All |
| Manage Tasks | ❌ | ✅ | ✅ | ✅ |
| Assign to Any | ❌ | ❌ | ❌ | ✅ |
| Access Templates | ✅ | ✅ | ✅ | ✅ |
| Manage Templates | ❌ | ❌ | ❌ | ✅ |
| Access Locations | ❌ | ❌ | Optional | ✅ |
| Add/Edit/Delete Locations | ❌ | ❌ | ❌ | ✅ |
| Add/Remove Users | ❌ | ❌ | ❌ | ✅ |
| Manage Teams | ❌ | ❌ | ❌ | ✅ |
| View Dashboards | ❌ | Optional | ✅ | ✅ |
| Access All (Bypass) | ❌ | ❌ | ❌ | ✅ |
Need Help
Reach out to us at Support@xenia.team
Comments
0 comments
Please sign in to leave a comment.