Overview of Custom Role Creation
Structure
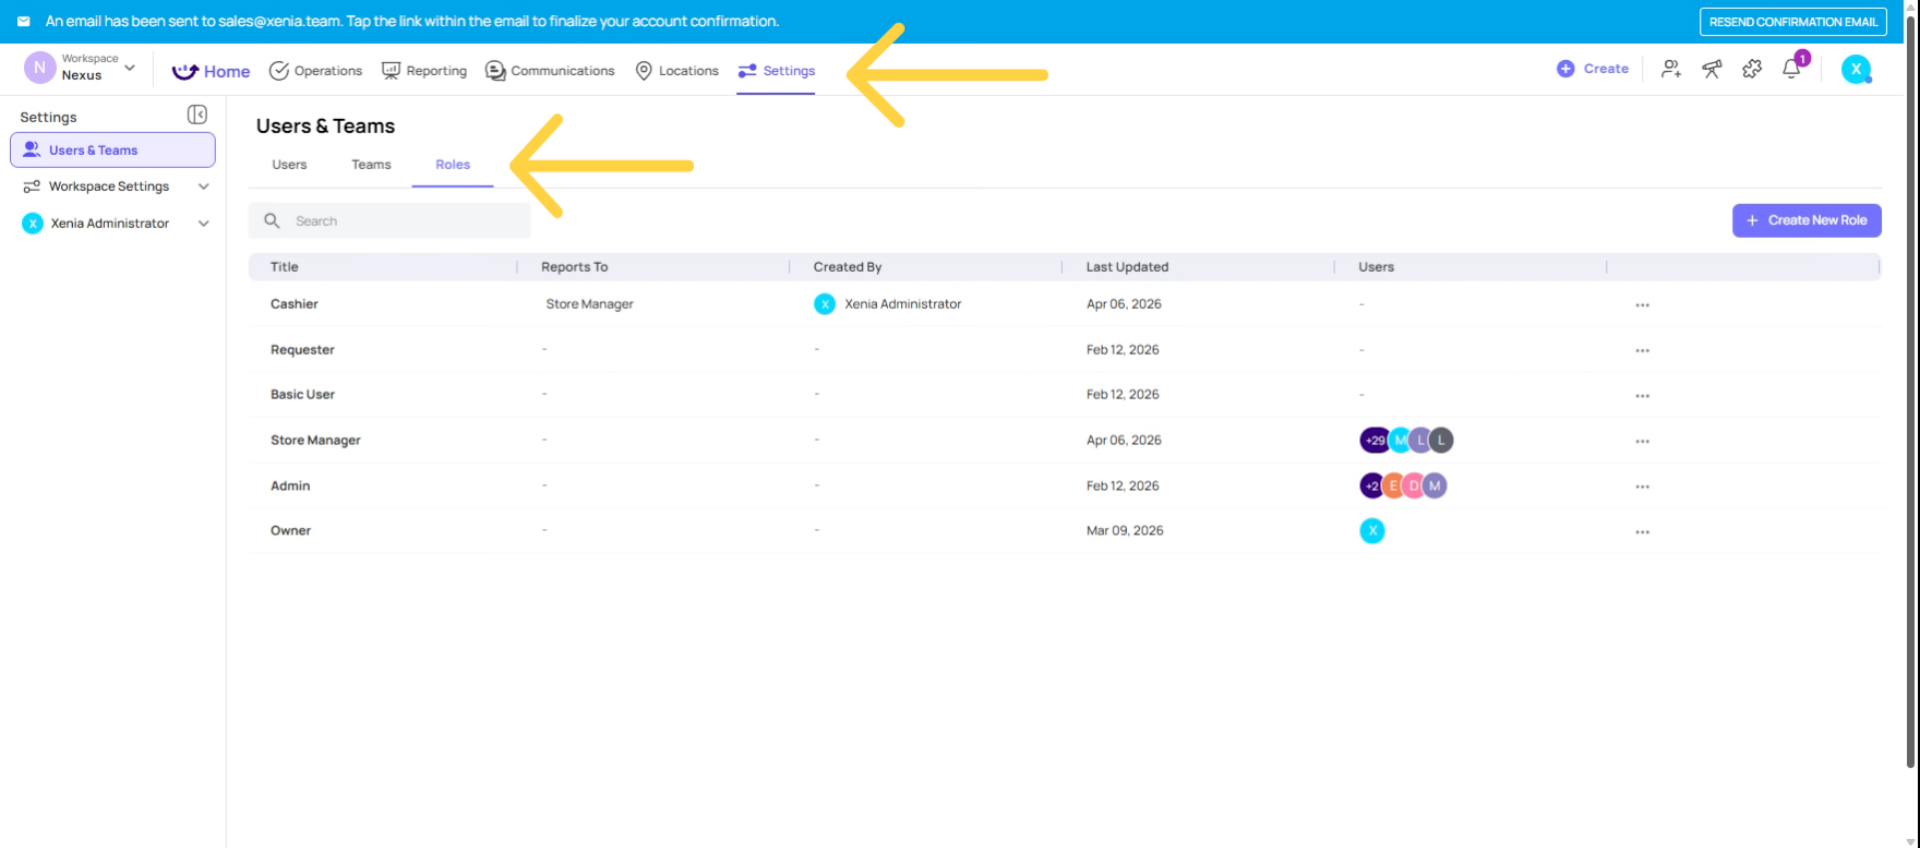
Where to Manage Roles
All role management lives in one place: Settings → Users, Teams & Roles → Roles tab
From here you can:
- View all existing roles and their permission counts
- Create new roles
- Edit any custom role
- Duplicate a role as a starting point
- Delete roles (with caution — )
Navigate to Roles Tab
Creating a New Role — Step by Step
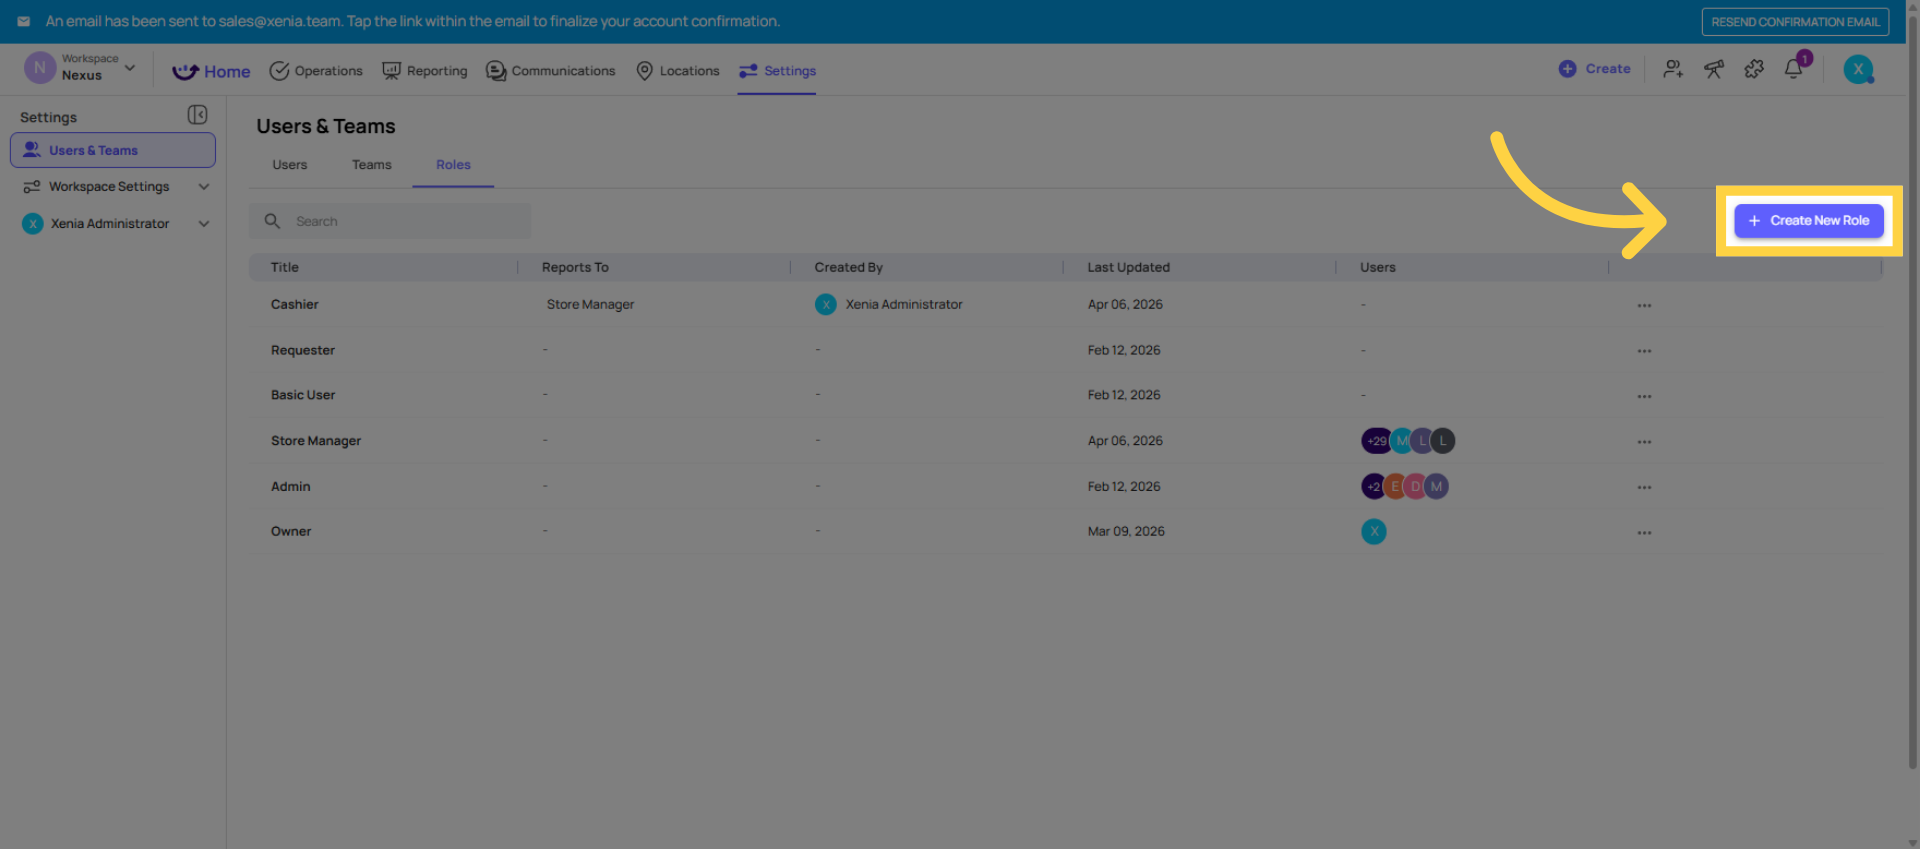
Step 1 — Open the Create Role flow
- Go to Settings → Users, Teams & Roles → Roles tab
Click Create Role in the upper right
Understand Role Creation Flow
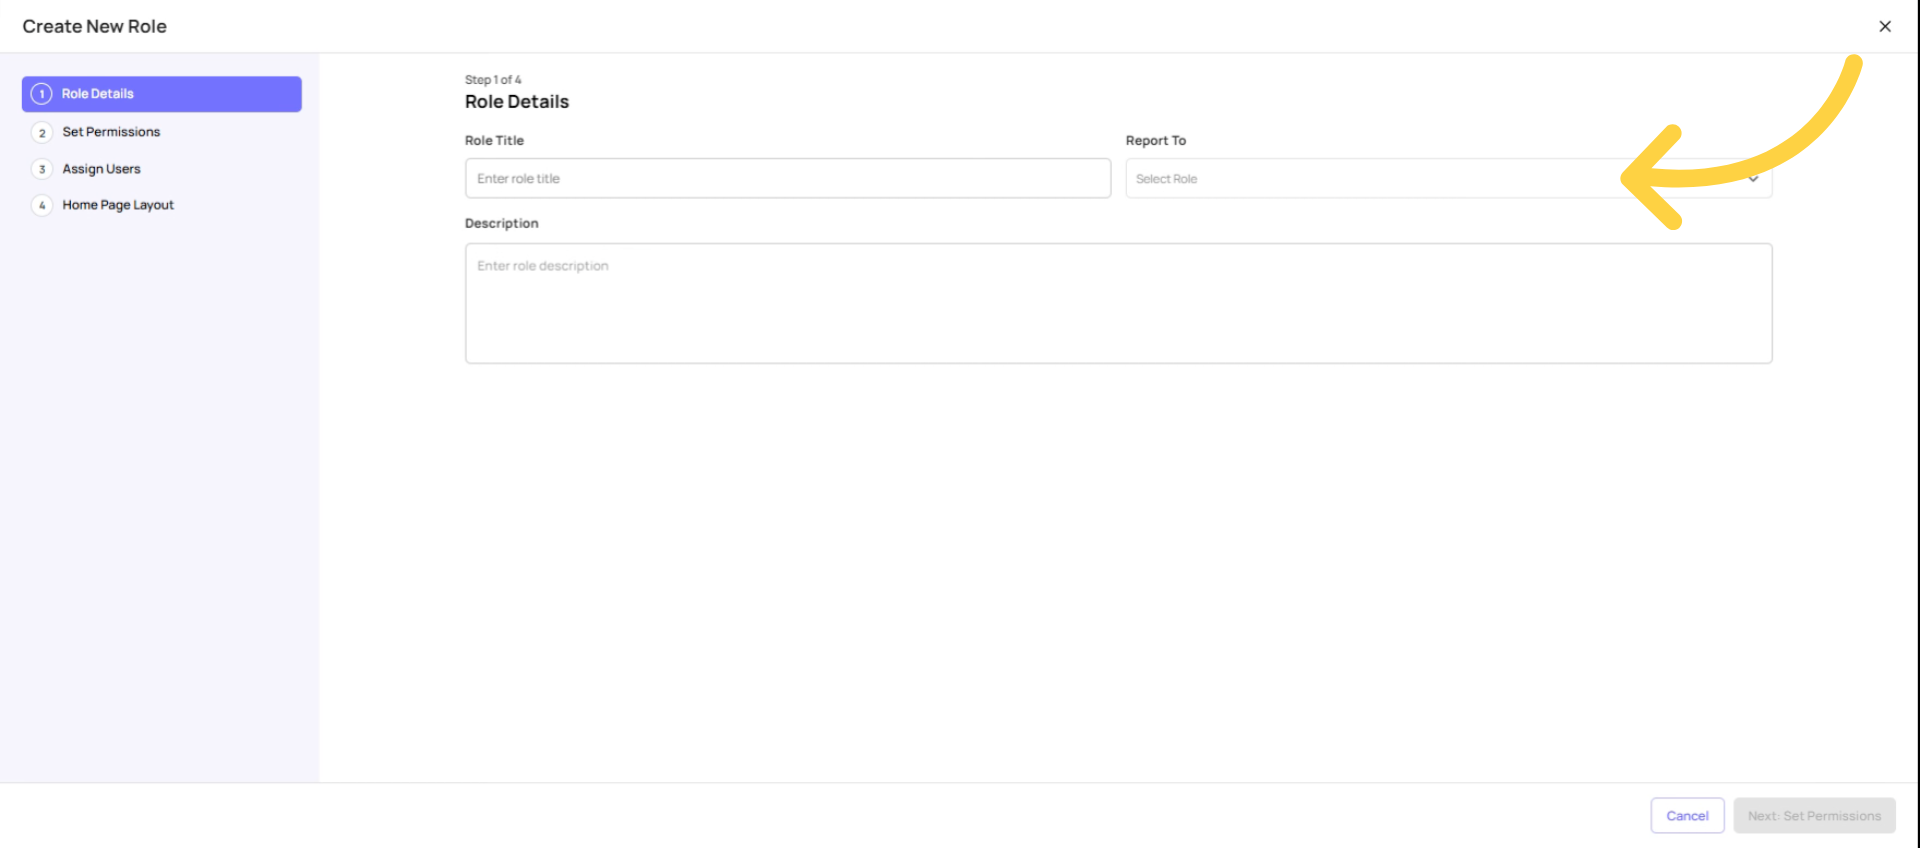
Step 2 — Fill in Role Details
- Name: Use your org's actual job title (e.g., "Store Manager," "District Manager," "Line Cook") — not generic labels like "Full User" or "Basic." This name appears when you assign projects, in reports, and in notification routing.
- Description: Optional but useful for documentation purposes
- Reports To: Select the role directly above this one in your org chart. This powers conditional notifications. Example: if you're creating a Store Manager role, set "Reports To" to District Manager (or whatever your next-level management role is). If you're creating a frontline Cashier role, set "Reports To" to Store Manager. Leave blank only if there's no role above this one that should receive escalation notifications.
Click Next to proceed to Permissions.
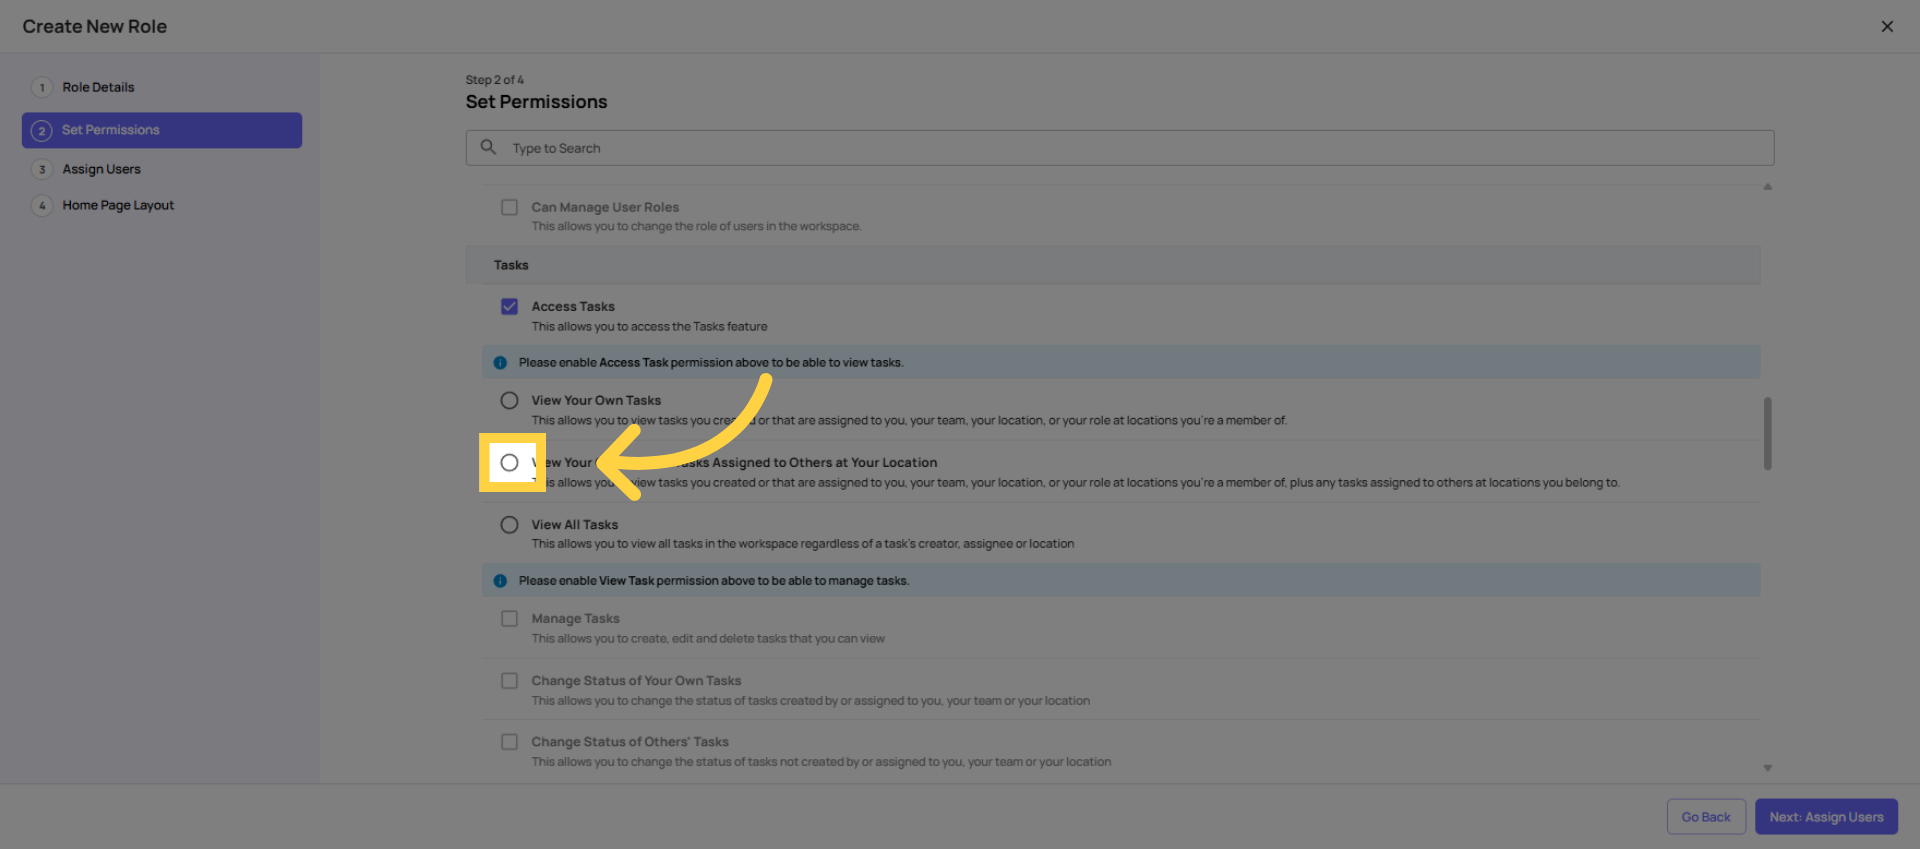
Configure Task Access and Visbility
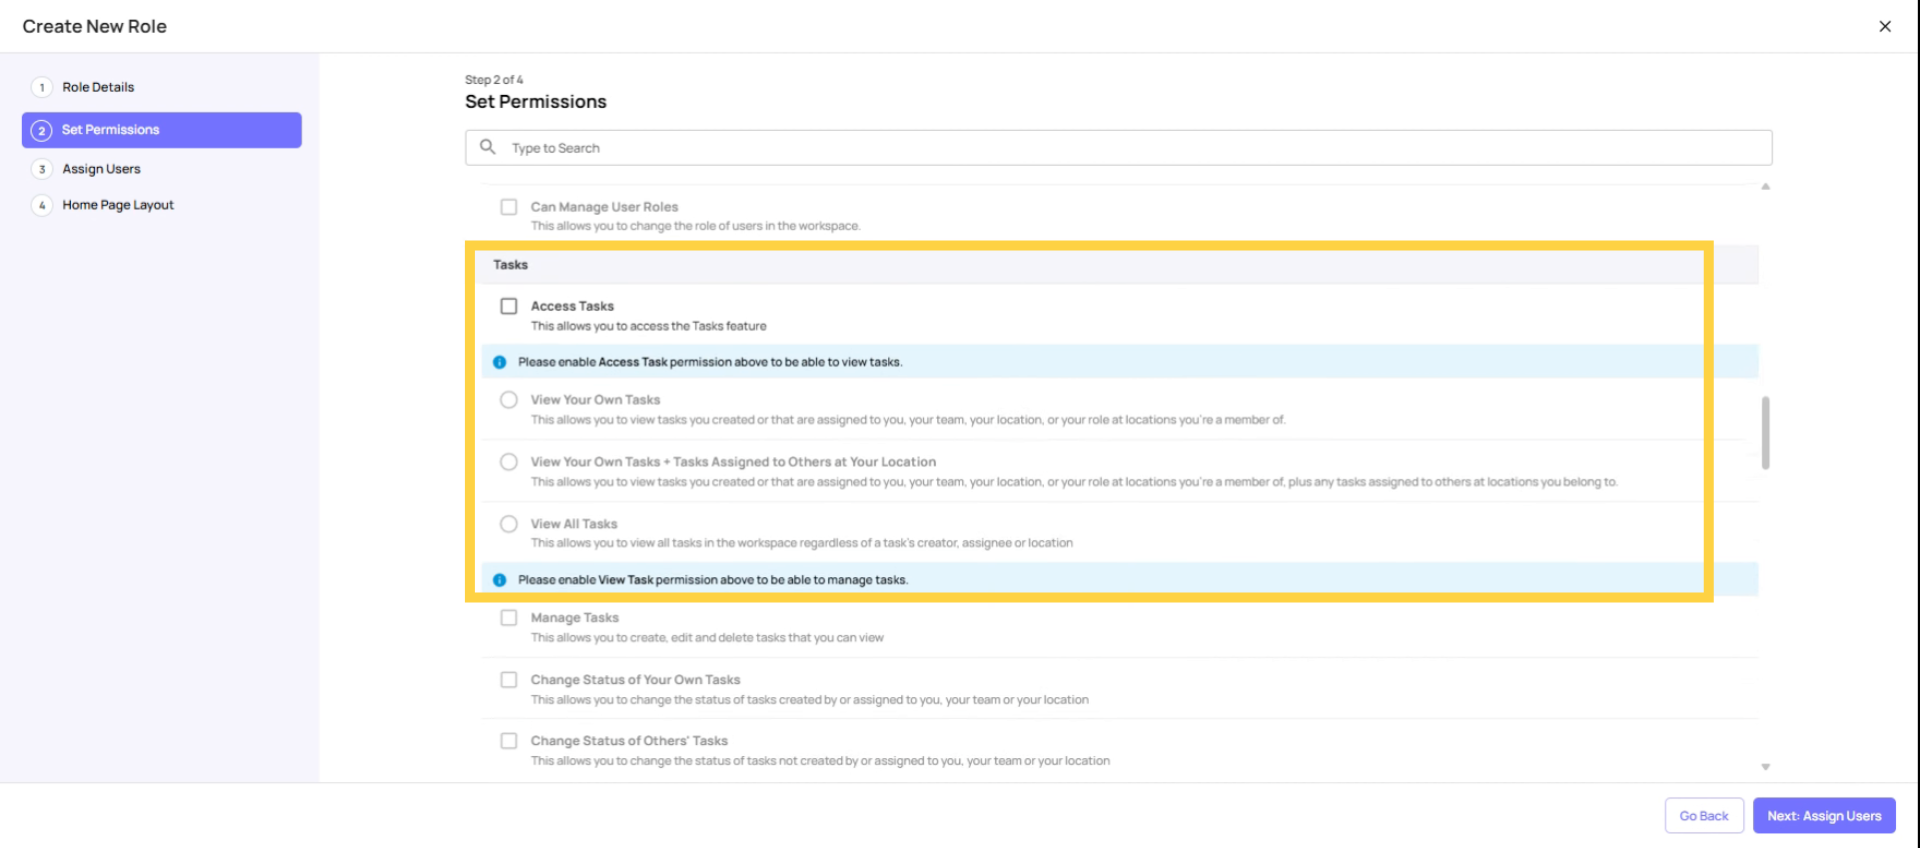
Step 3 — Configure Permissions
This is the most important step. Permissions are organized by module. Work through each section:
Tasks:
| Permission | Store/Frontline | Store Manager | District Manager | Admin |
| Access Tasks | ✅ ON | ✅ ON | ✅ ON | ✅ ON |
| View own tasks | ✅ Select | — | — | — |
| View tasks at locations | — | ✅ Select | ✅ Select | — |
| View all tasks | — | — | — | ✅ Select |
| Manage Tasks | OFF | Optional | ✅ ON | ✅ ON |
| Assign to any user/location | OFF | OFF | Optional | ✅ ON |
| Change status of own tasks | ✅ ON | ✅ ON | ✅ ON | ✅ ON |
| Change status of others' tasks | OFF | ✅ ON | ✅ ON | ✅ ON |
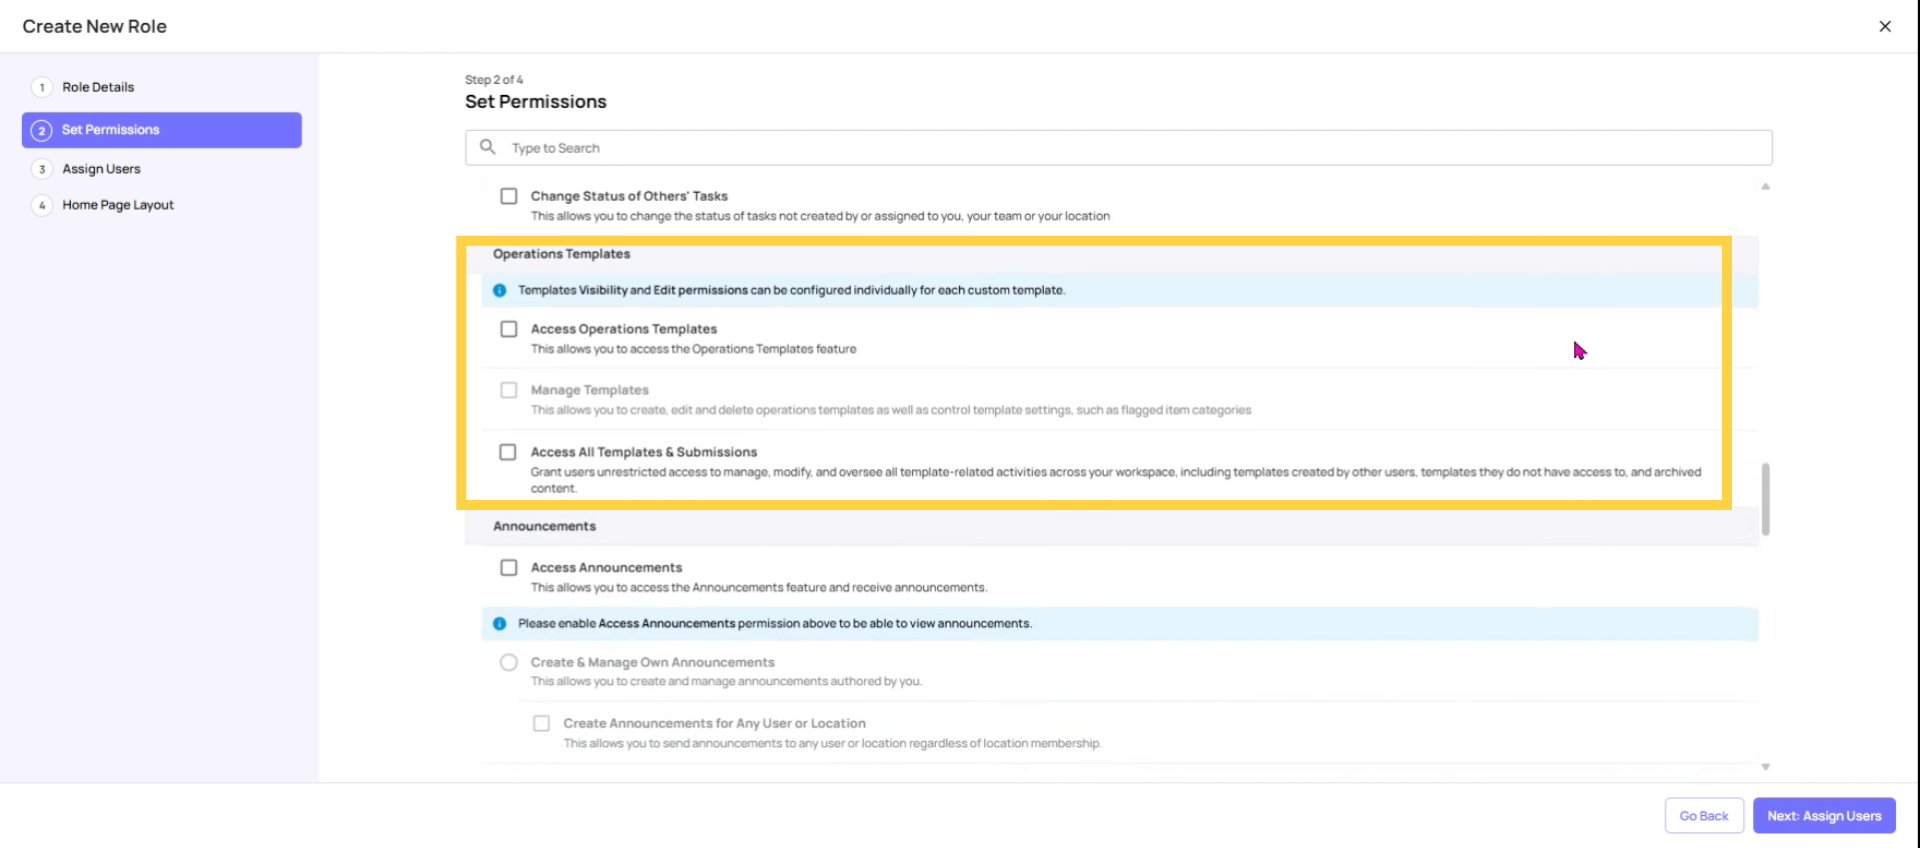
Set Operation Templates Permission
Operations Templates:
| Permission | Store/Frontline | Store Manager | Admin |
| Access Operations Templates | ✅ ON | ✅ ON | ✅ ON |
| Manage Templates | ❌ OFF | ❌ OFF | ✅ ON |
⚠️ Keep Manage Templates OFF for all store and frontline roles. This is the most commonly misconfigured permission. If a store-level user accidentally archives or deletes a template, it affects every location using that template.
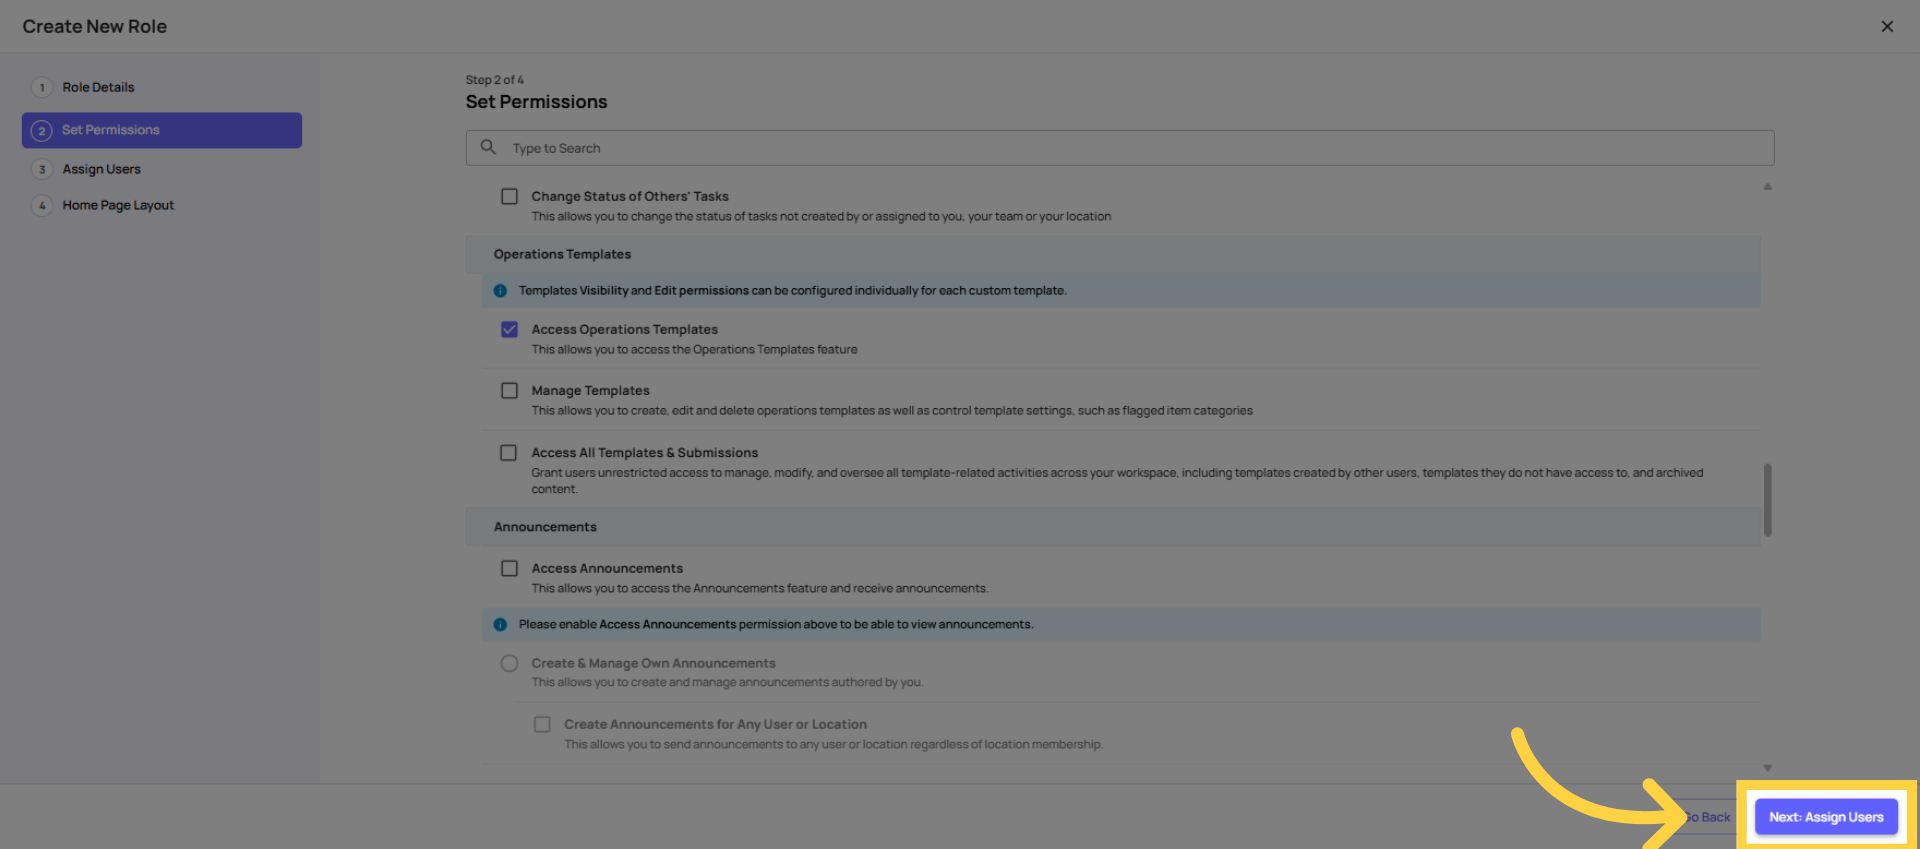
 Click Next: Assign Users to move to the user assignment step in the role creation process.
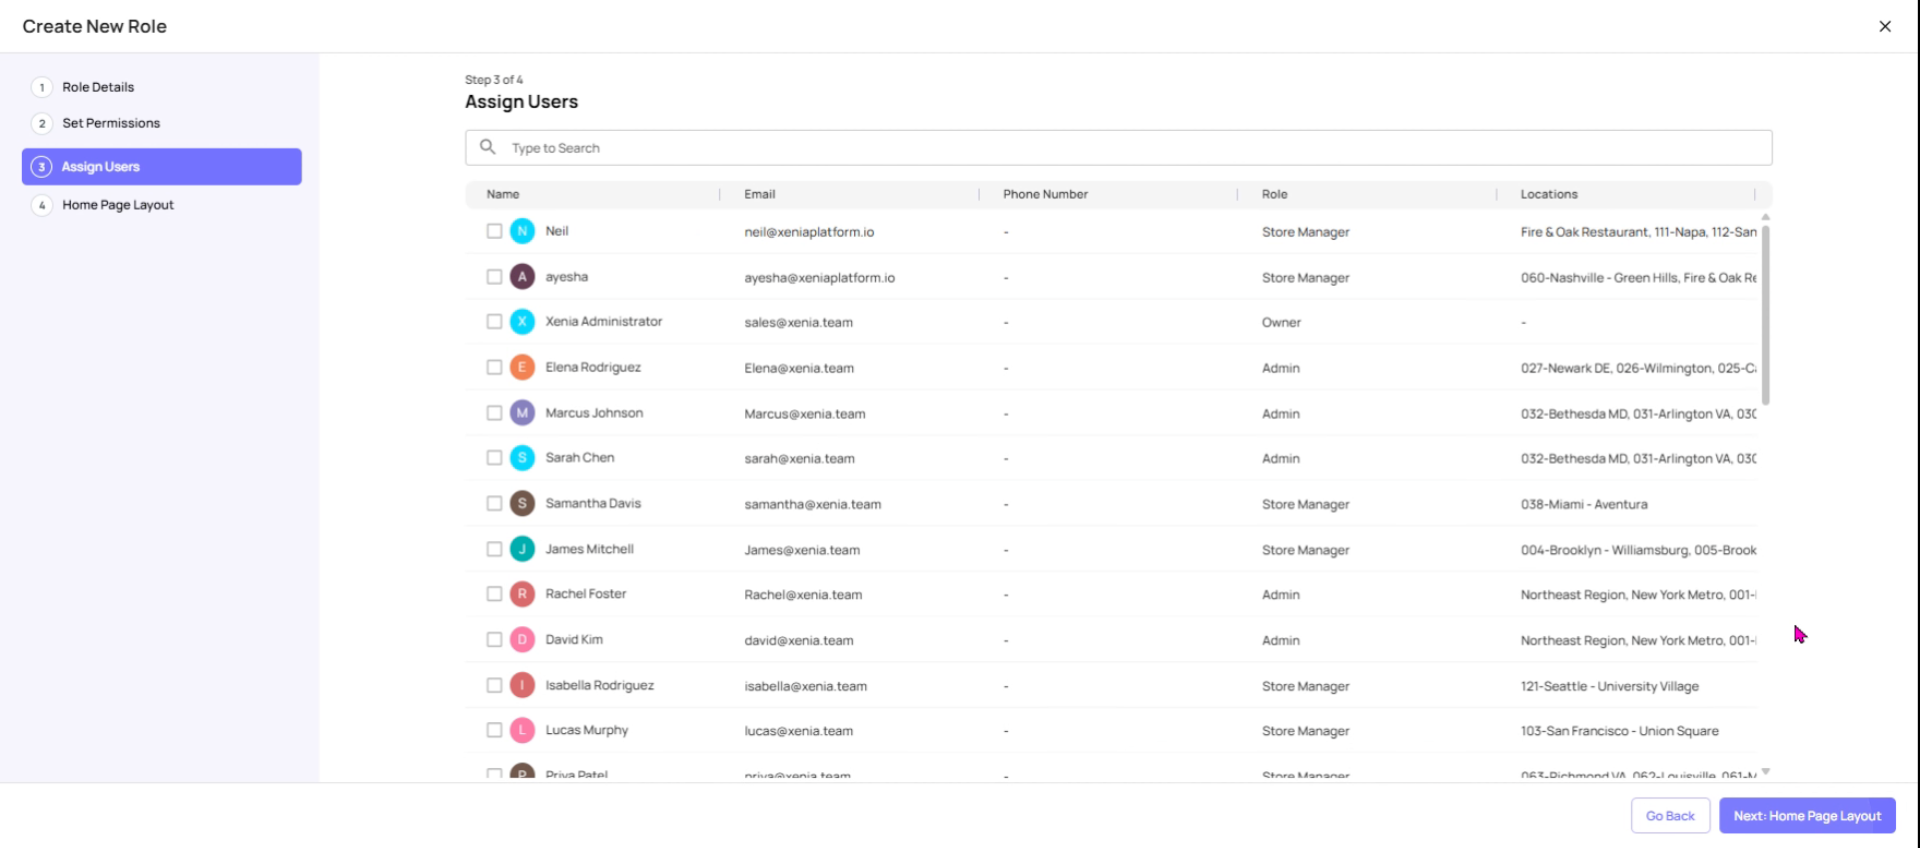
Assign users to Role
Assigning Users to a Role
After creating a role, you assign users to it when you invite them or update existing users:
When inviting a new user:
- Settings → Users → Add User → select the role from the dropdown
For existing users:
- Settings → Users → find the user → three dots → Update → change the role
Important: One account = one role. A user can only be in one role at a time. If a user needs a different set of permissions for a specific context, they'd need a second account (uncommon, but possible).
Select Homepage Layout
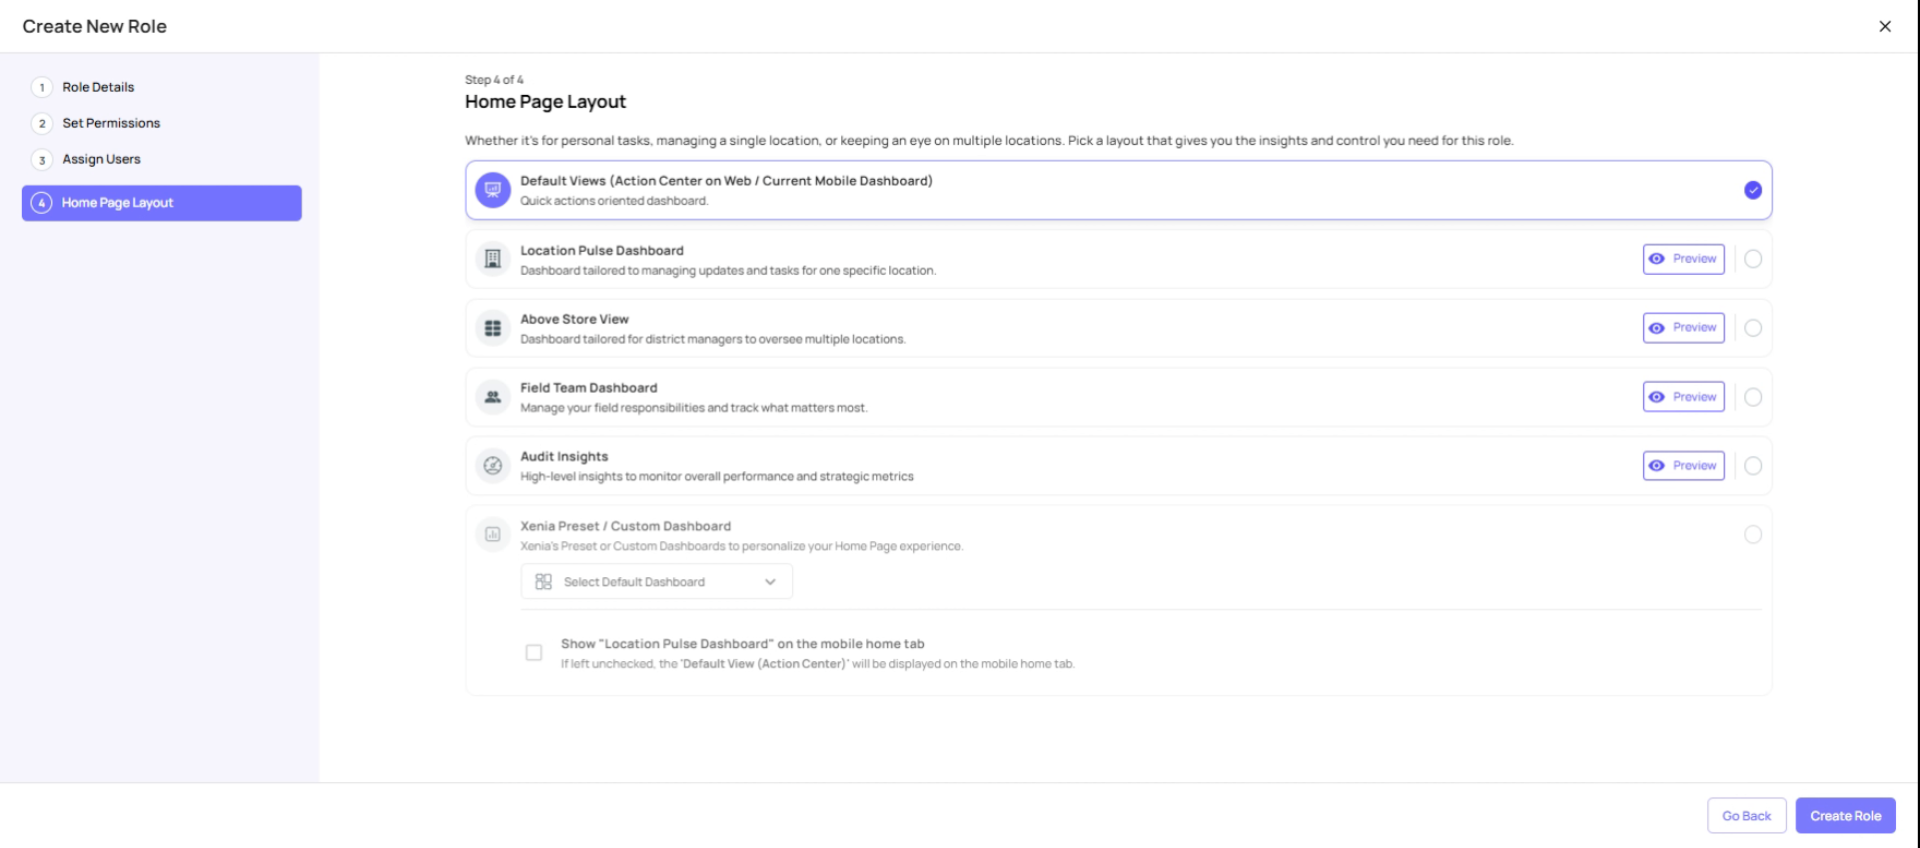
Step 4 — Set the Homepage Layout
This is Step 3 of the role creation flow. Choose what this role sees when they open Xenia:
| Role Type | Recommended Layout |
| Frontline crew, cashiers, cooks | Location Pulse Dashboard |
| Store Manager | Location Pulse Dashboard |
| District / Area Manager | Above Store View |
| Field Auditor / Inspector | Field Team Dashboard |
| QA / Compliance roles | Audit Insights Dashboard |
| Regional Director / VP | Preset Custom Dashboard |
| Admin | Default View |
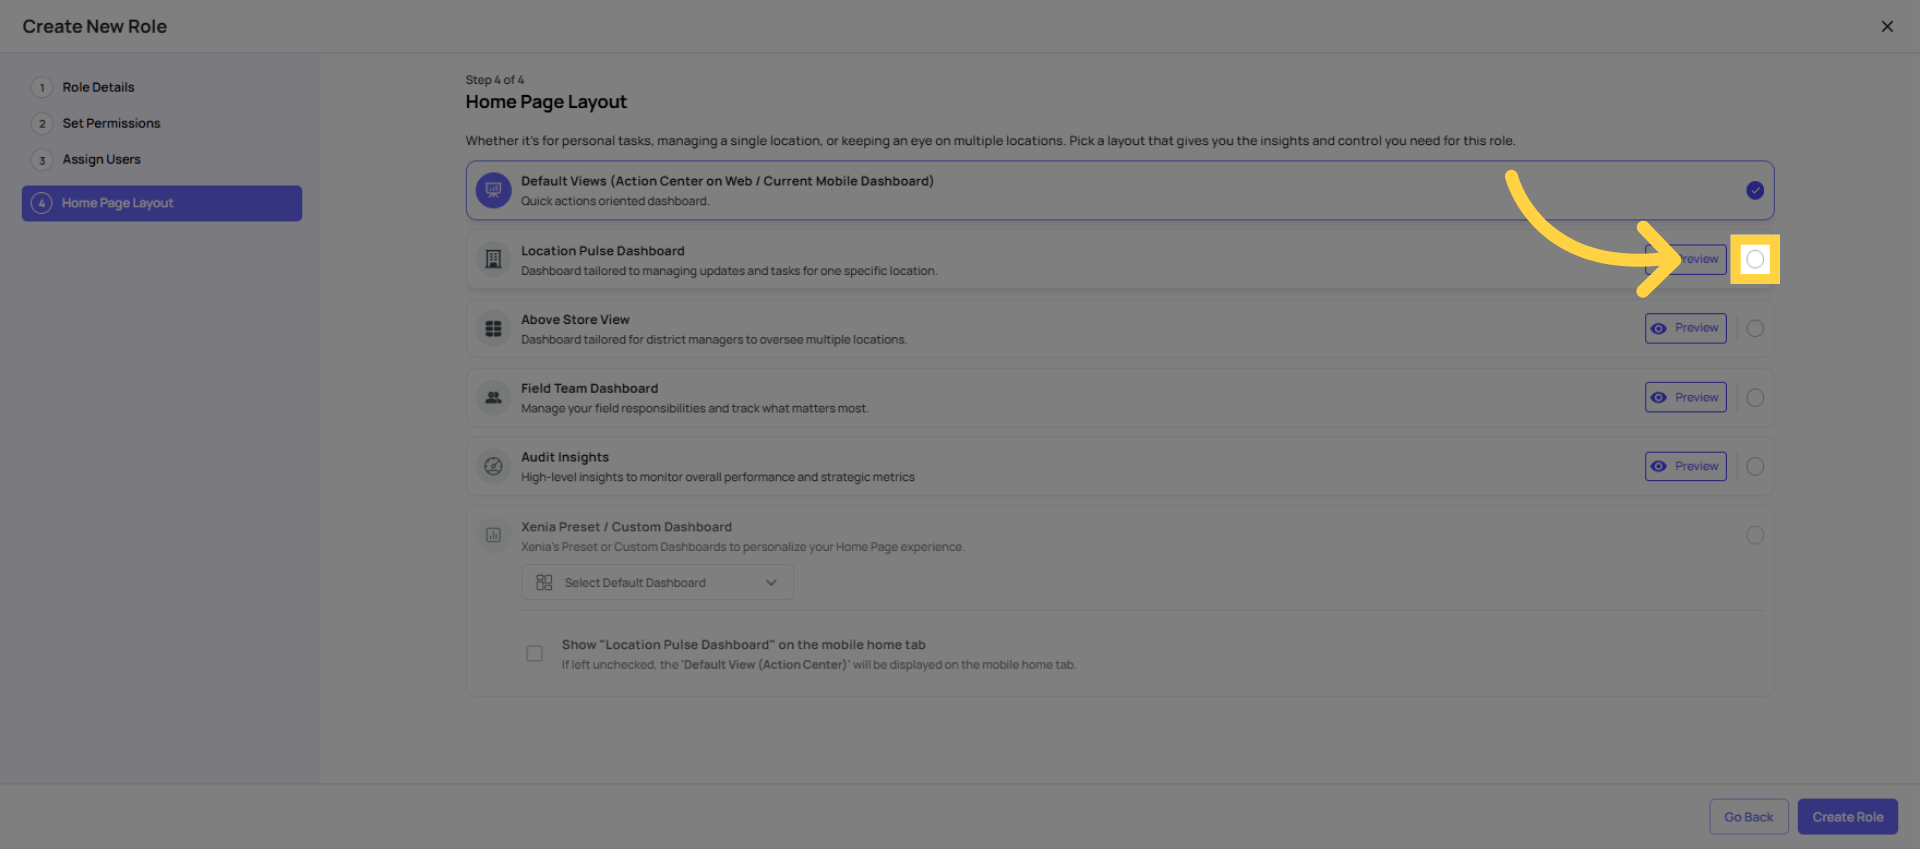
 Click Preview next to any option to see what it looks like before committing.
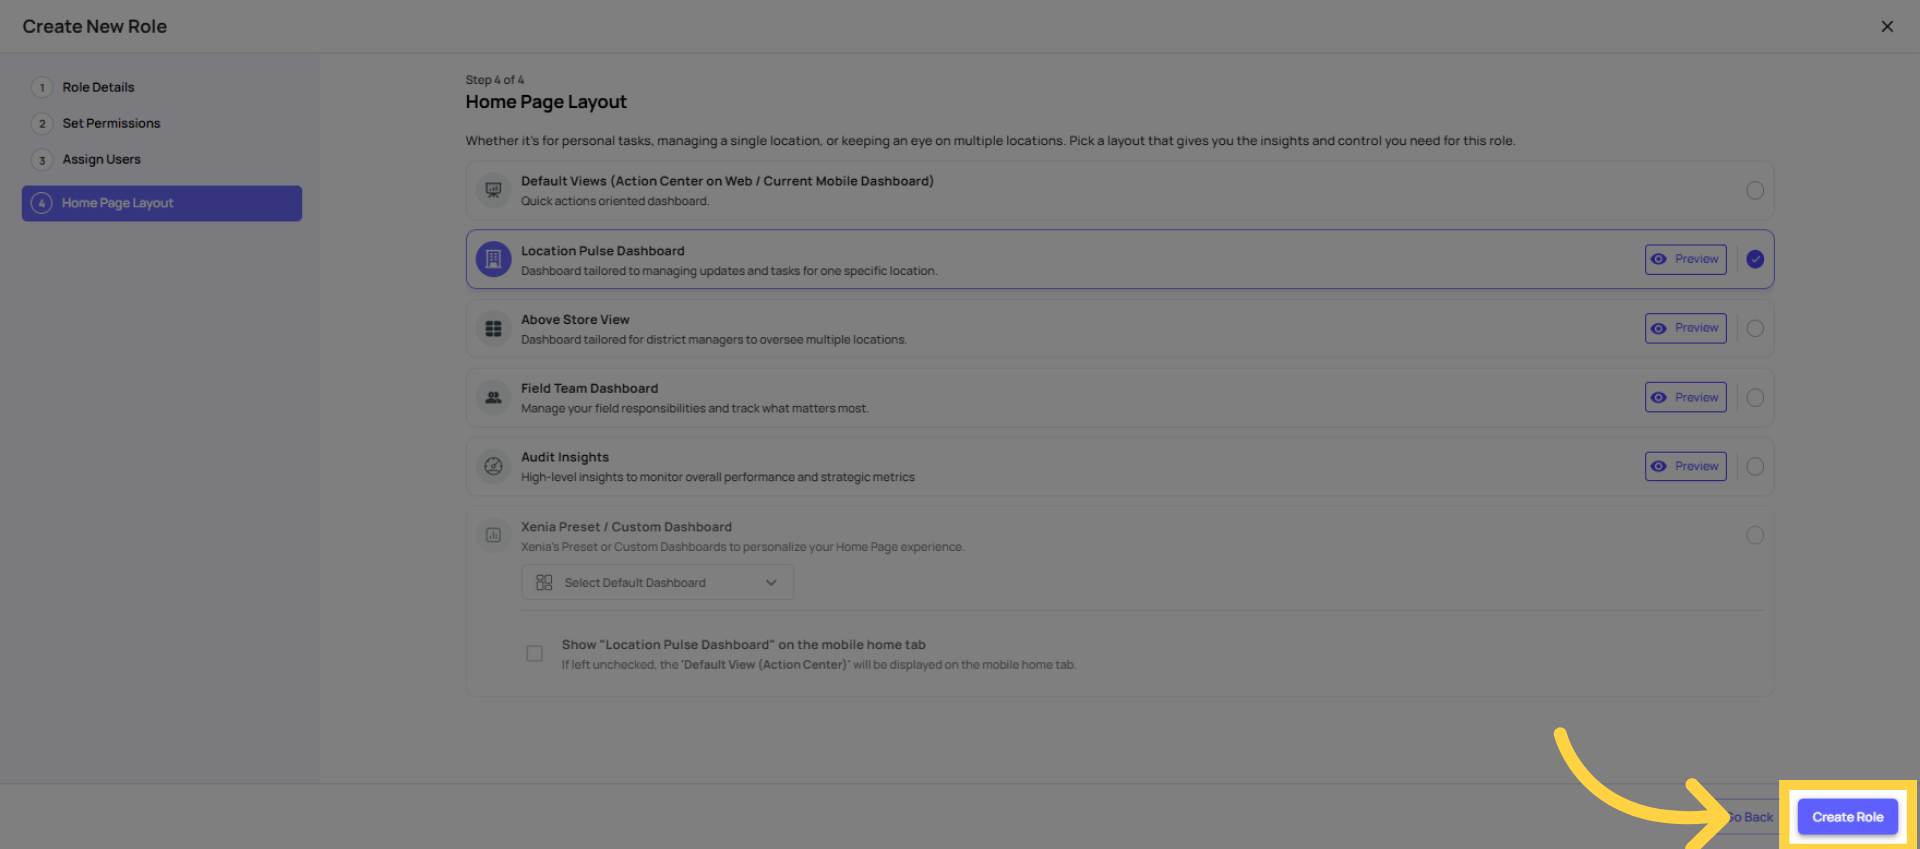
Create Role
Duplicate Existing Role
The Faster Way: Duplicating an Existing Role
If you already have a role that's close to what you need, duplicating is faster than starting from scratch.
- Find the role you want to duplicate
- Click the three dots (⋯) next to it
- Select Duplicate
- Rename it and adjust the permissions as needed
Important: Duplicating a role copies the permission configuration only. It does not copy users. You'll still need to assign users to the new role after creating it.
This is especially useful when creating role variants — for example, if you have a Store Manager role and need a slightly different version for a Senior Store Manager with one or two additional permissions.
Edit Existing Role Details
Editing an Existing Role
To edit any custom role:
- Go to Settings → Roles
- Click the three dots next to the role → Edit
- Work through the same three steps: Details → Permissions → Homepage Layout
- Click Update Role to save
Changes take effect immediately for all users in that role. No logout or refresh required.
What you cannot edit:
- Owner and Admin preset roles are locked — they cannot be modified
- The role name cannot be changed in a way that would break existing project assignments (though you can rename for display purposes)
Now click on Next to go to Set Permissions. Here you can make changes to the user, the role, and their permissions.
Common Role Configuration Mistakes
| Mistake | Impact | Fix |
| Giving frontline roles "Manage Templates" | Staff can edit, archive, or delete your checklists | Turn OFF Manage Templates in the role |
| Setting task visibility to "View own" for a store manager | Manager can't see their team's tasks | Change to "View tasks at your locations" |
| Not setting "Reports To" on any role | Conditional notification escalation doesn't work | Edit each role and set the "Reports To" field |
| Naming roles generically ("Full User," "Basic User") | Project assignments and reports are confusing | Rename roles to match actual job titles |
| Giving all roles "Assign to any user or location" | Any user can reassign tasks to anyone — including outside their location | Keep this ON only for Admin/Owner |
| Setting "View all tasks" for store-level roles | Store employees can see tasks from all locations in the workspace | Change to "View tasks at your locations" |
Need Help?
For assistance please reach out to us at support@xenia.team
Comments
0 comments
Please sign in to leave a comment.