Are you Ready to Go Live
What "Going Live" Means
Going live means your front-line team will start using Xenia for real — completing their assigned checklists, seeing their tasks on their devices, and having their submissions tracked in your reports.
Before that happens, spend 30 minutes running through this checklist. Catching a misconfigured role or a missing location now takes 5 minutes to fix. Catching it after 50 employees have logged in takes much longer.
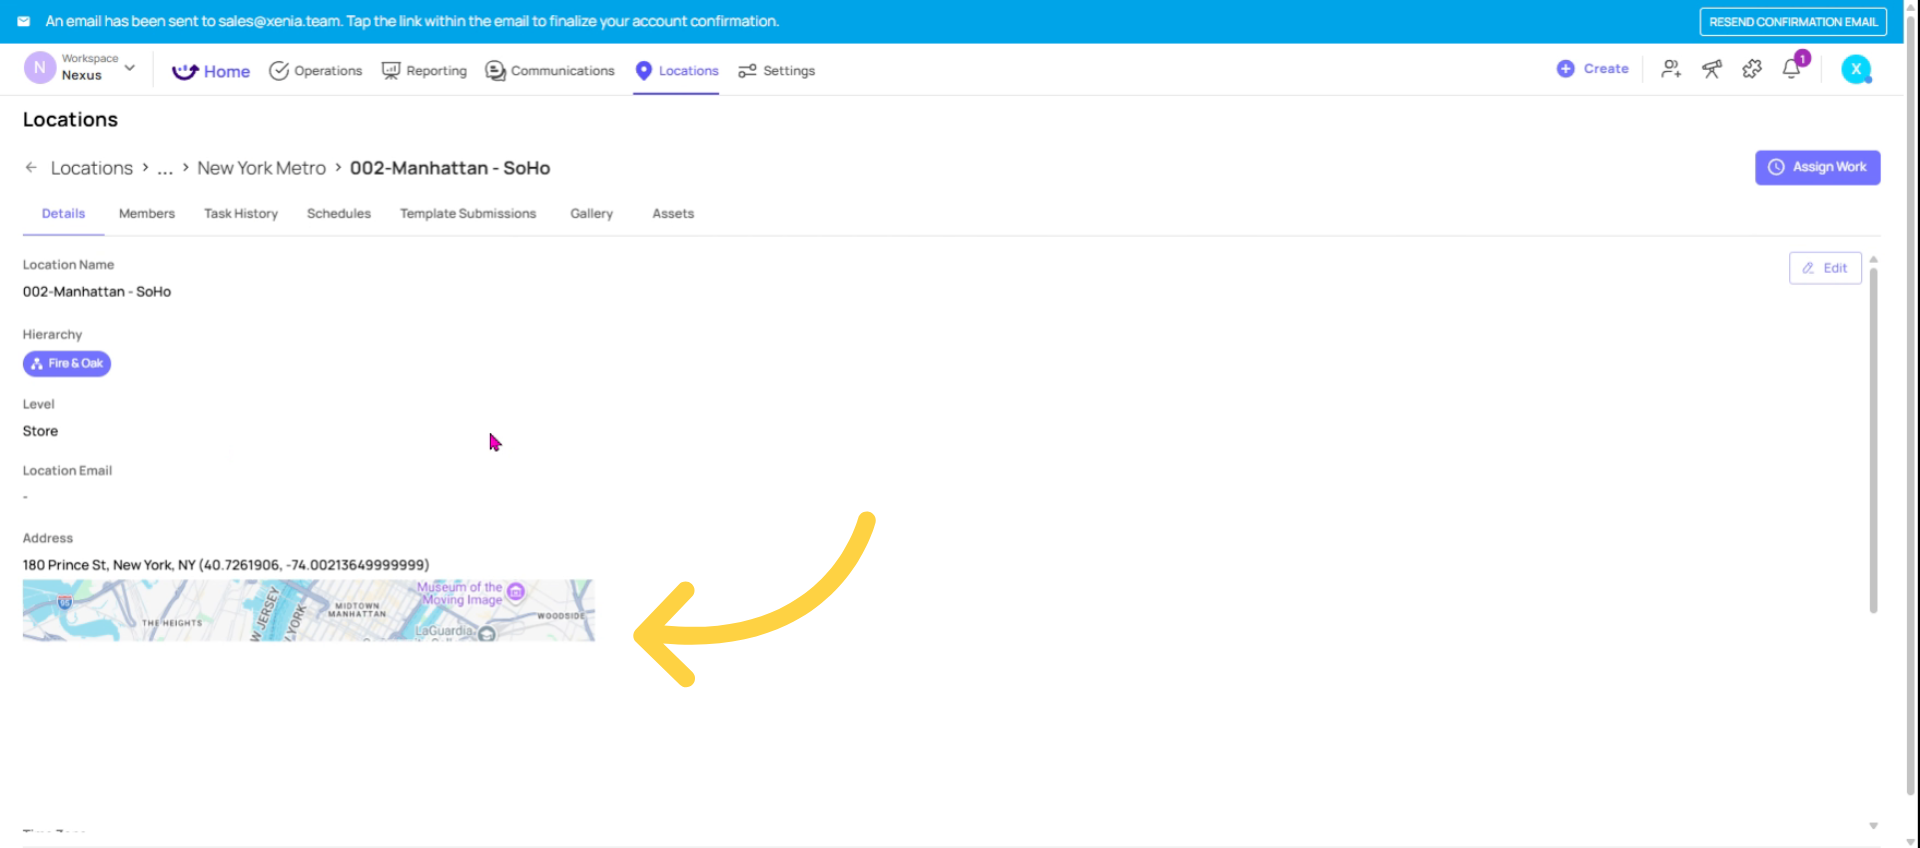
Navigate Location Tabs and Verify Sites
SECTION 1: Workspace Foundation
- Location hierarchy is built — all regions, districts, and sites are added with correct parent-child nesting
- All site-level locations have addresses — required for timezone-based task scheduling
- Hierarchy labels are customized — level names (e.g., "District," "Territory," "Store") reflect your org's terminology
Hierarchy structure is finalized — you've confirmed you won't need to restructure it after launch (changes cascade throughout the system)

Check Roles Tab Permissions
SECTION 2: Roles & Permissions
- All roles are created — one role per distinct job type (Store Manager, Cashier, District Manager, etc.)
- Permissions are configured for each role — especially task visibility, manage templates (should be OFF for frontline), and access controls
- "Reports To" is set for each role — required for conditional notifications when tasks are overdue
- Homepage layout is assigned to each role — Location Pulse for frontline/store roles; Above Store or Custom Dashboard for management
At least one Admin or Owner account is active — never go live without a fallback admin account
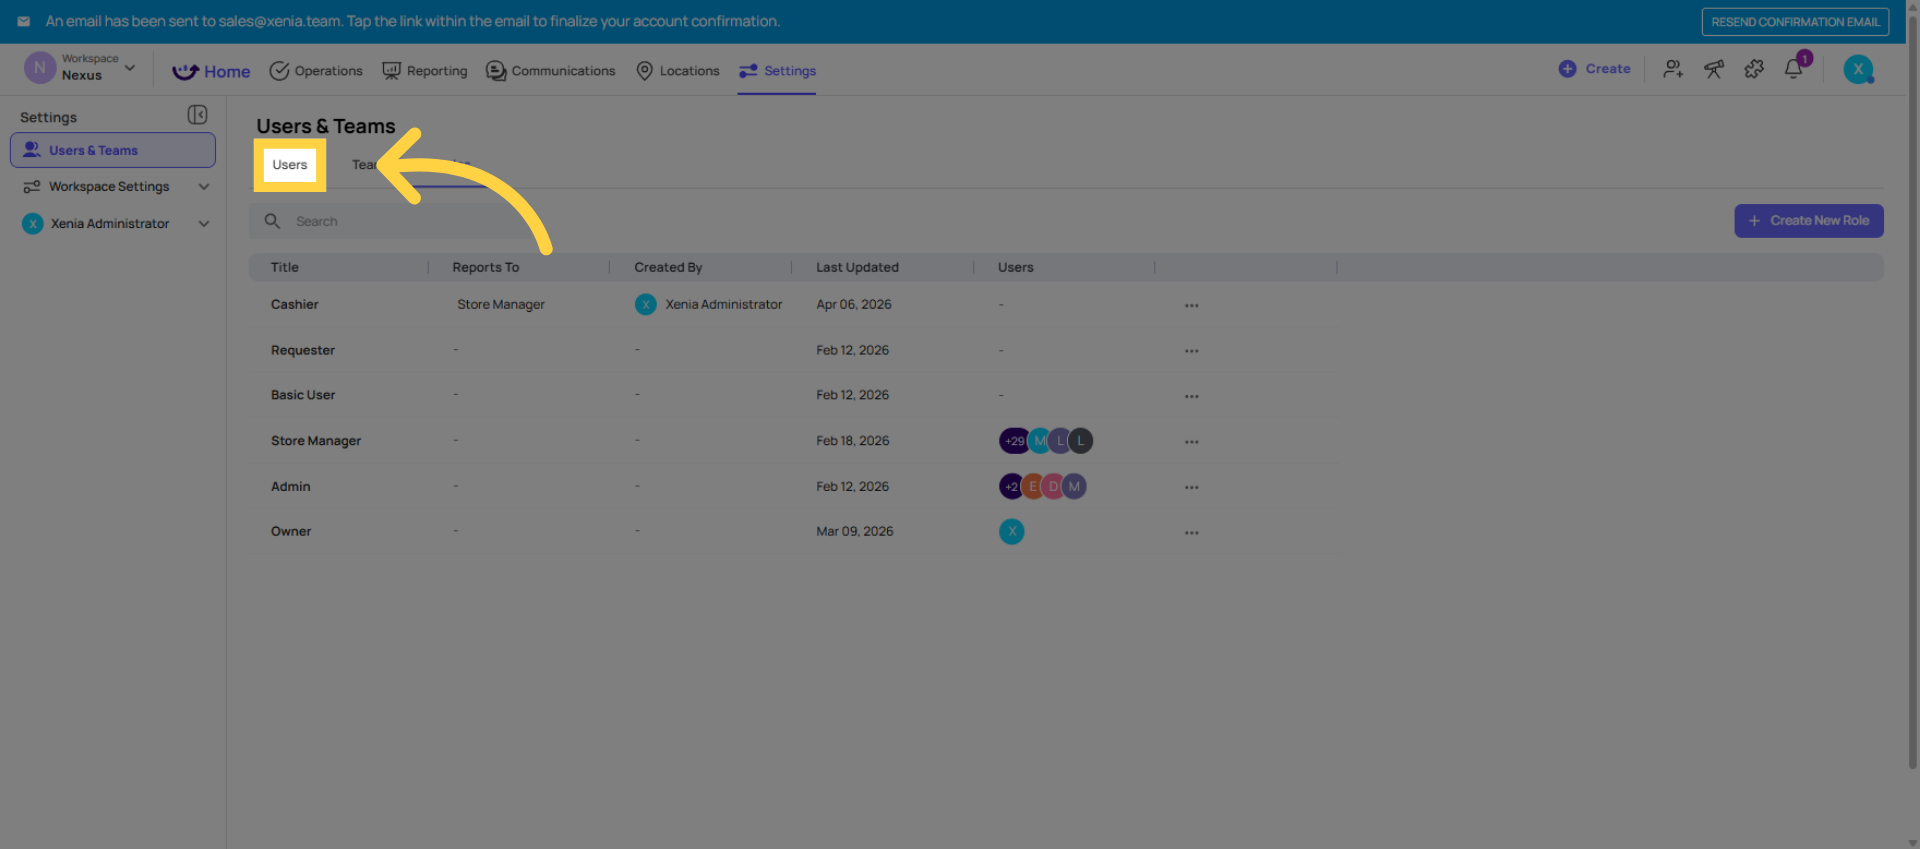
Access Users Section
SECTION 3: Users & Accounts
- All users are invited — either individually or via CSV bulk invite
- Every user has the correct role assigned — spot-check at least 5 users to confirm
- Every user has at least one location assigned — no location = no data visibility, no tasks
- Account strategy is decided — individual accounts for management, role-based shared accounts for frontline (if applicable)
- For shared/role-based accounts: passwords are set directly (don't wait for invite emails) and tested on the actual device
- All invite emails have been received and accepted — or passwords have been set by the admin
Email addresses are unique — no duplicates across the system
Review Checklist Template
SECTION 4: Templates (Checklists)
- All checklists are built — every checklist you plan to launch on Day 1 is in the template builder
- Checklists are reviewed for accuracy — questions are correct, sections make sense, step types are appropriate
- Required steps are set — critical items are marked required so they can't be skipped
- Photo automations are configured — conditional photo requirements are set up for key accountability steps
- Manage Templates permission is OFF for frontline roles — store staff should not be able to edit your checklists
- Template access controls are set — the right roles can submit; editing is restricted to admins
All templates are Published — unpublished templates won't appear for anyone
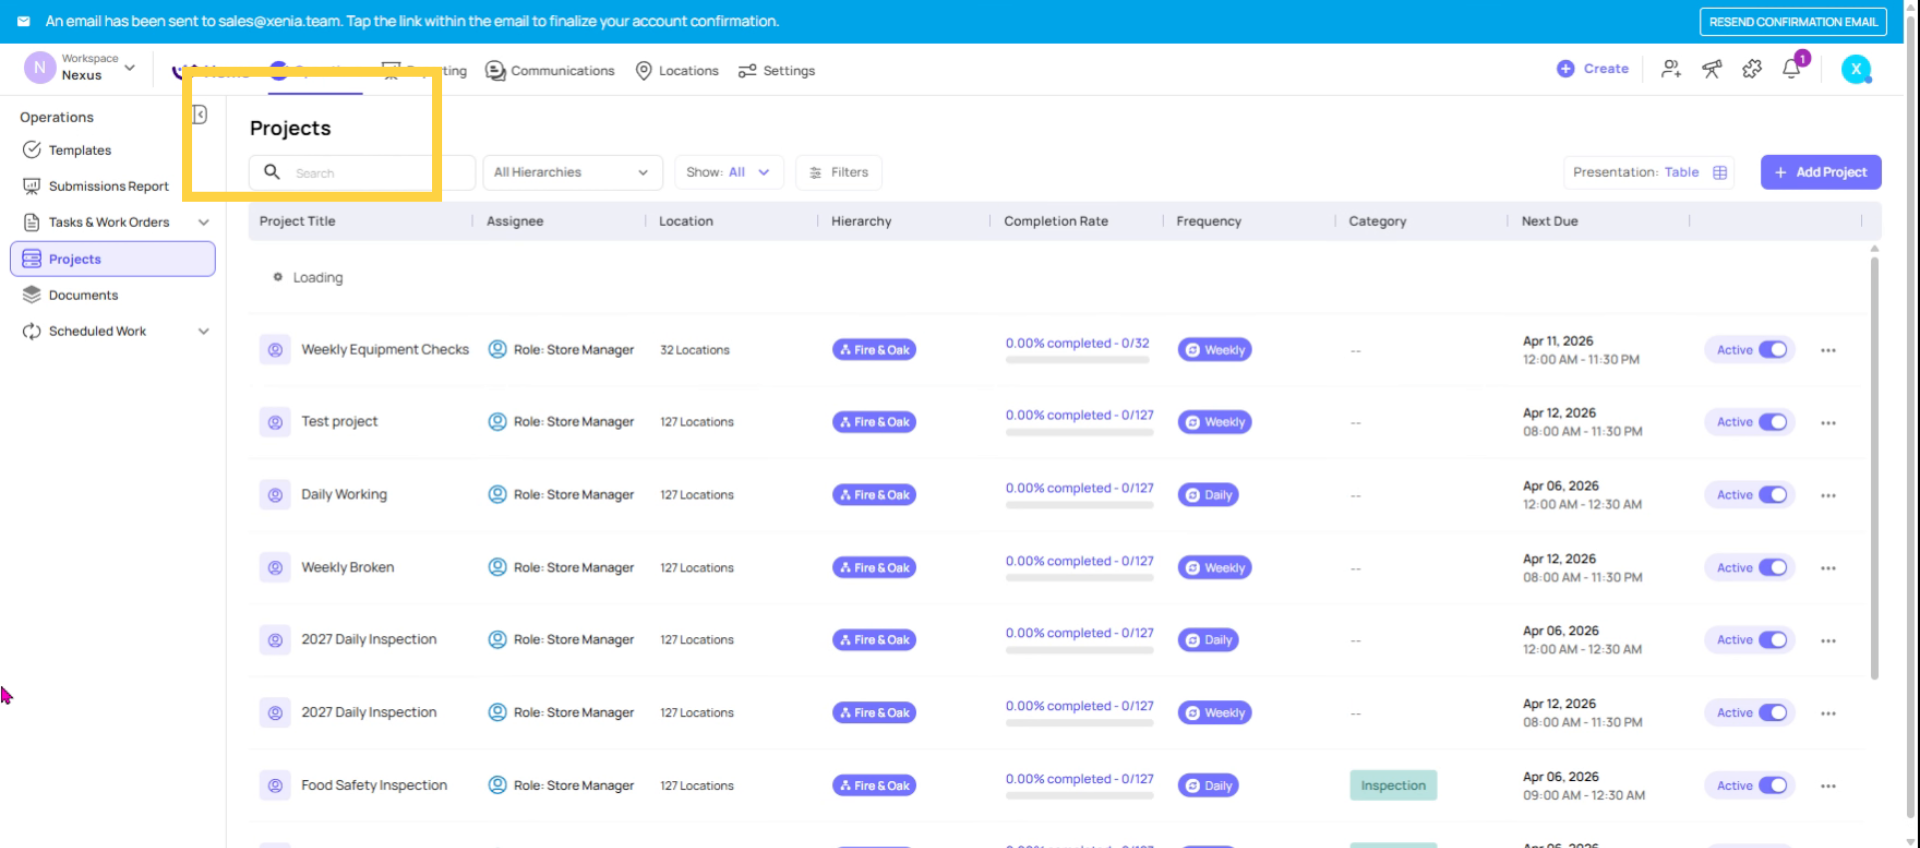
Confirm Project Settings
SECTION 5: Projects (Deployments)
- At least one project is created and active — your first checklist is deployed via a role-based project
- Projects are assigned to roles (not individual users) — ensures continuity when staff changes
- Correct locations are selected — each project runs at the right stores
- Start time and due time are configured — tasks appear at the right time for each location's timezone
- Cadence is set correctly — daily, weekly, or monthly as needed
- "Mark as missed after due time" is configured — intentionally turned on or off based on your policy
Overdue/missed notifications are set — the right role is notified when tasks are not completed on time
Final Implementation Advice
SECTION 6: Devices & Mobile Access
- Xenia app is downloaded on all store devices — iOS or Android, search "Xenia" (purple smiley face icon)
- All frontline accounts are logged in and tested — log in on the actual device that will be used in the store
- Home screen layout appears correctly — Location Pulse is showing on store/frontline devices
- Today's tasks are visible — after the project's start time, the checklist appears on the device
- At least one test submission has been completed — someone has gone through a checklist end-to-end on the actual device
📊 SECTION 7: Reporting Sanity Check
- At least one test submission appears in reports — go to Operations → Submission Reports and confirm you can see the test submission
- Completion data is rolling up correctly — check that the project's completion rate shows the test submission
- Location-level filtering works — filter by one location and confirm only that location's data shows
- Manager/admin can see submissions from their assigned locations — log in as a manager and verify they can only see their locations' data
3. Pre-Launch Test: Do This Before Your Team's First Shift
Before going live, run a quick end-to-end test yourself:
- Log in as a frontline user (use one of your store accounts) on the actual store device
- Confirm the home screen — does it show Location Pulse? Are today's tasks visible?
- Open a task — tap on it and click Start Checklist
- Complete the checklist — go through every step, including any photo steps
- Submit — tap Submit and confirm it goes through
- Log back in as admin — go to Reporting and confirm the submission appears
- Check the project — open the project and confirm it shows as Completed for that location
If all 7 steps work cleanly — you're ready to go live. If anything breaks, fix it now before your team encounters it on Day 1.
4. Common Issues Found During Pre-Launch Testing
| Issue | Likely Cause | Fix |
| Tasks not appearing on device | Project start time hasn't arrived yet, or user isn't assigned to the correct role/location | Check project timing; verify user's role and location in Settings → Users |
| Wrong home screen showing | Role's homepage layout is set incorrectly | Settings → Roles → Edit → Homepage Layout → Location Pulse |
| Can't submit checklist — required step blocked | A required step needs to be answered first | Complete all required steps, or adjust template if a required step is incorrect |
| No data appearing in reports | Template's submission access settings may be too restrictive, or no project-linked submission yet | Check template settings, or do a test submission via a project |
| User can't log in | Invite email not accepted, or password not set | Settings → Users → three dots → Send Password Instructions or Update Password |
| Location not showing on device | User has no location membership | Settings → Users → Update → add the correct location |
You're Live. What's Next?
Congratulations — your workspace is set up and your team is on Xenia. Here's what to do in the first week after launch:
Day 1–3: Monitor closely
- Check daily completion rates in your project reports
- Watch for Missed or Overdue tasks — these indicate timing, access, or training issues
- Be available to answer frontline questions about the app
Week 1: Gather feedback
- Talk to your store managers — what's working, what's confusing?
- Look at your first submissions — are the checklist steps clear? Are the right photos being taken?
- Identify any templates that need adjustment before adding more
After Week 1: Expand
- Add your next checklists (closing checklist, food temp log, etc.)
- Add more projects as you're ready
- Start exploring reporting dashboards to track performance trends
Need help?
- Reach out to Xenia support at support@xenia.team
Comments
0 comments
Please sign in to leave a comment.