1. Understand Bulk Upload Benefits
When to Use Bulk Location Upload
Adding locations one at a time works fine for small setups — 1 to 10 locations. But if you're onboarding with 10, 50, or hundreds of locations, doing it individually is impractical. Bulk upload via CSV lets you bring in your entire location hierarchy in a single file.
Common scenarios where you'll want this:
- Initial workspace setup with many locations
- Expanding into a new region and adding 10+ stores at once
- Migrating from another platform and rebuilding your location list
- Franchises or multi-unit operators setting up for the first time
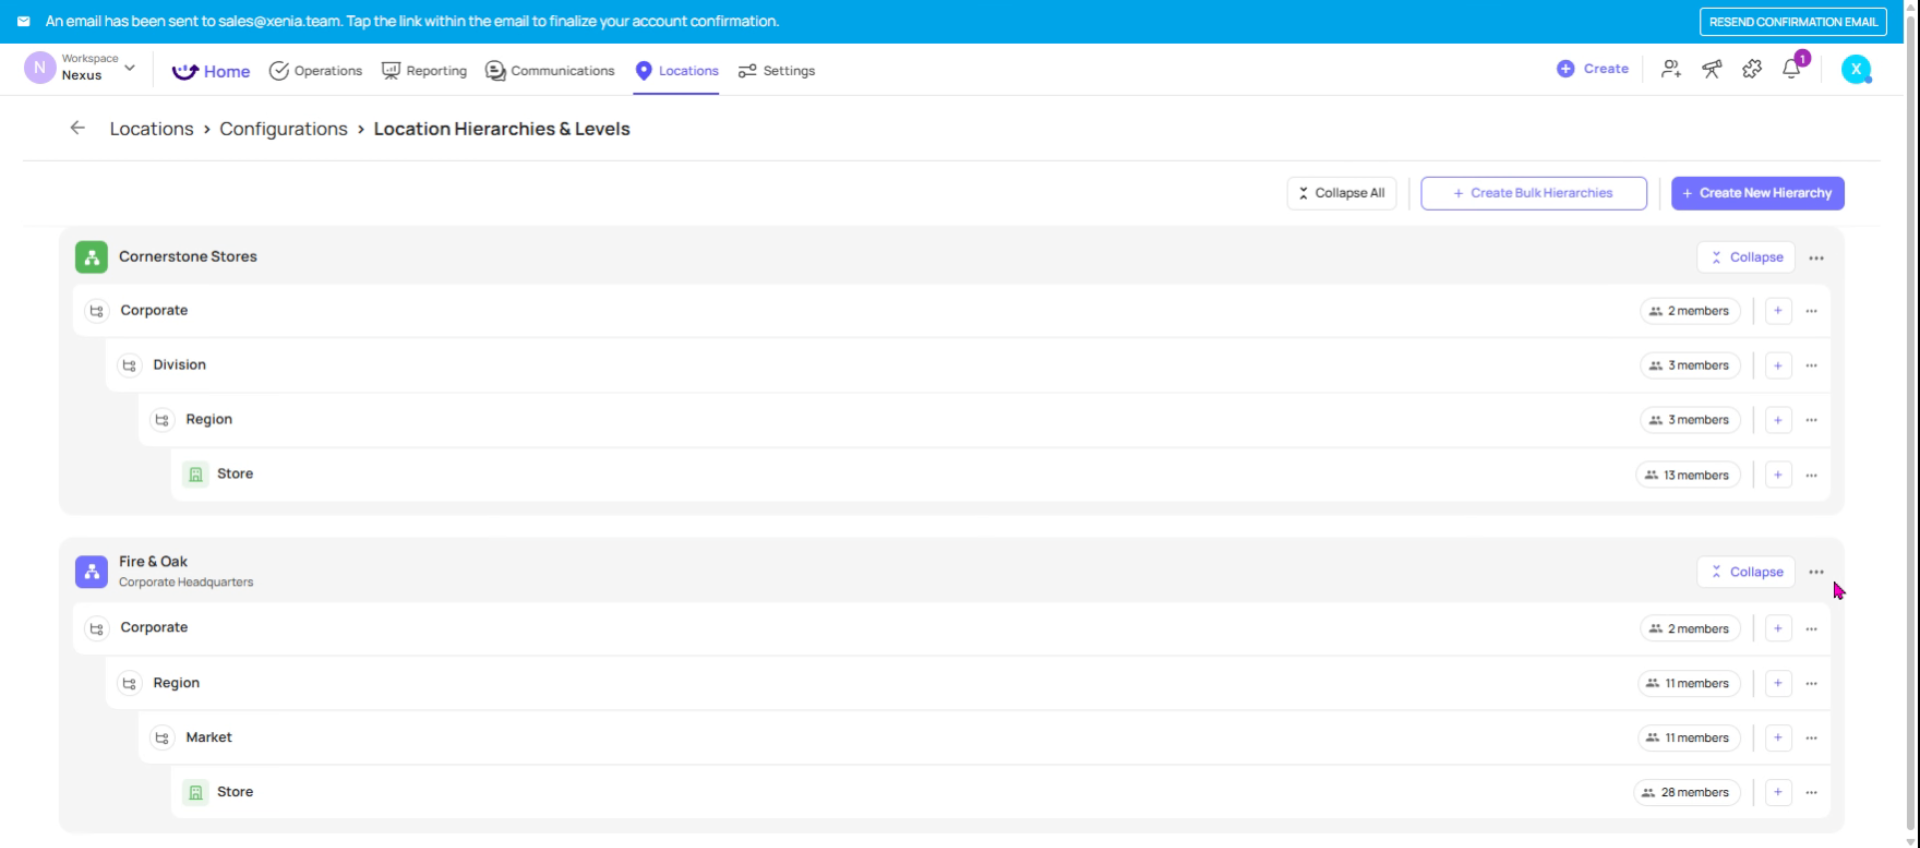
2. Configure Hierarchy Levels
Understand the Hierarchy Before You Build the CSV
Your CSV needs to reflect your hierarchy structure, not just a flat list of stores. Before filling anything in, confirm:
- How many levels does your hierarchy have? (e.g., Region → District → Site, or just Site)
- What are the names of those levels in your Xenia workspace? (set in Locations → Configurations → Customize)
- Which level does each location belong to?
- What is the parent of each location? (e.g., which District does each Site belong to?)
Build your hierarchy top-down: Regions/brands first, then districts, then sites. The parent levels must exist in Xenia before child levels can be assigned to them — if you're bulk uploading everything together, make sure higher levels are in the file before the locations that belong to them.
3. Match CSV Level Names
What Data to Prepare for Each Location
For each location you're adding, have the following ready:
| Field | Details | Why It Matters |
| Location Name | The display name of the location (e.g., "Store 101 - Downtown Chicago") | How it appears everywhere in Xenia |
| Hierarchy Level | What level this is — Region, District, or Site | Xenia needs to know where it sits in the tree |
| Parent Location | The name of the level above it | Nests the location correctly in the hierarchy |
| Address | Full street address | Critical — Xenia uses this to detect the location's timezone for accurate task scheduling |
| Location Email | Optional | Used for location-specific email notifications |
The address field is the most important data point for Sites. Without a correct address, Xenia cannot detect the location's timezone. When you deploy a project to run at 9am, it needs to know 9am where — and that's driven entirely by the address. A wrong or missing address means tasks may appear at the wrong local time.
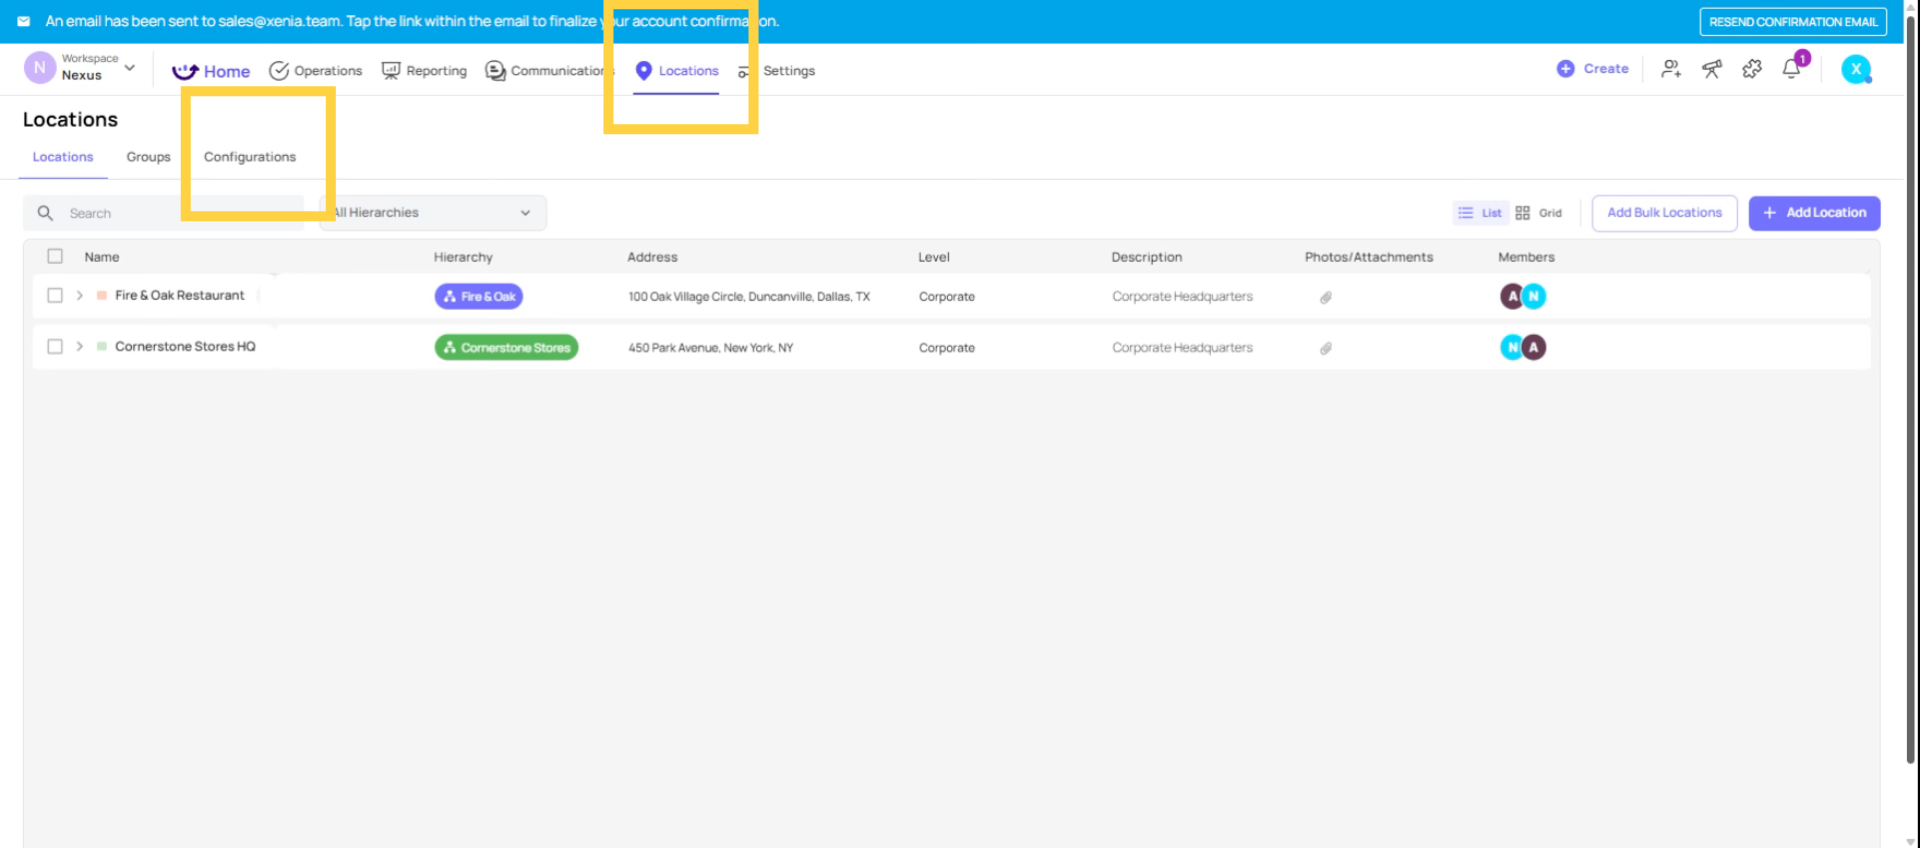
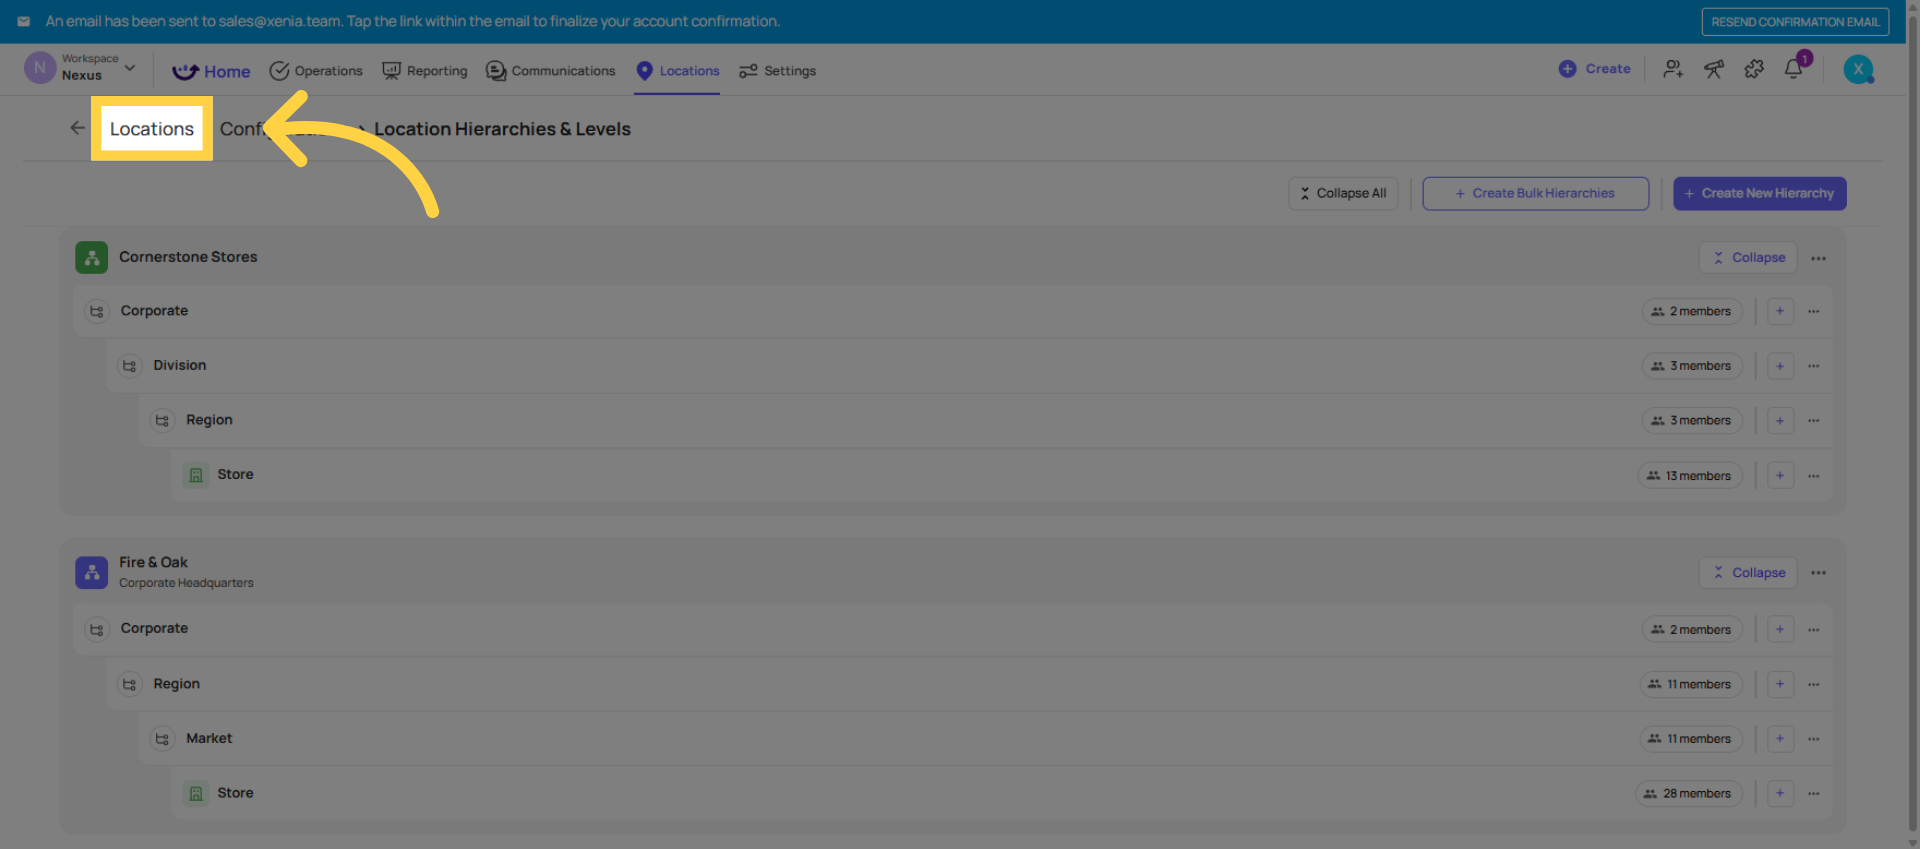
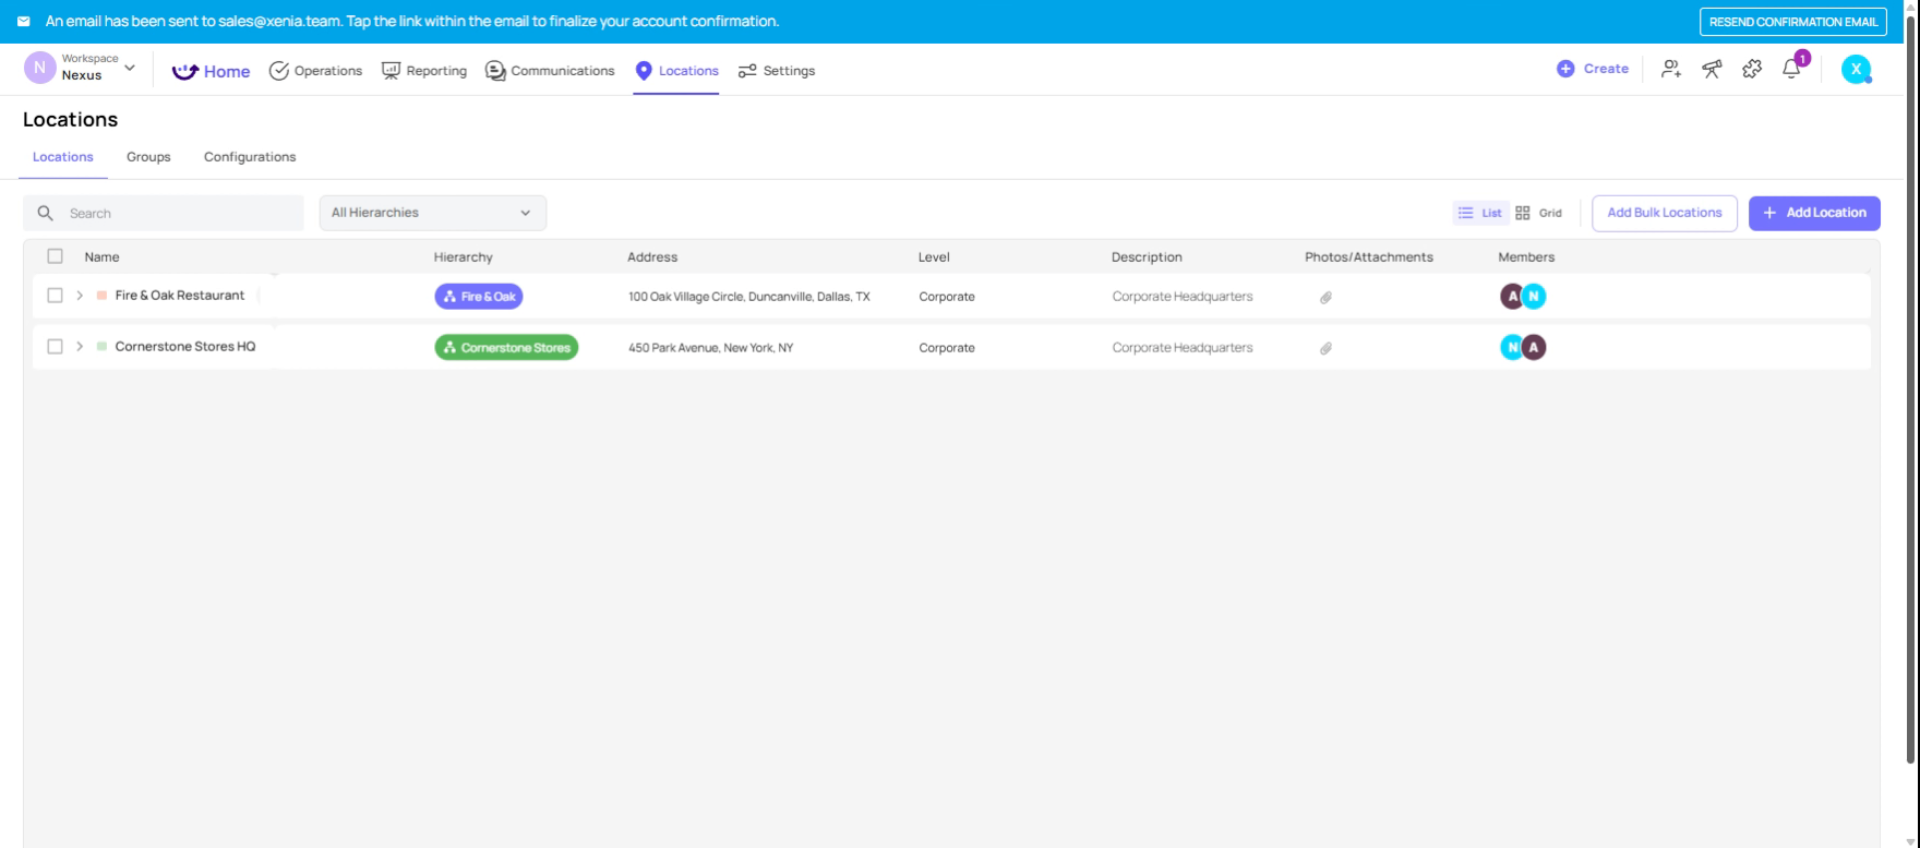
4. Open Locations Tab
5. Access Bulk Location Feature
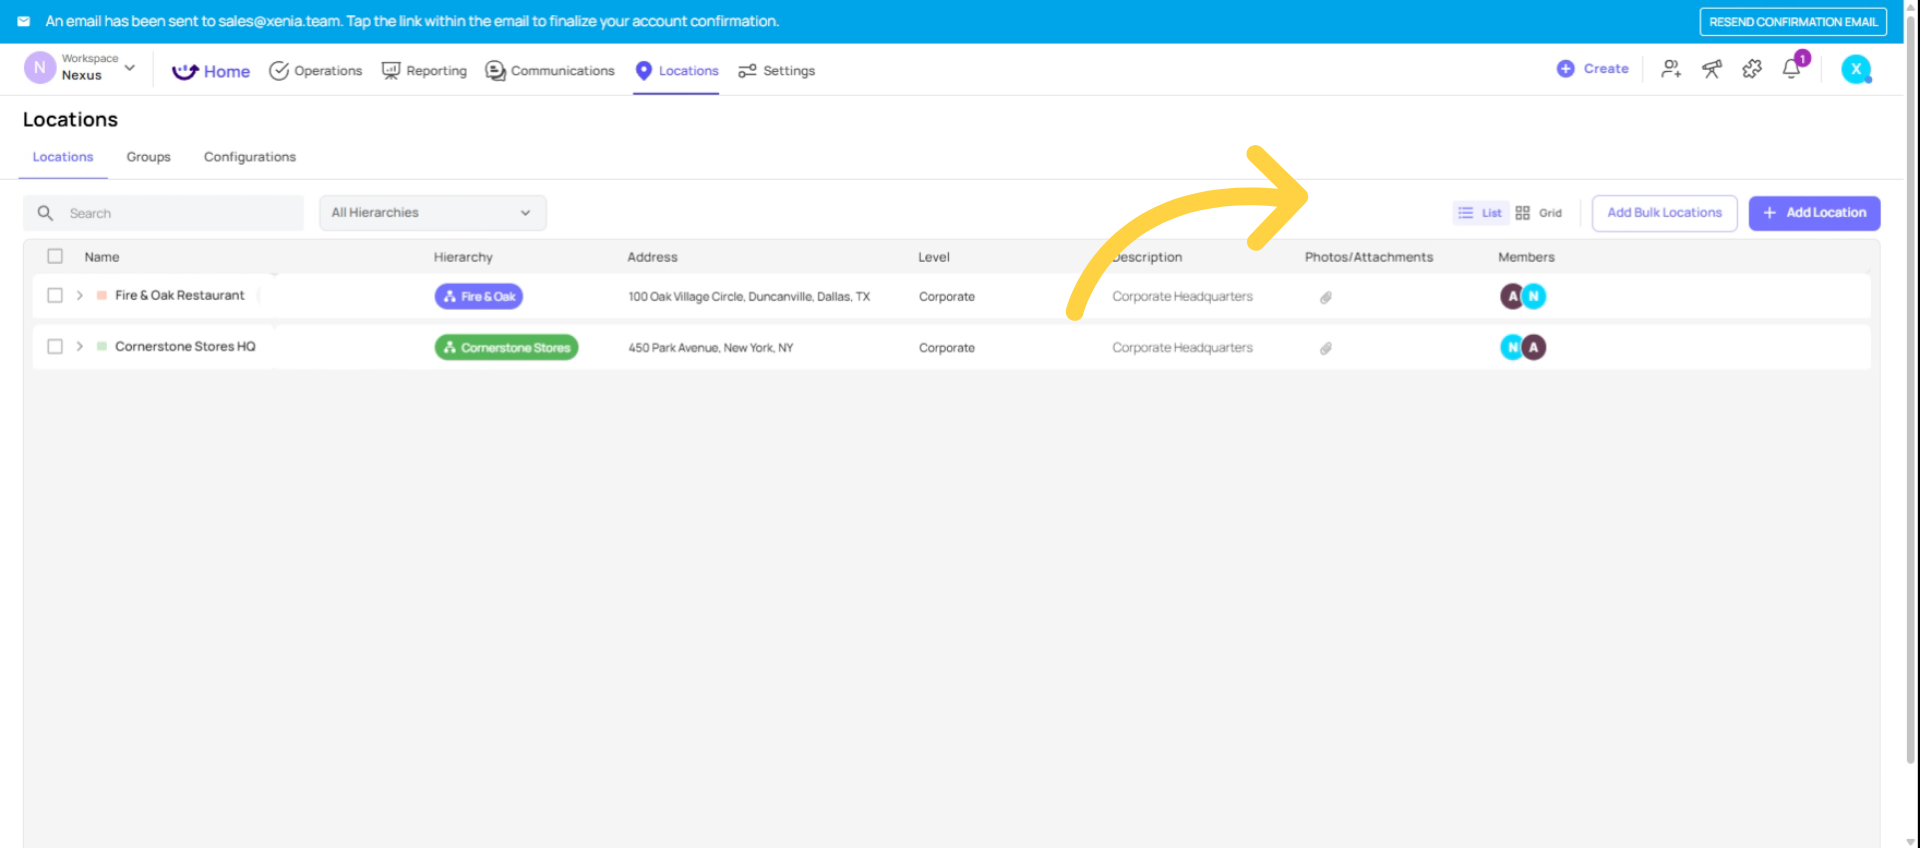
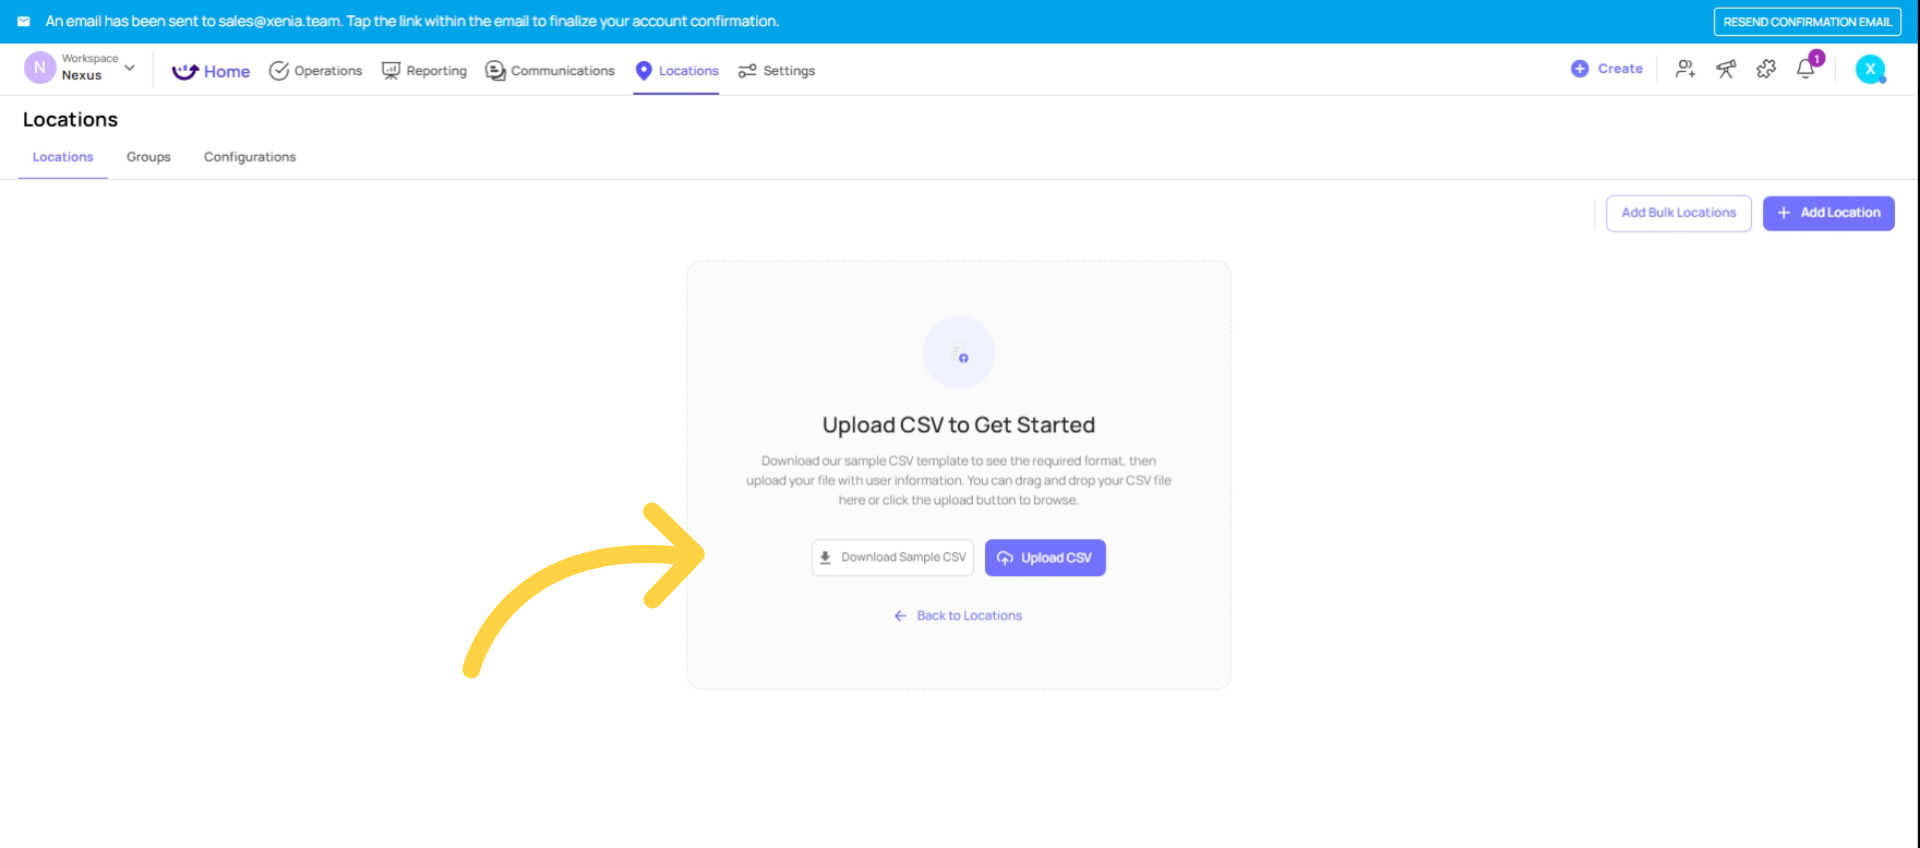
6. Download CSV Template
Fill Out the CSV
Open the downloaded template and fill in one row per location. Work top-down through your hierarchy:
- Add your top-level locations first (e.g., Regions or Brands) — these have no parent
- Add your mid-level locations next (e.g., Districts) — assign each to its Region
- Add your Sites last — assign each to its District, and include the full address
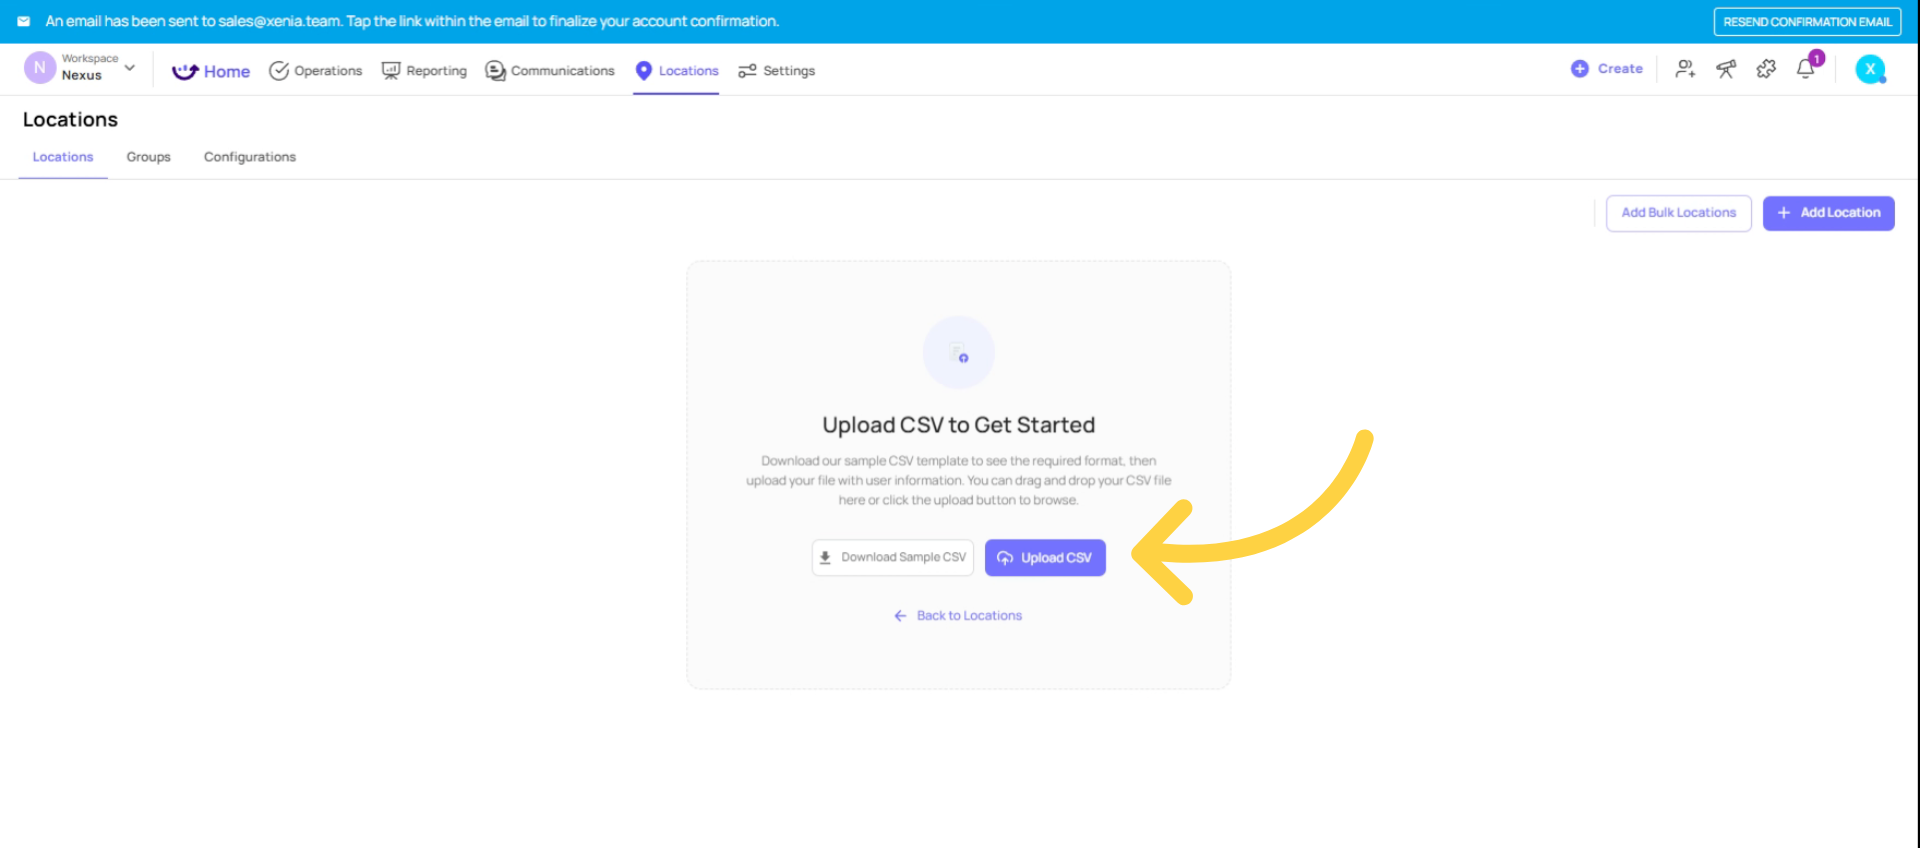
7. Upload CSV
Upload the File
- Click Upload CSV (or drag and drop)
- Xenia will validate the file — errors will be flagged before anything is created
- Review the import preview to confirm the hierarchy looks correct
Click Confirm to complete the import
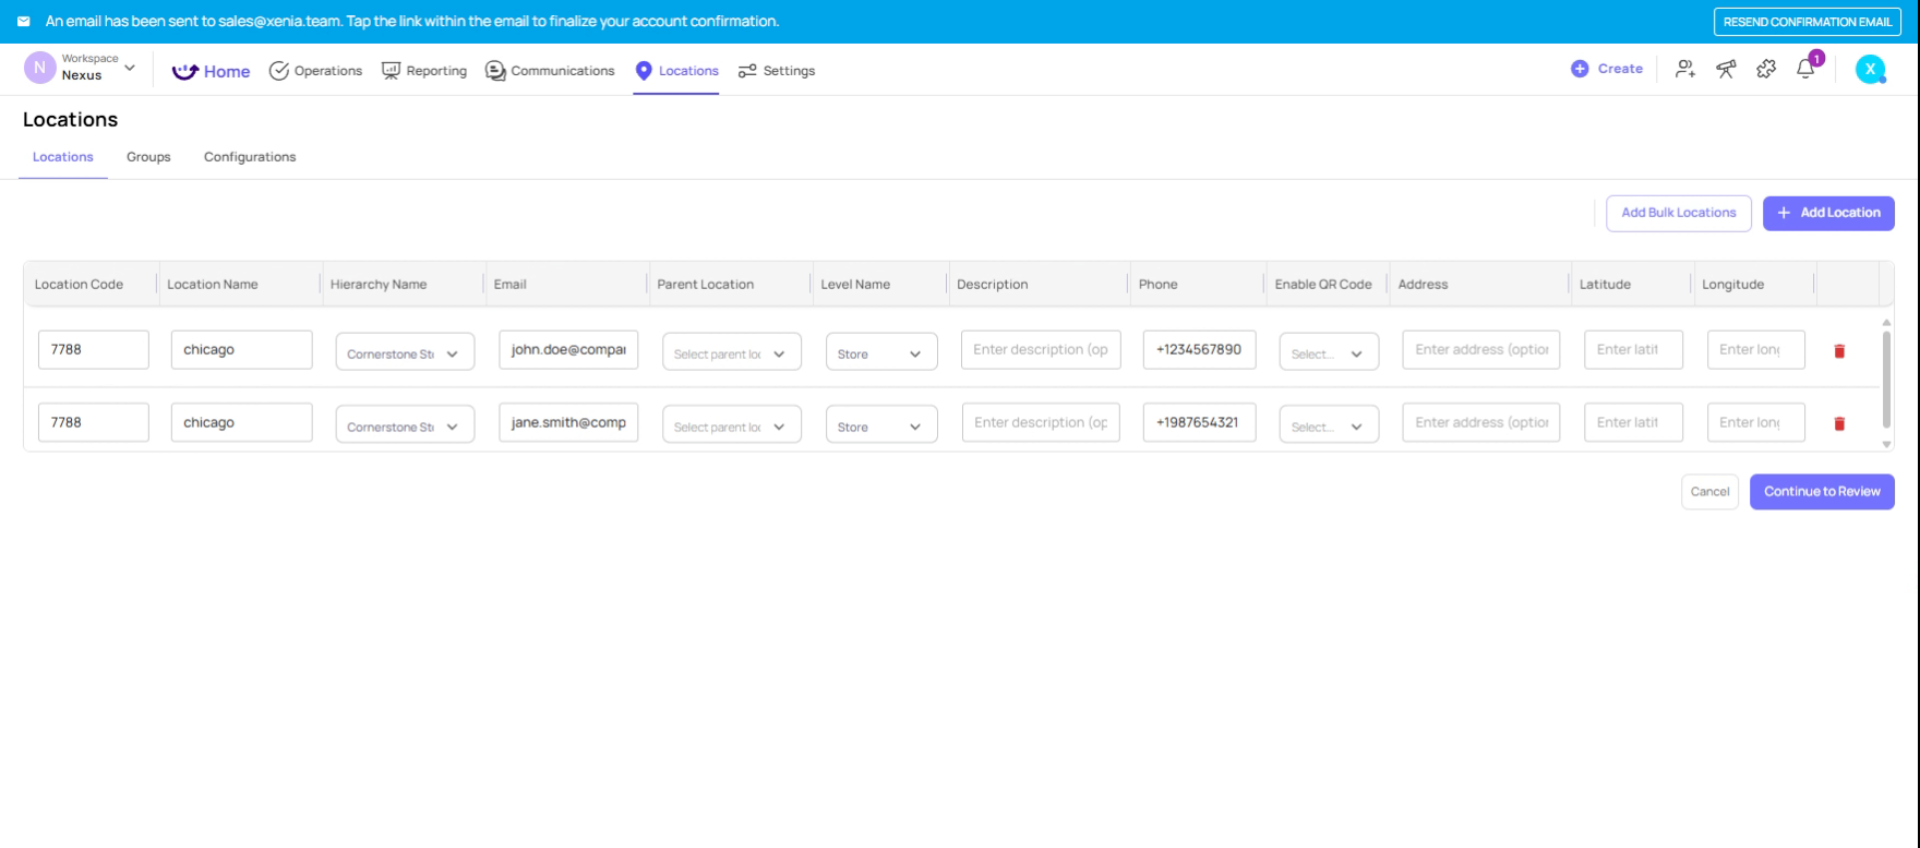
8. Review Import Validation
Review Before Uploading
Check your CSV for:
- ✅ All Site-level locations have a full address
- ✅ Parent location names match exactly (spelling and capitalization)
- ✅ Hierarchy levels match what's configured in your workspace
- ✅ No duplicate location names at the same level
- ✅ Top-level locations have no parent assigned
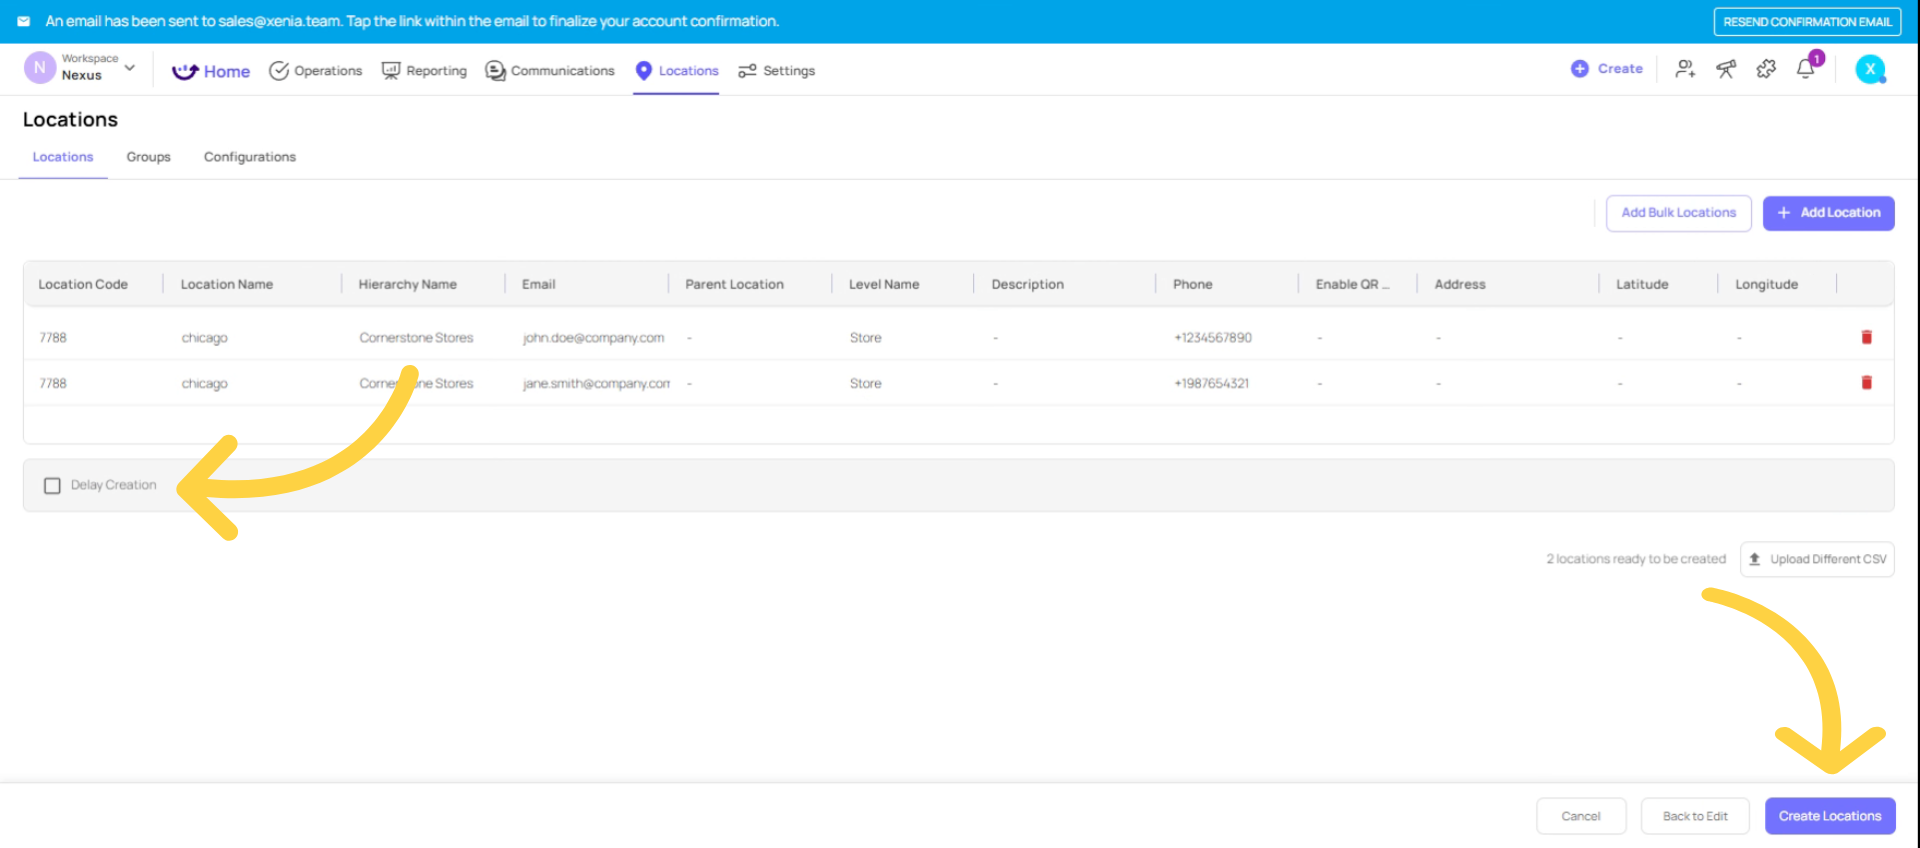
9. Schedule Location Creation
10. Understand Location Hierarchy Importance
After Your Locations Are Uploaded — What's Next?
Your locations are now in Xenia. The next steps that depend on them:
- Invite users: Assign each user to their correct location(s) — this is what controls their data access
- Deploy projects: When you create a project, select the locations it runs at — tasks appear at the right local time based on each location's address
- Reporting: Data rolls up through your hierarchy — completion rates, flagged items, and audit scores can all be grouped and compared by District or Region.
This article has guided you through setting up and managing your location hierarchy in Xenia using the bulk upload feature. By following these steps, you can efficiently add multiple locations, ensure accurate hierarchy configuration, and maintain data integrity for smooth project deployment and reporting. For more information, explore related articles on location management and project deployment in the Xenia knowledge base.
Need Help?
For assistance please reach out to us at support@xenia.team
Comments
0 comments
Please sign in to leave a comment.