1. Understand Bulk Invite Overview
When to Use Bulk Invite via CSV
Use bulk invite when you have 5 or more users to add at once. It's significantly faster than inviting one at a time and gives you a clean record of your user setup in a spreadsheet you can revisit and update.
Common scenarios:
- Onboarding your full management team at launch
- Setting up role-based store accounts across all your locations at once
- Adding a new region or group of stores
- Migrating from another platform and bringing your team over
2. Identify Bulk Invite Use Cases
Before You Fill Out the CSV — Plan Your Data
The two most impactful columns in the CSV are Role and Location. Getting these right is critical — errors here directly affect what each user can see and do in Xenia.
Before filling in the CSV, have the following ready:
- A finalized list of your roles (must match exactly what's in your Xenia workspace — spelling matters)
- A finalized list of your locations (must match exactly as they appear in Xenia)
- The email addresses for each user or role-based account
- The full name for each user (or account label for role-based accounts)
Pro tip: Complete your location hierarchy setup (Article 3) and role configuration (Article 4) before running a bulk invite. If roles or locations change after the CSV upload, you'll need to manually update affected users.
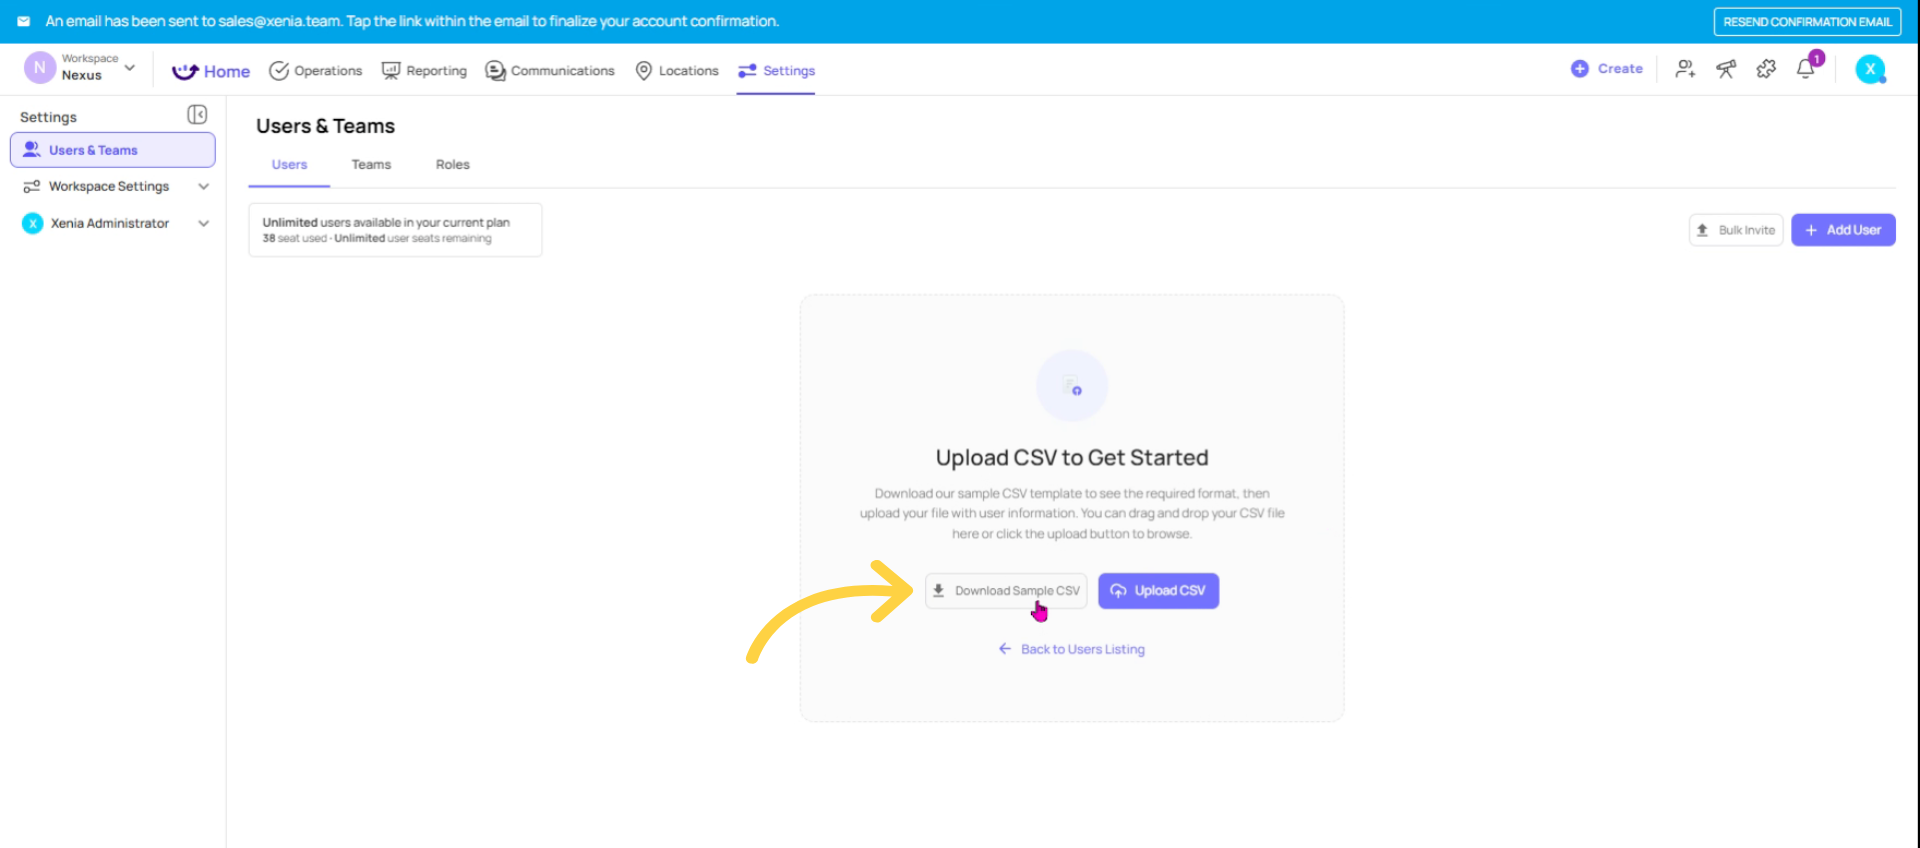
3. Access Bulk Invite Feature
Go to the Bulk Invite Option
- Go to Settings → Users, Teams & Roles → Users tab
- Click Add User or the Invite button
- Select Bulk Invite via CSV (or look for the CSV upload option)
Click Download Template to get the official CSV file

4. Download CSV Template
Fill Out the CSV Template
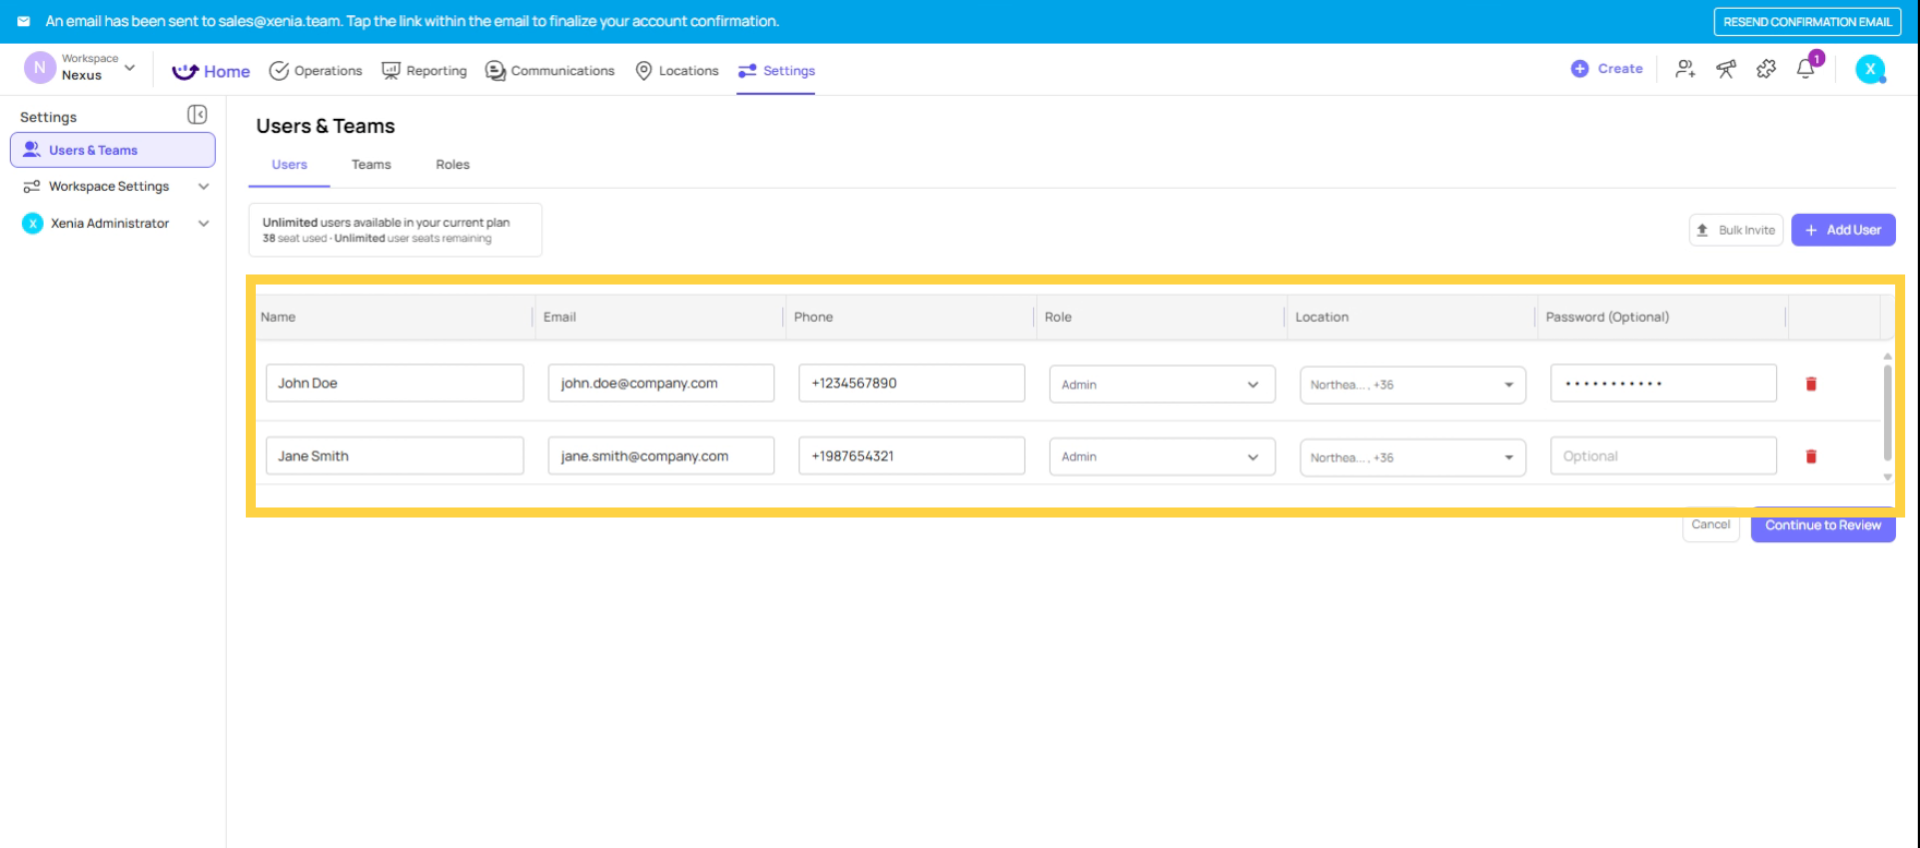
The CSV template will have columns for each required field. Fill in one row per user:
| Column | What to Enter | Notes |
| First Name | User's first name | Required |
| Last Name | User's last name | Required |
| Unique email address | Every account needs a unique email — no duplicates allowed | |
| Role | Role name | Must exactly match the role name in your Xenia workspace |
| Location(s) | Location name(s) | Must exactly match location names in Xenia; for multiple locations, follow the format shown in the template |
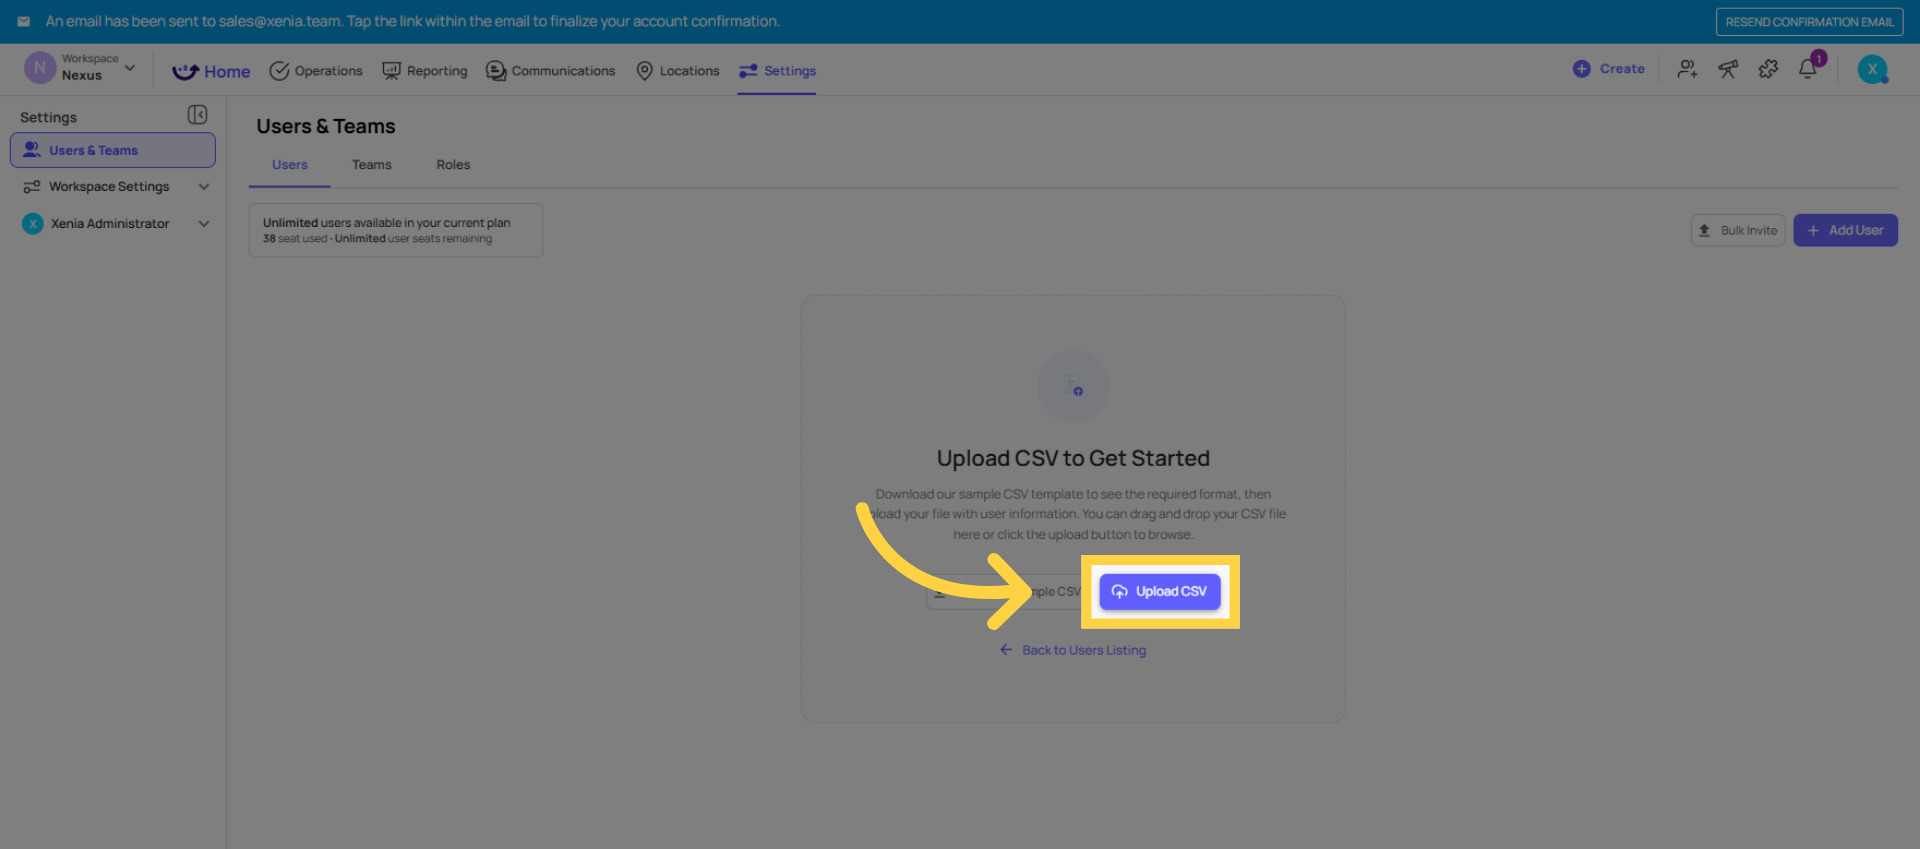
5. Click Upload CSV Button
Upload the CSV
- Click Upload CSV (or drag and drop the file)
- Xenia will validate the file — any errors will be flagged before the invites are sent
- Review the preview — confirm names, emails, roles, and locations look correct
Click Confirm / Send Invites
6. Validate Uploaded CSV
Double-Check Before Uploading
Before uploading, review every row for:
- ✅ All emails are unique — duplicates will cause errors
- ✅ Role names match exactly — a typo like "Store manager" vs "Store Manager" will fail or assign the wrong role
- ✅ Location names match exactly — same rule applies
- ✅ No empty required fields — each row needs a name, email, role, and at least one location
- ✅ One row per user — do not combine multiple users in a single row
The Role and Location columns have the most impact. A user with the wrong role gets the wrong permissions. A user with the wrong location sees the wrong data. Take an extra few minutes here.
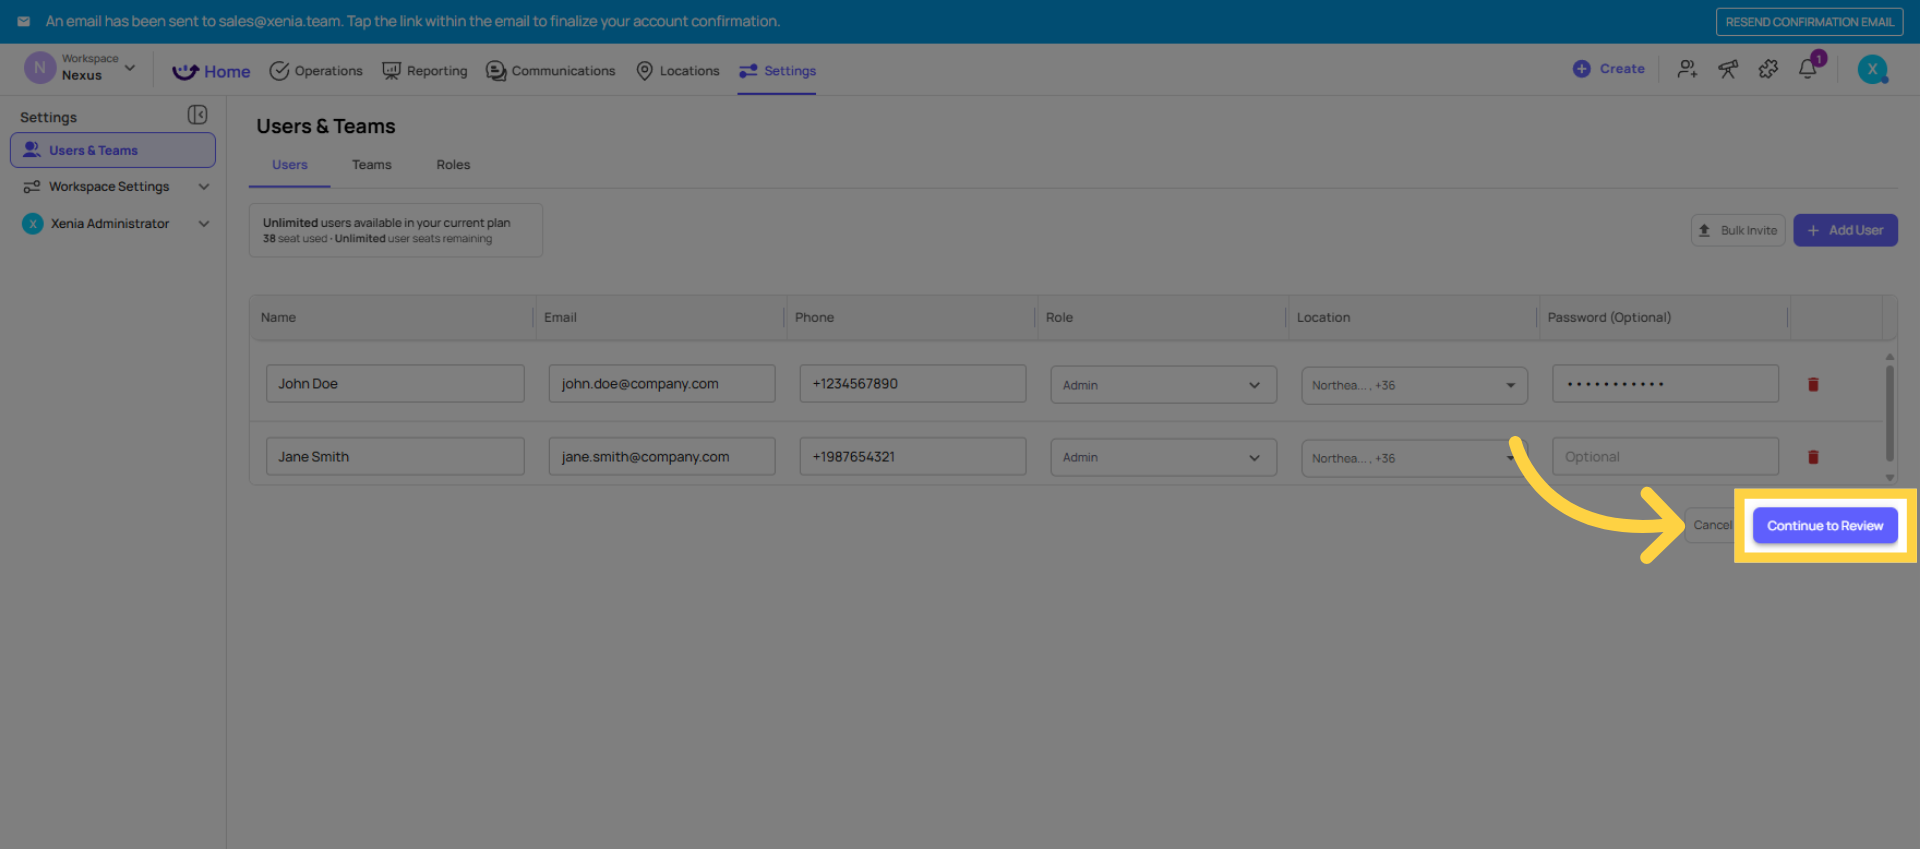
7. Continue To Review
8. Schedule Invite Delivery
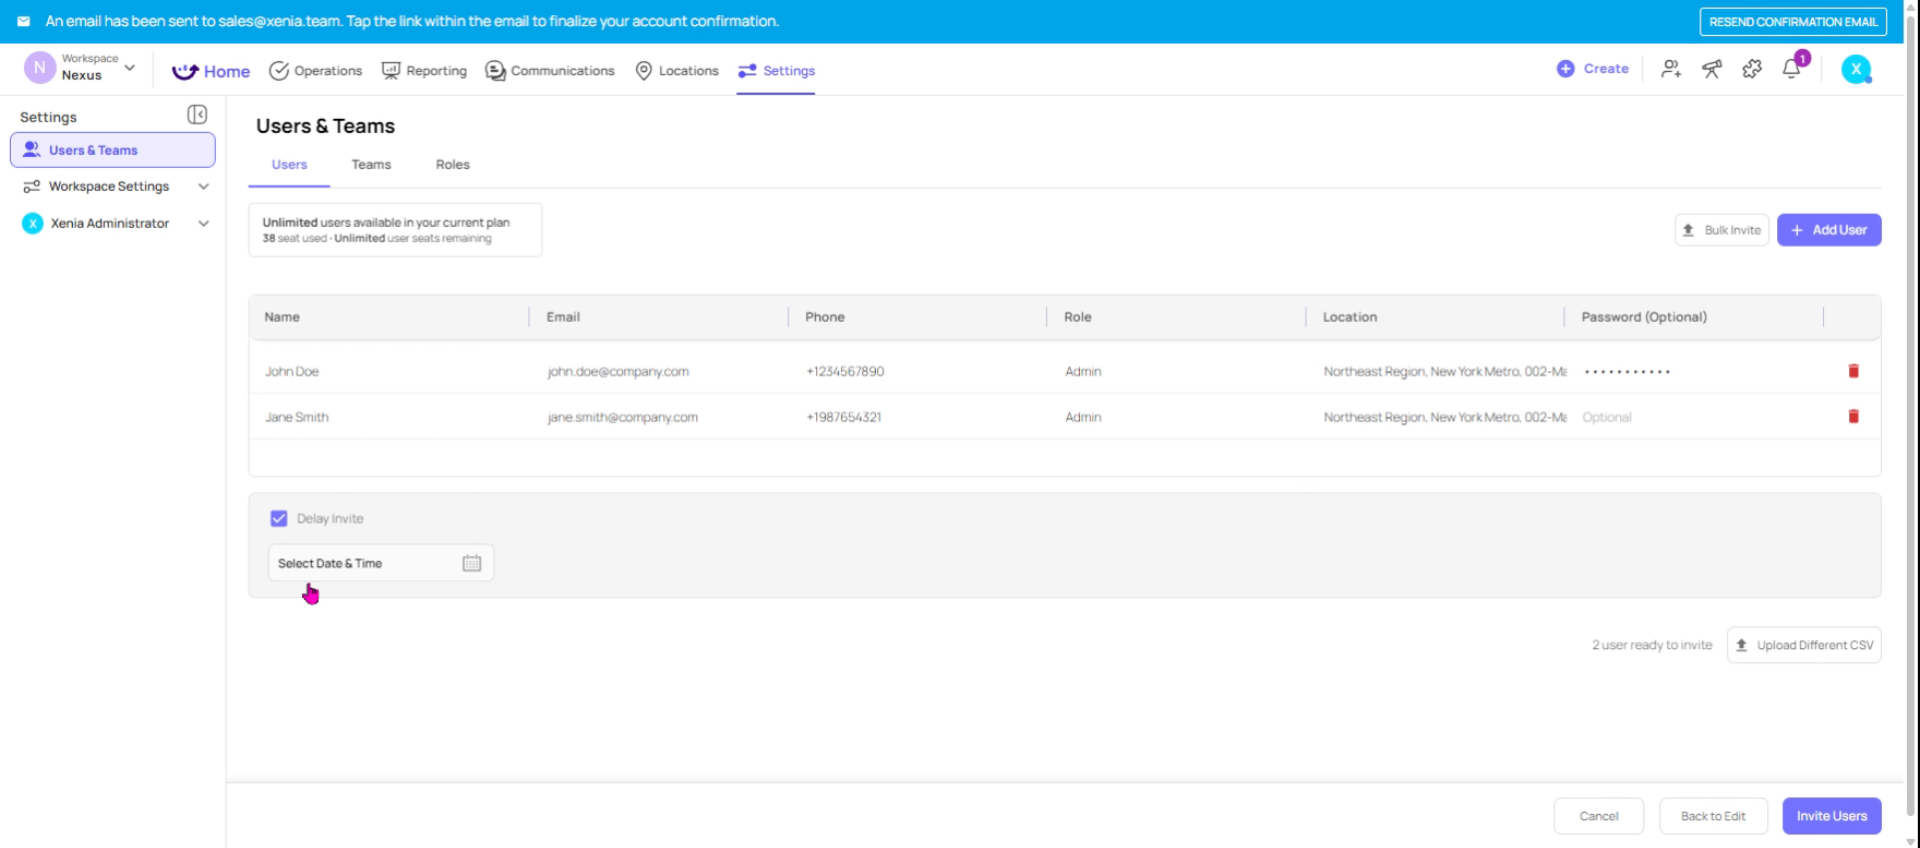
9. Open Invite Users

13. Verify User Details
What Happens Next
- Each user receives an invitation email with a link to set their password and log in
- For role-based shared accounts, you can set the password directly rather than sending an invite email — use the Update Password option on the user's profile after they've been created
- Users will only see data for the locations they've been assigned to
- Their home screen layout will reflect the homepage layout configured for their role
Need Help?
For assistance please reach out to us at support@xenia.team
Comments
0 comments
Please sign in to leave a comment.