1. Introduction to Projects
What Is a Project — and Why Does It Matter?
- A Project is the scheduling engine that deploys your checklist to your team
- Think of it this way: the Template is the checklist itself, the Project is what sends it to the right people at the right time, at the right locations, on the right cadence
- Without a project, your template just sits in your library — it won't appear on anyone's device
- Projects are what generate the completion data you'll see in your reports
The key metric Projects unlock:
- Completed on time
- Completed late
- Incomplete / Missed
These three statuses are how Xenia tracks accountability across your team and locations.
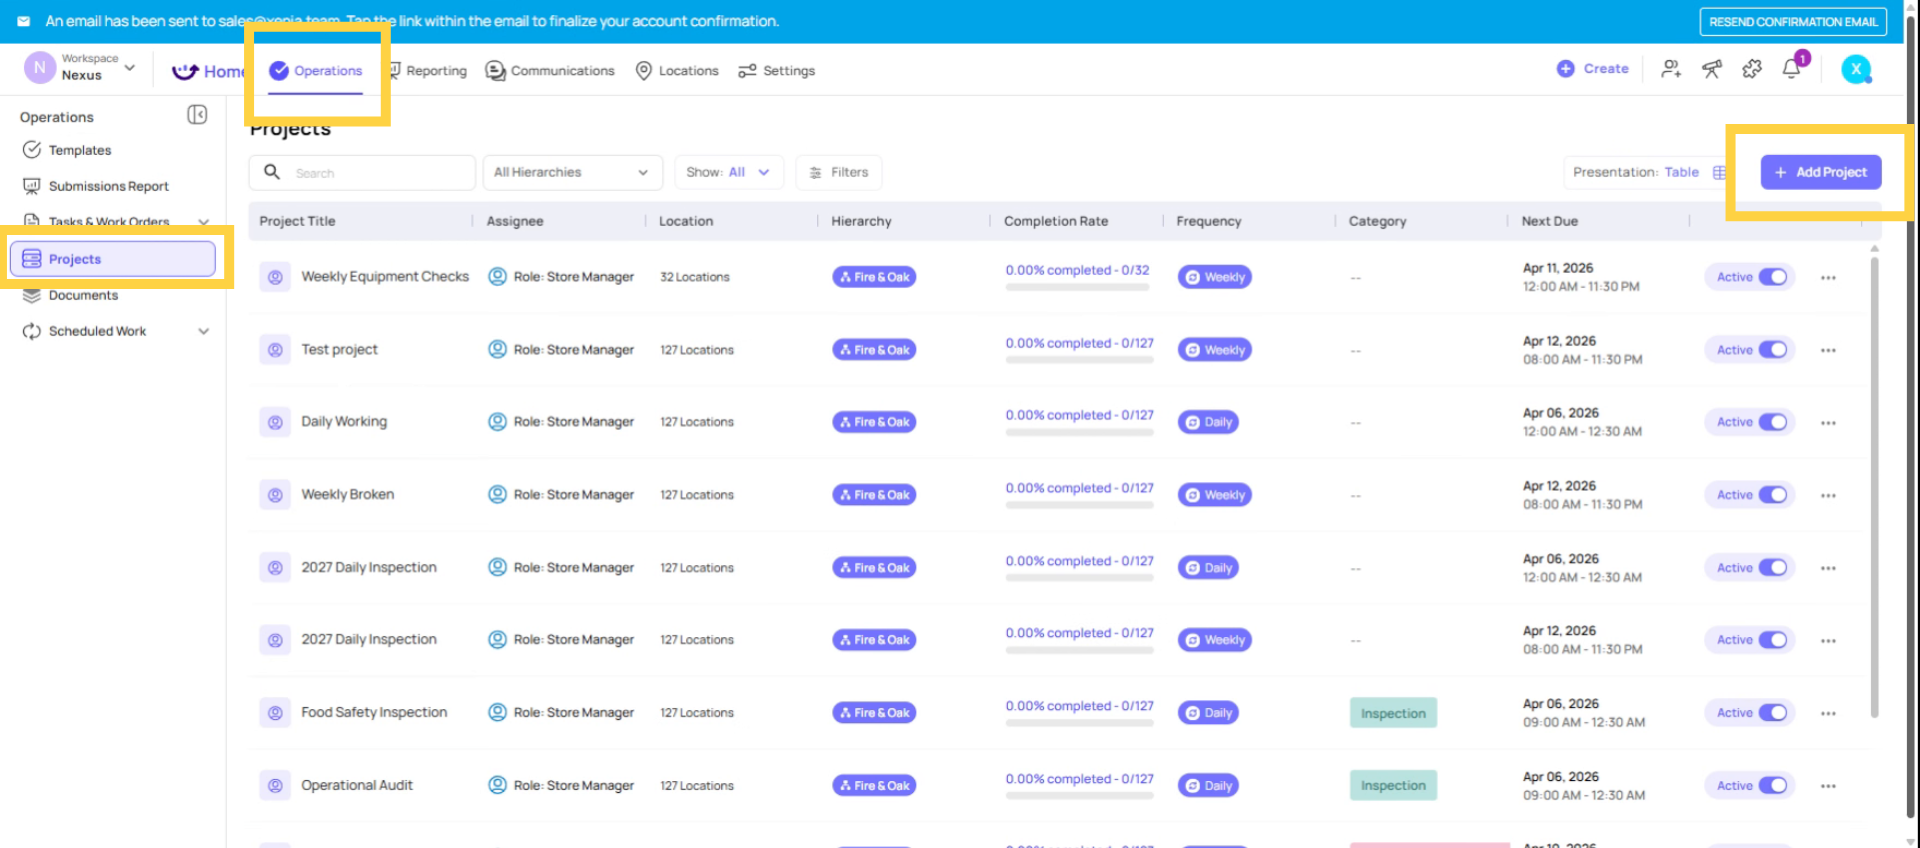
2. Access Projects Feature
Go to Projects
- Navigate to Operations → Projects
- Click Add Project
- Select Role-Based
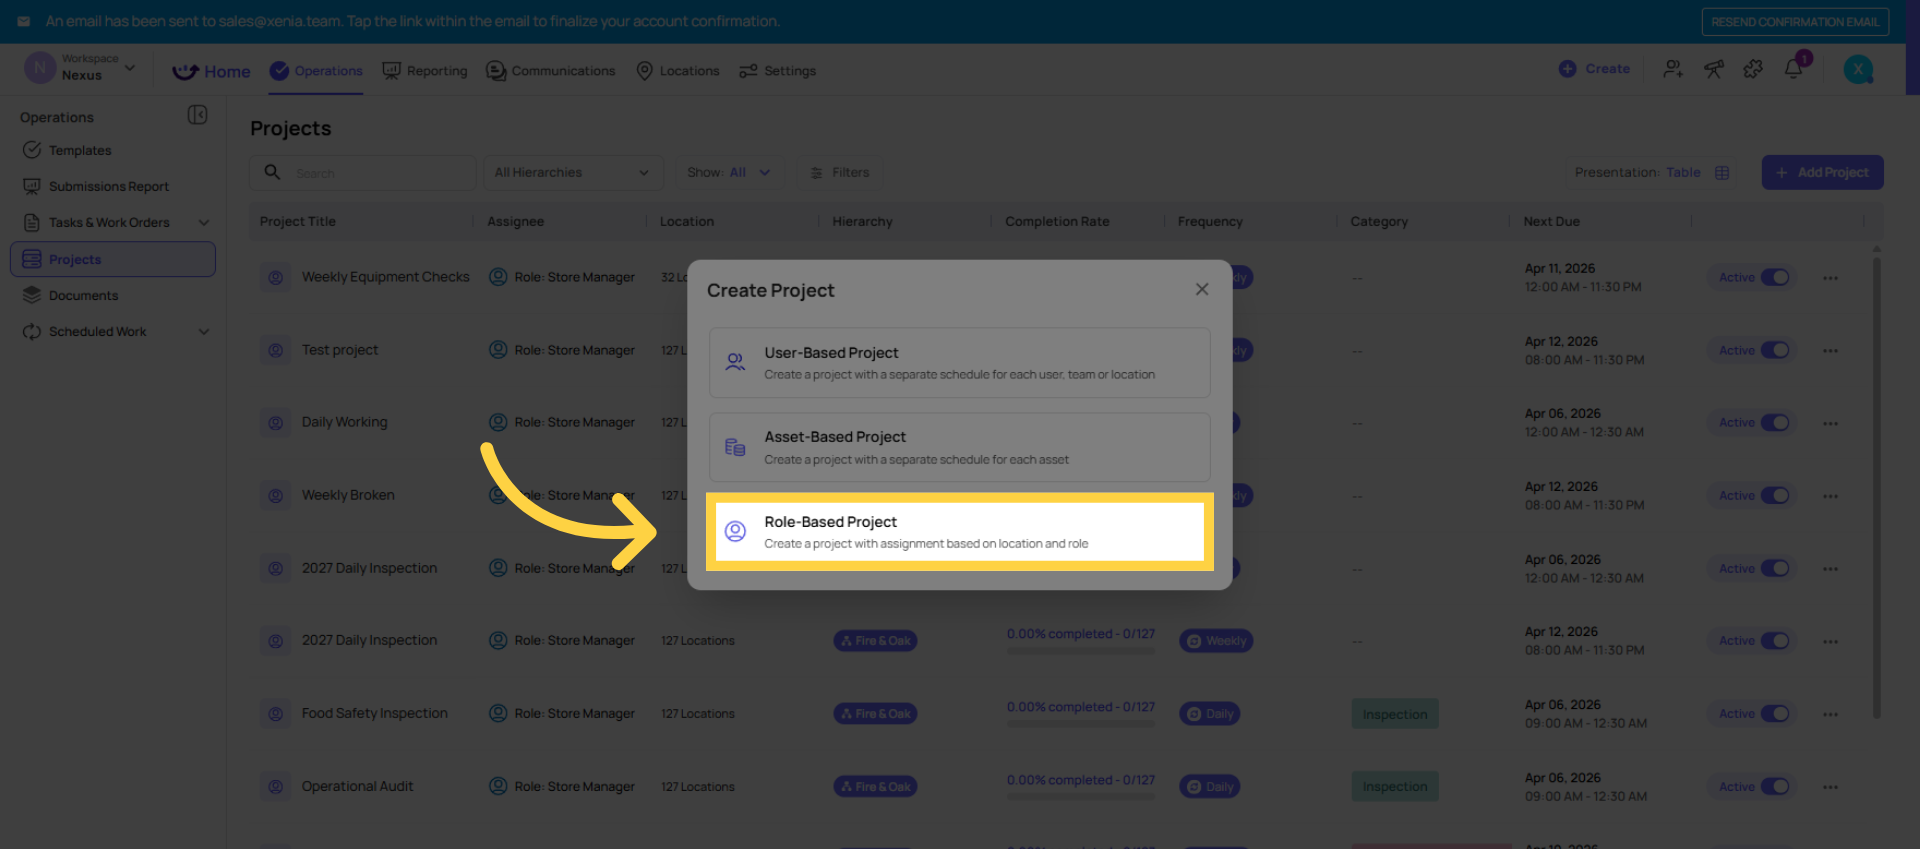
3. Explain Role Based vs User Based Assignment
Role-Based vs. User-Based Projects — Which Should You Use?
When creating a project, you choose how to assign it:
| Assignment Type | How It Works | Best For |
| Role-Based ✅ Recommended | Assigned to a role (e.g., Store Manager) — whoever holds that role at each location gets the task | Recurring daily/weekly/monthly checklists; organizations with any staff turnover |
| User-Based | Assigned to specific individual(s) by name | One-off tasks for a named person; unique assignments unlikely to repeat |
The golden rule: For recurring checklists, always use role-based. When an employee leaves and a new one joins, you don't touch the project — the new person automatically inherits the assignment the moment they're assigned that role. The role stays forever; employees come and go.

4. Create Role Based Project
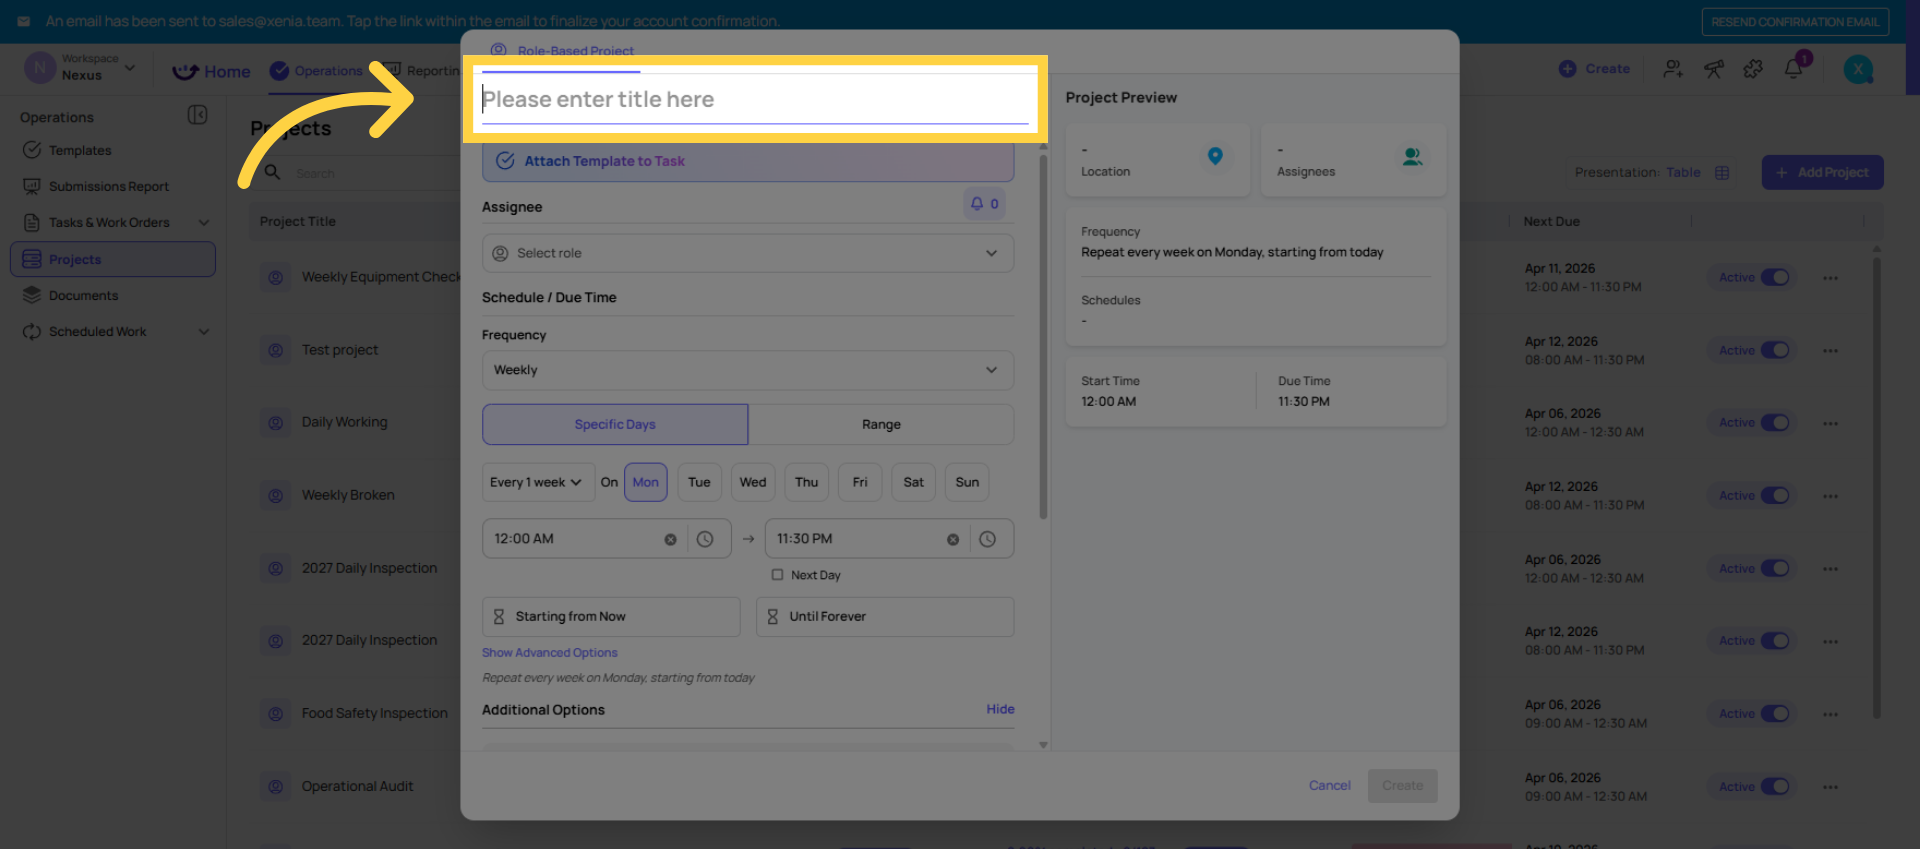
5. Enter Project Title
Name the Project
- Give it a clear, descriptive name (e.g., "Daily Store Opening Checklist — Store Manager")
- Naming tip: include the role and cadence so it's easy to identify later
6. Attach Template
Attach Your Template
- Click to select the checklist you want to deploy (e.g., "Daily Store Opening Checklist")
- This is the template you built in the previous step
- One project = one template

7. Select Role For Assignment
Select the Role
- Choose the role that should receive this task (e.g., Store Manager, Cashier, Basic User)
- Xenia will automatically assign the task to whoever holds that role at each selected location
8. Open Locations Dropdown
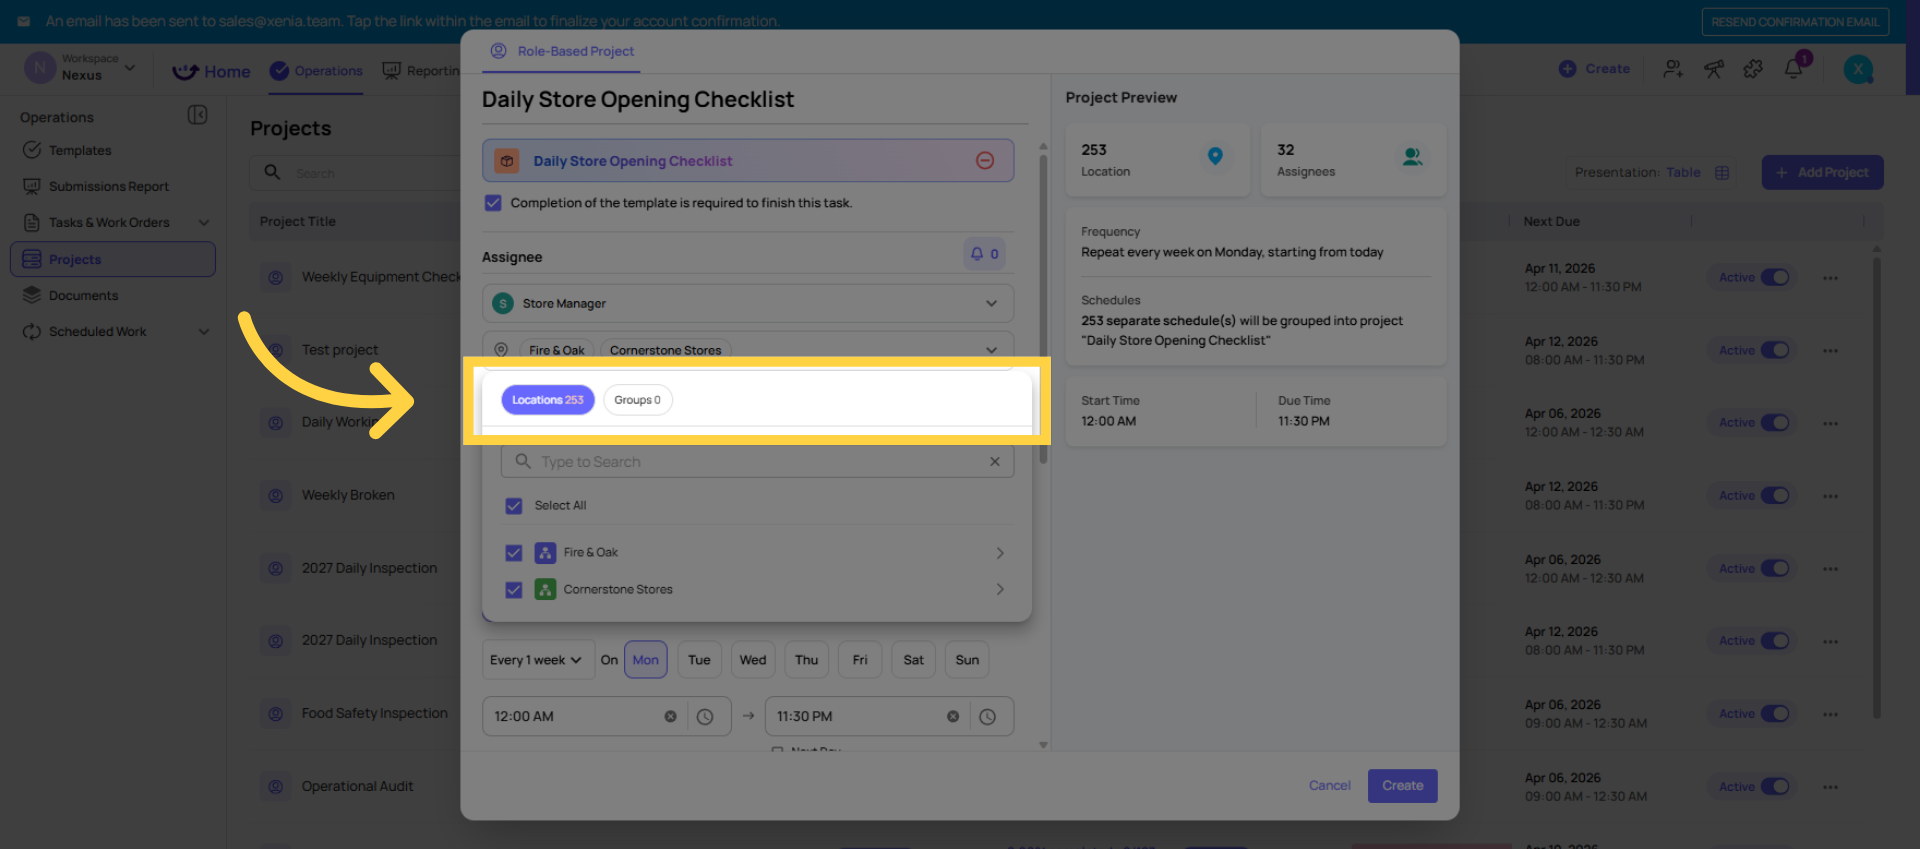
Select Locations
- Choose which locations this project runs at
- Select All Locations to deploy across your entire org — Xenia automatically creates one schedule per location
- Or select specific locations for a targeted rollout (e.g., just your pilot stores)
- As you add new locations in the future, you can easily add them to an existing project — no need to rebuild
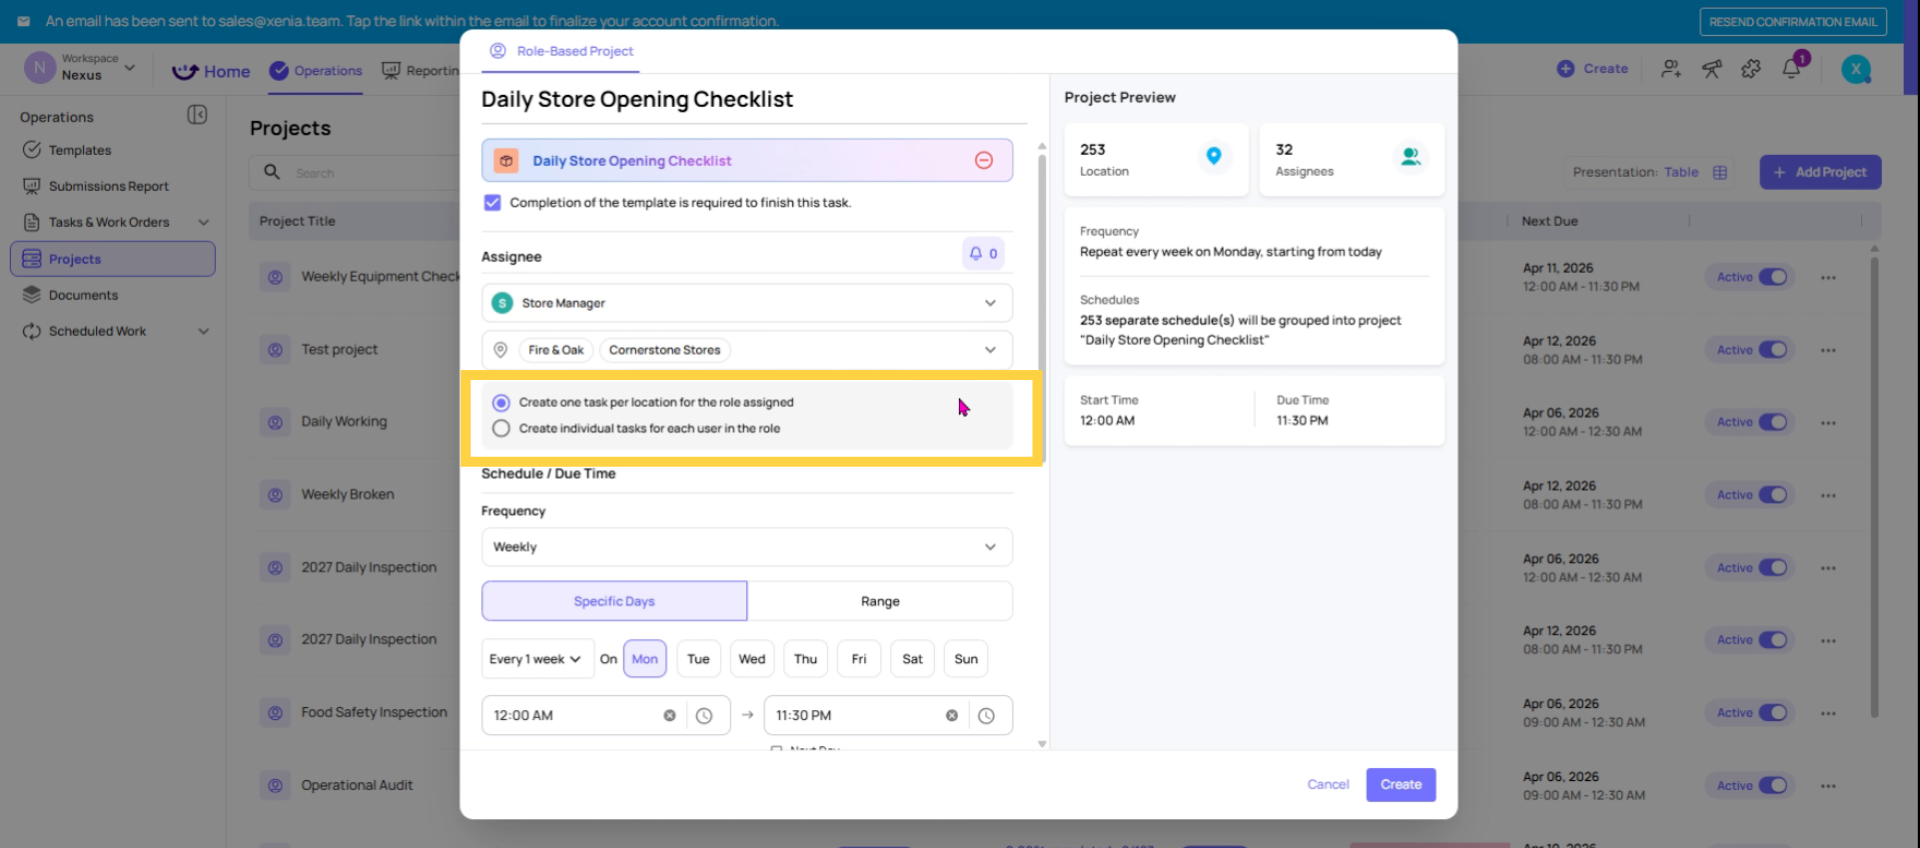
9. Task Creation Options
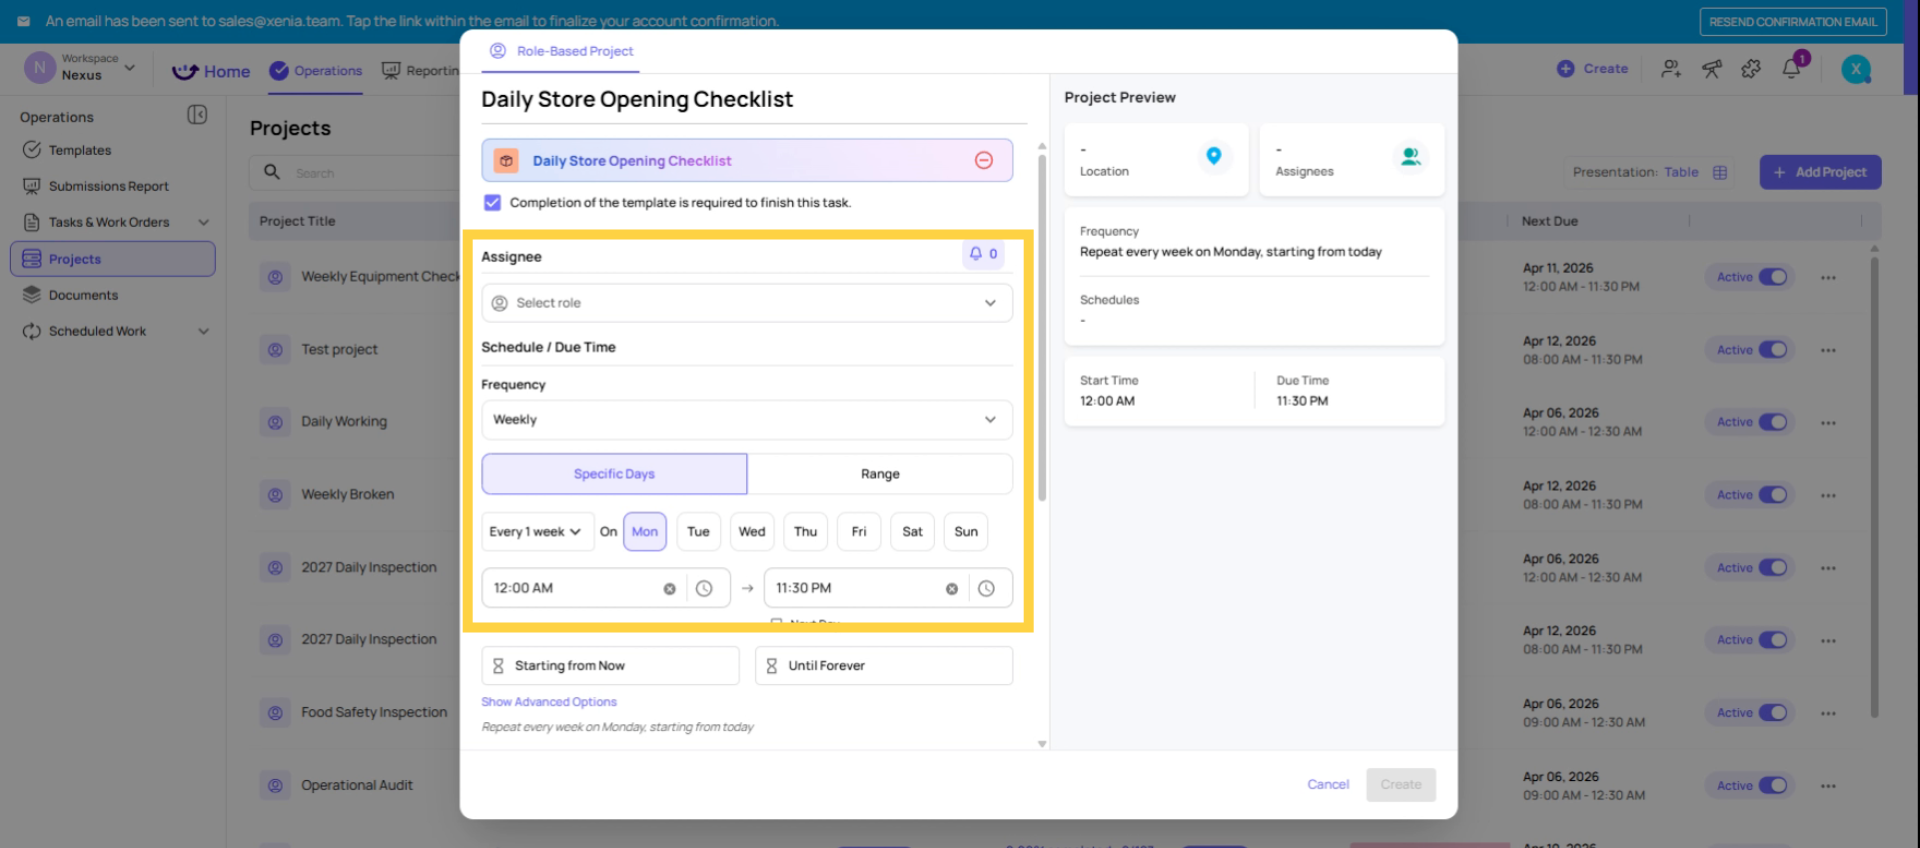
10. Set the Schedule / Cadence
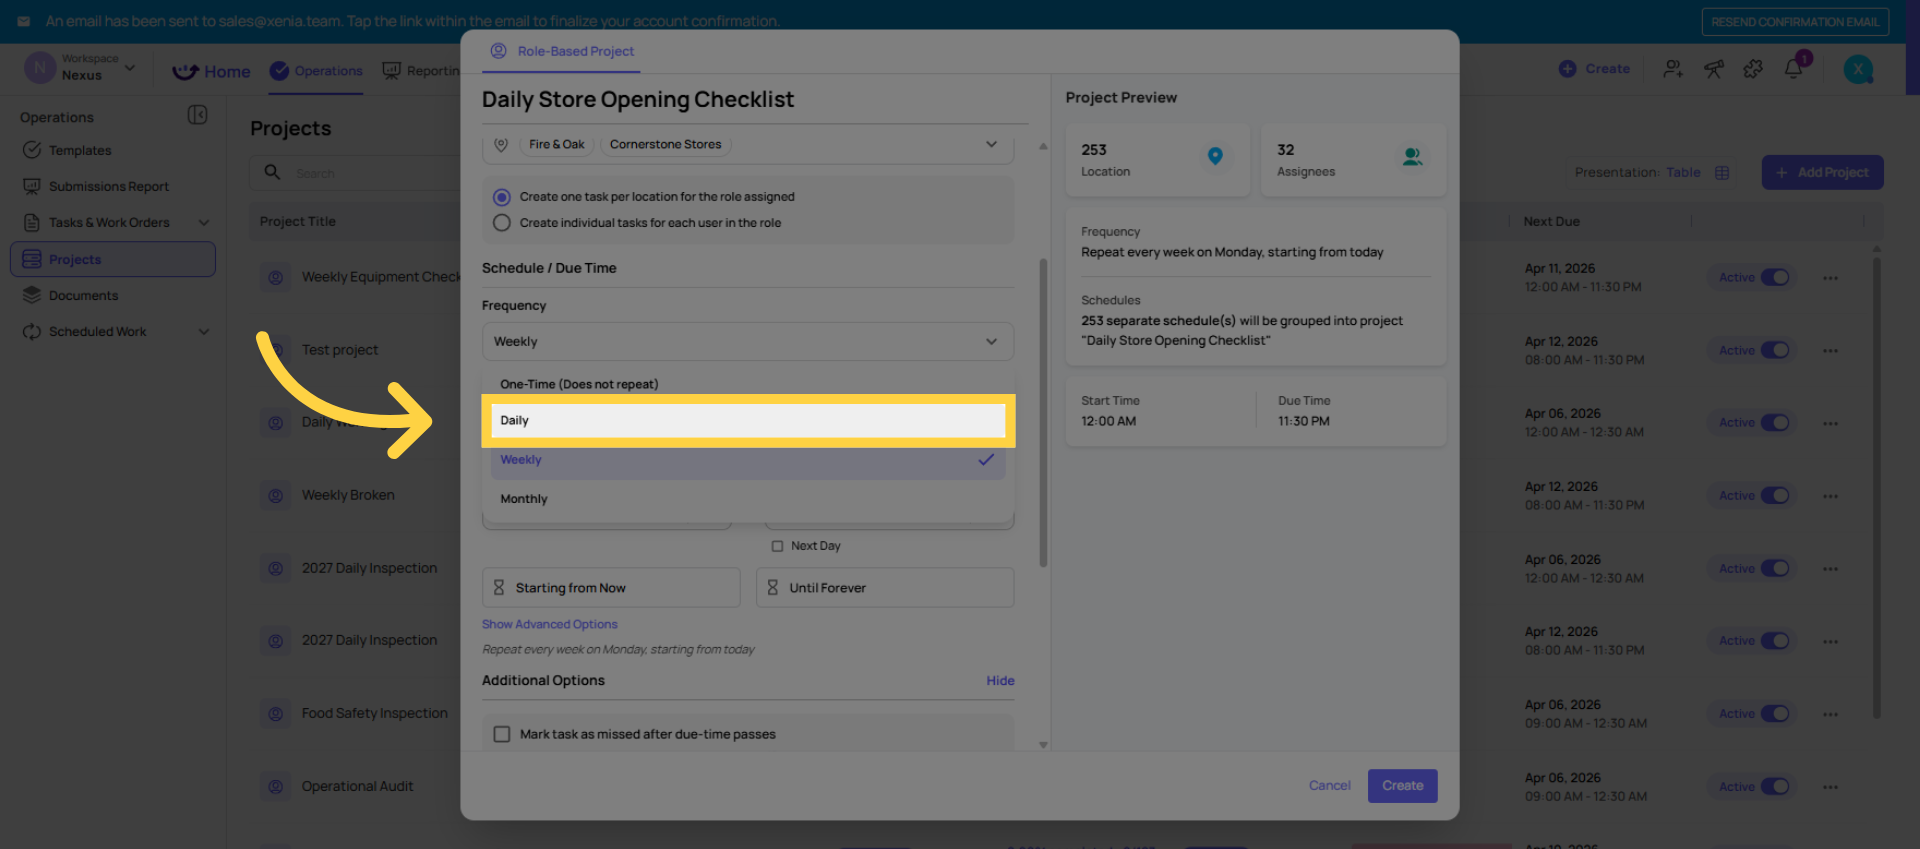
Set the Schedule / Cadence Choose how often this task recurs:
- Daily — appears every day
- Weekly — choose specific days (e.g., every Monday and Thursday)
- Monthly — choose specific days of the month
One-time — appears once on a specific date
11. Set Start Time and Due Time
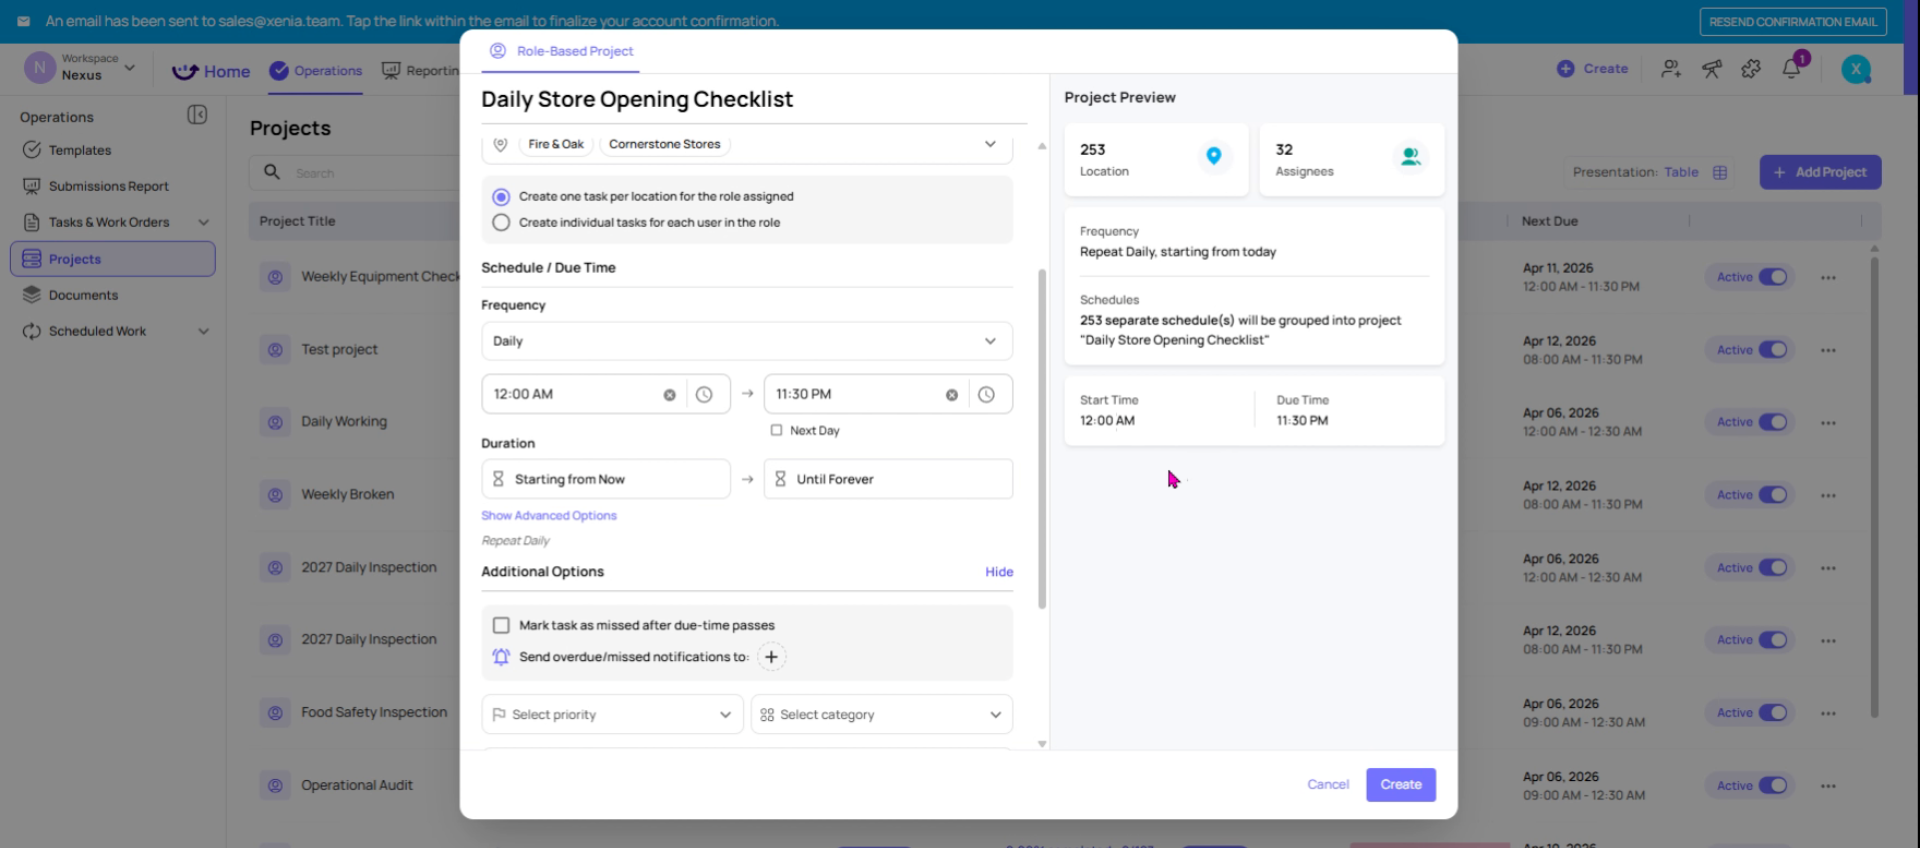
Set Start Time and Due Time
- Start Time — when the task first becomes visible and the employee gets notified
- Due Time — the deadline for completion; after this point the task is marked overdue or missed
- Xenia uses the location's address/timezone to ensure these times are accurate locally — a 9am start in New York won't show at 9am for a California location
- For shift-based operations, you can create multiple projects throughout the day (e.g., one project 6:30am–8:00am for opening, another 4:00pm–9:30pm for closing)
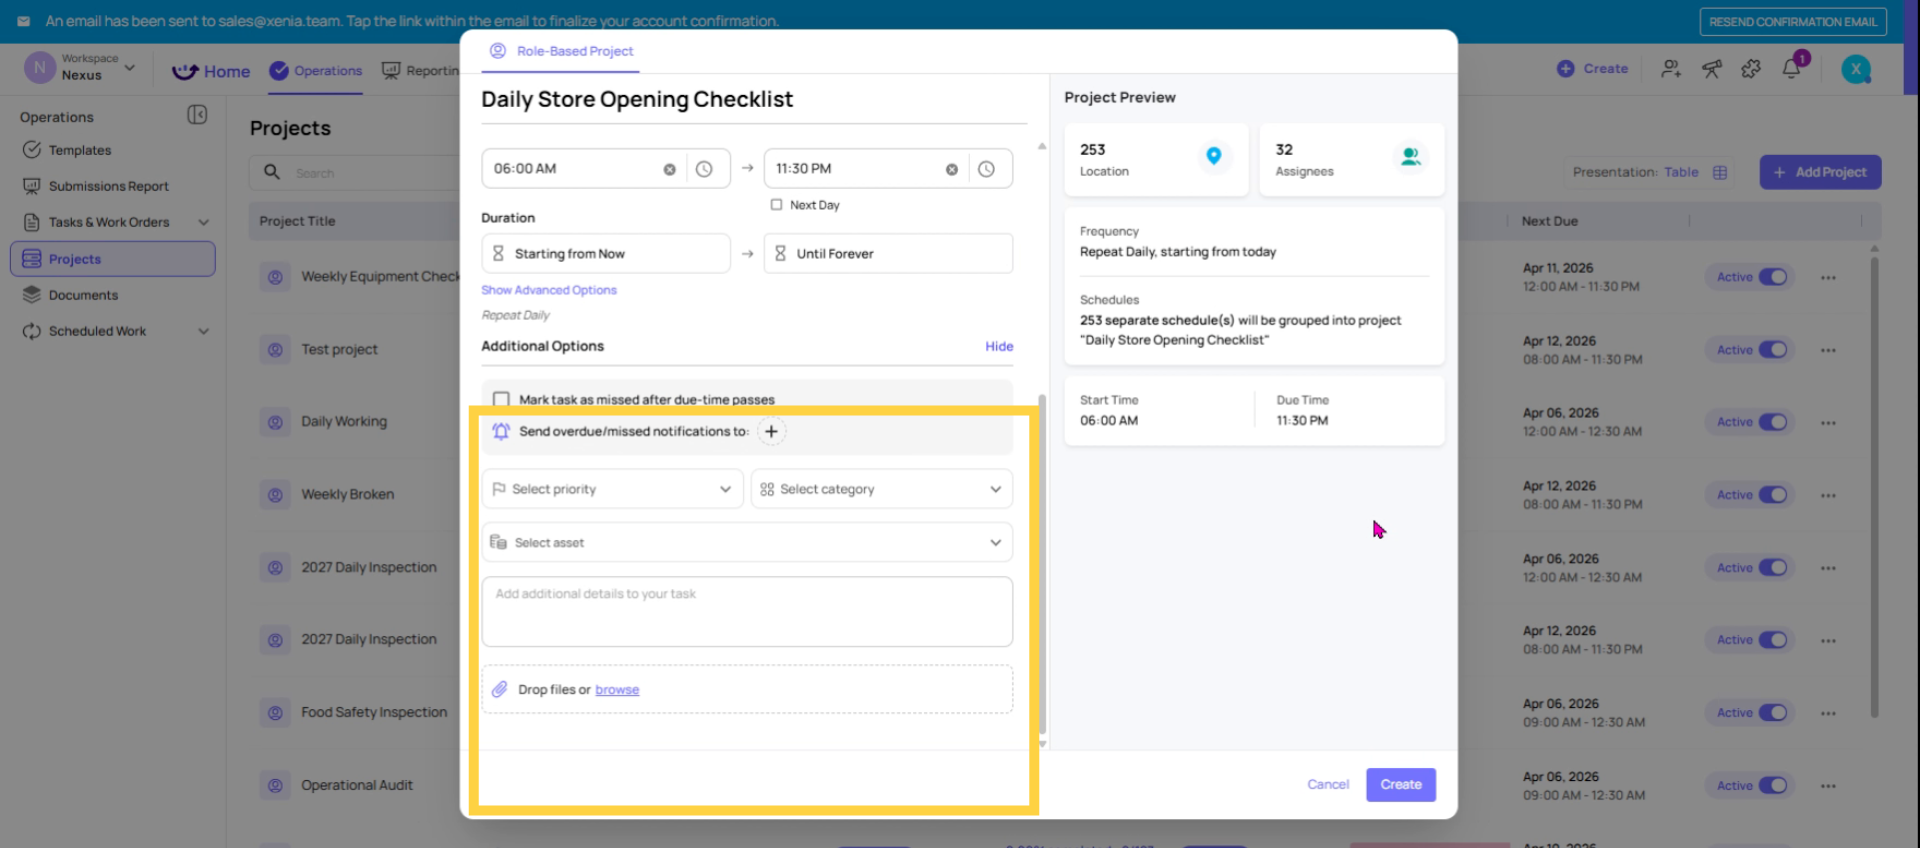
12. Mark as Missed After Due Time
Mark as Missed After Due Time (optional but recommended)
- Toggle on "Mark task as missed after due time passes"
- If ON: once the due time passes, the task is locked — employees cannot complete it late. It shows as Missed
- If OFF: the task becomes Overdue but employees can still complete it late — it tracks as Completed Late in reporting
- Recommendation: Use Missed for strict time-sensitive tasks (e.g., opening checklist must be done by 9am). Use Overdue/Completed Late when you'd still rather it be done late than not at all
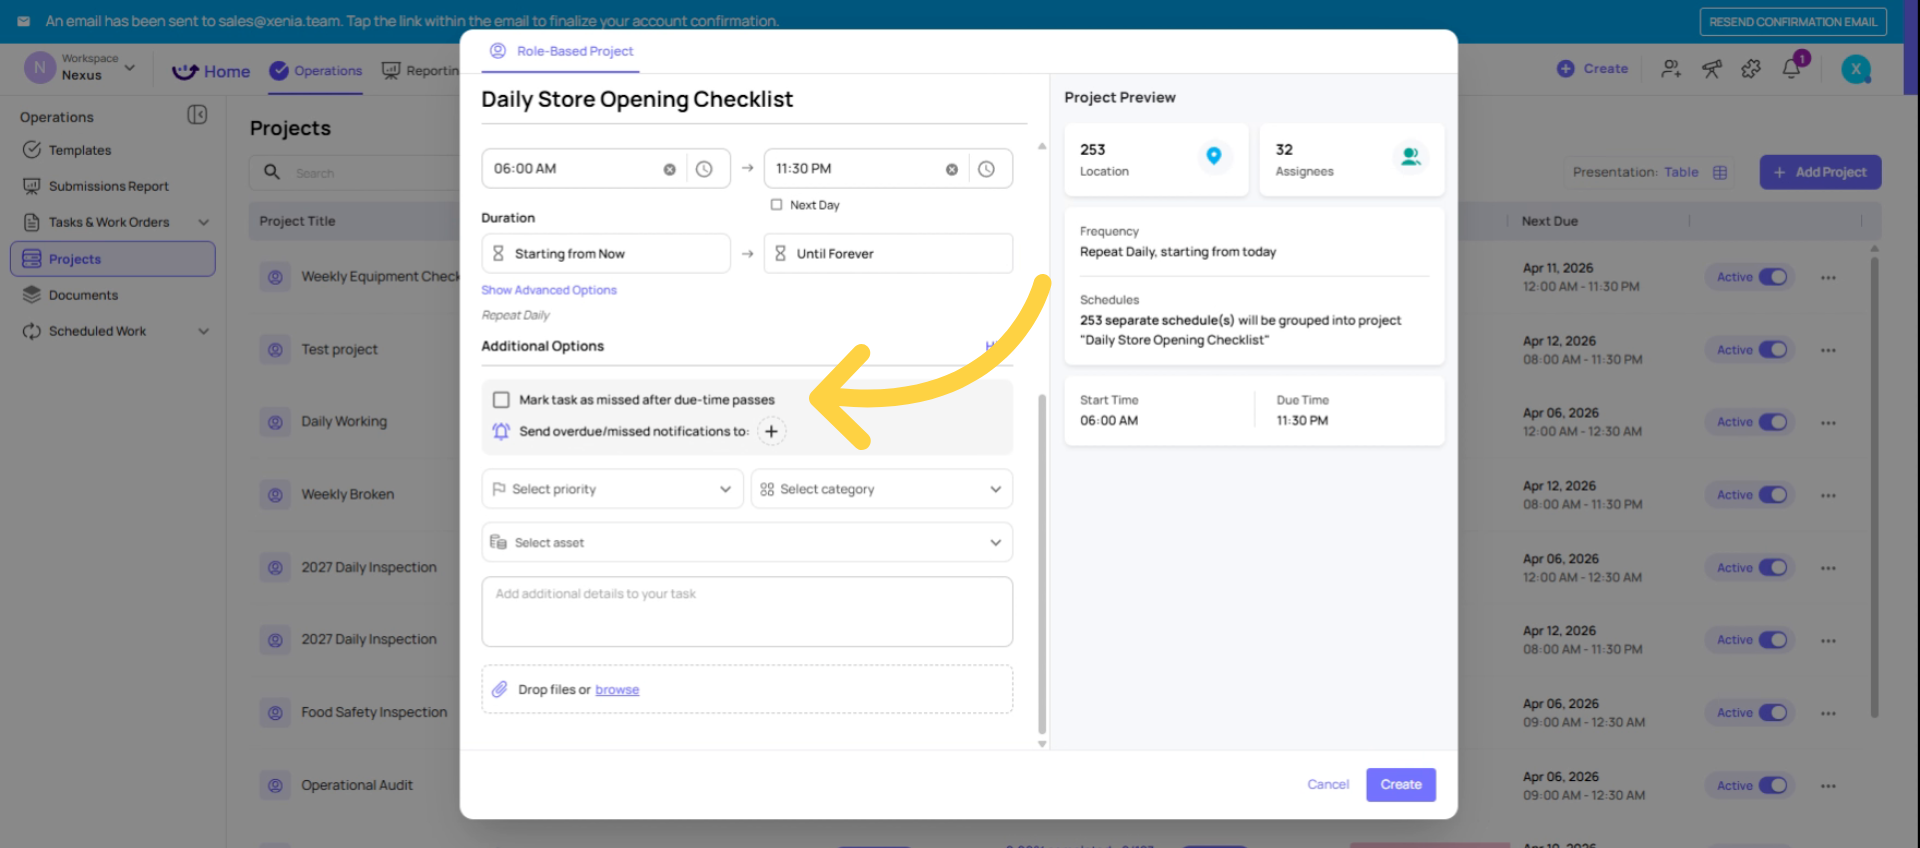
13. Set Overdue/Missed Notifications
Set Overdue/Missed Notifications
- Choose which role gets notified if the task is missed or overdue
- This must be a role, not an individual user (when using role-based projects)
- Xenia notifies the role member at that specific location — so the District Manager of Store 5 gets notified about Store 5, not all district managers across all locations
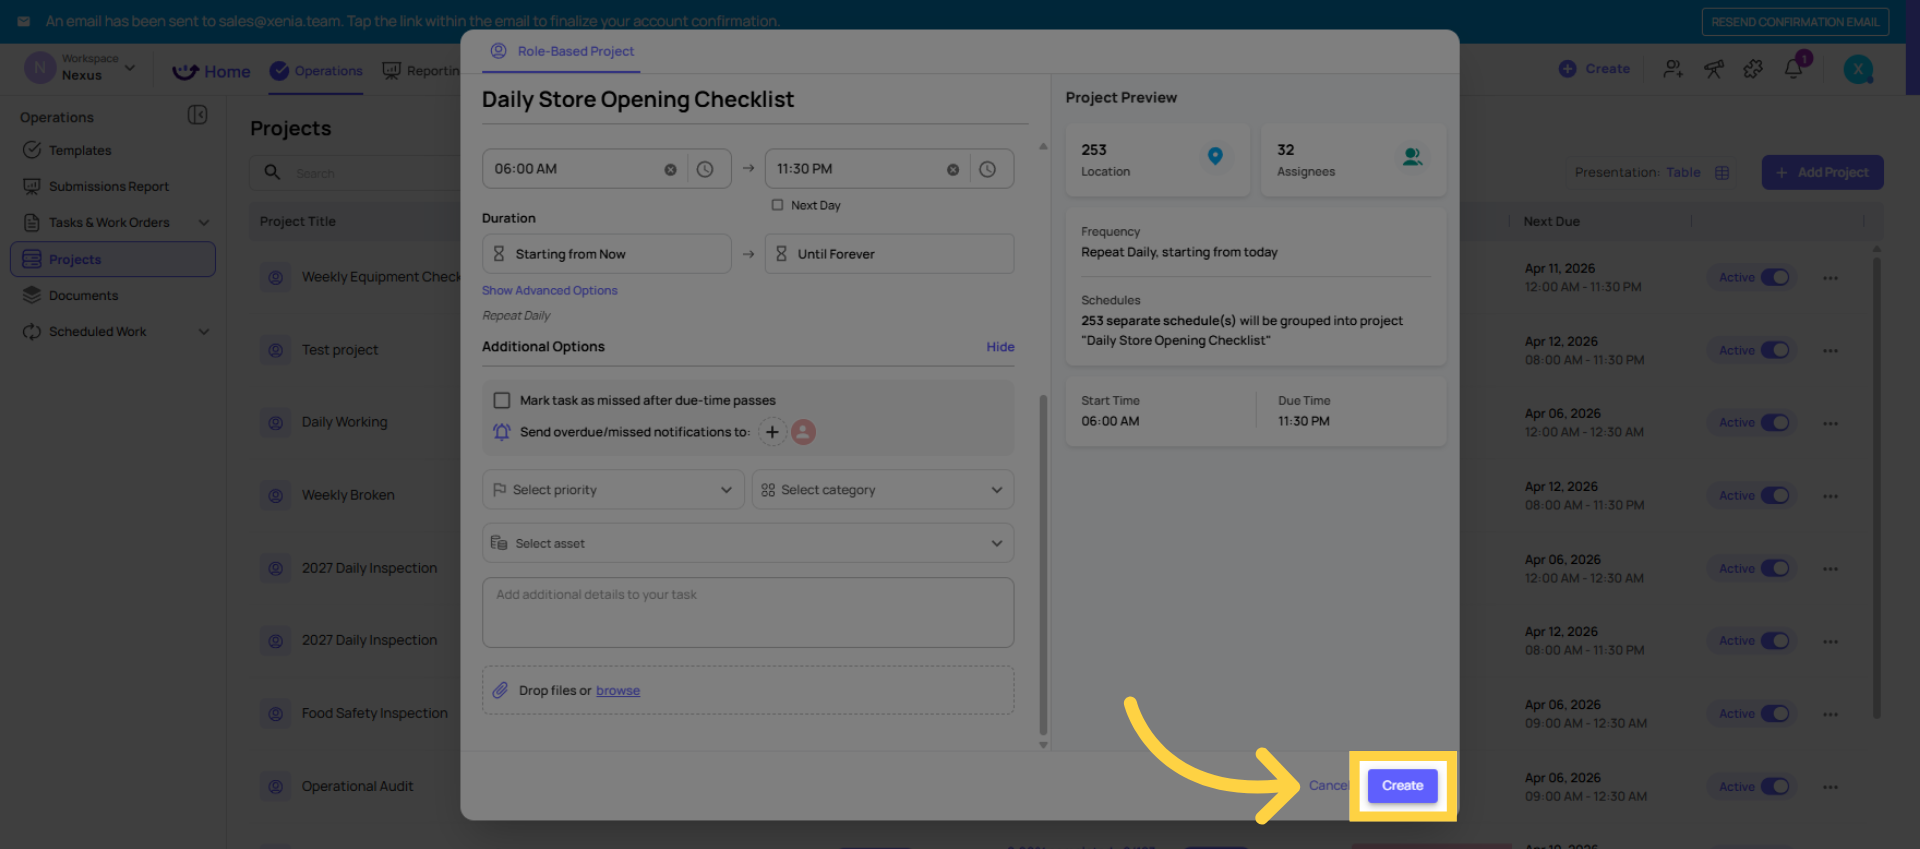
14. Click Create Button
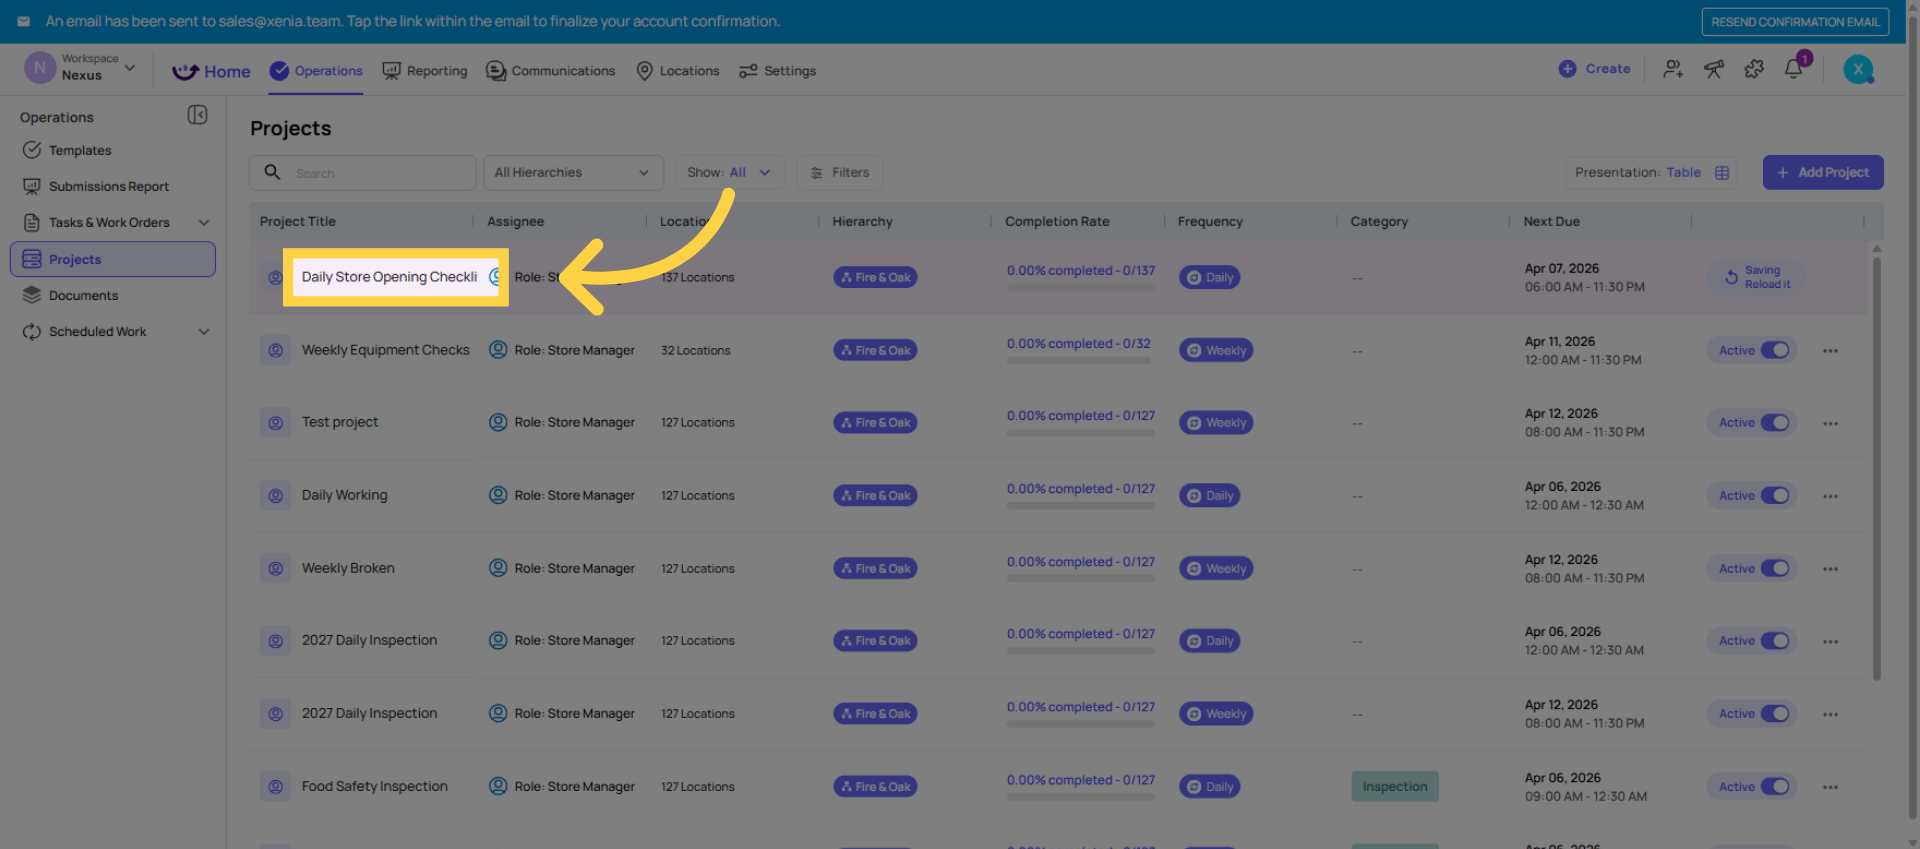
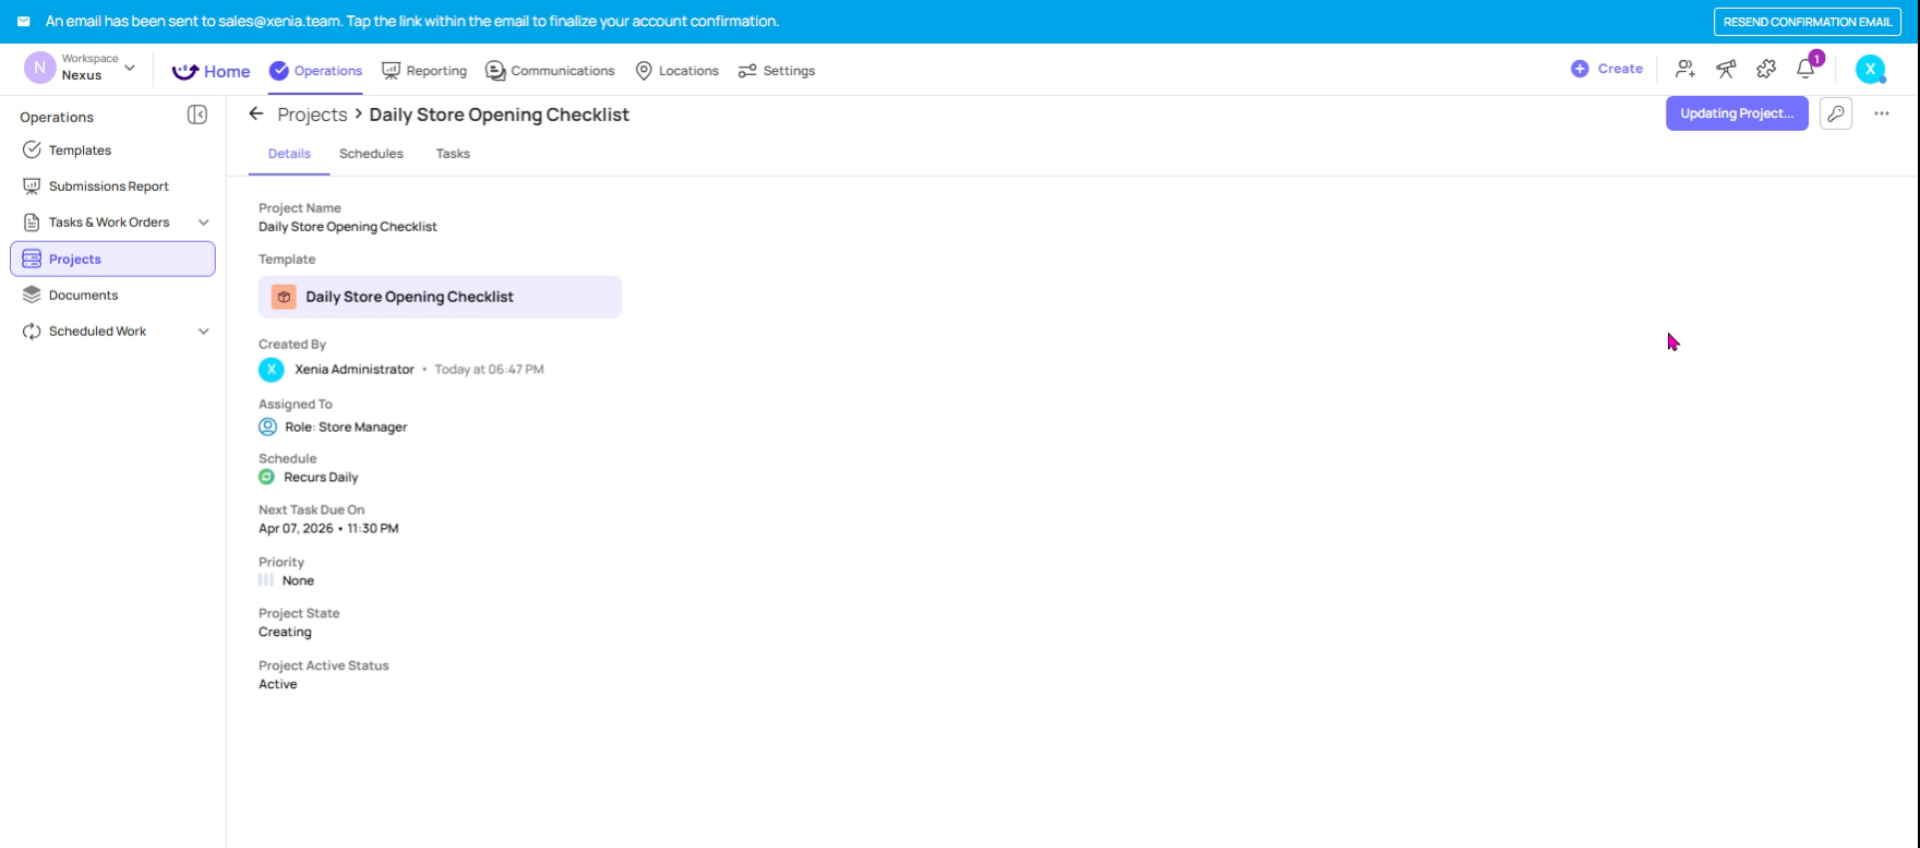
15. Open Project
16. Manage Project Post Launch
What Employees See After You Create the Project
- On the Location Pulse home screen (recommended for frontline roles), tasks appear under "Due Today" with a clear status indicator
- Employees see the task name, the attached checklist, and the due time
- They tap it, complete the checklist, and submit — it immediately logs in your reports
- If they miss the due time (and Missed mode is on), the task locks and shows as missed
Managing a Project After Creation
- Add a new location: Open the project → Edit → add the location to the existing schedule. No rebuild required
- Remove a location: Edit the project and deselect that location
- Add a new role/user: Same — edit the project and add the new assignee
- Change the checklist: You'd need to create a new project (the template attachment cannot be swapped mid-project)
- Pause a project temporarily: Use the Pause/Active toggle — useful during holidays or shutdowns
Archive a project: Removes it from the active list but preserves all historical completion data
Viewing Project Completion Data
Once the project is running, you can track performance directly inside the project:
- Click into any project to see completion rates per location
- Filter by date range to see trends
- Three statuses tracked: Completed On Time, Completed Late, Incomplete/Missed
- Gallery View inside the project shows all photos taken during submissions
- Full completion data also rolls up into your Reporting dashboards
Projects vs. Schedules — When to Use Which
- Projects = bulk deploy the same checklist across multiple locations and roles at once. Best for standardized recurring operations
- Schedules = one individual recurring assignment to a specific user, team, or location. Best for unique cadences or one-off recurring tasks
For most daily/weekly operational checklists, Projects is the right tool.This article has guided you through setting up and managing a role-based project in Xenia, including task assignment, scheduling, notifications, and tracking completion data. For more information, explore related articles on project templates and reporting features.
Need Help?
For assistance please reach out to us at support@xenia.team
Comments
0 comments
Please sign in to leave a comment.