Before You Build — What to Have Ready
Before opening the template builder, take 5 minutes to plan:
- What is this checklist for?
- Who will complete it?
- How will it be deployed — as a scheduled project every day, or ad hoc on demand?
- What questions need to be answered to confirm the work was done?
You don't need a perfect plan, but having a rough sense of the steps in mind makes building much faster. You can always add, remove, or reorder later.
Navigate To Template Creation
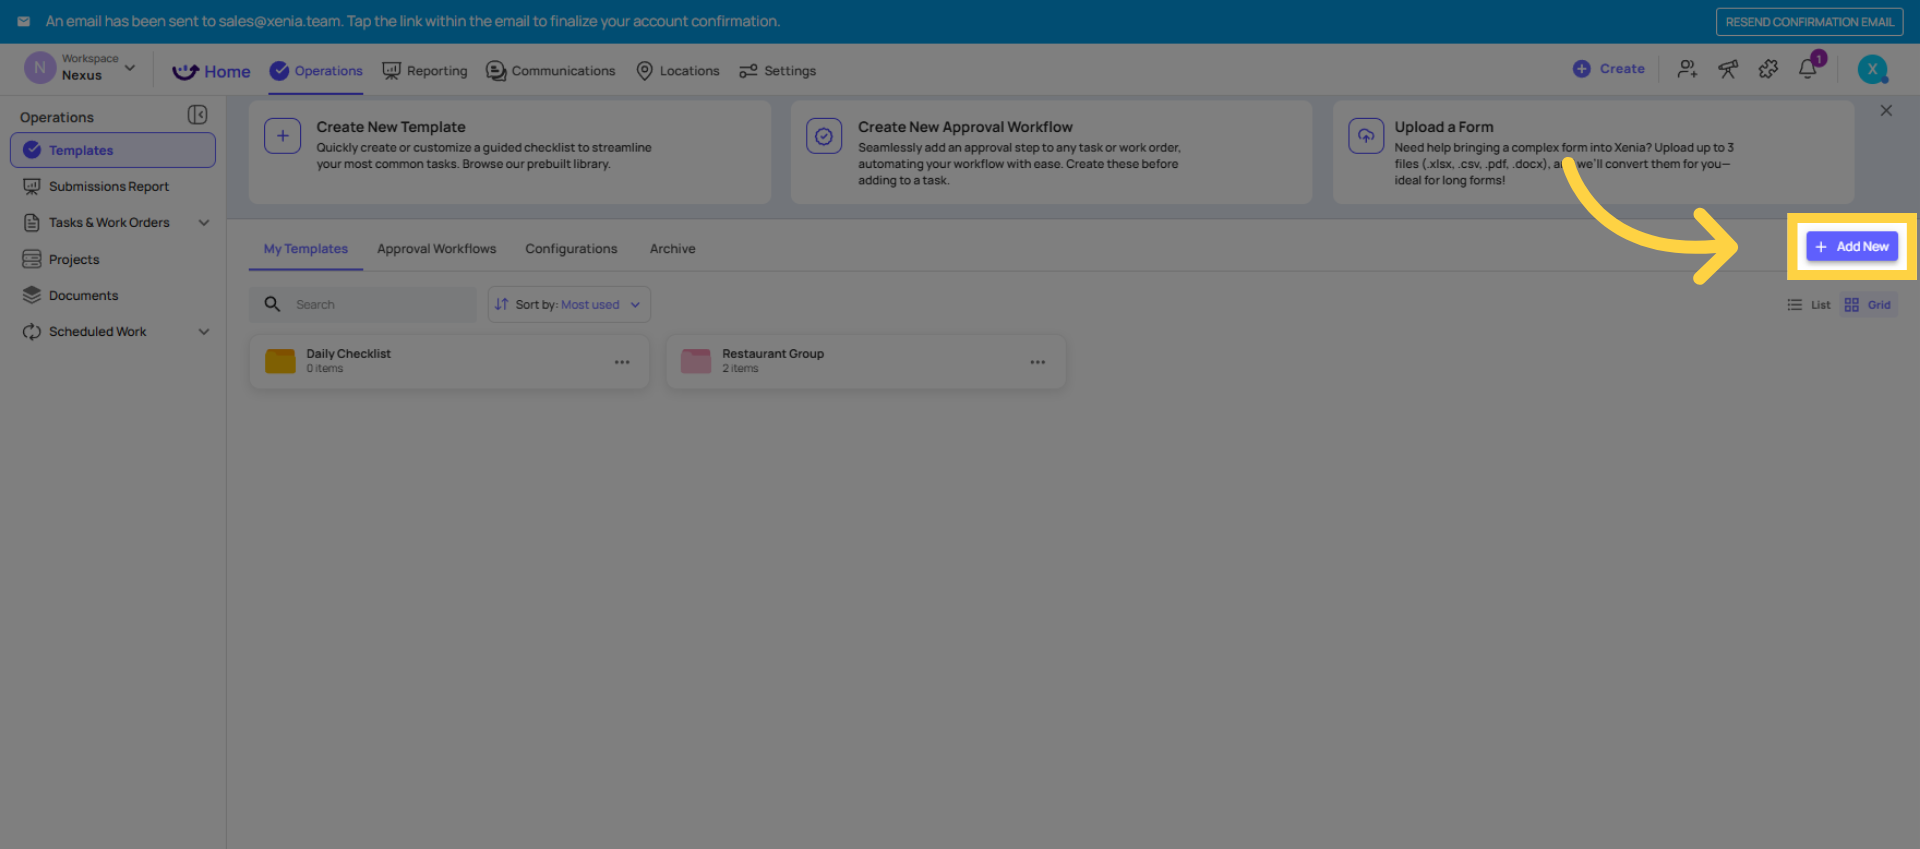
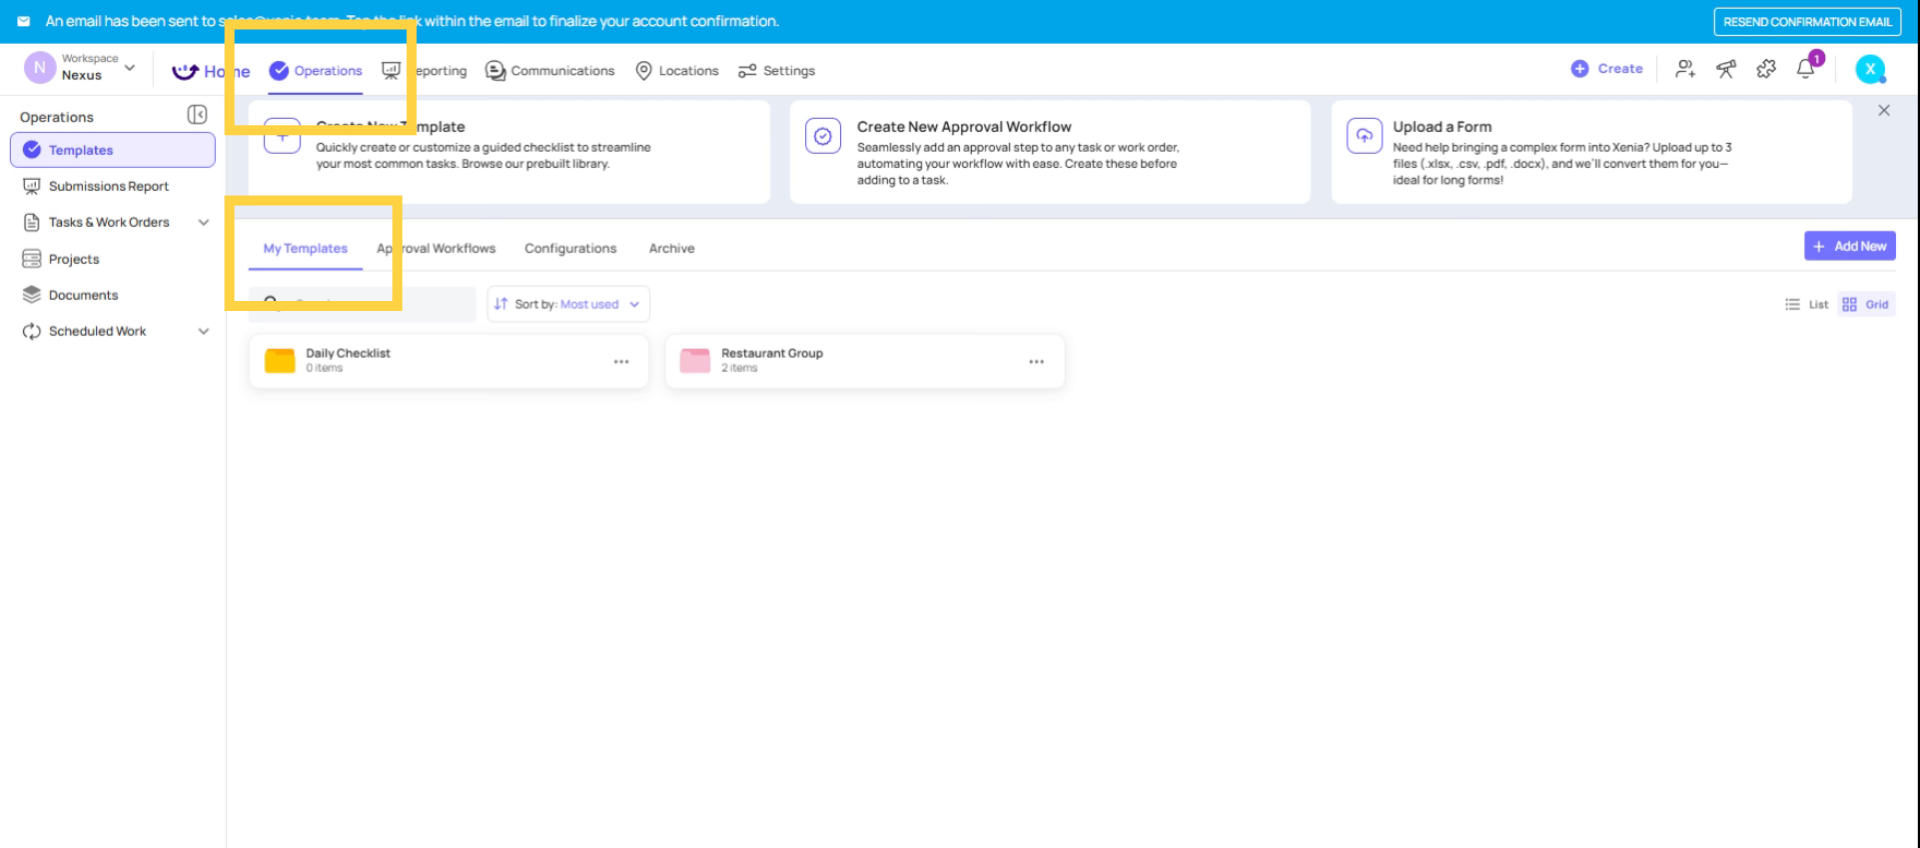 Click the "Add New" button to initiate the creation of a new checklist template within Xenia.
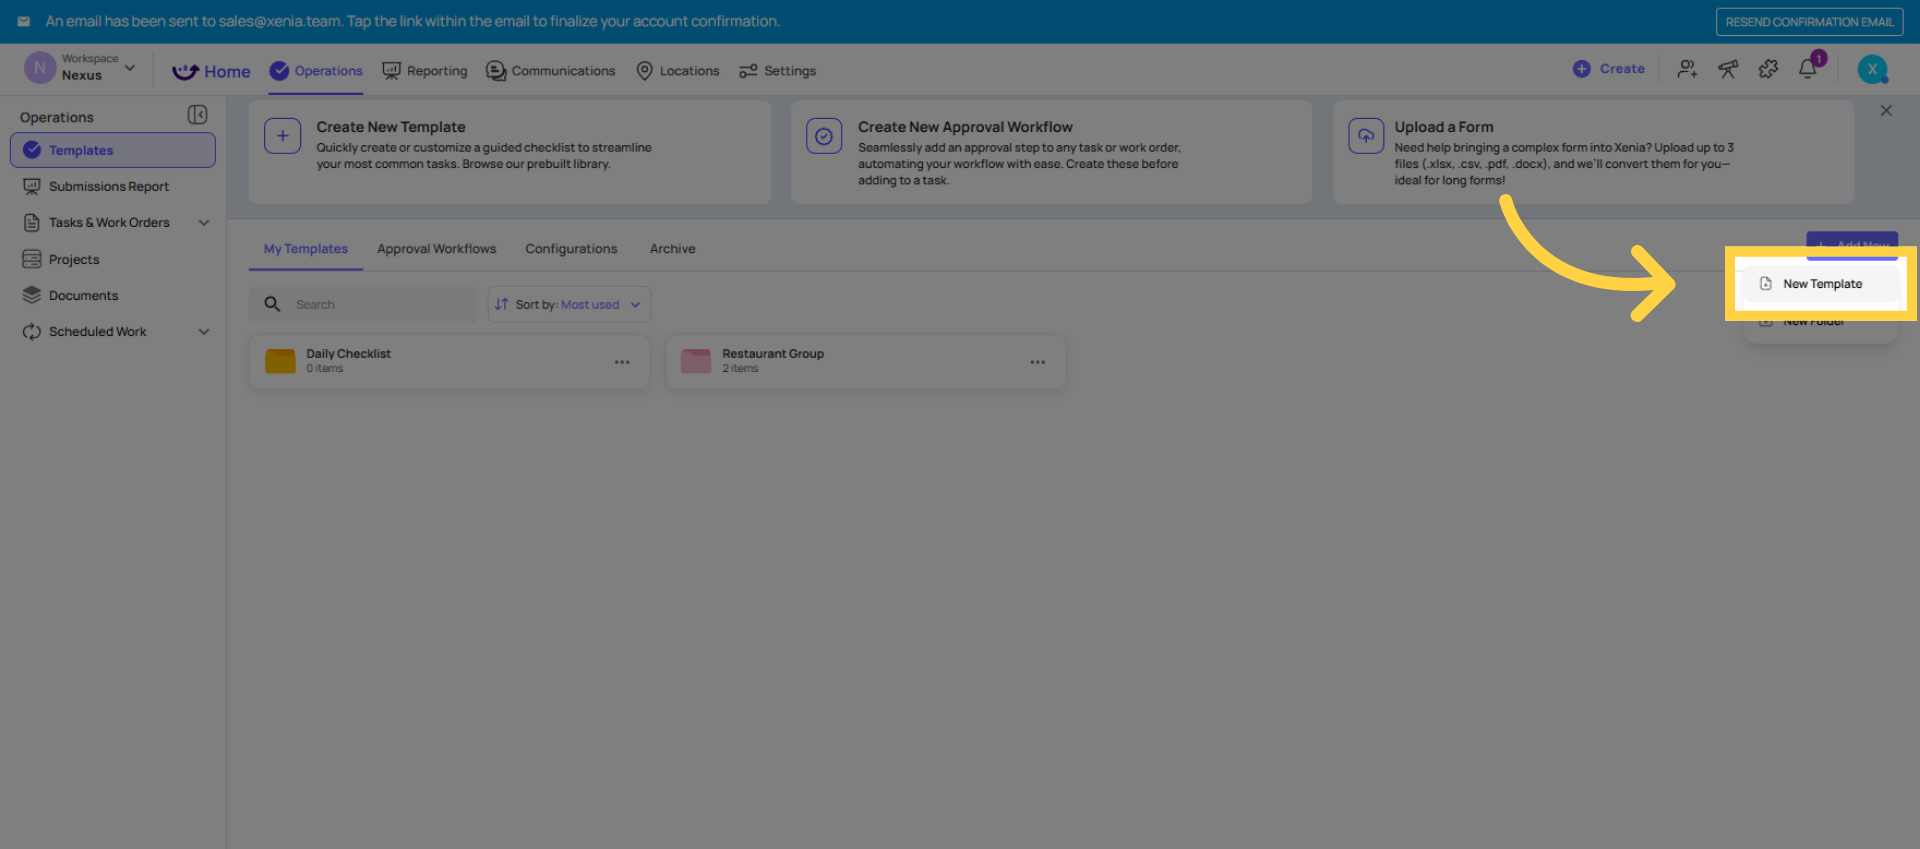
 Click the "New Template" option to initiate the creation of your checklist, either from a blank slate or utilizing alternative methods.
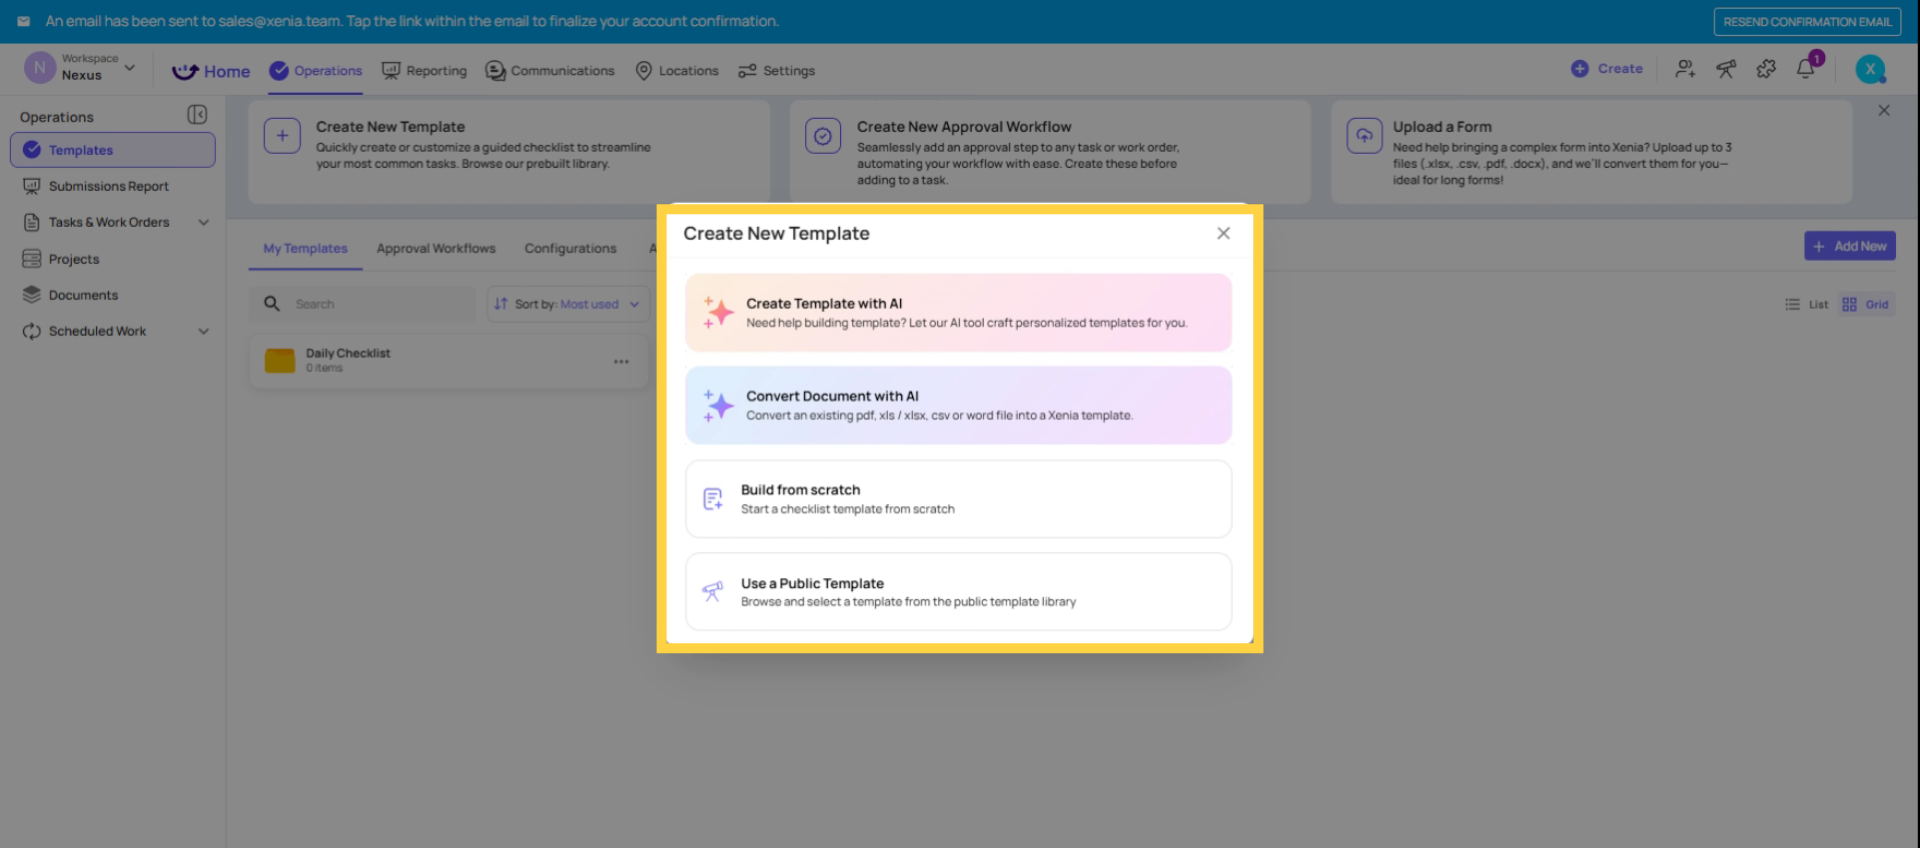
Review Template Creation Options
Ways to Start a Template
Option A — Build from Scratch Full control; start with a blank canvas
Option B — Use the AI Template Builder Type a prompt (e.g., "Daily restaurant opening checklist") and Xenia generates a full template for you to customize — fastest way to get started
Option C — Use the Template Library Xenia has hundreds of ready-to-use templates (checklists, SOPs, inspections, logs, surveys) — find one close to what you need, save it to your workspace, and customize from there
Option D — Convert a Document with AI Best when: you already have an existing checklist in PDF, Excel, or Word format and want to convert it into a Xenia template without rebuilding it step by step.
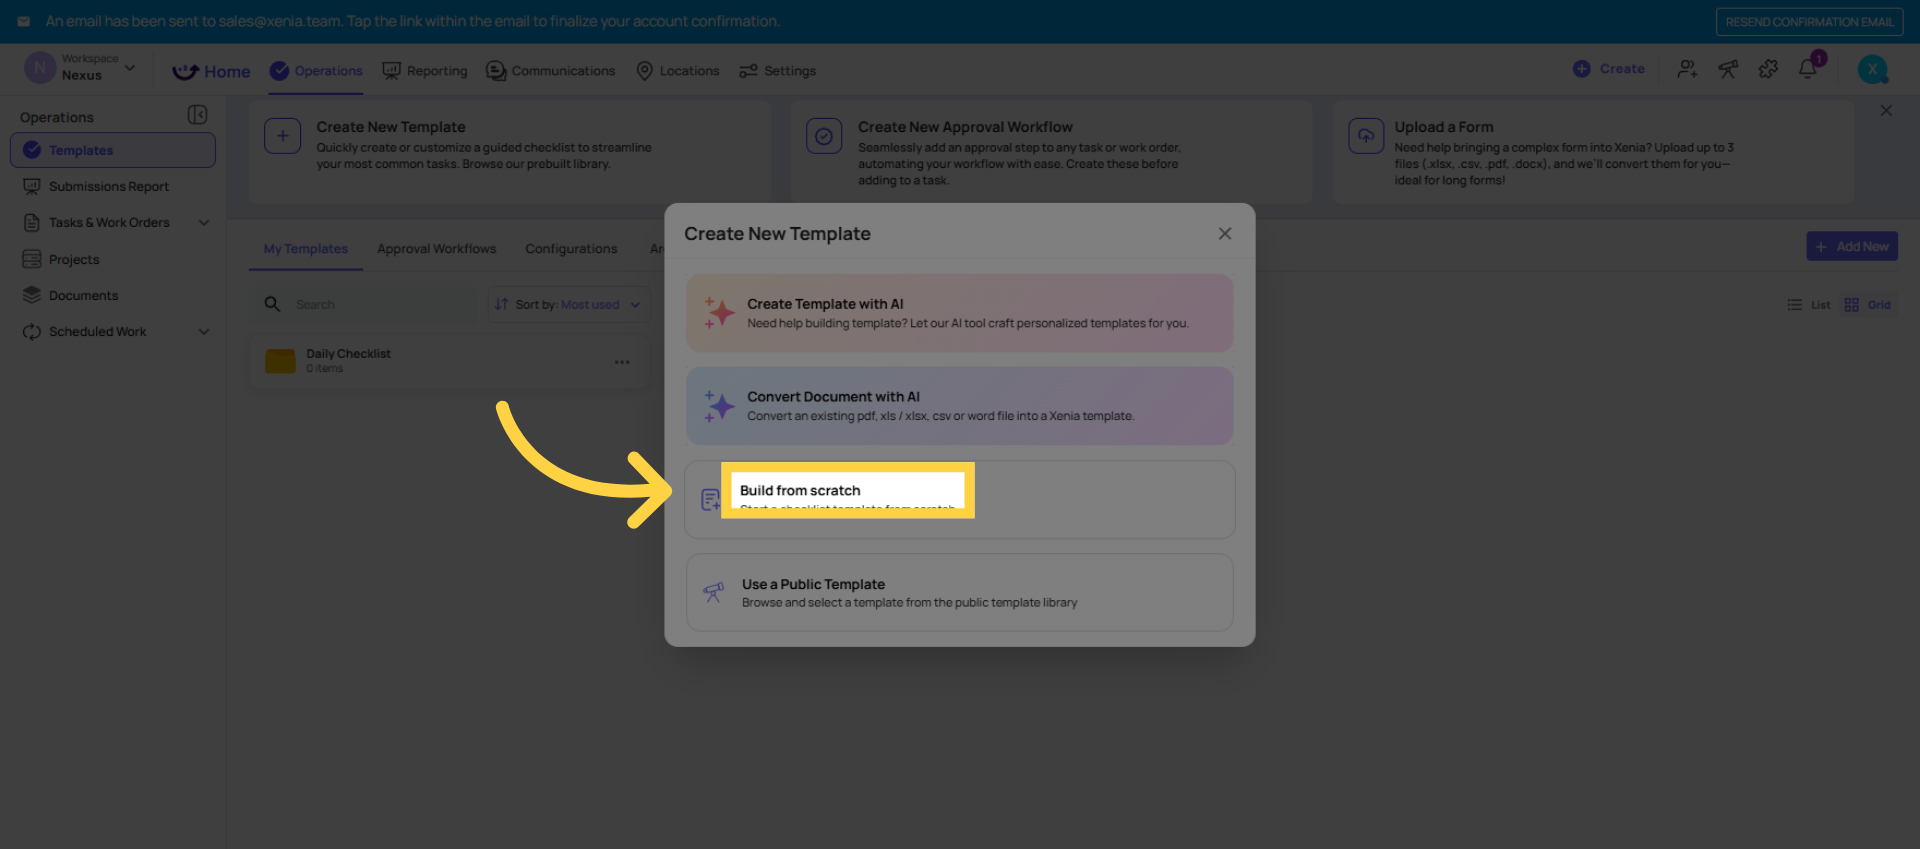
Path 1 — Build from Scratch
Best when: you know exactly what your checklist needs and want full control from step one.
- Go to Operations → Templates
- Click + Add New or Create Template
- Select Build from Scratch (or just name and create)
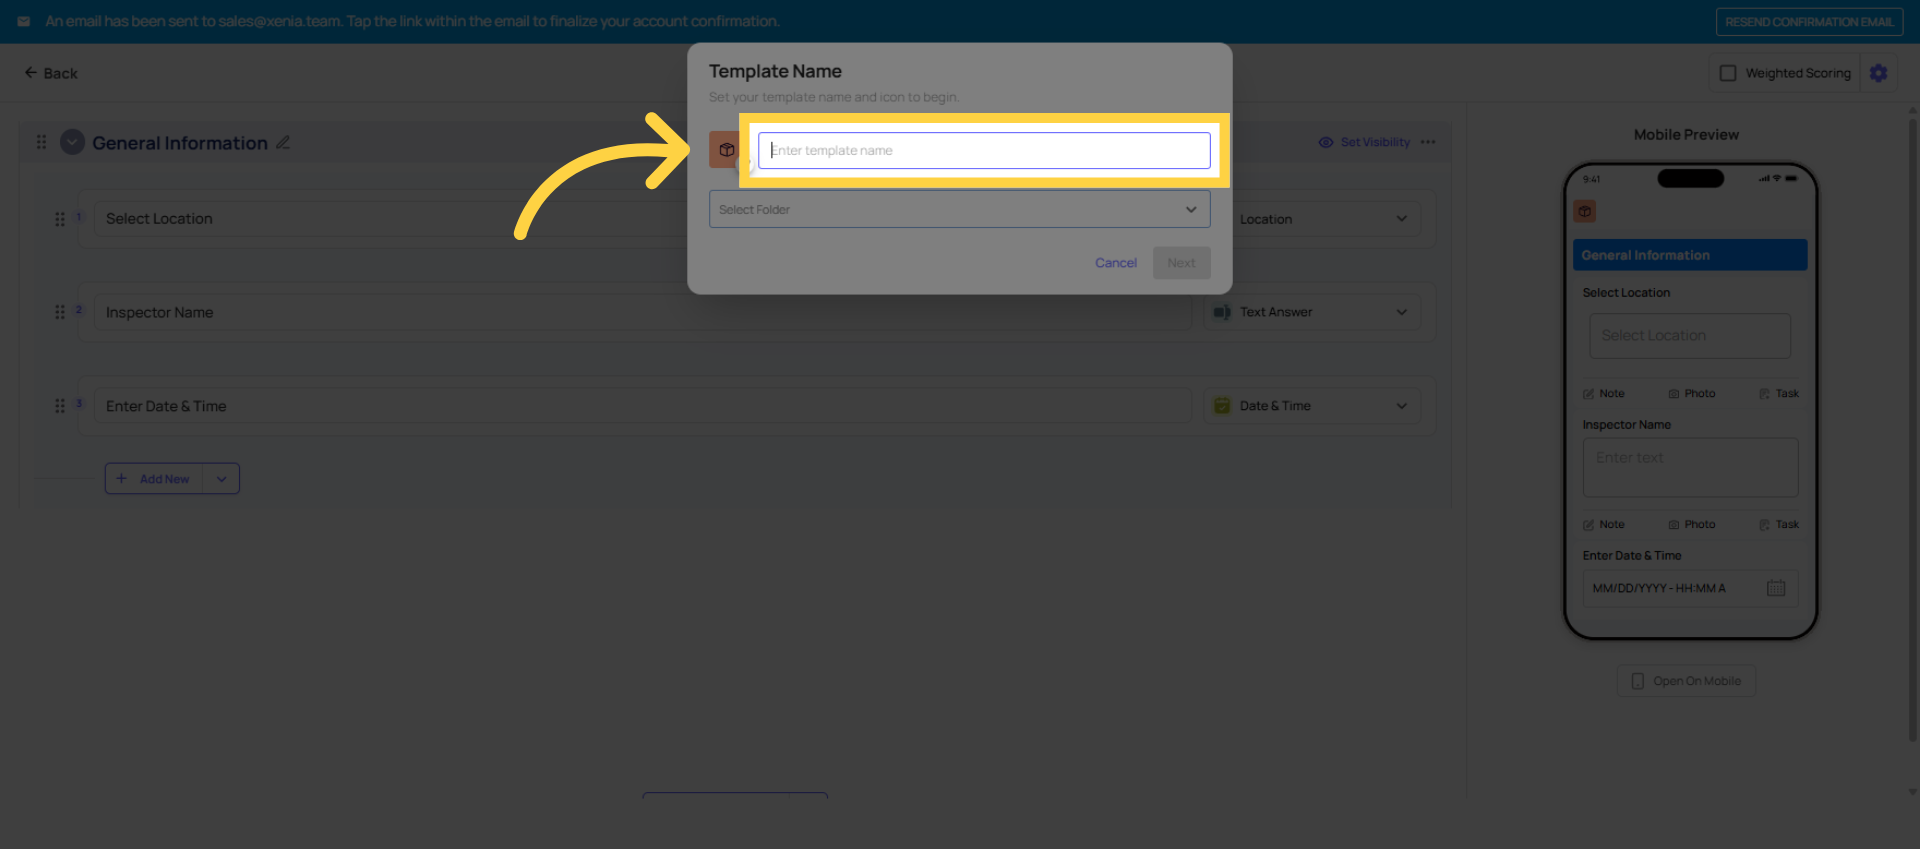
- Give the template a clear, specific name — "Daily Opening Checklist" is better than "Opening." "Walk-in Cooler Temperature Log" is better than "Temp Log."
- Choose a folder (or create one)
- Click Create — you're now in the template builder
Path 2 — Convert a Document with AI
Best when: you already have an existing checklist in PDF, Excel, or Word format and want to convert it into a Xenia template without rebuilding it step by step.
- Go to Operations → Templates
- Click + Add New → select Convert Document with AI (sometimes labeled Upload a Form or Convert with AI)
- Upload your existing document — PDF and Excel are the most common formats used. Word documents are also supported.
- Xenia's AI reads the document and converts it into a template with steps, sections, and step types mapped from the content of your file
- Review the generated template — check that steps were correctly interpreted, step types make sense (a yes/no answer should be Multiple Choice, a temperature should be a Temperature step, etc.)
- Edit any steps that need adjustment
- Add the Select Location step at the top if it isn't already there — this is required for projects, notifications, and reporting to work correctly
- When satisfied, click Done
- Proceed to Settings (Step 4) and Publish (Step 5)
Important notes on Convert Document with AI:
- AI conversion is not perfect — it's a strong starting point, not a finished template. Always review every step before publishing.
- Complex Excel files with merged cells, formulas, or non-standard formatting may not convert as cleanly as a simple PDF or Word document. If your file is complex and the conversion doesn't look right, contact the Xenia support team — send the file to templates@xenia.team and the team can convert it manually for you.
- If you encounter an error during conversion, the fastest path is to send the file directly to the Xenia support team rather than troubleshooting the upload.
Path 3 — Build with AI (Prompt-Based)
Best when: you're starting from scratch but want a head start — type a description of what you need and AI generates a draft template for you.
- Go to Operations → Templates
- Click + Add New → select Build with AI or Create with AI
- Choose the template type (Checklist, Inspection, Form, etc.) and your industry (Restaurant, Retail, Healthcare, etc.)
- Type a prompt describing what you want. The more specific, the better. "Create a daily restaurant opening checklist covering front of house, kitchen, and safety procedures" gives better results than "opening checklist."
- Click Generate — Xenia builds a draft template based on your prompt, pulling from its internal template database
- Review the generated steps, sections, and structure. You can edit the prompt and regenerate, or click into individual steps to modify them.
- When satisfied, click Done
- Add the Select Location step at the top — it's often not included automatically in AI-generated templates and is required for everything downstream to work
- Proceed to Settings and Publish
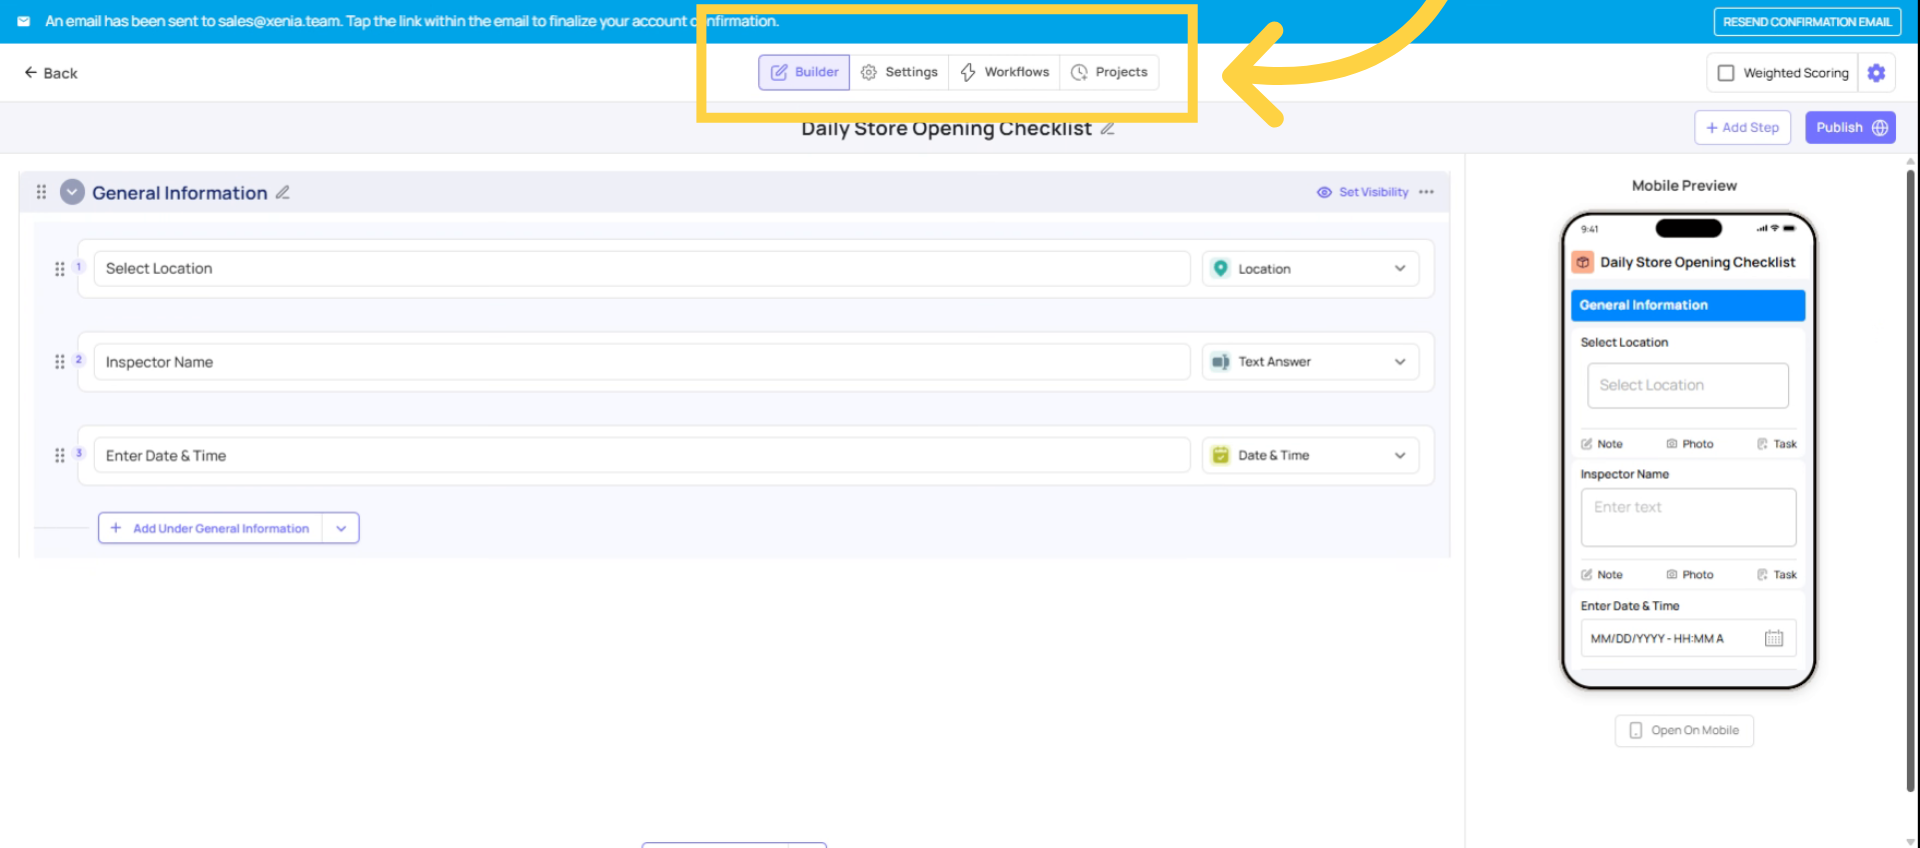
The Template Builder: Three Tabs
When you open a template for editing, there are three tabs:
- Build — where you add/edit all your steps and sections
- Settings — where you configure access controls, submission mode, email notifications, and scoring
- Publish — where you publish the template to make it live for your team
General Information Section
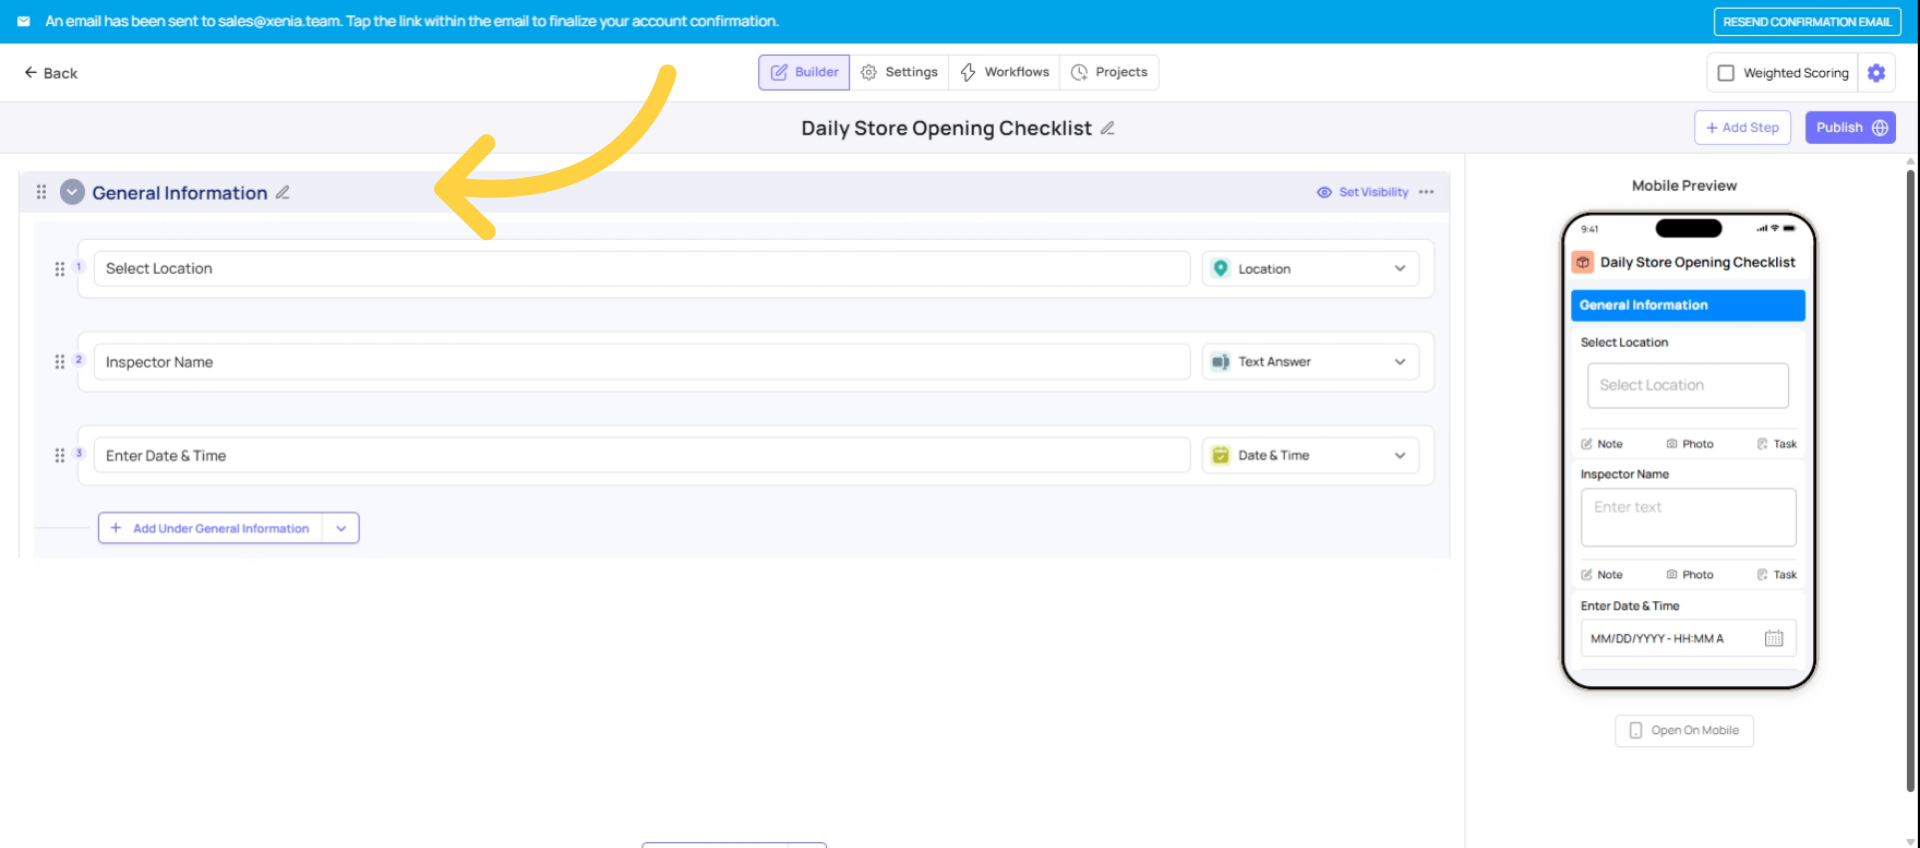
Add and Configure Steps (Build from Scratch)
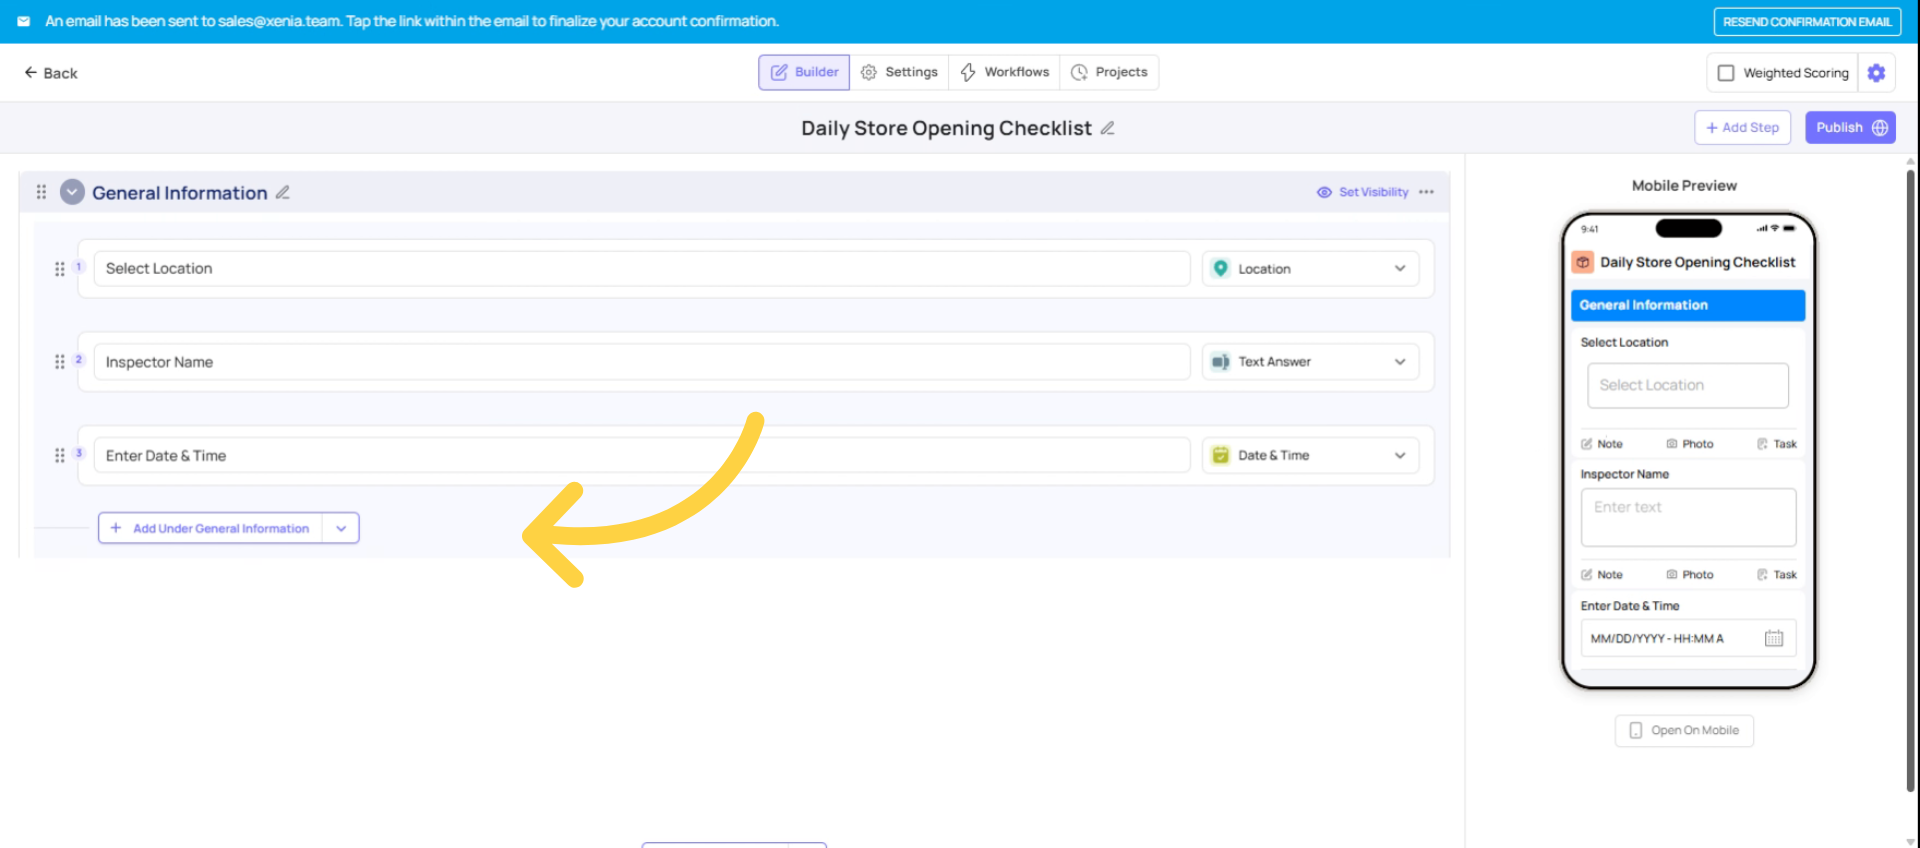
Add Your First Section
- Sections group related steps together — great for long checklists
- Click Add Section and name it (e.g., "Front of House", "Kitchen", "Safety Checks")
- You can add multiple sections and reorder them by dragging
- Steps added inside a section belong to that section
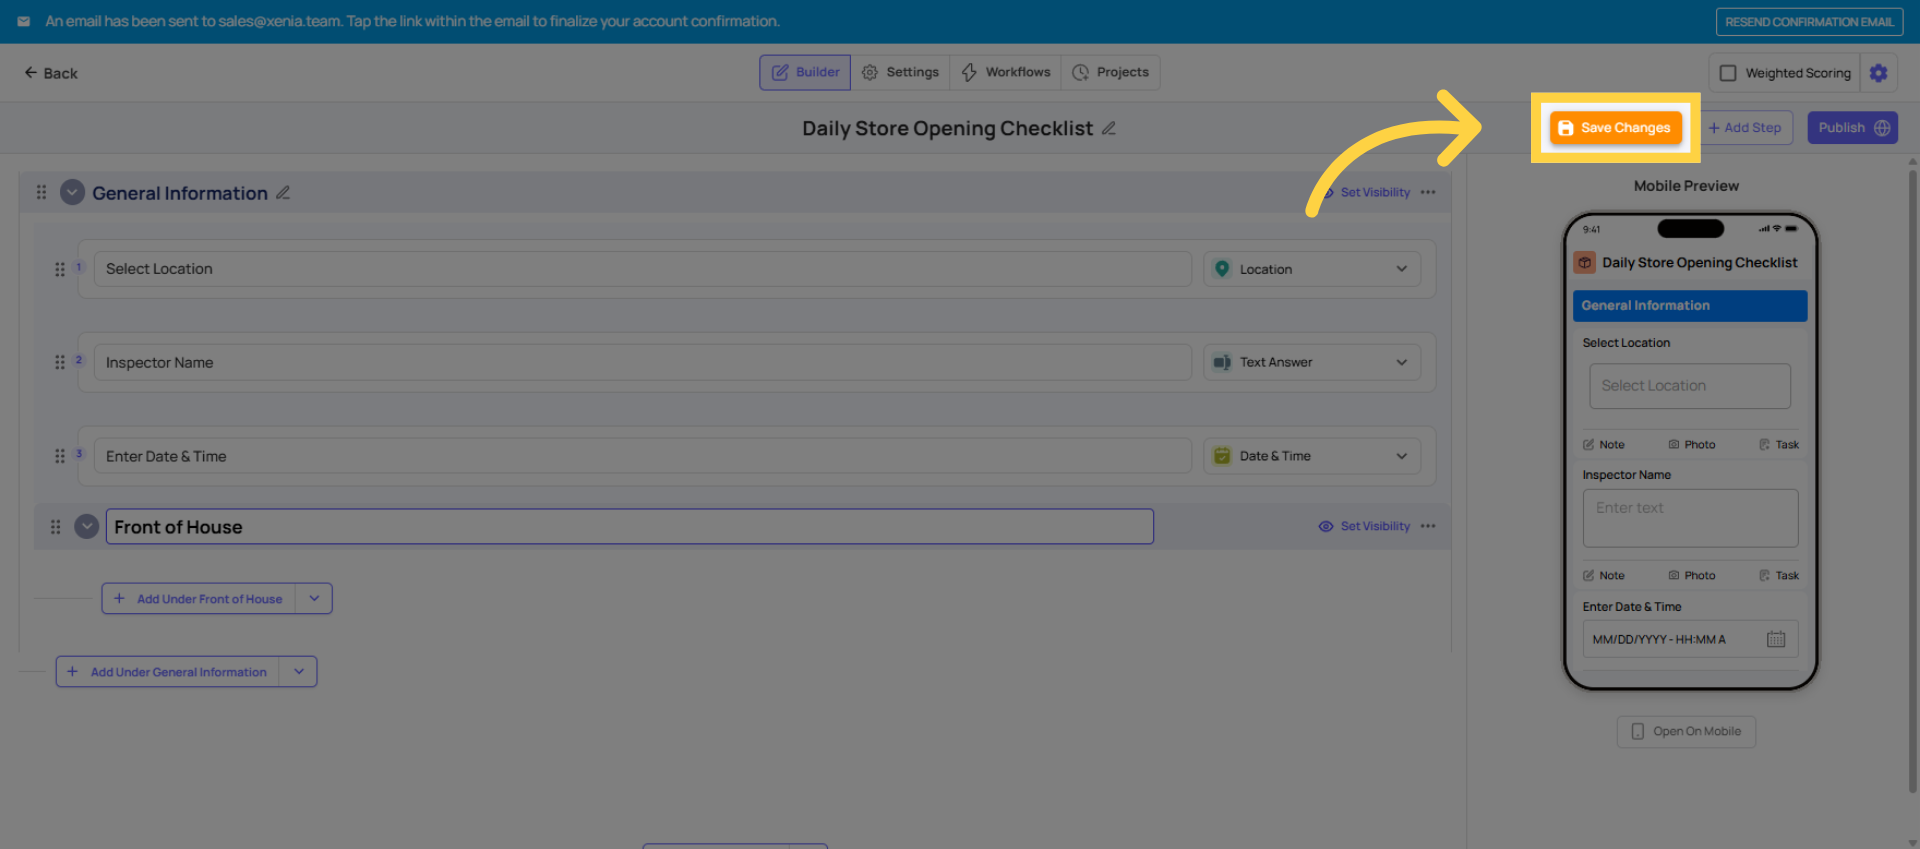
Save Changes
Configure Settings
Click the Settings tab. Key settings before publishing:
Template Access:
- Can Submit — which roles can see and complete this template
- Can Edit — which roles can open the builder and edit it (typically Admin only)
Submission Access:
- Set the visibility tier per role (Tier 1/2/3)
Submission Mode:
- Project-based — only completable as a scheduled assignment
- Ad Hoc — submittable anytime without a project
- Both — either
Overview of Step Types
| Step Type | Use When… |
| Procedure | Simple to-do item — no response needed, just mark done |
| Yes / No (Multiple Choice) | Binary check — "Is the floor clean?" Yes/No displayed as bright green/red |
| Multiple Choice | Multiple options — customize choices (e.g., Good / Fair / Poor) |
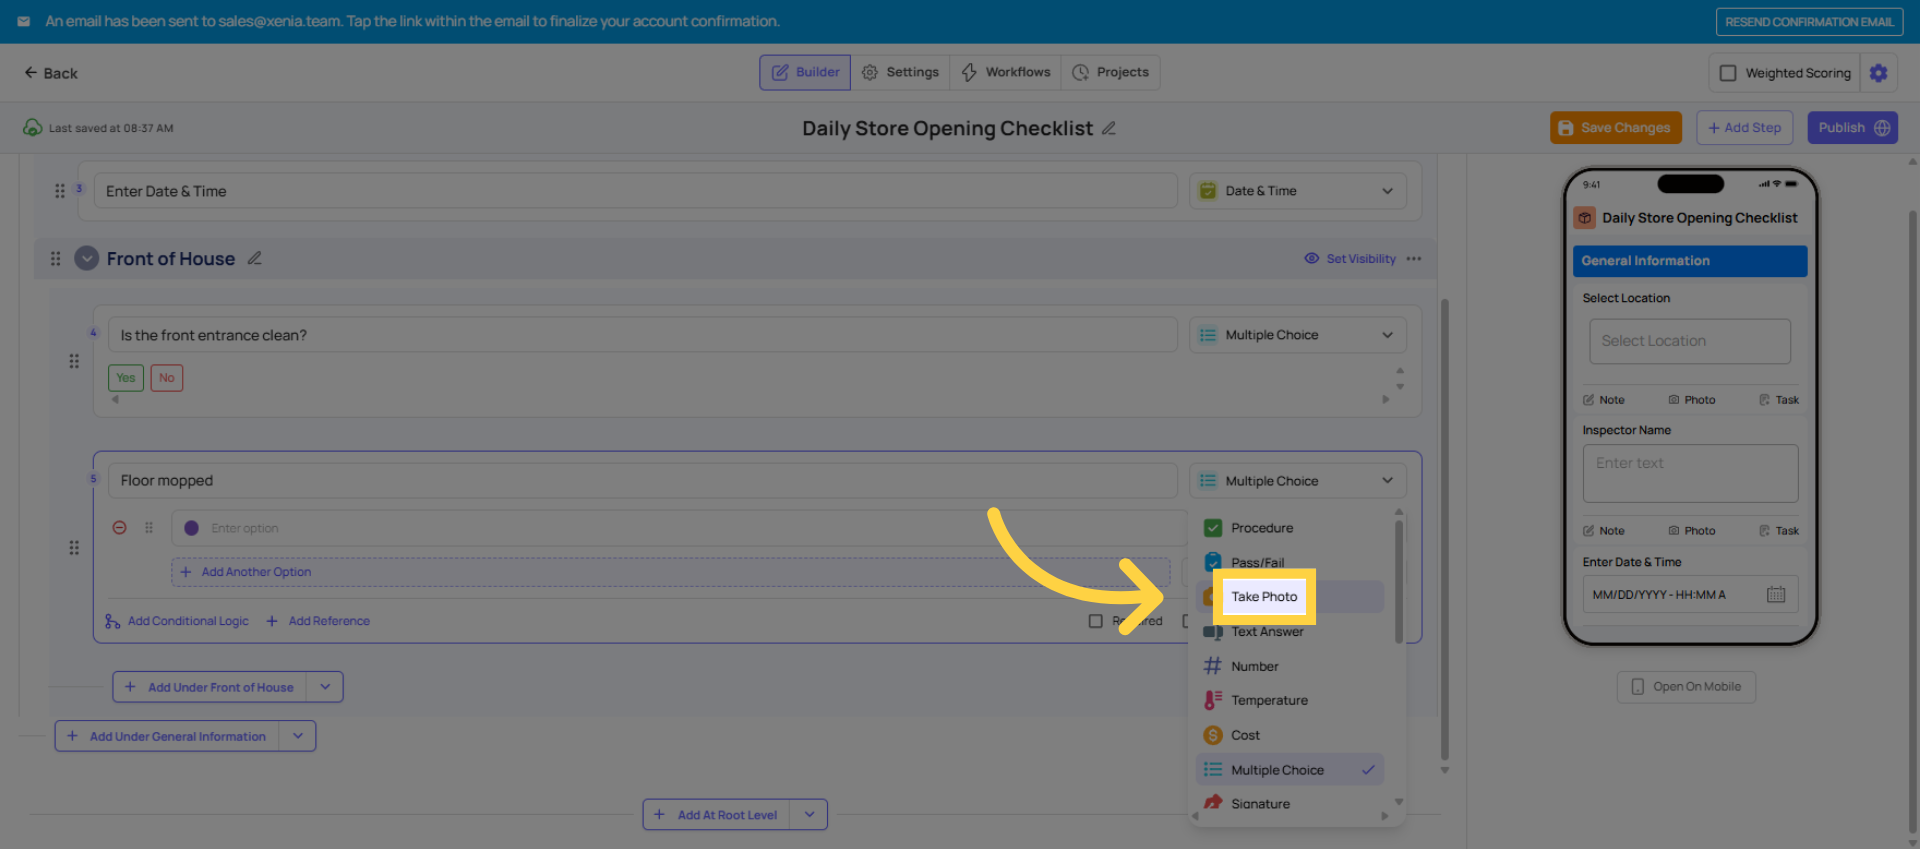
| Take Photo | Force a photo to be taken on the spot — cannot use old camera roll photos |
| Text Field | Written response — notes, readings, free text |
| Number Answer | Numeric input — useful for counts, readings |
| Temperature | Temperature logging in °F, °C, or K |
| Signature | Digital sign-off — great for manager verification |
| Date / Time | Timestamp capture |
| Geostamp | Confirms the user is physically at the location when submitting |
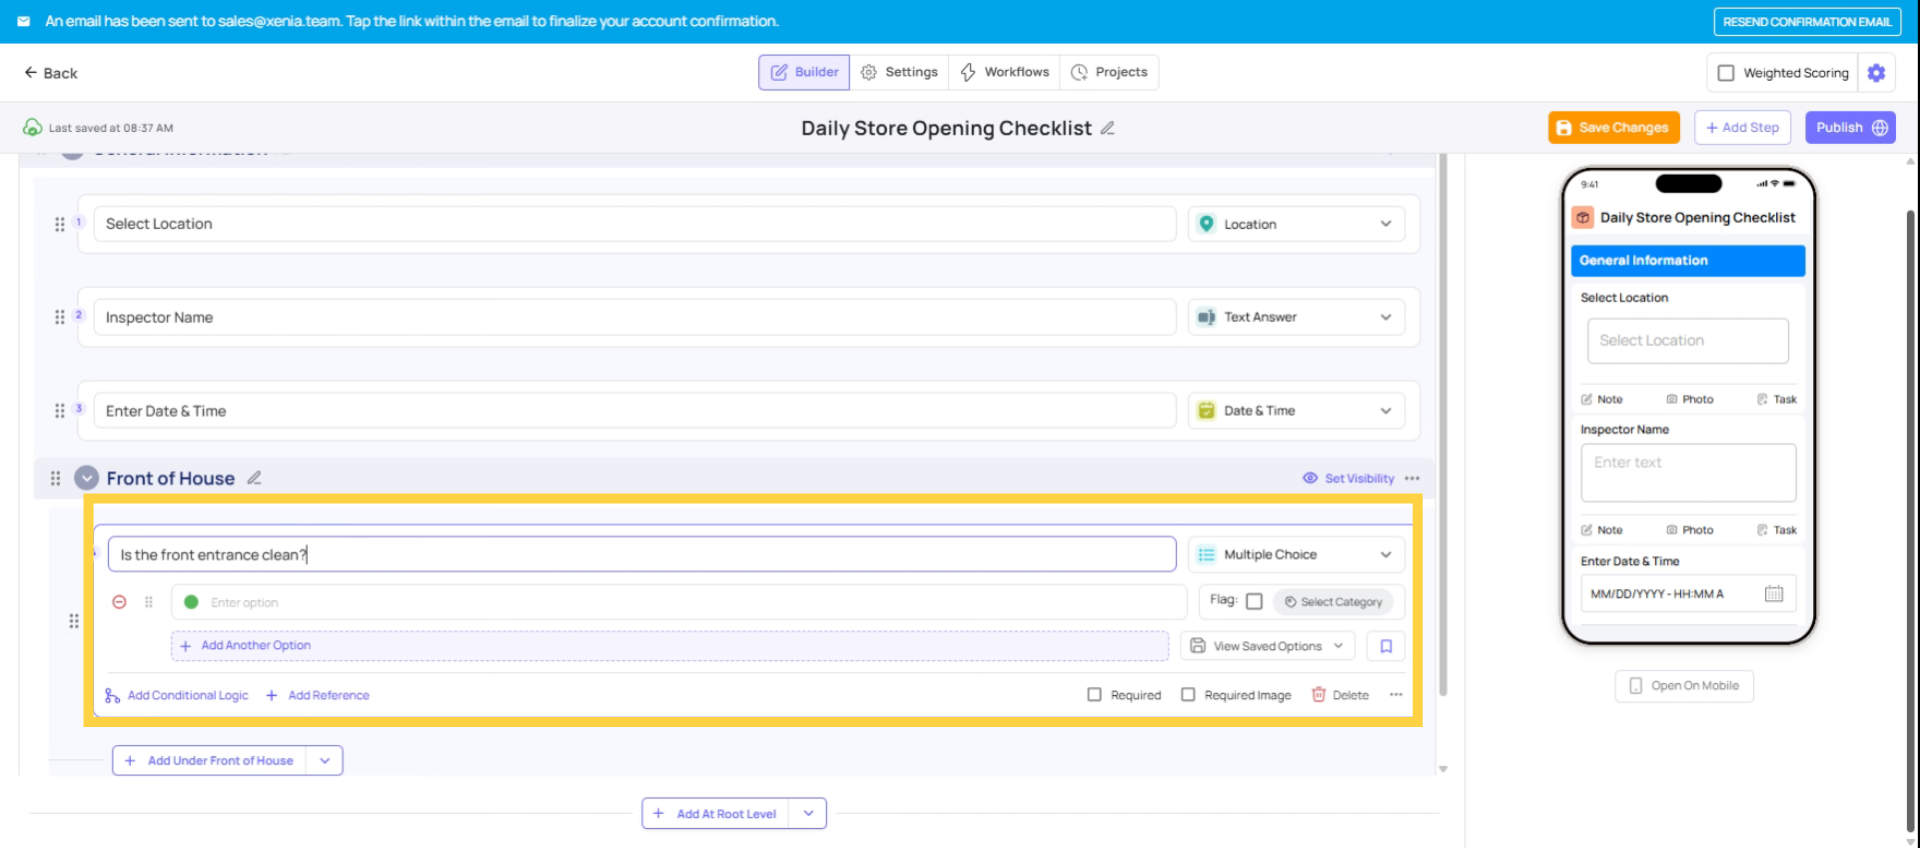
For a simple daily checklist, Yes/No multiple choice steps are the most common starting point — they're fast for employees to complete and clear to read (bright green yes, bright red no).
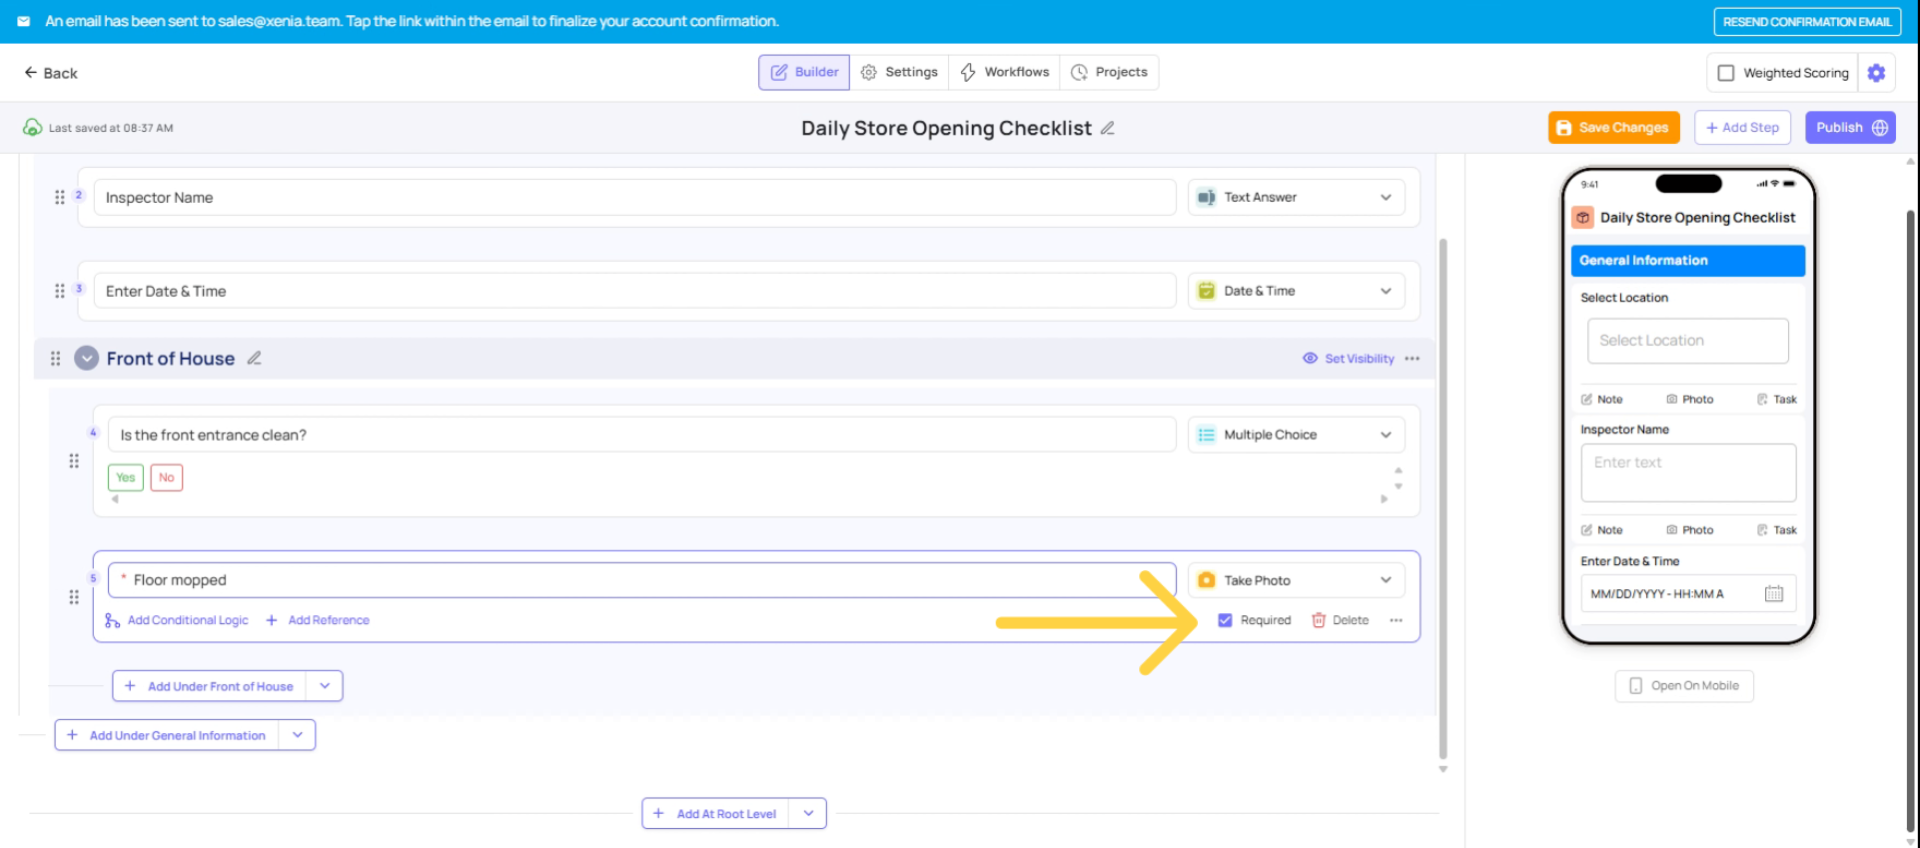
Yes/No Step Visual Preview
Take photo Step
Required Steps
Make Steps Required
- Toggle Required on any step to force employees to respond before they can submit
- If a required step is skipped, Xenia will block submission and alert the employee
- Use required sparingly — only on truly critical items, otherwise it slows people down
Add Conditional Logic
You can require a photo based on a specific answer using conditional logic:
- Click on any Yes/No or Multiple Choice step
- Click Add Automation (or Conditional Logic)
- Set condition: e.g., "If answer is No → Require image capture"
- Now if an employee answers No, a camera popup appears and they must take a real-time photo — they cannot use old images from their camera roll
This is one of Xenia's most used features for accountability (e.g., "Is the bathroom clean? No → Take a photo of the issue").
 Click the Add Automation/Logic option to set up automated responses based on step answers.
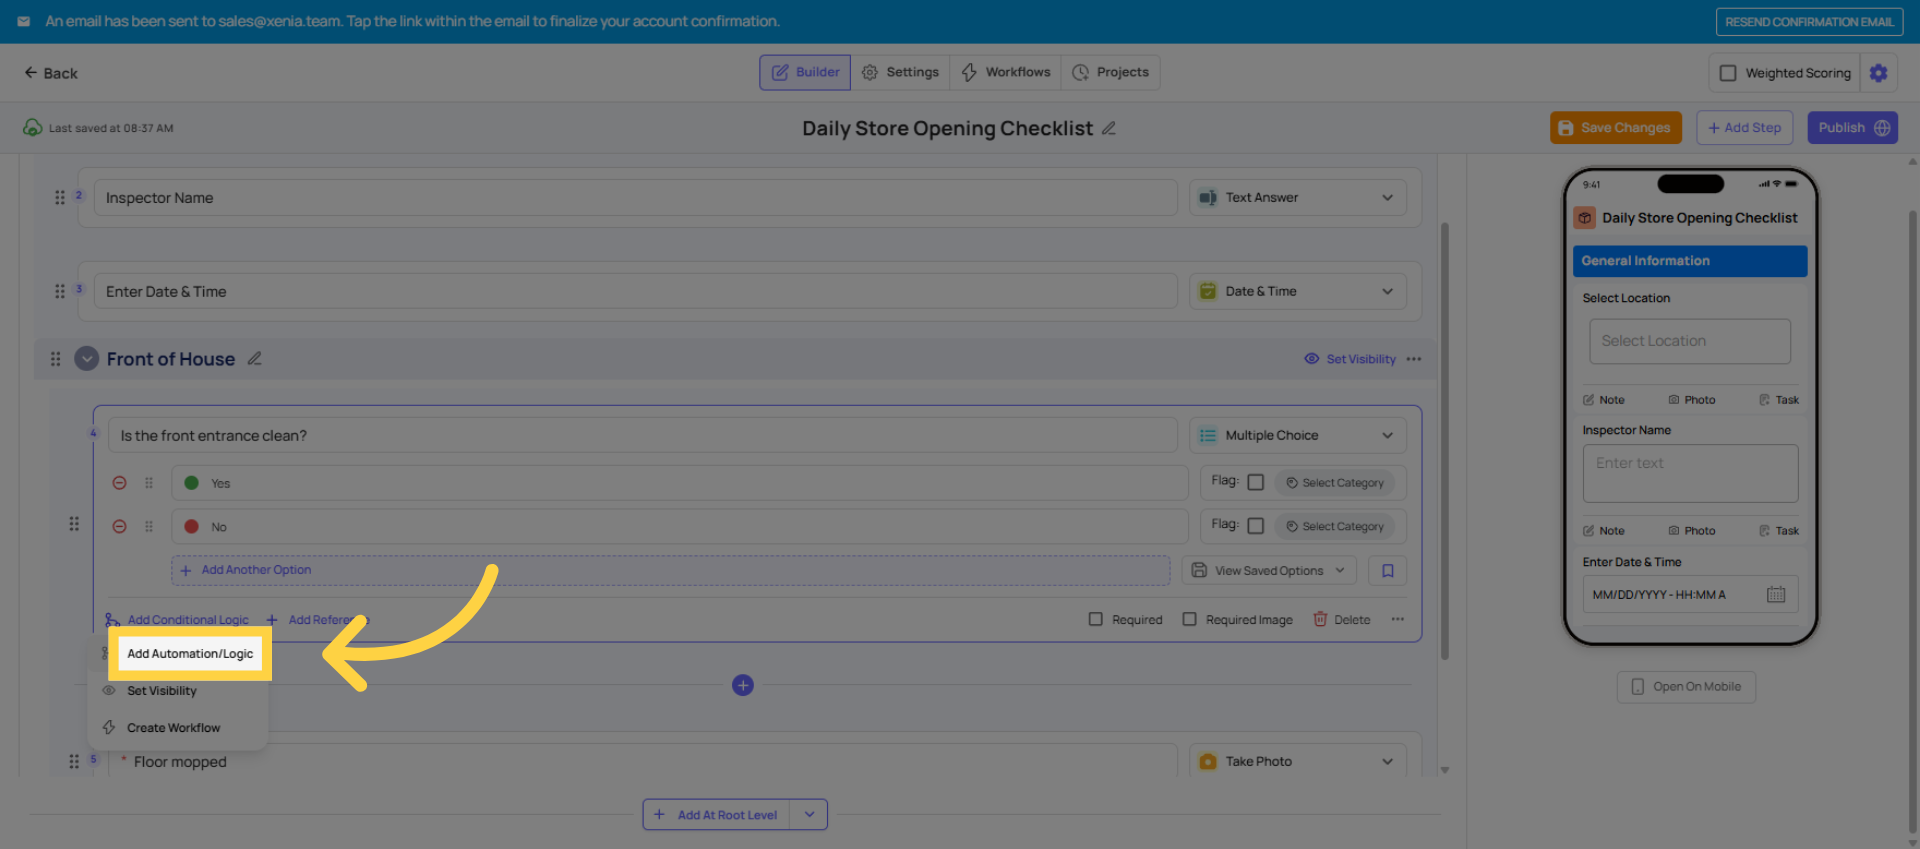 Now if an employee says no to whether the floor is clean at the front entrance, I can trigger an image capture, send a notification, ask follow-up questions, require a corrective task, or flag the response. If I select require image capture, every time the user selects no, a camera will pop up automatically, and they have to document the issue in real time.
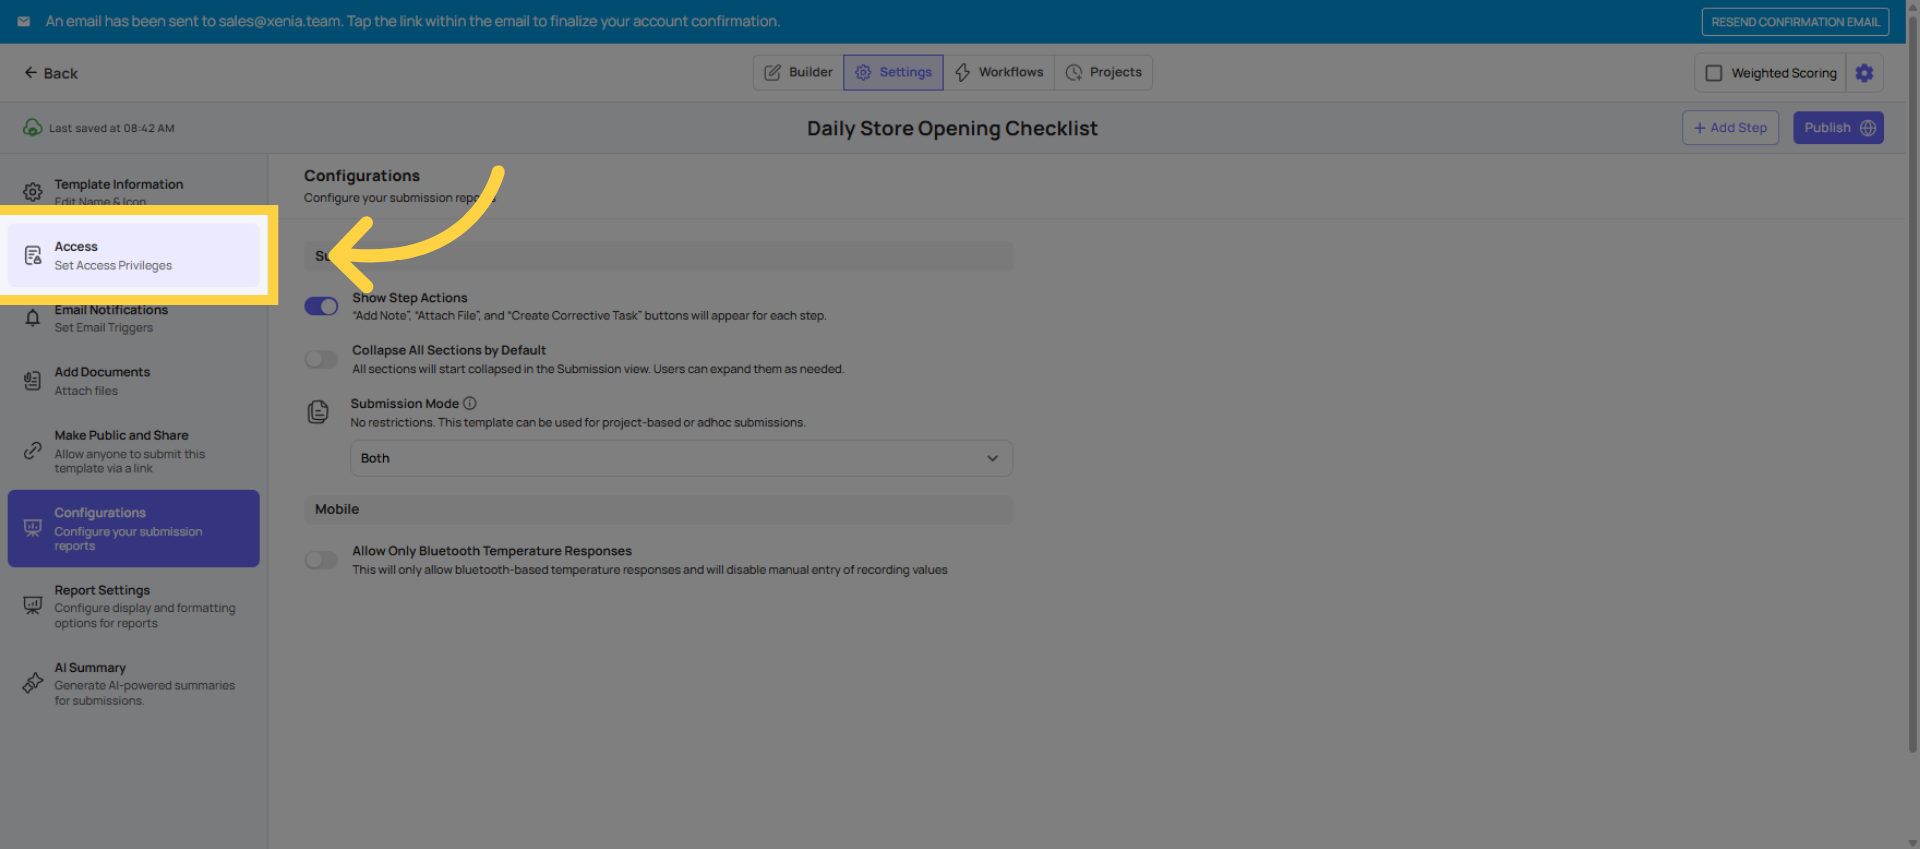
Settings

Submission Mode Options
-
Submission Mode:
- Project-based — template can only be completed when assigned via a project (use for scheduled recurring tasks)
- Ad hoc — available for employees to complete anytime (use for incident reports, vendor issues, one-off forms)
- Both — can be used either way
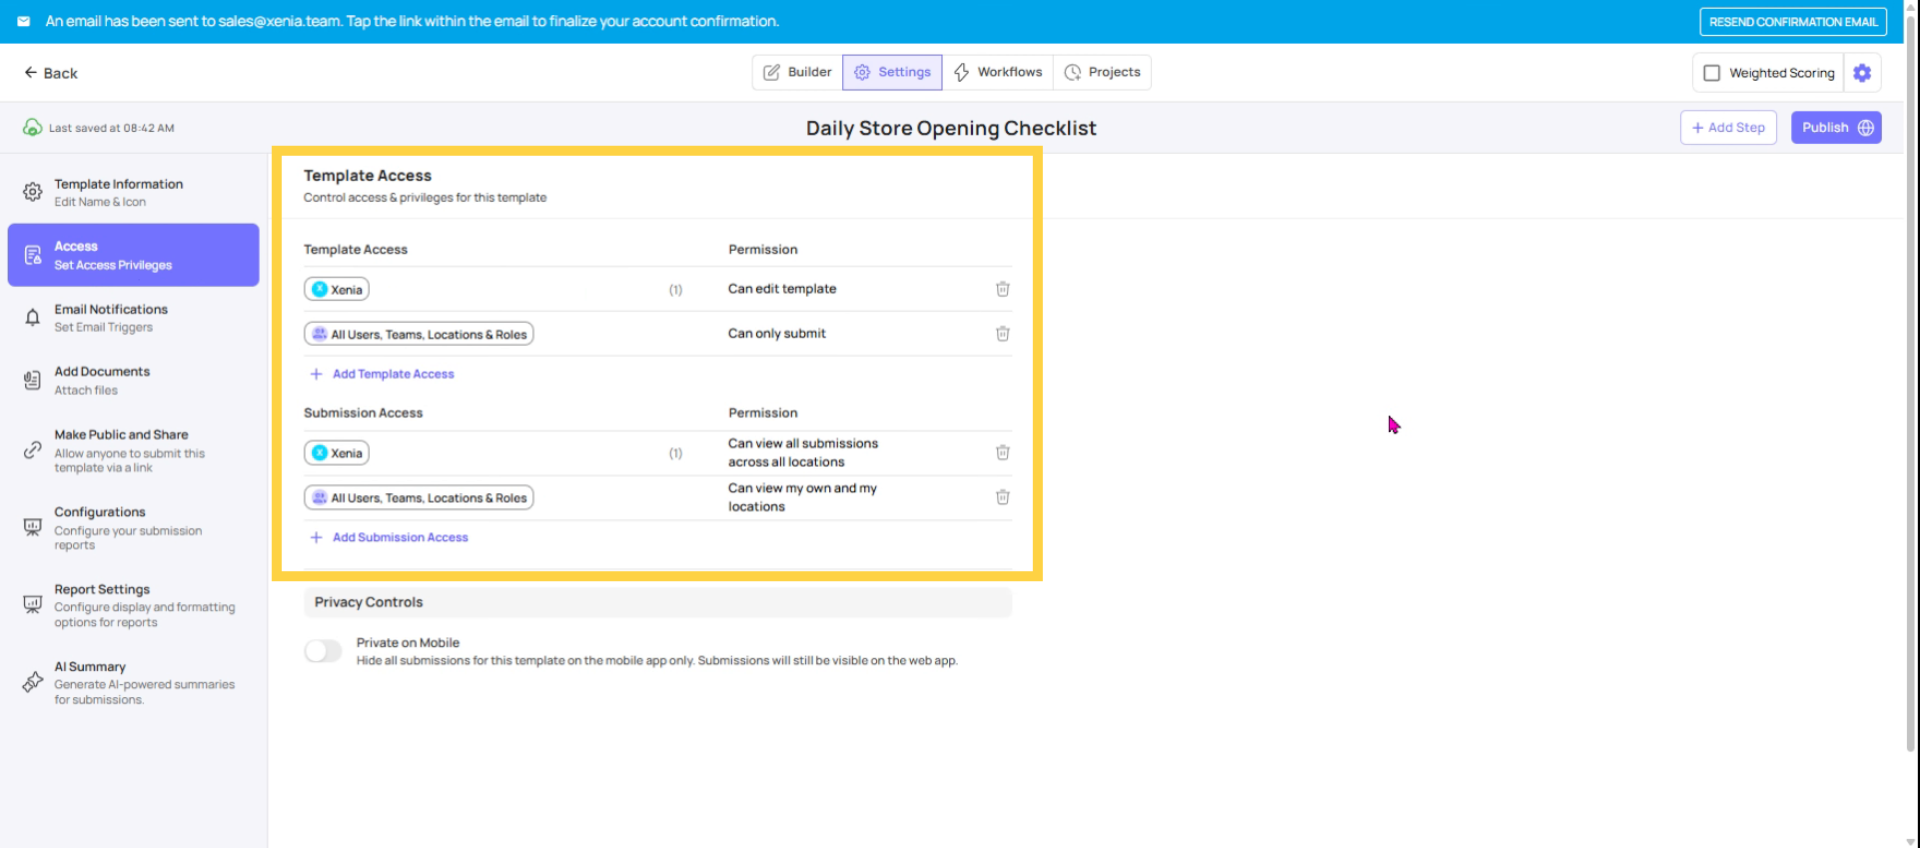
Set Template Access
 Under access controls, set which roles can submit this template and importantly, set who can edit it. I would recommend restricting template editing to admins only. You don't want staff accidentally modifying your checklist questions.
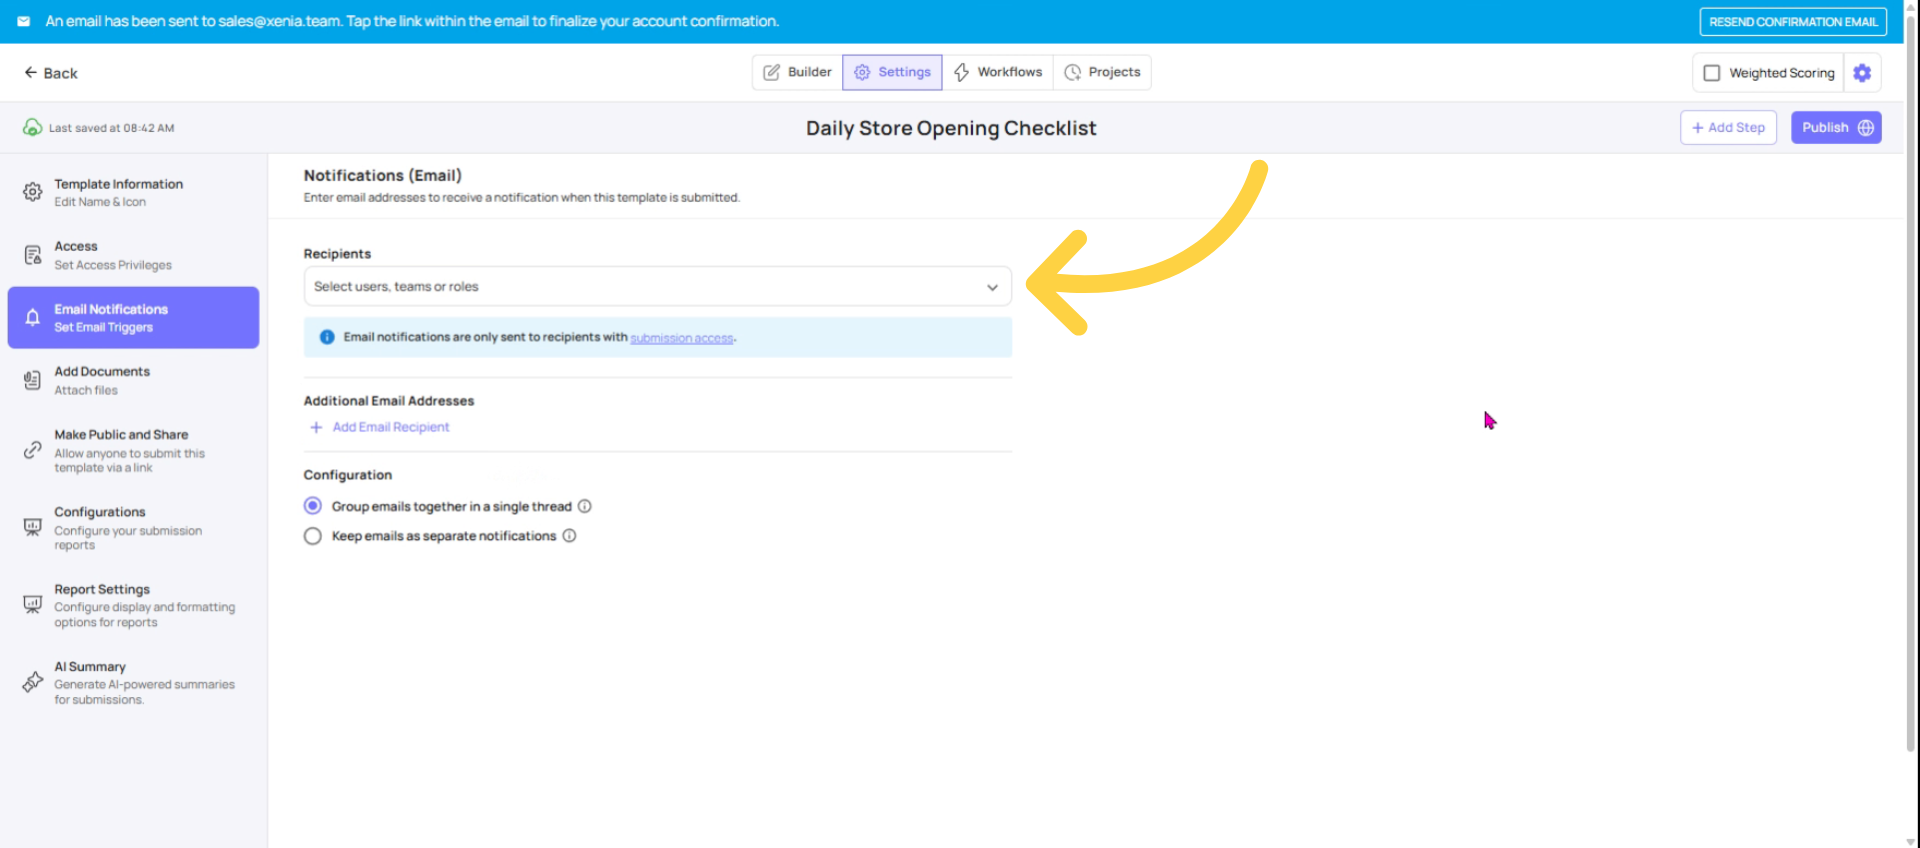
Email Notifications
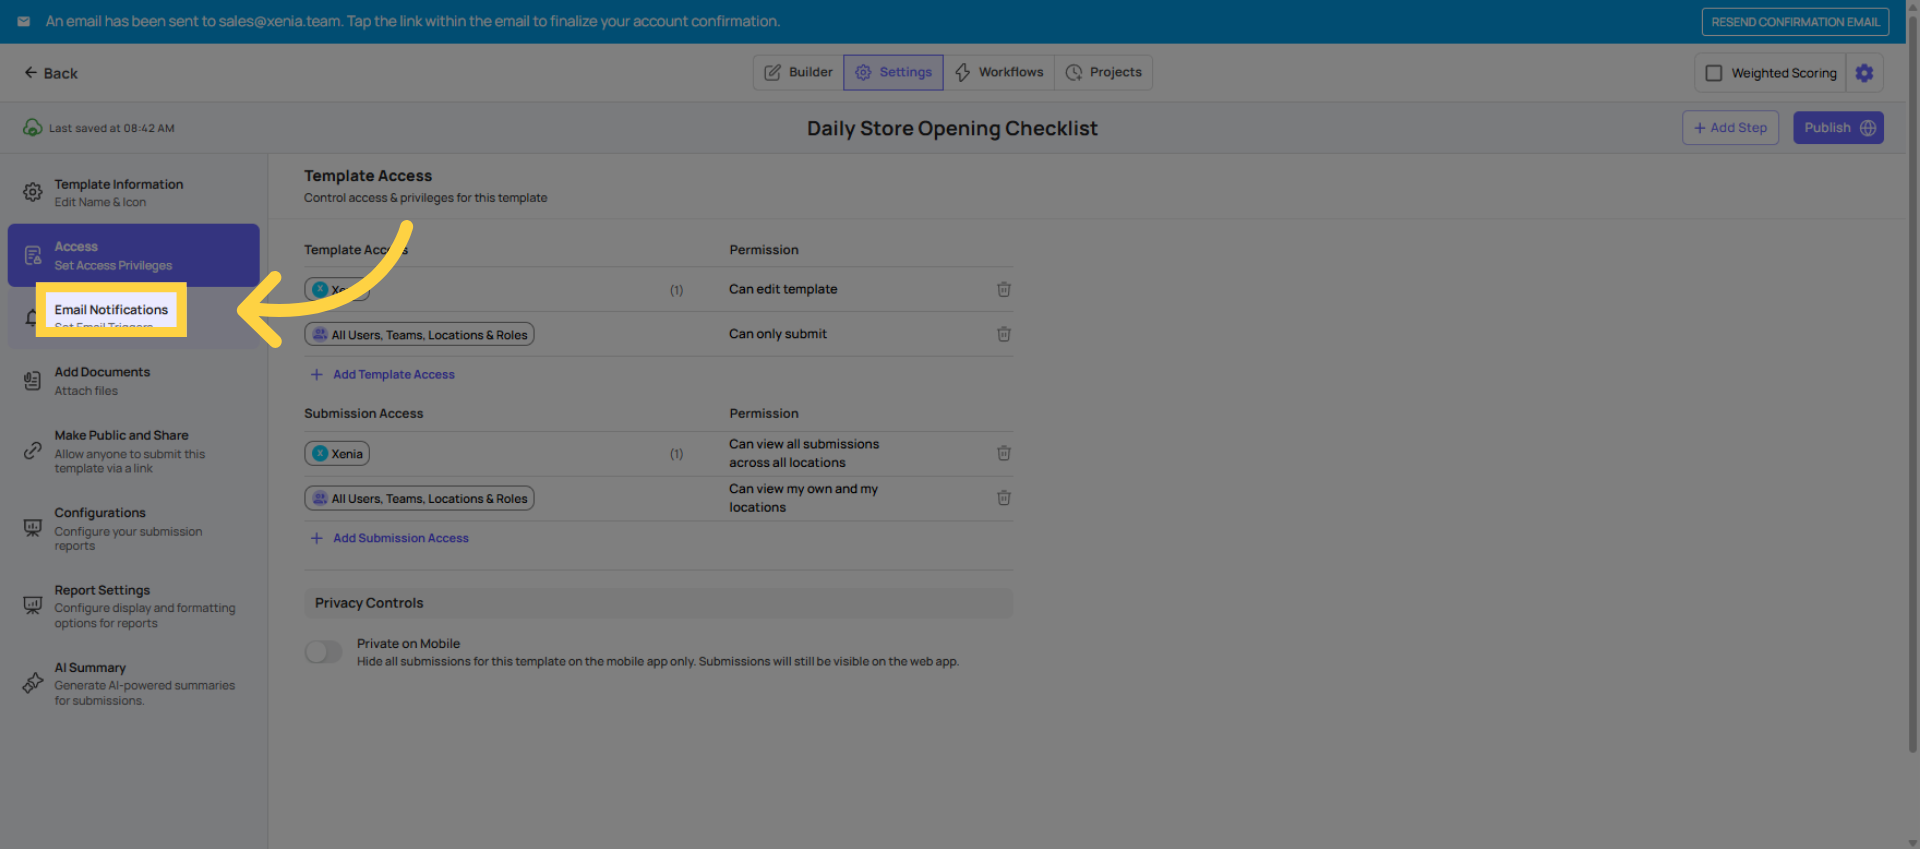 Under email notifications, you can add roles to be notified whenever this checklist is submitted. Xenia is smart about this. It only notifies the role member at that specific location, not every person with that role across all locations.
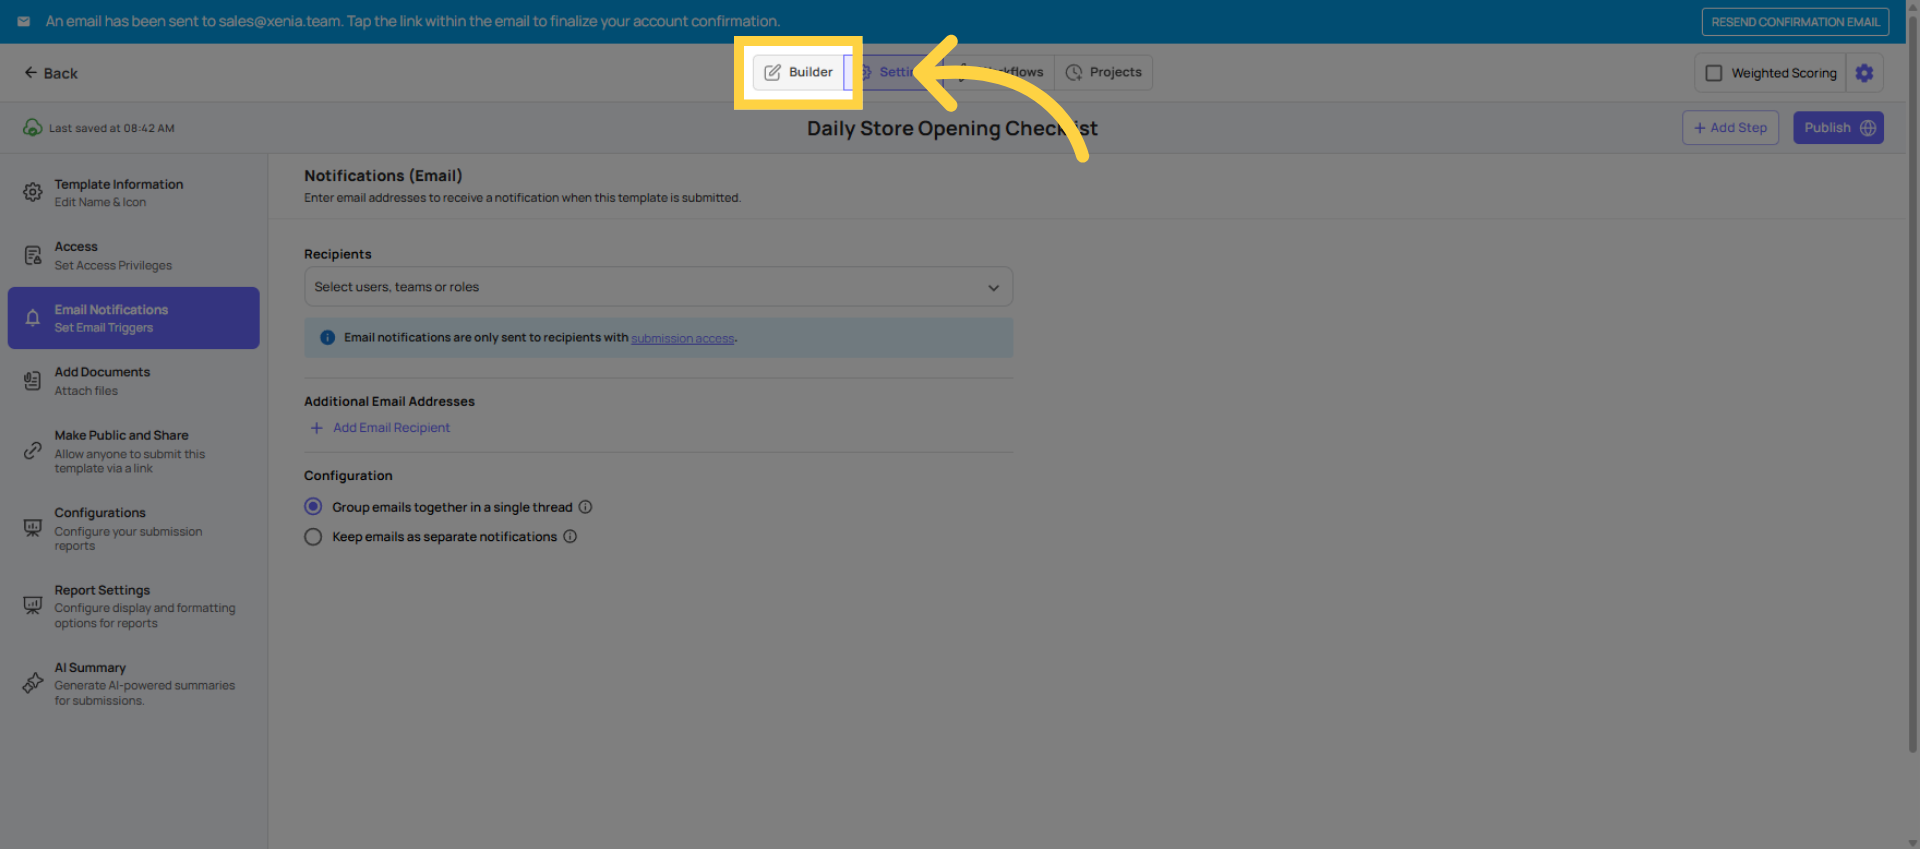
 Click the builder tab to return to the checklist builder interface.
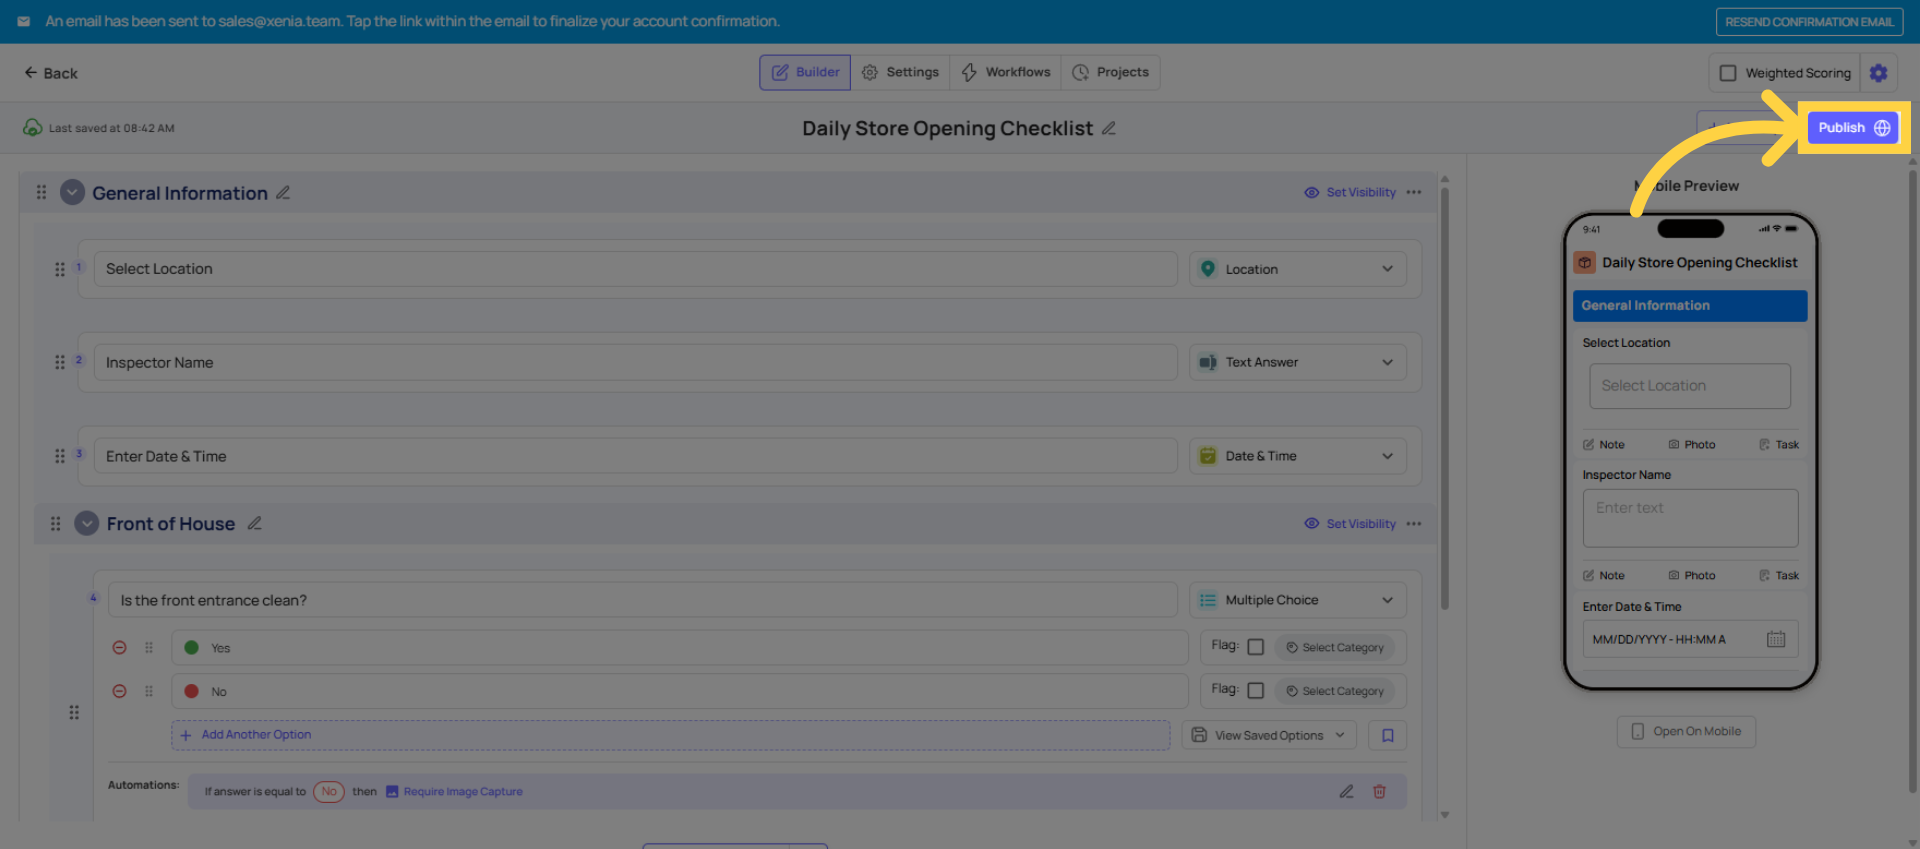
Publish
Organizing your Templates
- Use folders inside the Templates section to keep checklists organized by type (Daily Ops, Safety, HR, Audits, etc.)
- You can duplicate any template using the three-dot menu — useful for creating location-specific variations
Common First-Checklist Mistakes
| Mistake | Fix |
|---|---|
| No Select Location step | Add it at the top — it's required for projects, notifications, and reporting |
| Forgetting to publish | Publish tab → Publish |
| Assuming AI conversion is complete | Always review and edit every converted step before publishing |
| Building 40+ steps with no sections | Break long checklists into sections |
| Not checking the mobile preview | Use the preview pane before publishing |
Need Help?
For assistance please reach out to us at support@xenia.team
Comments
0 comments
Please sign in to leave a comment.