This article explains how to set up roles in Xenia to control user permissions, home screen layouts, and task assignments. You'll learn how to configure roles correctly to match your organization's needs.
1. Understand Role Setup Overview
What Is a Role in Xenia?
A role in Xenia does three things simultaneously:
- Controls permissions — what a user can see and do across the platform
- Enables assignment — you can deploy tasks and projects to a role, not just an individual person (so when staff changes, the work stays)
- Sets the homepage layout — what a user's home screen looks like on web, mobile, and tablet
These three functions are configured together when you create or edit a role.
2. Identify Preset Roles
Within Xenia, two role types exist. The first are preset roles, specifically "owner" and "admin." These roles provide comprehensive system access and are not subject to modification or deletion.
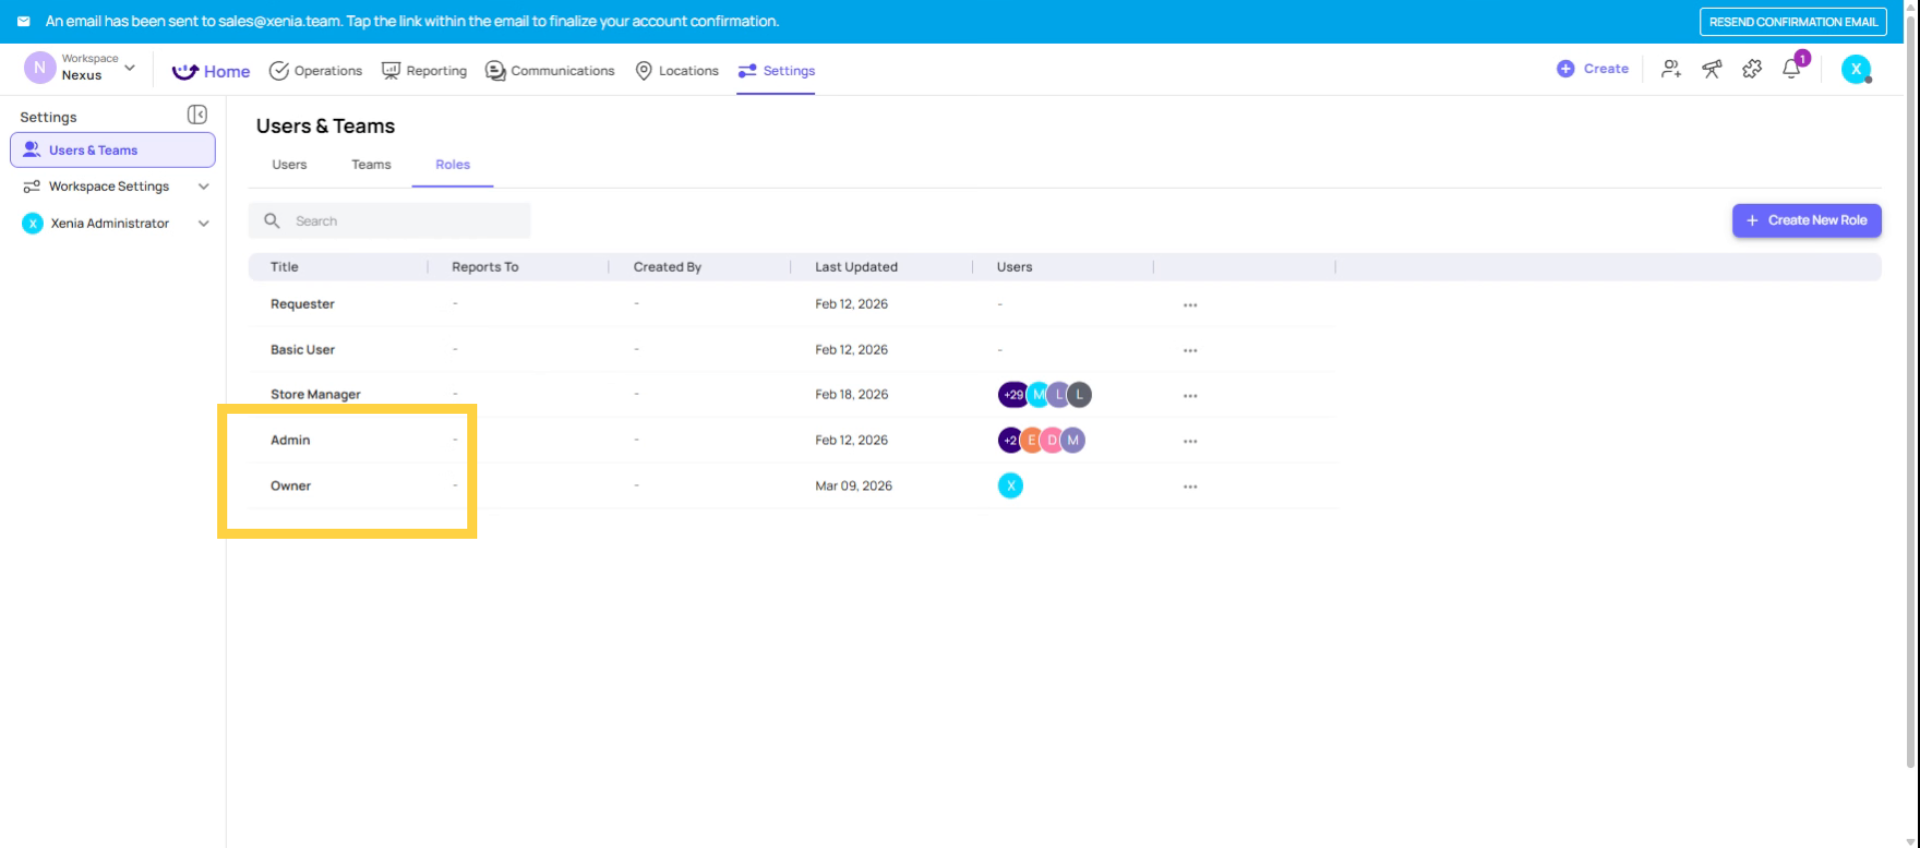
3. Examples of Custom Roles
Examples of custom roles include store managers, district managers, cashiers, and line cooks. These roles are created and configured to align with the specific needs of the organization.
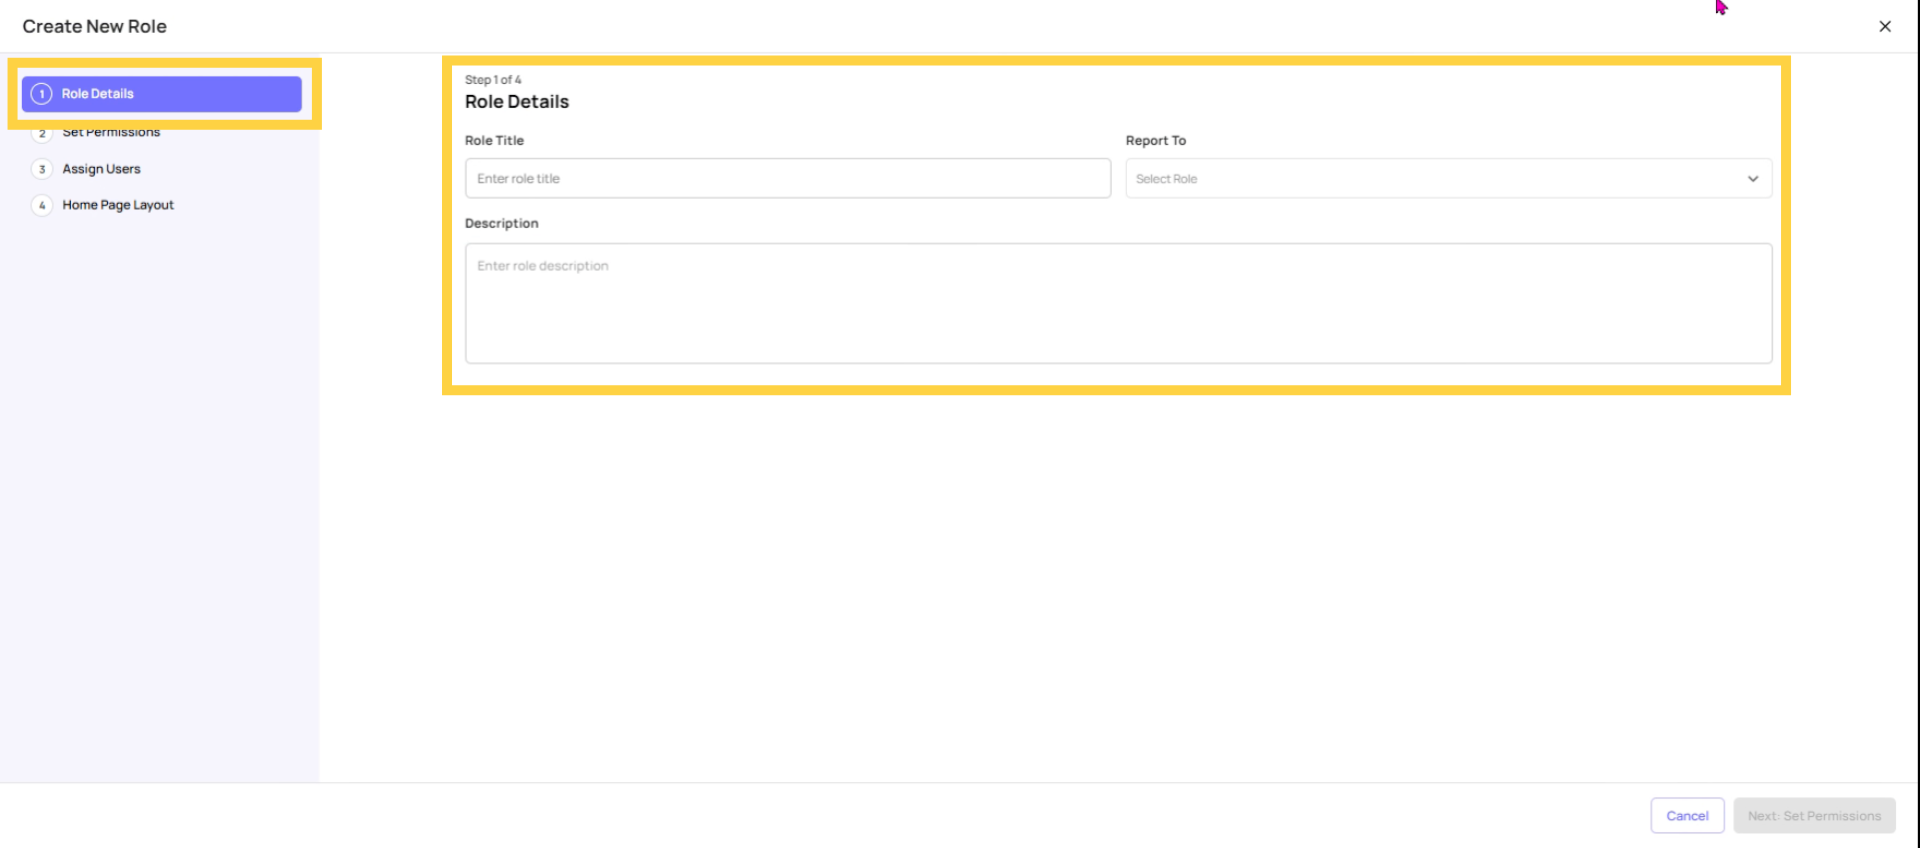
4. Set Role Details
To create or modify a custom role, a three-step process is utilized. The initial step involves defining the role details, specifically the role name, a descriptive summary, and crucially, the "reports to" field. This field establishes the organizational hierarchy above the role, which facilitates automated notifications. For instance, if a task assigned to a cashier becomes overdue, Xenia can automatically notify the individual to whom the cashier reports, in this scenario, the store manager.
5. Configure Role Permissions
Step 2 involves configuring permissions, which is a critical phase. Here, you determine the level of access this role will have to platform resources and functionalities.
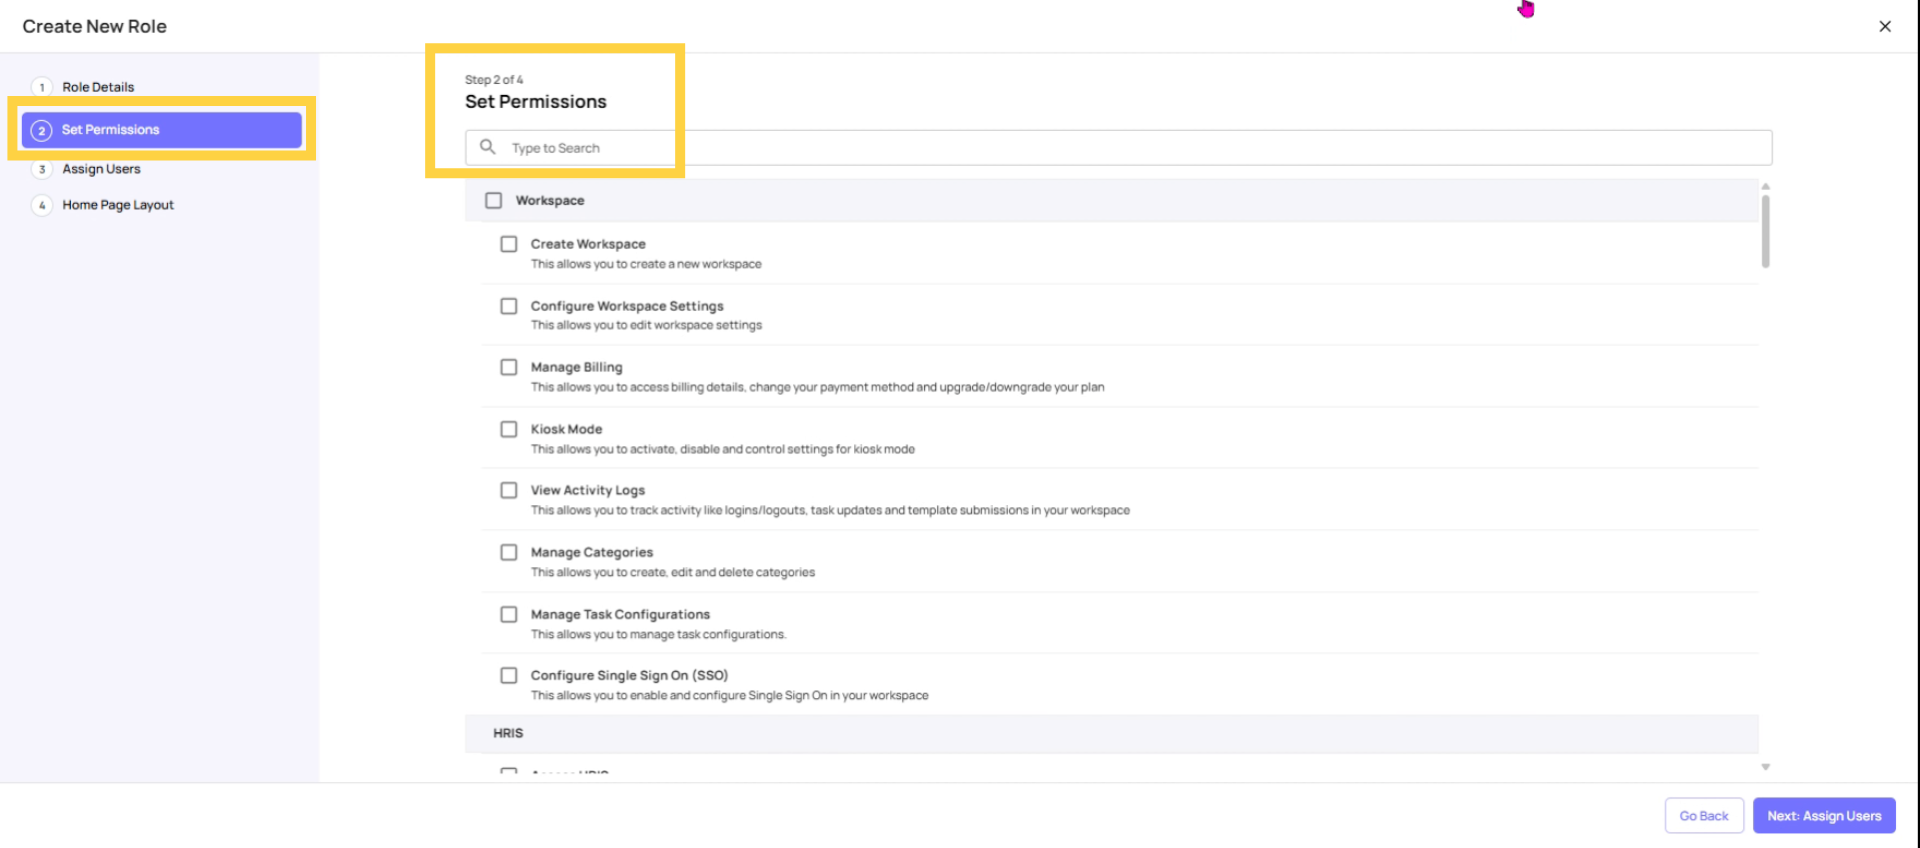
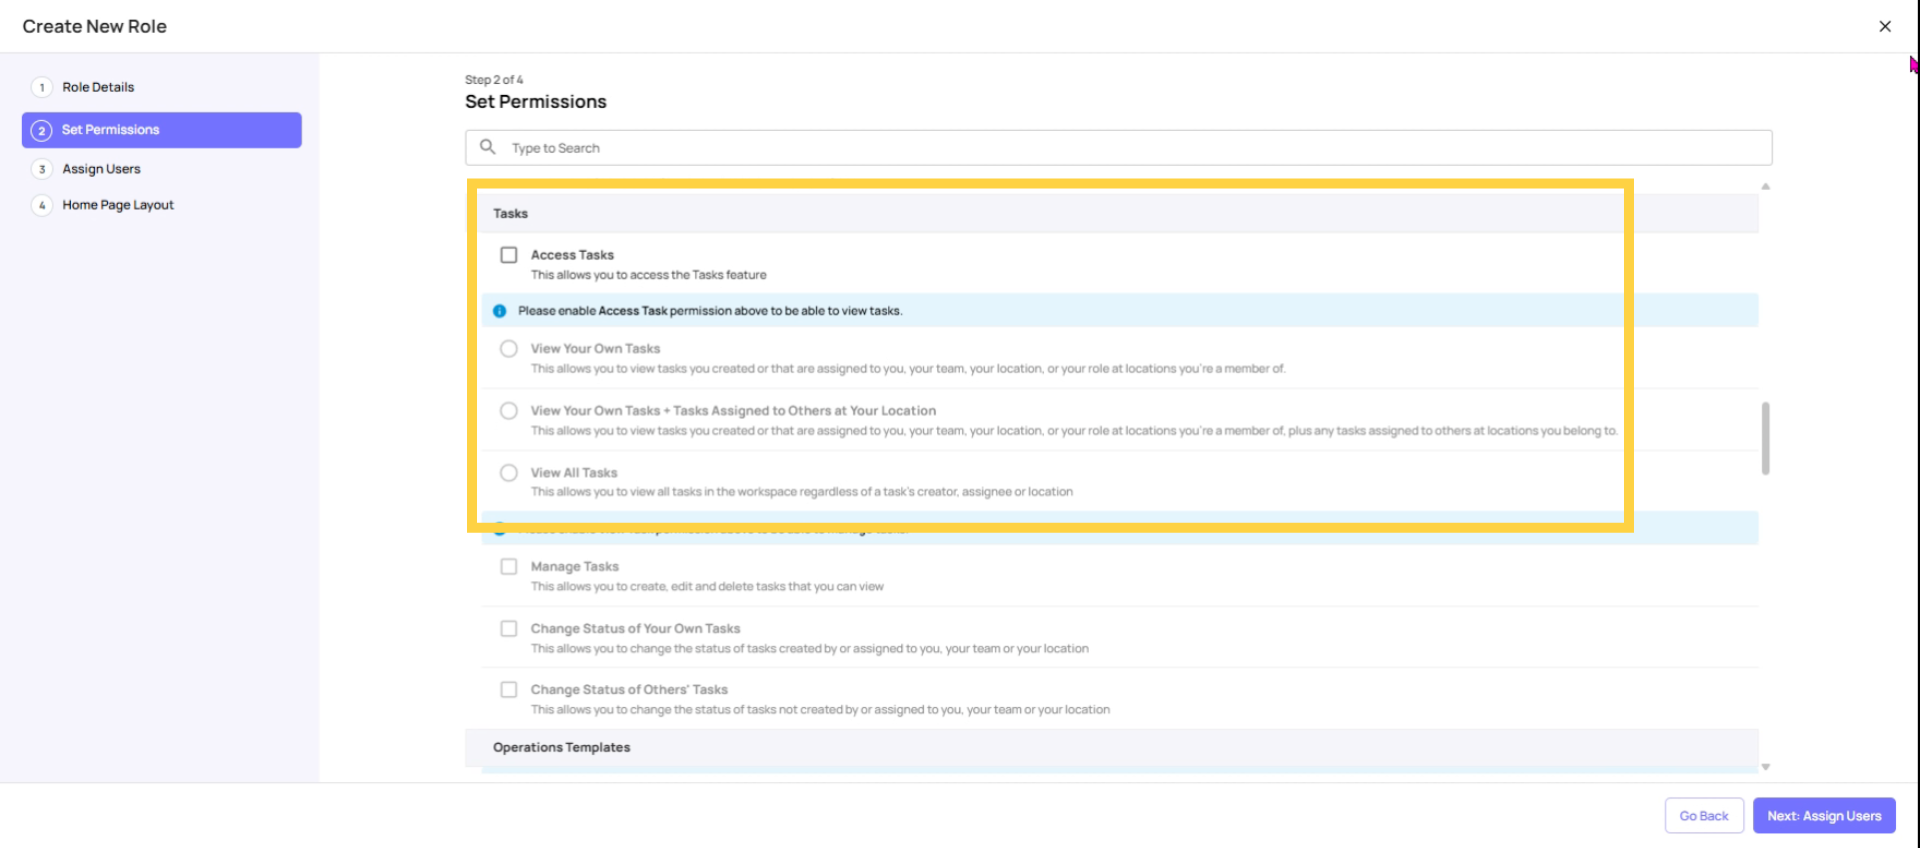
6. Set Task Visibility Permissions
Regarding task visibility permissions, the most crucial setting to configure is task visibility. Users can be granted the ability to view their own tasks, tasks within their designated location, or all tasks across the workspace. For store-level roles, it is generally recommended to utilize the middle option, allowing them to view tasks specific to their location.
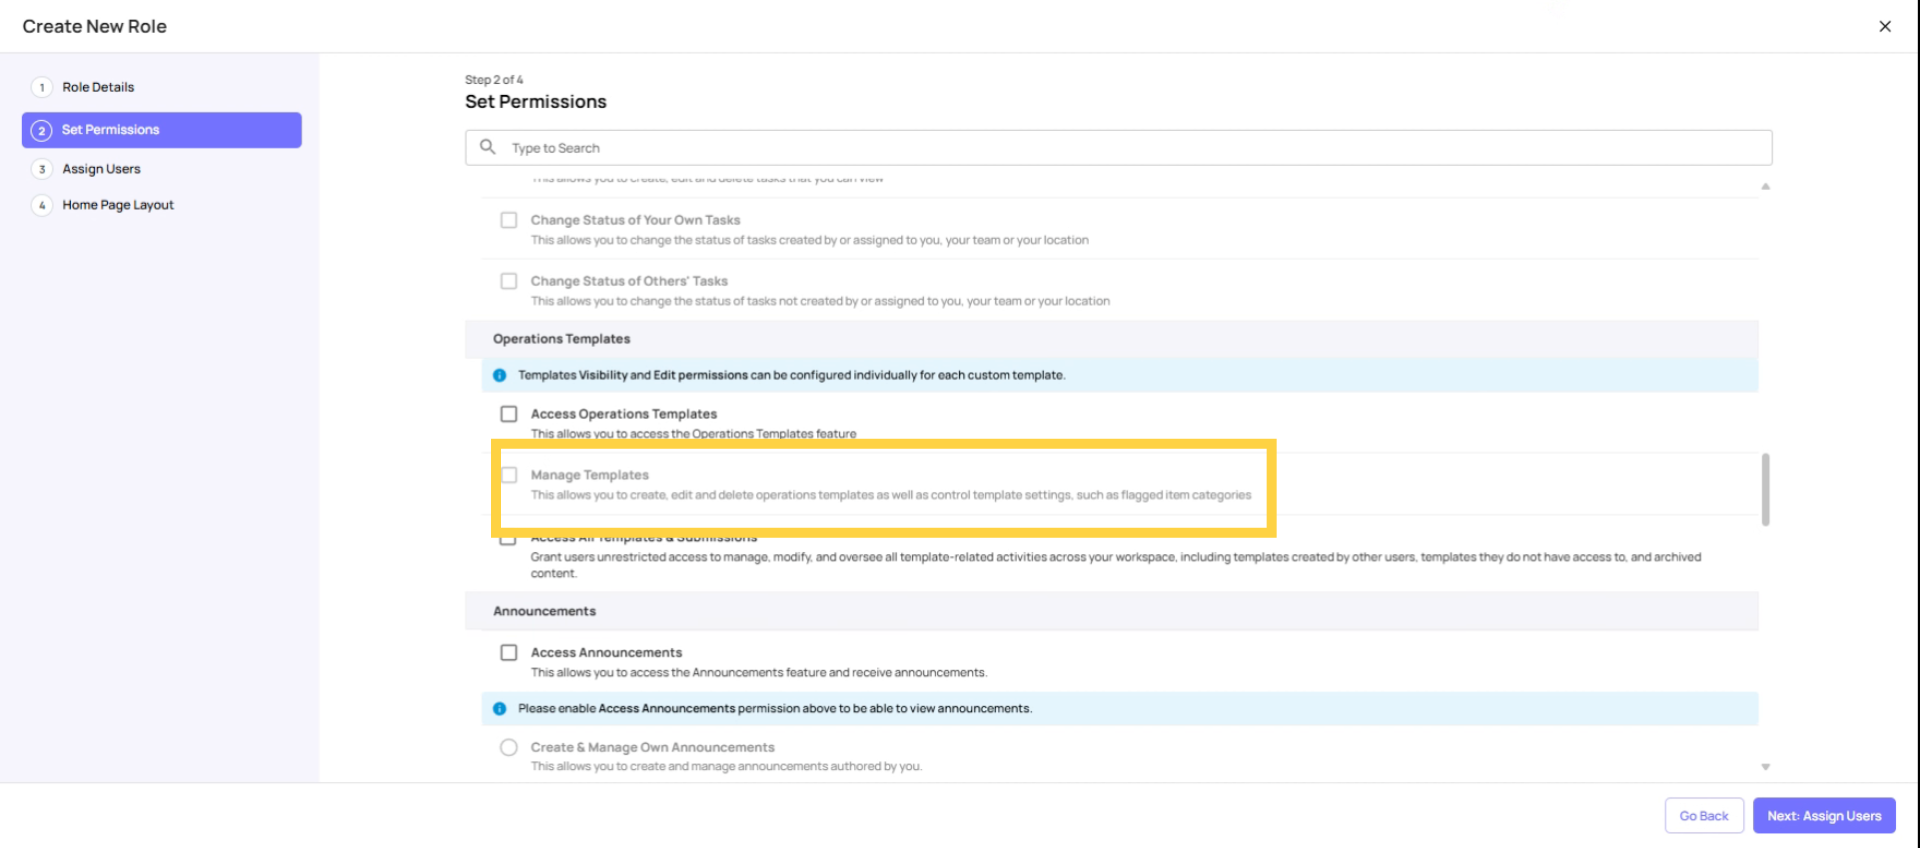
7. Restrict Manage Templates Permission
For store and frontline roles, it is strongly recommended to disable the "Manage Templates" permission to prevent accidental modification or deletion of checklists.
8. Choose Homepage Layout
The third step involves configuring the homepage layout, which is the initial interface users encounter upon accessing Xenia through various devices. For store and frontline roles, the Location Pulse Dashboard is the recommended selection. This dashboard presents a streamlined, intuitive interface that clearly displays both current and completed tasks, resulting in the highest task completion rates observed across all layout options.

9. Create or Duplicate Roles
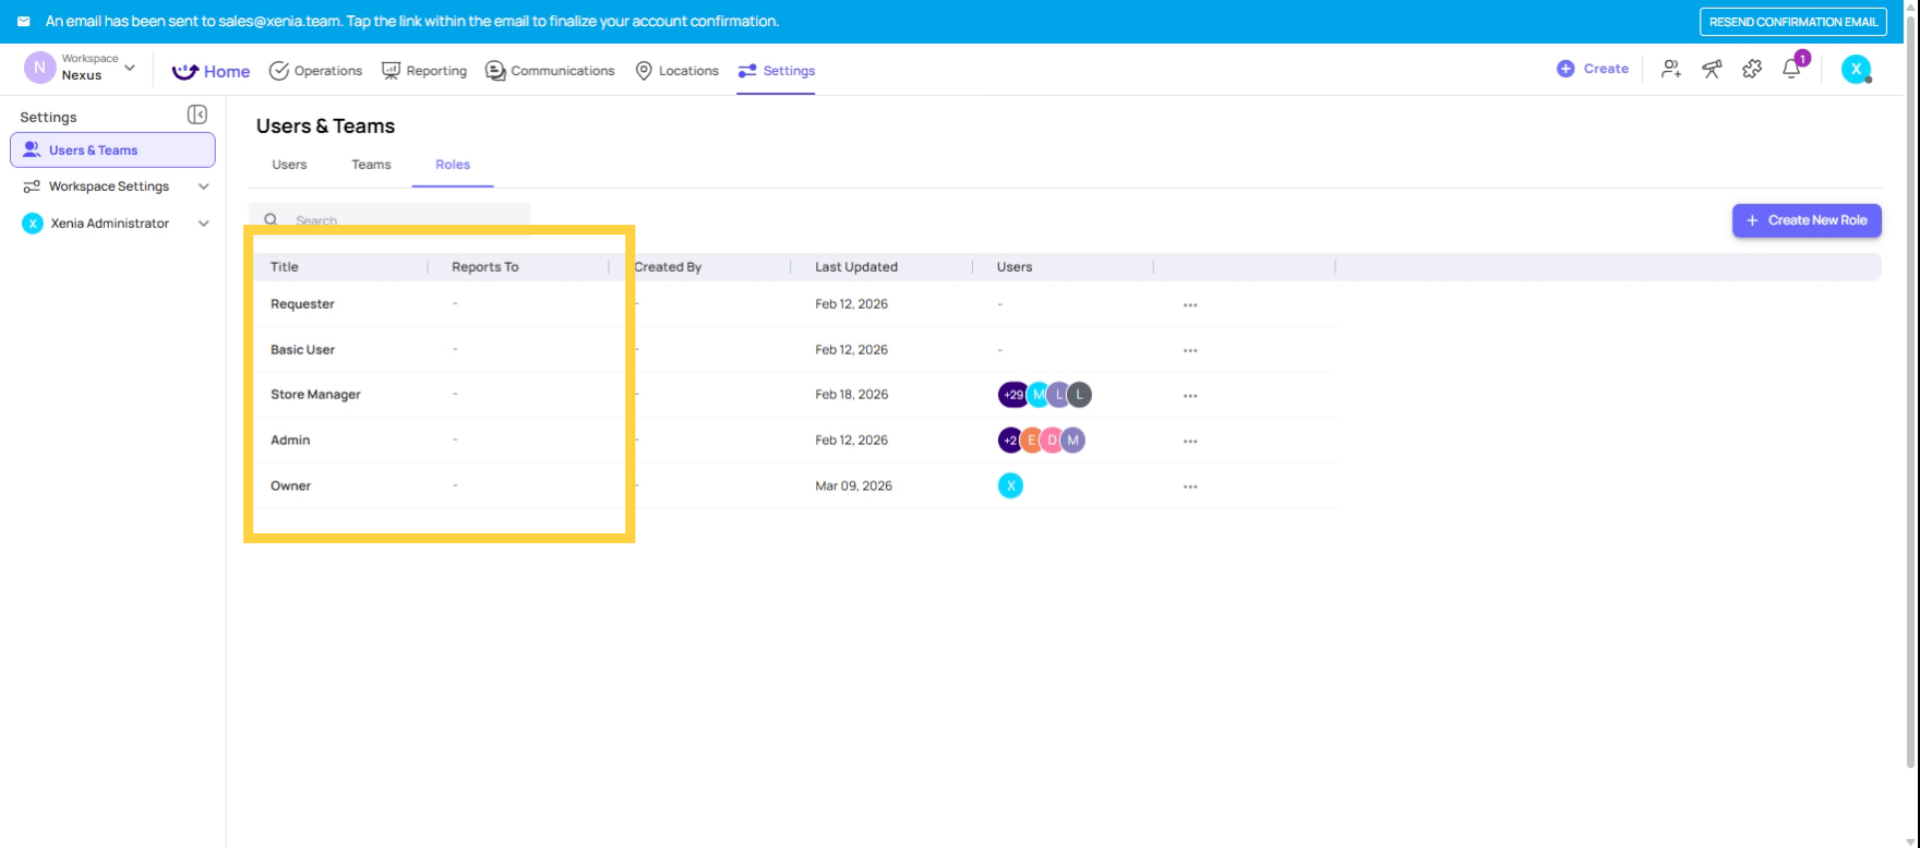
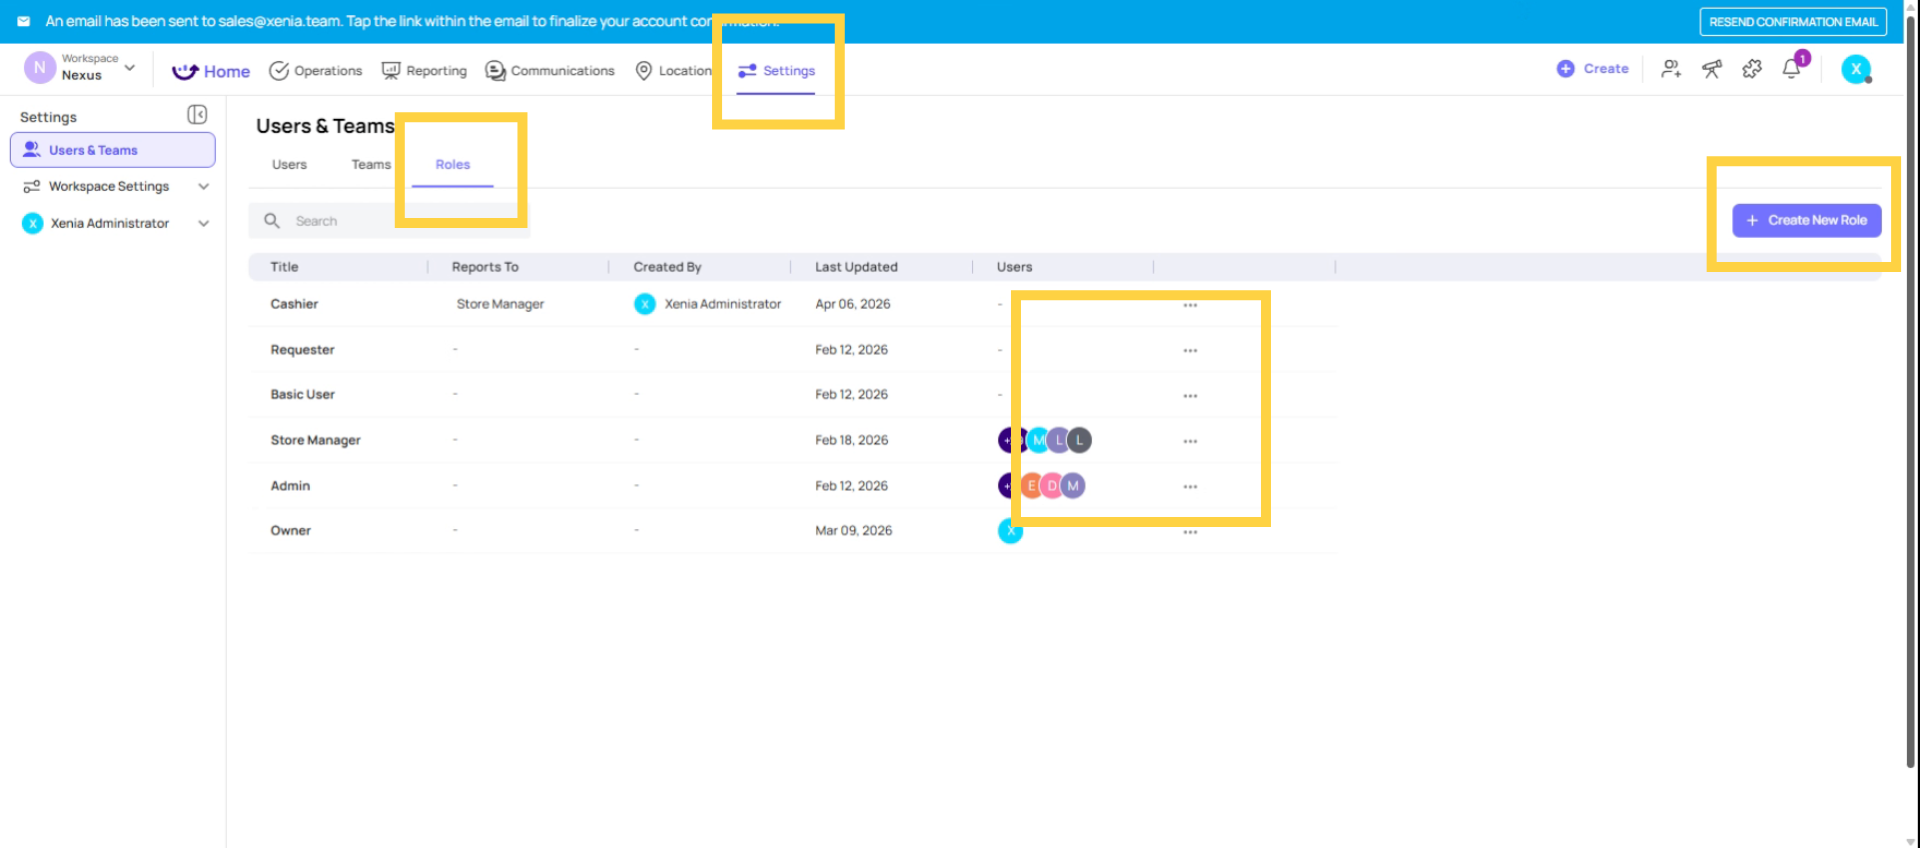
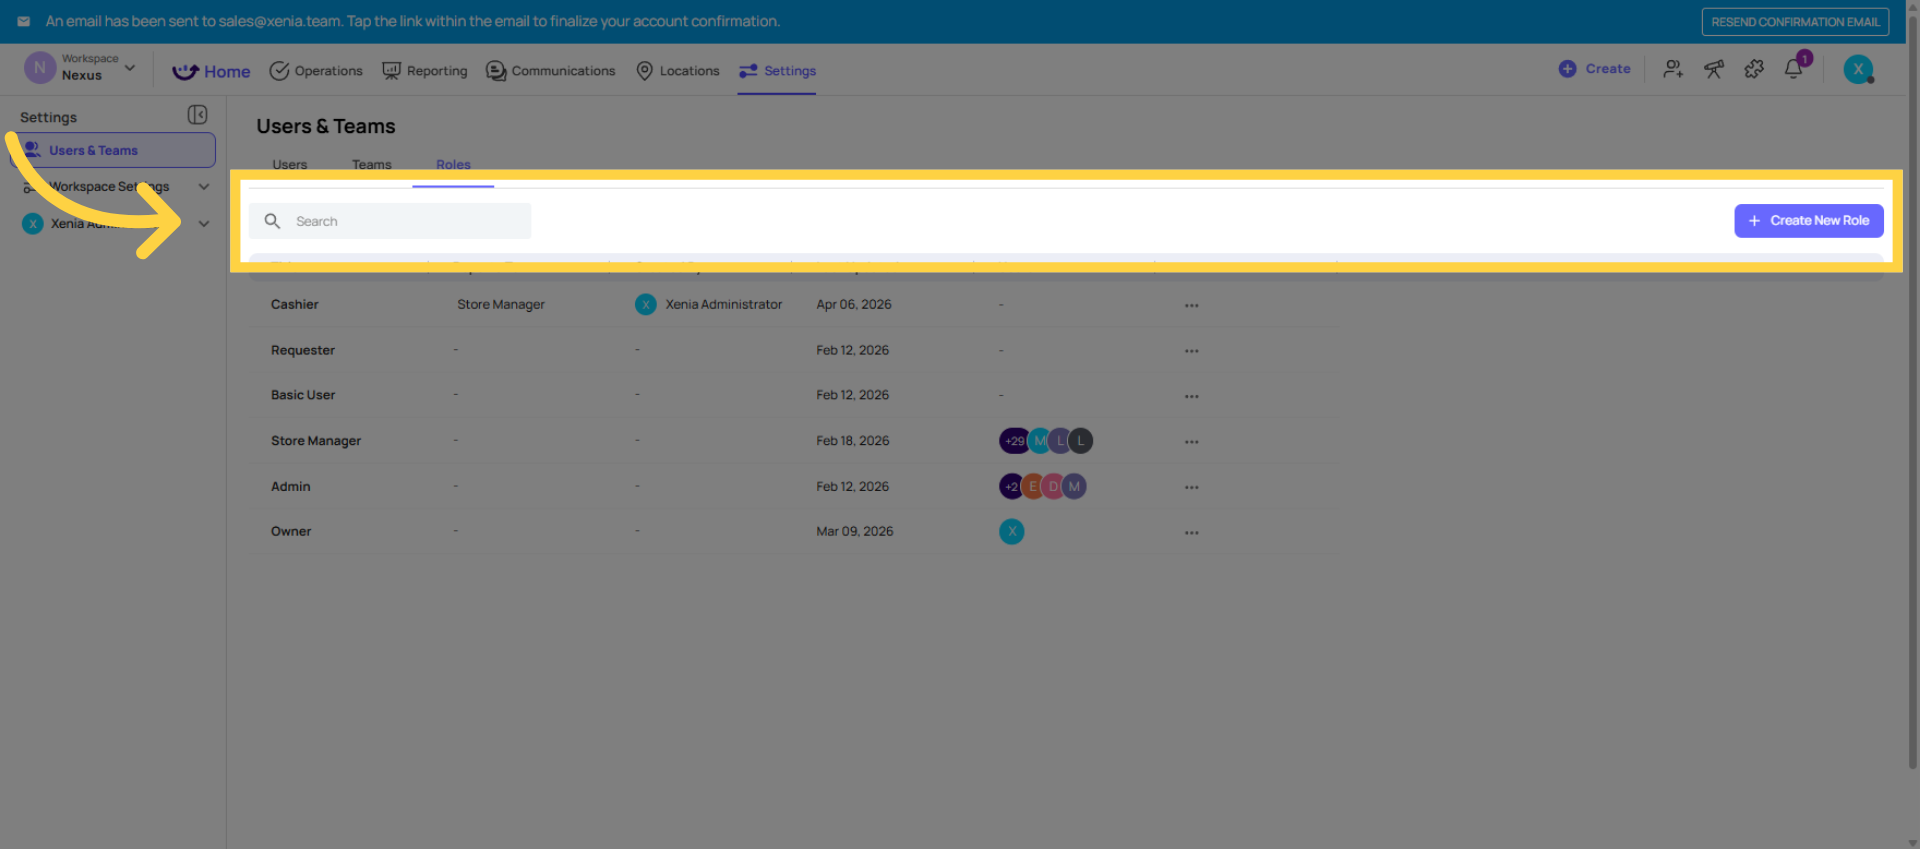
To establish a new role, navigate to Settings, subsequently select Users, Teams, and Roles, and then access the Roles tab. Proceed by clicking the "Create Role" option. Alternatively, if a comparable role has been previously configured, locate the corresponding entry and click the ellipsis (three dots) to the right. From the dropdown menu, select "Duplicate" to create a role. This approach streamlines the process. Following the duplication, customize the role by adjusting the details, permissions, and homepage layout as required.
10. Click Create New Role
Click Create New Role.
11. Edit Role Details
To modify a role after its creation, locate the ellipsis (three dots) and select "Edit Details."
12. Apply Role Changes Immediately
Please note that any modifications made to a role will be immediately reflected for all users assigned to that role. Therefore, it is essential to proceed with deliberate consideration. It is also important to remember that the "owner" and "admin" roles are protected and cannot be modified. Custom roles, however, can be adjusted as needed. These principles form the basis of role management within Xenia.
This article explained how to set up and manage roles in Xenia, covering preset and custom roles, permissions, homepage layouts, and updating roles. For more information, see related articles on user management and task assignments.
Need Help?
Need Help?
For assistance please reach out to us at support@xenia.team
Comments
0 comments
Please sign in to leave a comment.