This article explains how to invite users to your Xenia workspace. You'll learn the best practices for account strategies and how to manage user invitations effectively.
1. Before You Invite Anyone — Choose Your Account Strategy
Before we jump in, there's one important decision you need to make, and that's your account strategy.
1. Before You Invite Anyone — Choose Your Account Strategy
1. Before You Invite Anyone — Choose Your Account Strategy
Two approaches, each with pros and cons:
- Individual Accounts — one unique email per person
- Best for: managers, supervisors, anyone with specific accountability
- Pro: full audit trail, individual performance tracking
- Con: more admin work when staff turns over
- Role-Based / Shared Accounts — one email per role per location (e.g., manager.downtown@yourcompany.com)
- Best for: high-turnover frontline positions (cashier, cook, crew)
- Pro: continuity — employee comes and goes, account stays
- Con: no individual-level tracking
- Important rule: Every email must be unique — you cannot reuse one email across multiple locations or roles
Recommendation: Use a hybrid approach — individual for management, role-based for frontline
2. Unique Email Requirement
In Xenia, every user needs a unique email address. You cannot reuse the same email for multiple accounts. So the question is, do you create accounts tied to individual people or accounts tied to role? For your management team, district managers, store managers, supervisors, we recommend individual accounts. This gives you a full audit trail and performance tracking per person.
3. Role-Based Accounts
For high turnover frontline positions, like cashiers, cooks, and crew members, we recommend role-based accounts. Instead of using a person's name, create an email address. When that employee leaves, just reset the password. The account stays, the role stays, and all your projects keep running without any changes.
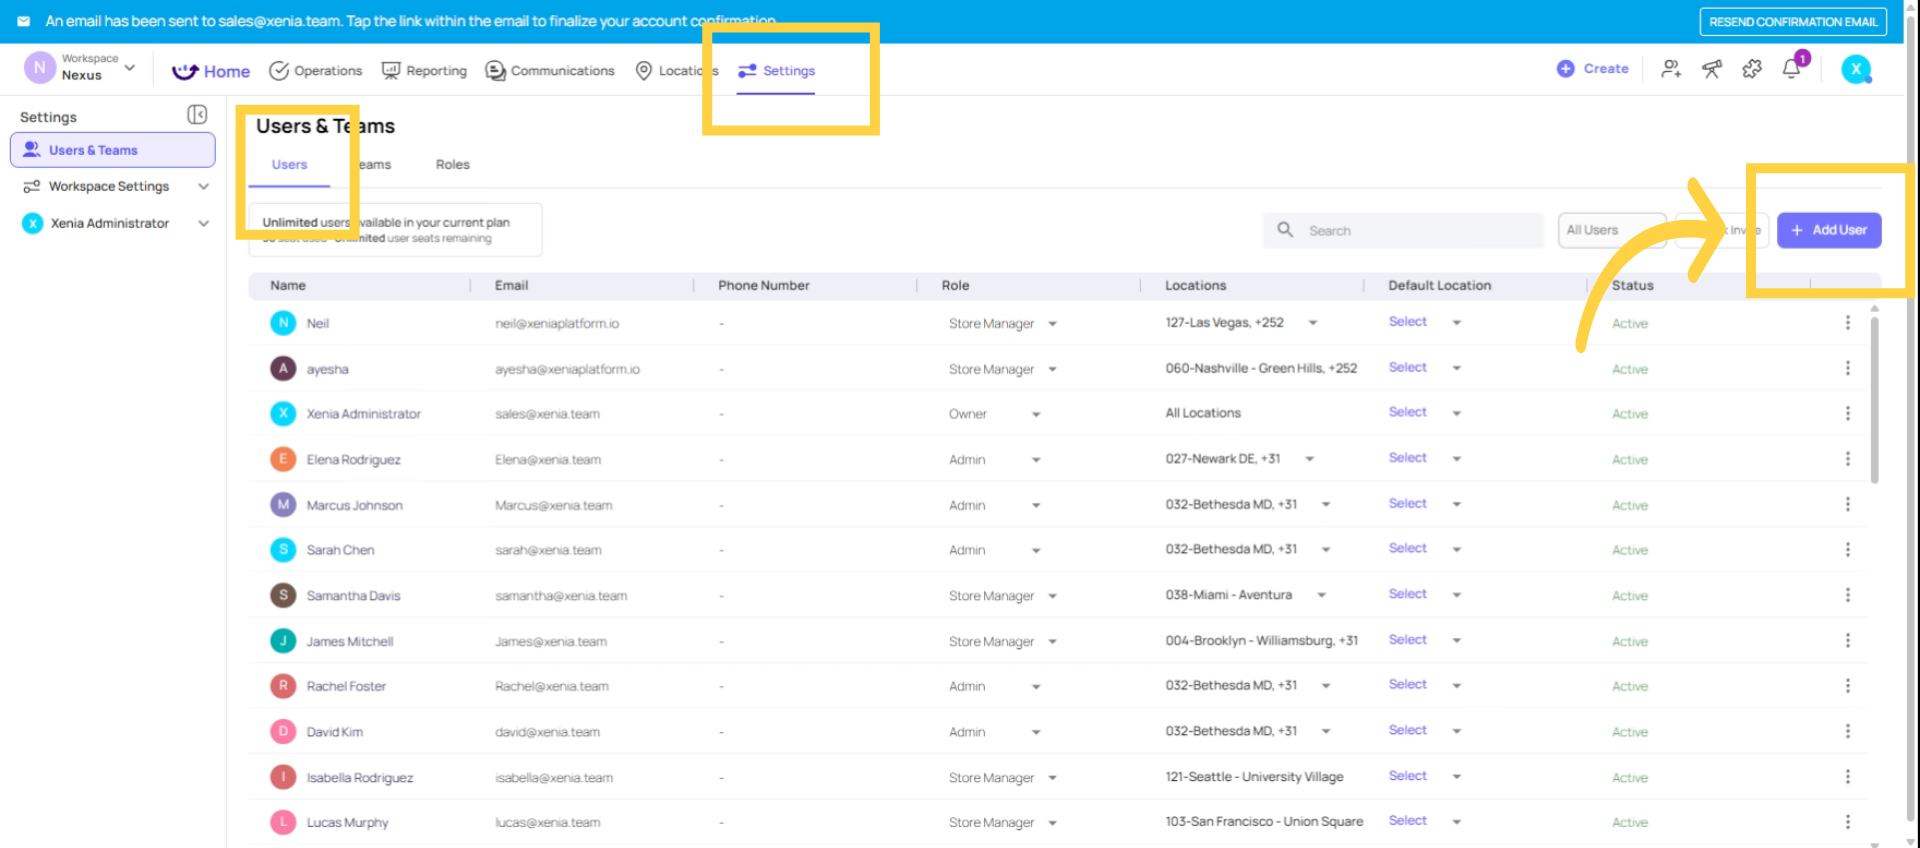
4. Navigate to Add User Screen
To invite someone individually, go to Settings and then to Users. Click Add User.
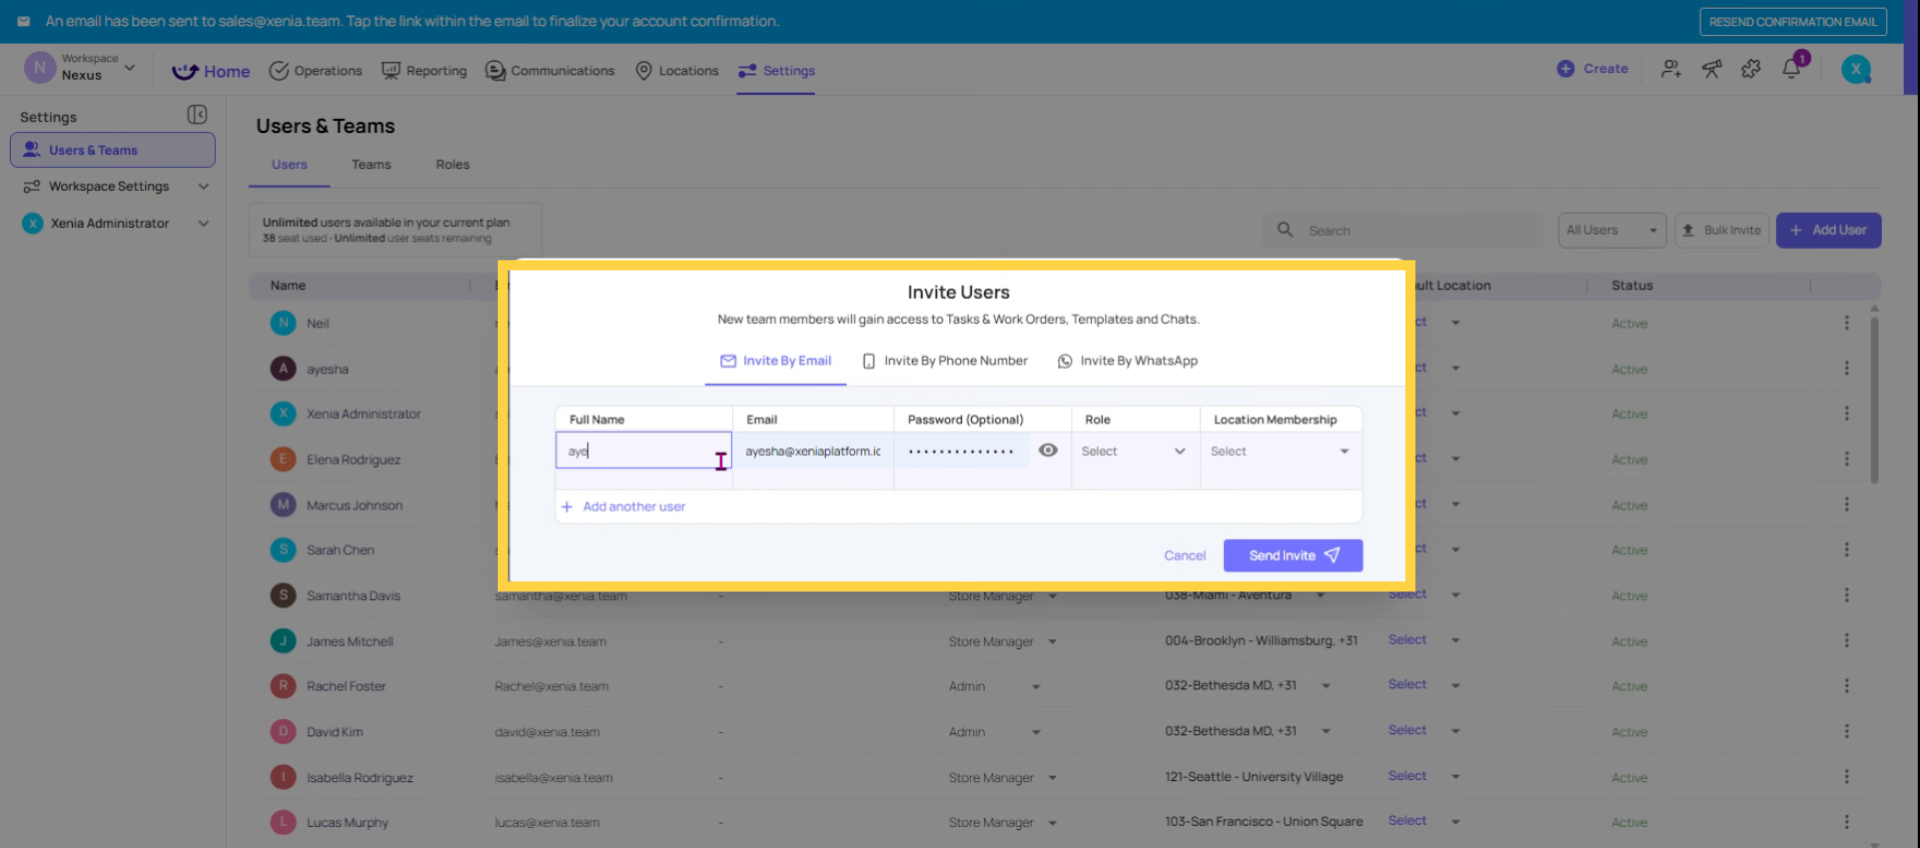
5. Enter User Details and Assign Role
Enter their name, their email address, and assign their role. This controls the permissions and what their home screen looks like. Now assign their location. This controls what they can see. These two fields are the most important, so take a moment to get them right.
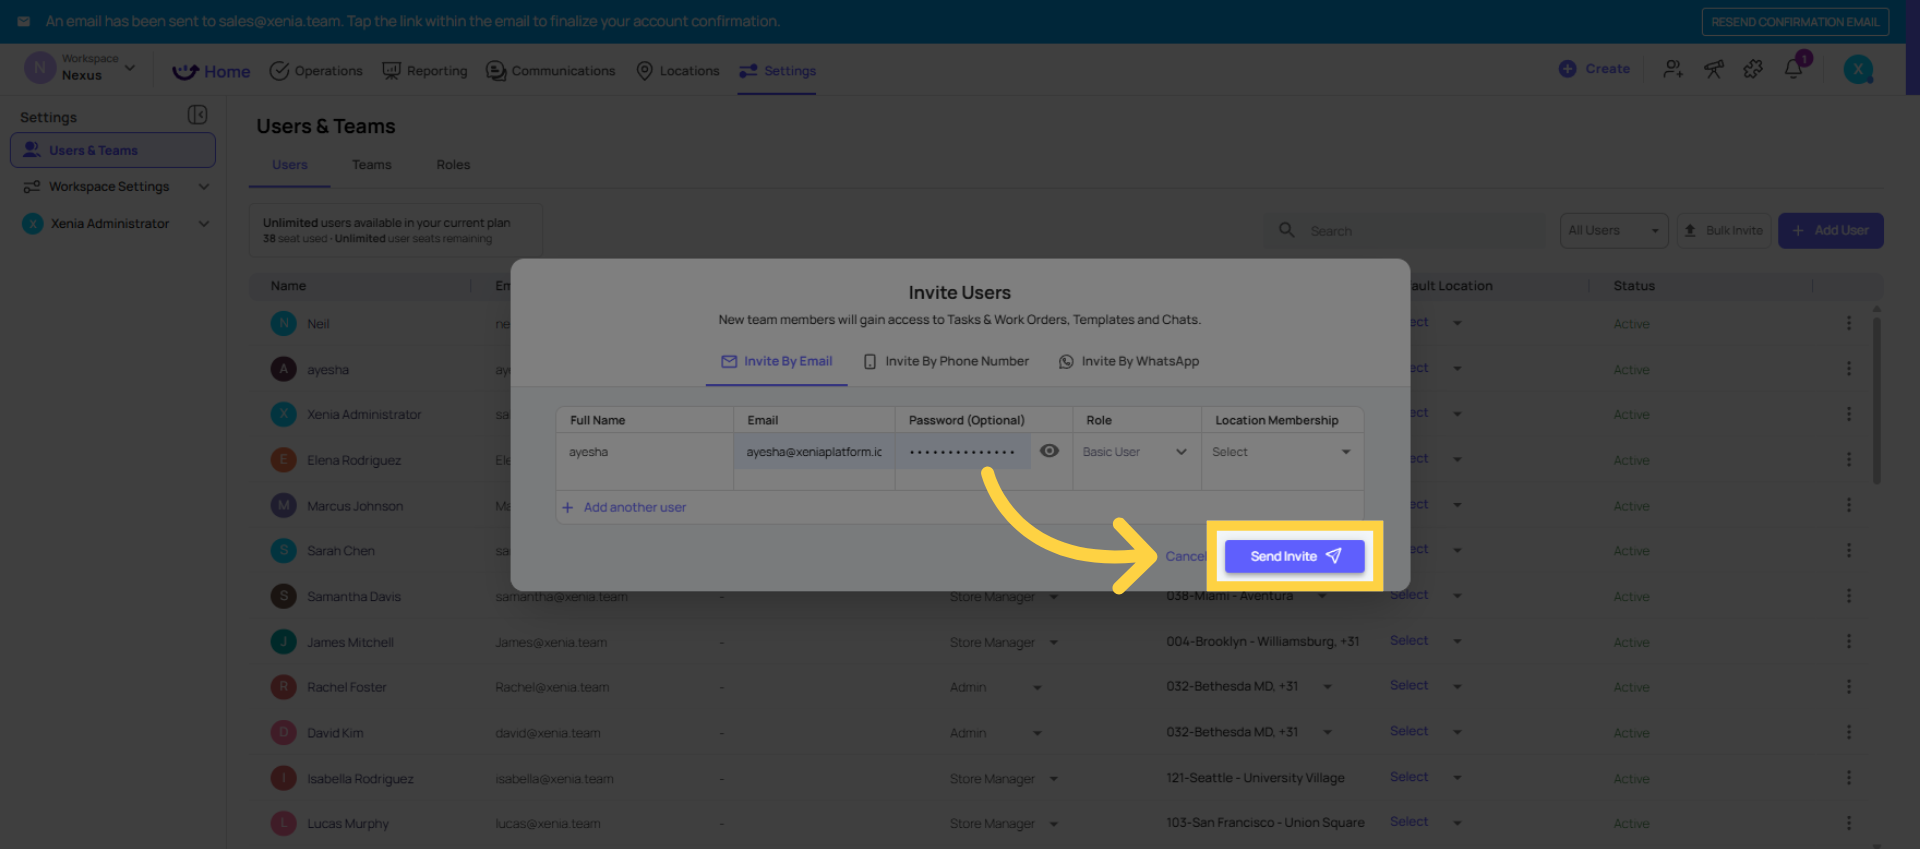
6. Click Send Invite Button
Click the Send Invite button to send the invitation email to the user.
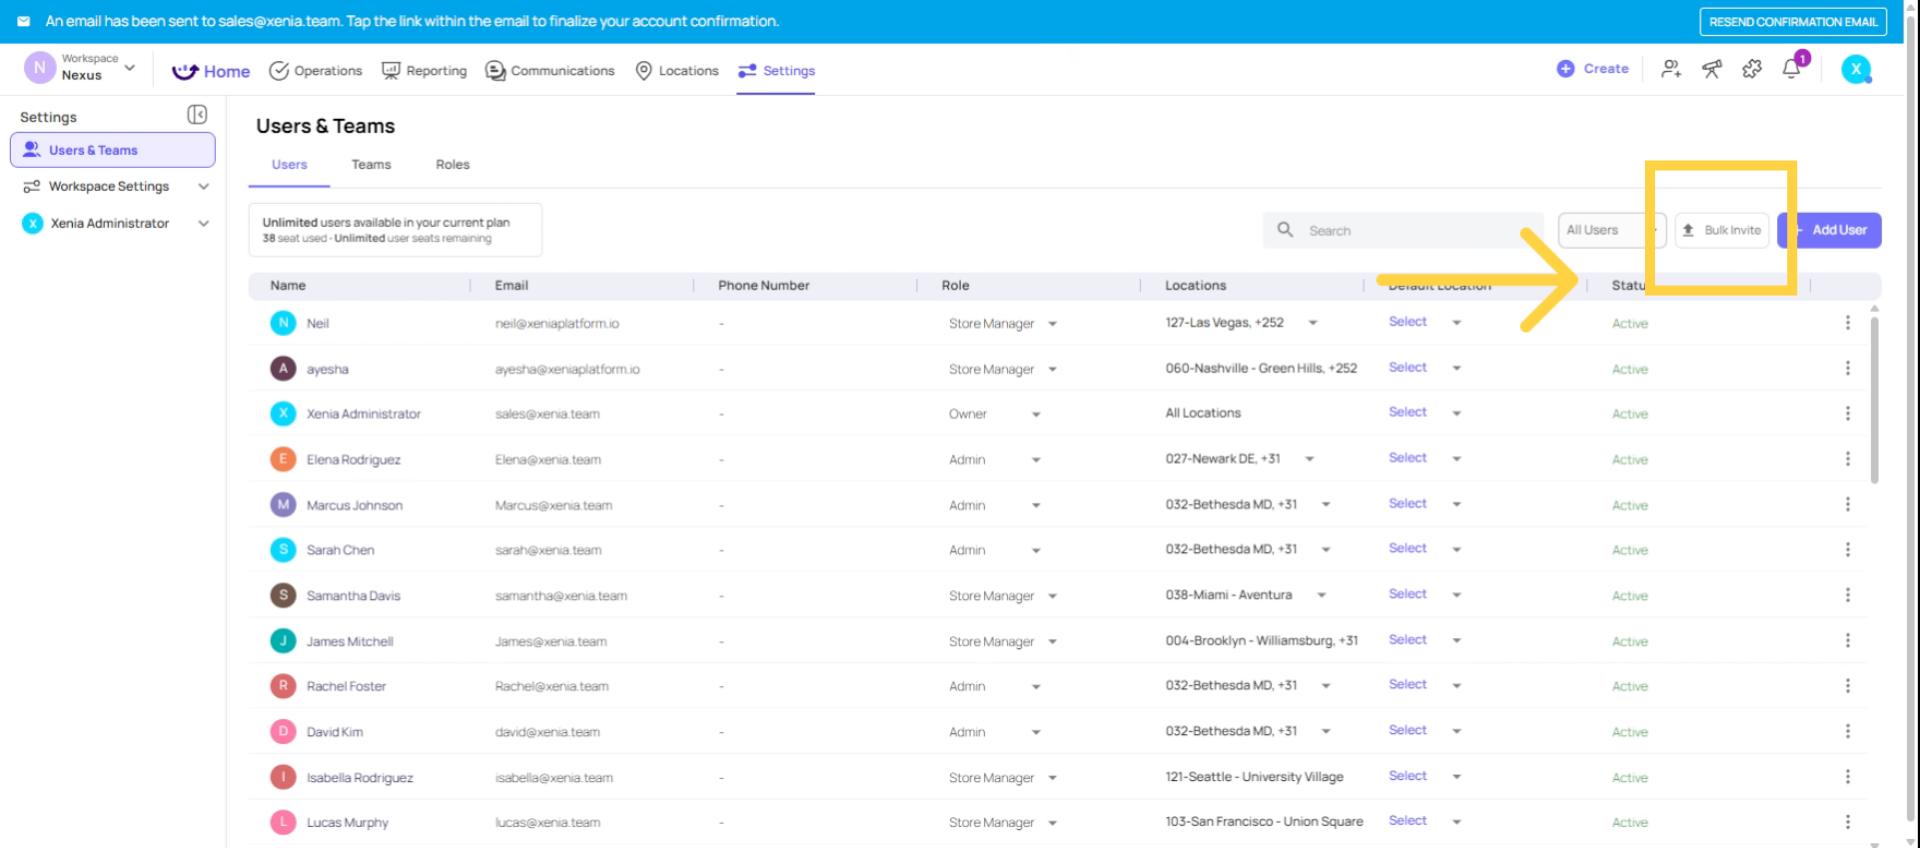
7. Bulk Invitation via CSV
If you're inviting five or more people at once, the bulk invite via CSV is the way to go. Click bulk invite via CSV here.
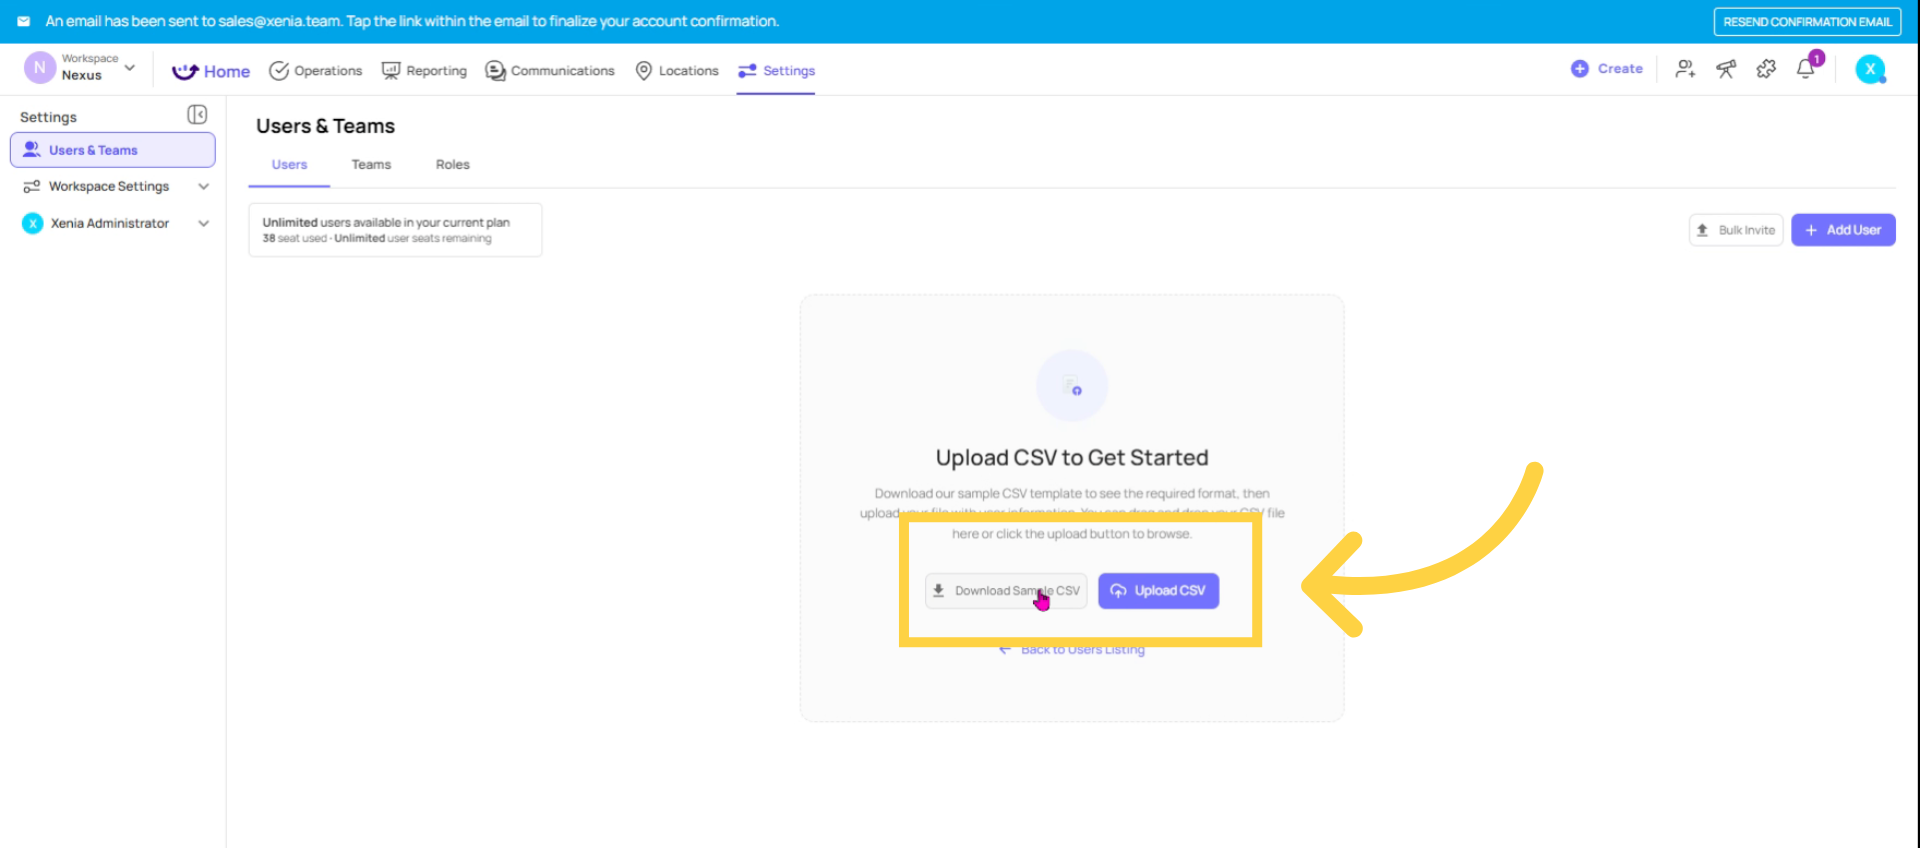
8. Download and Upload CSV Template
Download the sample CSV file, fill in the columns: name, email, role, and location, one user per row. Then upload the file here by clicking upload CSV.
9. Manage Existing Users
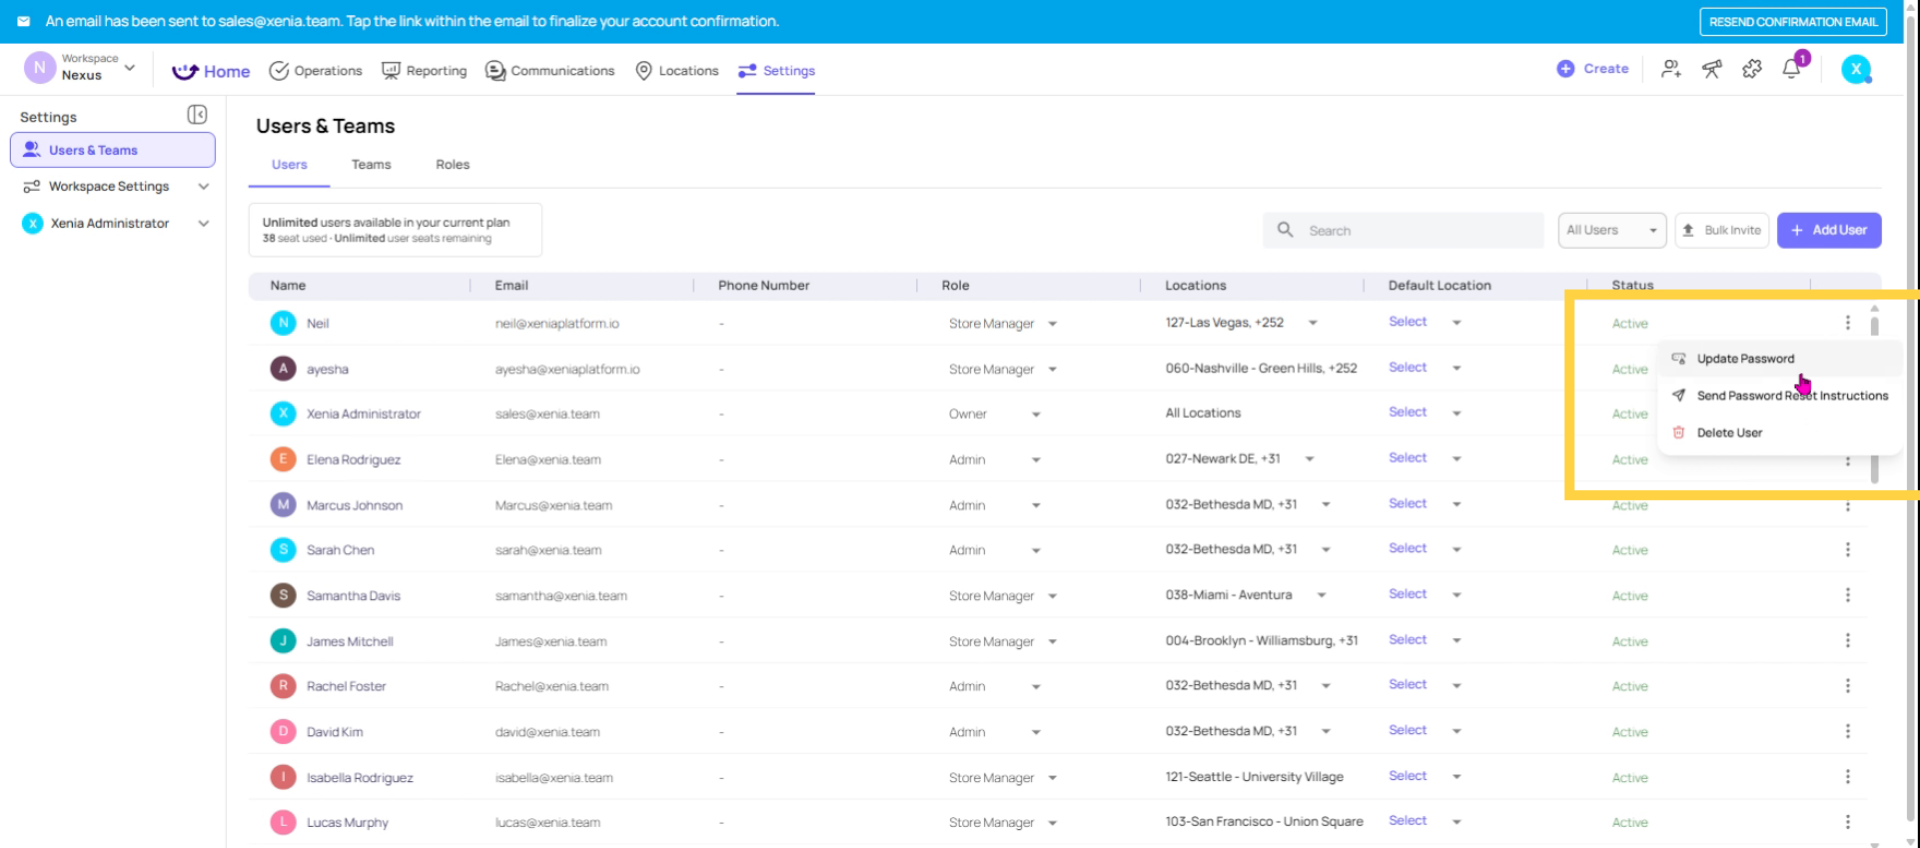
Once users are in the system, managing them is simple. Click three dots next to any user to update their details.

10. Reset Password or Delete User
You can update their password, send password reset instructions, or delete that user.
11. Change User Role or Location
Now from here you can change their role or you can change their location as well
This article has guided you through inviting users to your Xenia workspace, covering individual and bulk invitations, user management, and best practices for account strategies. For more information, explore related articles on user roles and workspace settings.
Need Help?
Need Help?
For assistance please reach out to us at support@xenia.team
Comments
0 comments
Please sign in to leave a comment.