This article explains how to add a new location within your Xenia location hierarchy. You will learn the essential steps to efficiently onboard new stores, offices, or facilities in the system.
Introduction to Location Hierarchy
In this article, I'm going to show you how to add a new location within your hierarchy in Xenia. Whether you're onboarding a new store, office, or facility, this is a core admin task that takes just a few minutes once you know where to look. Before we jump in, let me quickly explain what the location hierarchy is, because it's the foundation for everything you'll do here.
Defining Location Hierarchy
In Xenia, a location hierarchy is the organisational structure of all the physical or conceptual places where your team does work.
Access Location Section
On the Xenia web app. At the top of the screen, in the navigation bar, you’ll find the Location option. Click on it to view all the locations you’ve set up in one place.
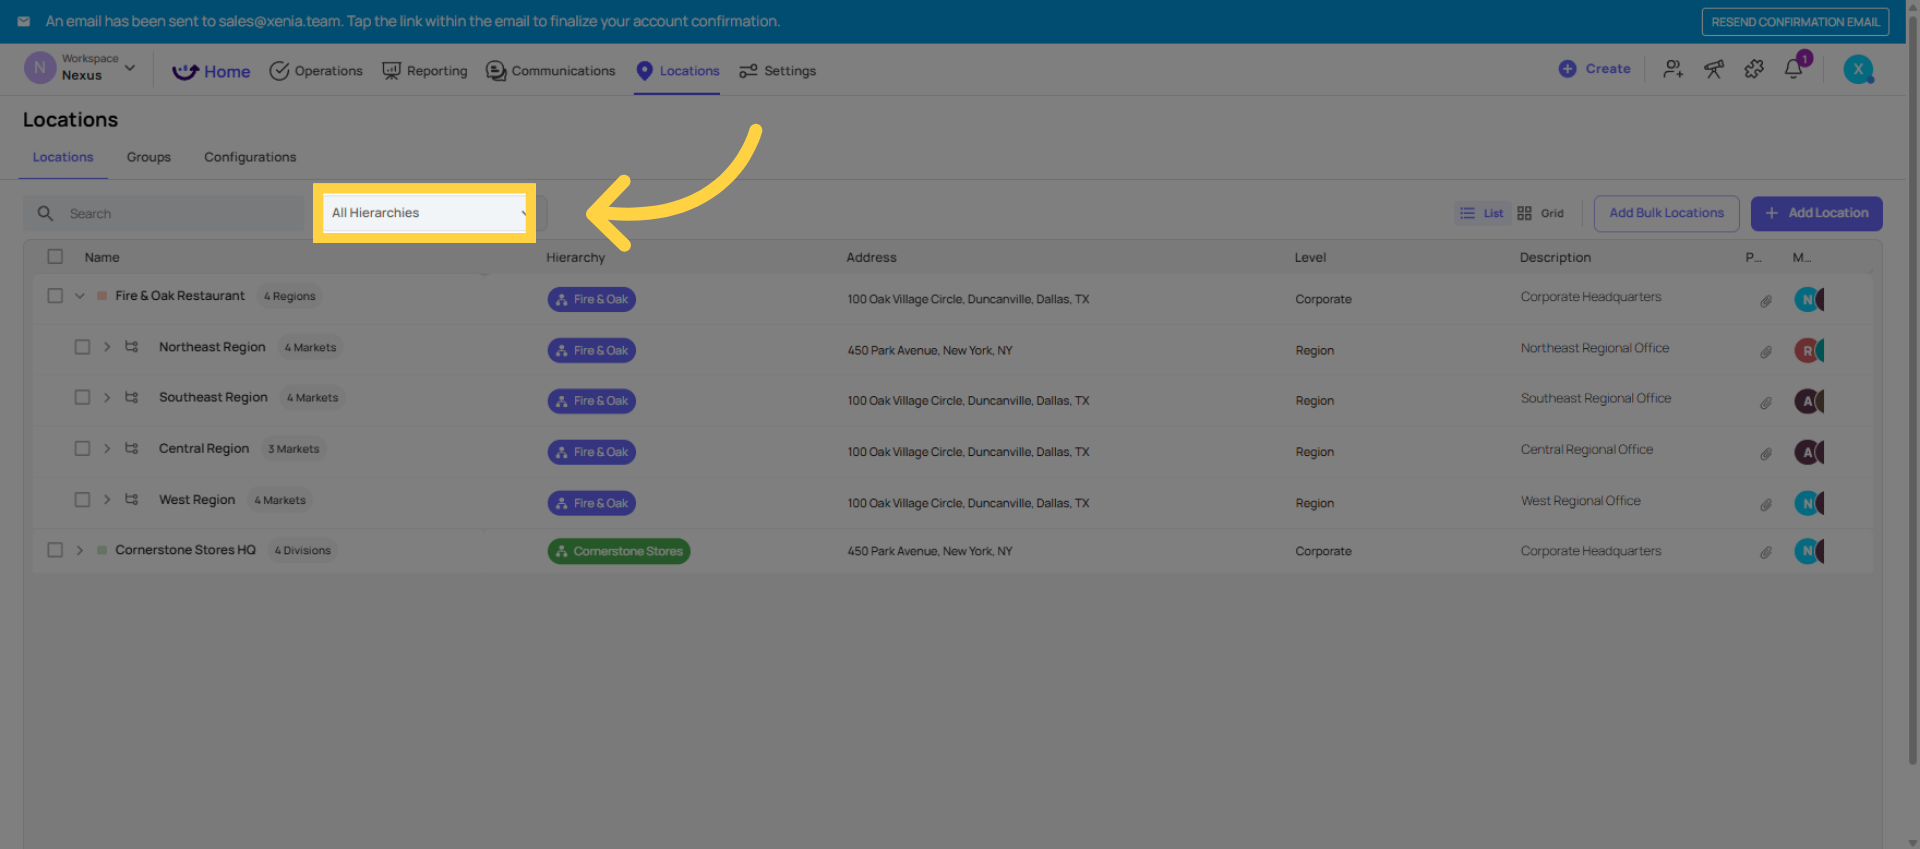
View Location Hierarchy
You will see your existing location hierarchy laid out, and you can expand each level by clicking the arrow next to a parent location to see all of your existing locations.
Open All Hierarchies
Click the All Hierarchies option to view and manage all your location hierarchies in one place.
Start Adding Location
Now in order to add a new location, you have to click on add location.
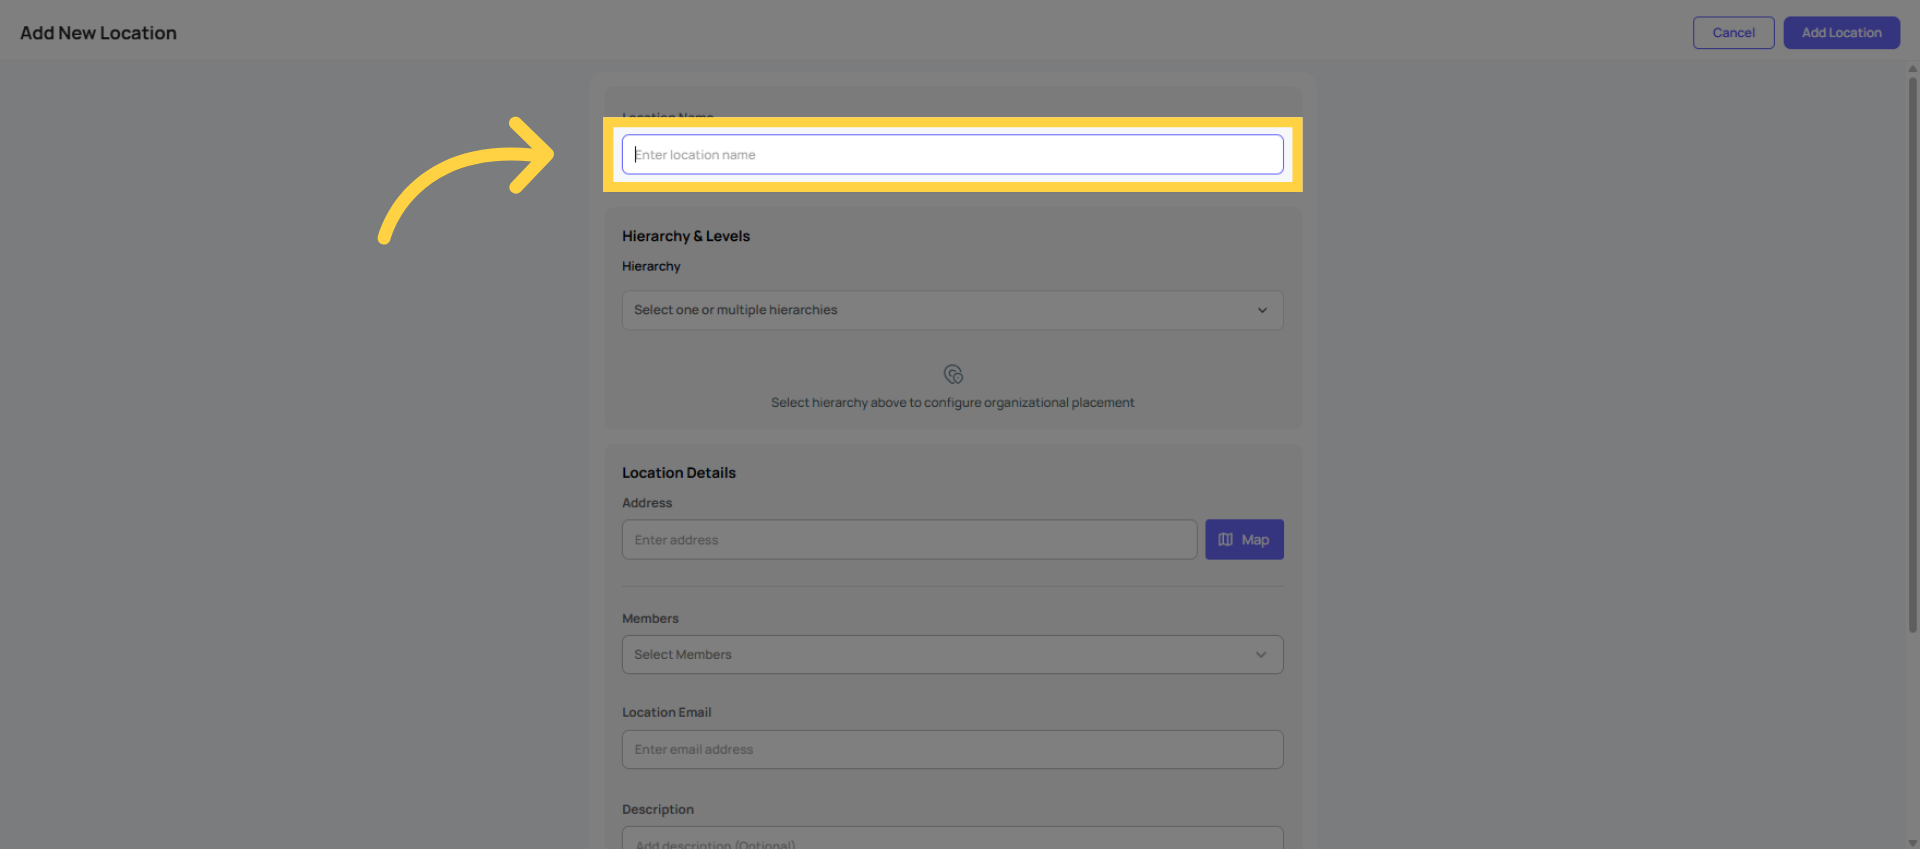
Enter Location Name
Enter your location name in the provided field.
Select Hierarchy Level
Now I have to select a specific hierarchy for this location. For example, I'm selecting cornerstone stores here.
Choose Location Type
Hierarchy levels are the structured layers used to organize your organization, such as Corporate, Division, Region, and Store.They define how locations are grouped and connected, making it easier to manage operations and reporting across different levels.
Map Location Address
You can also map the address at this step. If the exact address is unavailable, simply select the desired location directly from the map. Simply click Save, and the system will automatically capture the address along with its corresponding coordinates.
Add Location Members
You can add members at this stage. If you’d like to include them now, simply select them from the available options here.
Add Email and Attachments
You can also enter a location email address and provide a specific description here. Additionally, you have the option to attach photos, files, or a QR code.
Once you click Add Location, it will be added immediately.
Verify Added Location
Under Cornerstone Stores HQ, you can now see that the North Side location has been successfully added.
This is the process for setting up and adding new locations within your hierarchy. Thank you for watching!
This article has guided you through adding a new location within your Xenia location hierarchy, covering naming, hierarchy selection, address mapping, and member assignment.
Need Help?
- If you run into any issues or have questions about bulk locations, reach out to the Xenia support team at support@xenia.team or your Implementation Specialist for assistance.
Comments
0 comments
Please sign in to leave a comment.