How to assign work across multiple sites with Xenia Projects
Last updated: October 19, 2026
Once you've created a daily operations checklist, you are now ready to deploy your tasks across multiple sites/locations with Xenia's Projects feature. Here is a step-by-step guide on how to create your first project, from start to finish!
1. Navigate to: Operations > Projects > Add Project
2. You now have three types of Projects to choose from. In this use case, only two apply:

Select User-Based Projects if you want bulk create assignments across multiple locations, teams, or specific people.
Select Role-Based Projects if you want to create assignments for a specific role at their respective locations or sites.
3. Fill out the required fields in the Projects scheduling engine:
Name your Project - This is what your Project will come up as on your Projects page and what assignees will see as a task, in the Xenia app.
Attach a Template - These are the checklists, audits, and temperature logs that your assignees will be completing on a daily, weekly, or monthly basis.
Select an Assignee - This will be a specific role (Role-Based Project) or user(s) specified by persons, teams, or locations (User-Based Project) the tasks will be deployed to.
When selecting Role-Based Project there are two options on how to deploy tasks:

Create one task per location for the role assigned - each user in the role receives a task, but only one task is necessary to complete (multiple users can contribute to completing one task)
Create individual tasks for each user in the role - each user in the role receives an individual task for them to complete (each user completes their own task)
Select your Scheduling Frequency - When do you want your tasks to deploy
Daily: 7 days per week
Weekly: Less than 7 days per week
Monthly: Specific day each month
Quarterly: Specific day in 3,6,9, or 12 month increments
Set Time Parameters
Start time and due time for tasks to be completed
Start date and end date for the duration of the Project
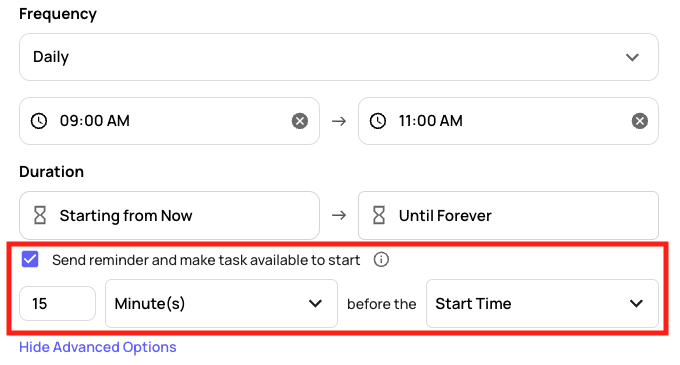
Configure Advanced Options - You can set a reminder and make your task available to start prior to the designated time parameters. This is useful if you think it’s beneficial for the assignees to have access to the tasks ahead of the actual start time.
Fill out the Additional Options section
Choose whether to mark task as missed after due time passes
If you decide to check the box as missed the task cannot be started after due time, and will be marked as missed if not completed on time.
If you do not check the box, tasks can be started after due time, but will be marked as overdue

Customize your notifications - These are users who will be notified for on the status of your project for various reasons
Watchers: People to notify when task status changes (open, in progress, complete, etc.)
Overdue Notifications: People to notify when tasks are late/missed
4. Click Create - Now your projects are live to view on the Projects tab!